Table of Contents
Advertisement
Quick Links
Published 05/2019
This Operator's Manual is an integral part of the safe operation of this
machine and must be maintained with the unit at all times. READ,
UNDERSTAND, and FOLLOW the Safety and Operation Instructions
contained in this manual before operating the equipment. C01-Cover
Schulte Industries Ltd.
PO Box 70
Englefeld Saskatchewan
Canada S0K 1N0
Tel. (306) 287-3715
Fax. (306) 287-3355
Parts Fax. (306) 287-4066
Web: www.schulte.ca
SDX-102
SNOW REMOVAL
s/n: B10210746910-B10210805911 inclusive
OPERATOR'S MANUAL
©2019 Alamo Group Inc.
Part No. B102-010C
Advertisement
Table of Contents

Subscribe to Our Youtube Channel
Related Manuals for Schulte SDX-102


Summary of Contents for Schulte SDX-102
- Page 1 READ, UNDERSTAND, and FOLLOW the Safety and Operation Instructions contained in this manual before operating the equipment. C01-Cover Schulte Industries Ltd. PO Box 70 Englefeld Saskatchewan Canada S0K 1N0 Tel.
- Page 2 To the Owner/Operator/Dealer All implements with moving parts are potentially hazardous. There is no substitute for a cautious, safe-minded operator who recognizes the potential hazards and follows reasonable safety practices. The manufacturer has designed this implement to be used with all its safety equipment properly attached to minimize the chance of accidents.
- Page 3 DEALER’S PREDELIVERY SERVICE GUIDE for the SCHULTE SDX-102 SNOW BLOWERS DETAILS OF ITEMS LISTED BELOW ARE COVERED IN THIS OPERATOR’S MANUAL ____Shipping damage corrected ____Set up machine as outlined in the shipping instructions attached to these instructions. ____Check that all safety decals are in good condition, replace if necessary.
-
Page 5: Table Of Contents
Table of Contents SAFETY SECTION ......................1-1 GENERAL SAFETY INSTRUCTIONS AND PRACTICES ................. 1-2 OPERATOR SAFETY INSTRUCTIONS AND PRACTICES ................1-3 CONNECTING OR DISCONNECTING IMPLEMENT SAFETY INSTRUCTIONS AND PRACTICES ....1-5 EQUIPMENT OPERATION SAFETY INSTRUCTIONS AND PRACTICES ............1-6 TRANSPORTING SAFETY INSTRUCTIONS AND PRACTICES ..............1-10 MAINTENANCE AND SERVICE SAFETY INSTRUCTIONS AND PRACTICES .......... - Page 6 PTO RPM and Ground Speed ......................... 4-27 Operating the Snow Blower ..........................4-27 Shutting Down the Implement .......................... 4-30 DISCONNECTING THE SNOW BLOWER FROM THE TRACTOR ..............4-30 SNOW BLOWER STORAGE ........................... 4-32 TRANSPORTING THE TRACTOR AND SNOW BLOWER ................4-33 Transporting on Public Roadways ........................
-
Page 7: Safety Section
SAFETY SECTION Safety Section 1-1 © 2019 Alamo Group Inc. -
Page 8: General Safety Instructions And Practices
Safety Messages. Always use good common sense to avoid hazards. (SG-2) Si no lee ingles, pida ayuda a alguien que si lo lea para que le traduzca las medidas de seguridad. (SG-3) SDX-102 05/19 Safety Section 1-2 © 2019 Alamo Group Inc. -
Page 9: Operator Safety Instructions And Practices
(SG-I7) Always read carefully and comply fully with the manufacturer’s instructions when handling oil, solvents, cleansers, and any other chemical agent. (SG-22) SDX-102 05/19 Safety Section 1-3 © 2019 Alamo Group Inc. - Page 10 Stay away until all motion has stopped and the snow blower is securely blocked up before removing material, performing service, and making repairs. (SSB-5) SDX-102 05/19 Safety Section 1-4 © 2019 Alamo Group Inc.
-
Page 11: Connecting Or Disconnecting Implement Safety Instructions And Practices
Tractor PTO by pushing the PTO into the Tractor and through the support bearings or downward onto the PTO shaft, breaking it off. A broken driveline can cause personal injury. (S3PT-18) SDX-102 05/19 Safety Section 1-5 © 2019 Alamo Group Inc. -
Page 12: Equipment Operation Safety Instructions And Practices
Operator’s Manuals, been trained in proper operation of the tractor and Implement, and are physically large enough to reach and operate the controls easily. (SG-11) SDX-102 05/19 Safety Section 1-6 © 2019 Alamo Group Inc. - Page 13 In case of mechanical difficulty during operation, place the transmission in the park position, set the parking brake, shut down all power, including the PTO and the engine and remove the key. Wait until all rotating motion has stopped before dismounting. (SG-39) SDX-102 05/19 Safety Section 1-7 © 2019 Alamo Group Inc.
- Page 14 Do not operate this machine with anyone in the immediate area. Stop Snow Blowing if anyone is within 200 feet of Snow Blower. (SSB-11) SDX-102 05/19 Safety Section 1-8 © 2019 Alamo Group Inc.
- Page 15 The Implement can block the operators vision directly in front of the Implement. Inspect the area before operating the Implement and make sure that there are no obstacles, passersby, or coworkers in the path of the Implement. (SSB-22) SDX-102 05/19 Safety Section 1-9 © 2019 Alamo Group Inc.
-
Page 16: Transporting Safety Instructions And Practices
Make certain that the “Slow Moving Vehicle” (SMV) sign is installed in such a way as to be clearly visible and legible. When transporting the Equipment use the Tractor flashing warning lights and follow all local traffic regulations. (SG-6) SDX-102 05/19 Safety Section 1-10 © 2019 Alamo Group Inc. - Page 17 Failure to maintain adequate vision of the public roadway and traffic can result in serious injury or even death. (STI-10) SDX-102 05/19 Safety Section 1-11 © 2019 Alamo Group Inc.
-
Page 18: Maintenance And Service Safety Instructions And Practices
Make sure all pins have cotter pins and washers. Serious injury may occur from not maintaining this machine in good working order. (SG-21) SDX-102 05/19 Safety Section 1-12 © 2019 Alamo Group Inc. - Page 19 Use only OEM specified shear pins as replacement pins. The use of incorrect shear pins can cause failures in the Snow Blower rotating components resulting in property damage and/or serious bodily injuries. (SSB-19) SDX-102 05/19 Safety Section 1-13 © 2019 Alamo Group Inc.
-
Page 20: Concluding Safety Instructions And Practices
Safety Messages and operation instruction in each of the appropriate sections of the Tractor and Equipment Manuals. Pay close attention to the Safety Signs affixed to the Tractor and Equipment. (SG-18) SDX-102 05/19 Safety Section 1-14 © 2019 Alamo Group Inc. -
Page 21: Decal Location
SAFETY Decal Location SDX-102 05/19 Safety Section 1-15 © 2019 Alamo Group Inc. - Page 22 ** Decal used depending on RPM of Machine NOTE: Schulte supplies safety decals on this product to promote safe operation. Damage to the decals may occur while in shipping, use, or reconditioning. Schulte cares about the safety of its customers, operators, and bystanders, and will replace the safety decals on this product in the field, free of charge (Some shipping and handling charges may apply).
-
Page 23: Decal Description
SAFETY Decal Description SDX-102 05/19 Safety Section 1-17 © 2019 Alamo Group Inc. - Page 24 SAFETY SDX-102 05/19 Safety Section 1-18 © 2019 Alamo Group Inc.
- Page 25 SAFETY SDX-102 05/19 Safety Section 1-19 © 2019 Alamo Group Inc.
- Page 26 SAFETY SDX-102 05/19 Safety Section 1-20 © 2019 Alamo Group Inc.
- Page 27 SAFETY SDX-102 05/19 Safety Section 1-21 © 2019 Alamo Group Inc.
- Page 28 SAFETY SDX-102 05/19 Safety Section 1-22 © 2019 Alamo Group Inc.
- Page 29 SAFETY SDX-102 05/19 Safety Section 1-23 © 2019 Alamo Group Inc.
- Page 30 SAFETY SDX-102 05/19 Safety Section 1-24 © 2019 Alamo Group Inc.
-
Page 31: Federal Laws And Regulations
Some regulations specify that no one under the age of 16 may operate power machinery. It is your responsibility to know what these regulations are in your own area or situation. (Refer to U.S. Dept. of Labor, Employment Standard Administration, Wage & Home Division, Child Labor Bulletin #102.) SDX-102 05/19 Safety Section 1-25 © 2019 Alamo Group Inc. -
Page 33: Introduction Section
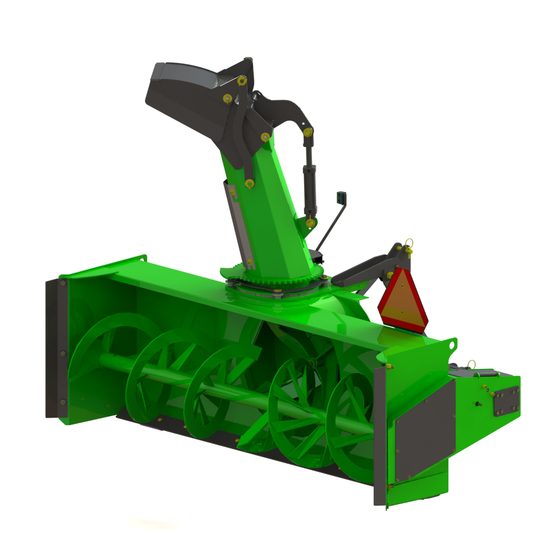
INTRODUCTION SECTION Introduction Section 2-1 © 2019 Alamo Group Inc. - Page 34 INTRODUCTION The SDX-102 Snow Blowers are designed for removing accumulations of snow from driveways, barnyards, roadways and parking lots. Check local regulations before operating on roadways. With proper maintenance as described in this manual, your Snow Blower will provide you with years of dependable service with a minimum of repairs.
- Page 35 Manual. Keep this as part of the permanent maintenance file for the implement. Special Notes: The SDX-102 Snow Blower and it’s drive kits employ shear bolts to protect the auger, fan, and driveline. The specified shear bolts are listed below: The SDX-102 Snow Blower cross shaft shear bolt is: 3/8 x 2 Grade Two (2).
-
Page 37: Assembly Section
ASSEMBLY SECTION © 2019 Alamo Group Inc. -
Page 38: 3-Point Hitch Kit Mounting
3. Assemble the two 3-point Hitch Braces (5) to the Lower Link Arms (1) using two 1” x 5” bolts and locknuts (6) and to the Top Link Arm using 1” x 6-1/2” bolt and locknut (7). SDX-102 05/19 Assembly Section 3-2... - Page 39 Failure to properly install the universal joint may cause the universal joint to separate during operation possible resulting in personal injury or damage to equipment. 9. Carefully raise and lower the snow blower. SDX-102 05/19 Assembly Section 3-3 © 2019 Alamo Group Inc.
- Page 40 It is possible that the power shaft will be too long for some tractor installations. If the power shaft is too long, extend the 3-point link arms of your snow blower or consult your dealer for further assistance. SDX-102 05/19 Assembly Section 3-4...
- Page 41 Turn discharge chute full length and right. Make adjustments if necessary. Before operating the snow blower carefully read the Safety and Operation Sections of this operator’s manual. SDX-102 05/19 Assembly Section 3-5 © 2019 Alamo Group Inc.
-
Page 43: Operation Section
OPERATION SECTION Operation Section 4-1 © 2019 Alamo Group Inc. - Page 44 Pictures contained in this section are intended to be used as a visual aid to assist in explaining the operation of a SDX-102 Snow Blower and are not necessarily of a SDX-102 Snow Blower. Some pictures may show shields removed for picture clarity. NEVER OPERATE these implements without all shields in place and in good operational condition.
-
Page 45: Standard Equipment & Specifications
CAT II, CAT II Quick Hitch, CAT 3N Quick Hitch PTO speed 540 RPM or 1000 RPM (if equipped with reducing Gearbox) Capacity: Dry Snow - Wet Snow (Dry)388 tons/hr - (Wet)1222 tons/hr SDX-102 05/19 Operation Section 4-3 © 2019 Alamo Group Inc. -
Page 46: Operator Requirements
Serious injury or death to the operator or others could result if the operator is under the influence of drugs or alcohol. (SG-27) SDX-102 05/19 Operation Section 4-4 © 2019 Alamo Group Inc. -
Page 47: Tractor Requirements
Never operate the tractor PTO with the PTO master shield missing or in the raised position. OPS-U- 0004 SDX-102 05/19 Operation Section 4-5 © 2019 Alamo Group Inc. -
Page 48: Tractor Horsepower
The recommended tractor HP for the snow blower SDX-102 is 85-140 HP. Operating the implement with a larger tractor will greatly increase the risk of damaging the implement. -
Page 49: Power Take Off (Pto)
Refer to the tractor Operator’s Manual or consult an authorized dealer for instructions to change tractor tire spacing. OPS-R- 0062 SDX-102 05/19 Operation Section 4-7 © 2019 Alamo Group Inc. -
Page 50: Getting On And Off The Tractor
Use all handrails and steps for support and never rush or jump off the tractor. OPS-U- 0009 SDX-102 05/19 Operation Section 4-8 © 2019 Alamo Group Inc. -
Page 51: Starting The Tractor
Start tractor only when properly seated in the Tractor seat. Starting a tractor in gear can result in injury or death. Read the Tractor operators manual for proper starting instructions. (SG-13) SDX-102 05/19 Operation Section 4-9 © 2019 Alamo Group Inc. -
Page 52: Connecting The Snow Blower To The Tractor
Always shut the Tractor completely down, place the transmission in park, and set the parking brake before you or anyone else attempts to connect or disconnect the Implement and Tractor hitches. (S3PT-15) SDX-102 05/19 Operation Section 4-10 © 2019 Alamo Group Inc. -
Page 53: Driveline Attachment
PTO shaft. Push and pull the driveline back and forth several times to ensure a secure attachment. SDX-102 05/19 Operation Section 4-11 © 2019 Alamo Group Inc. -
Page 54: Driveline Length Check
At its farthest extension, a minimum profile engagement of 6” must be maintained for a Constant Velocity (CV) tube type driveline and a minimum engagement of 6” for non-CV solid shaft drivelines. SDX-102 05/19 Operation Section 4-12 © 2019 Alamo Group Inc. -
Page 55: Connecting Snow Blower Hydraulic Lines To The Tractor
If the tractor ports, Snow Blower ports and hydraulic hose ends become contaminated, wipe clean with a rag before connecting. SDX-102 05/19 Operation Section 4-13 © 2019 Alamo Group Inc. -
Page 56: Pre-Operation Inspection And Service
Never work under the Implement, the framework, or any lifted component unless the Implement is securely supported or blocked up to prevent sudden or inadvertent falling which could cause serious injury or even death. (SSB-33) SDX-102 05/19 Operation Section 4-14 © 2019 Alamo Group Inc. -
Page 57: Tractor Pre-Operation Inspection/Service
Before each implement use, a complete inspection and service is required to ensure the implement is in a good and safe working condition. Damaged and/or broken parts should be repaired and/or replaced immediately. To ensure the implement is ready for operation, conduct the following. SDX-102 05/19 Operation Section 4-15 © 2019 Alamo Group Inc. - Page 58 A driveline not attached correctly to the Tractor PTO shaft could come loose and result in personal injury and damage to the Implement. (S3PT-17) SDX-102 05/19 Operation Section 4-16 © 2019 Alamo Group Inc.
- Page 59 Do not put hands or feet near the rotating fan. Fan contact can result in serious injury or even death. Stay away until all motion has stopped and the snow blower is securely blocked up before removing material, performing service, and making repairs. (SSB-6) SDX-102 05/19 Operation Section 4-17 © 2019 Alamo Group Inc.
- Page 60 REMOVE the HOSE and have it tested at a Dealer. If oil does penetrate the skin, have the injury treated immediately by a physician knowledgeable and skilled in this procedure. (SG-15) SDX-102 05/19 Operation Section 4-18 © 2019 Alamo Group Inc.
- Page 61 The engine coolant fluid level is full The radiator is free of debris The air filter is in good condition Operator’s Signature:__________________________________________________________________ DO NOT OPERATE an UNSAFE TRACTOR or IMPLEMENT SDX-102 05/19 Operation Section 4-19 © 2019 Alamo Group Inc.
- Page 62 Snow blower auger bearings are properly lubricated. Snow blower fan bearings are properly lubricated. Snow blower blades are not chipped, cracked or bent. Operator’s Signature:____________________________________________________________________ DO NOT OPERATE an UNSAFE TRACTOR or IMPLEMENT SDX-102 05/19 Operation Section 4-20 © 2019 Alamo Group Inc.
-
Page 63: Driving The Tractor And Snow Blower
Such an impact could cause the Implement and Tractor to pivot violently resulting in loss of steering control, serious injury, or even death. Never allow the Implement to contact obstacles. (S3PT-12) SDX-102 05/19 Operation Section 4-21 © 2019 Alamo Group Inc. -
Page 64: Starting The Tractor
When operating in traffic, always use the Tractor’s flashing warning lights and reduce your speed. Be aware of traffic around you and watch out for the other guy. SDX-102 05/19 Operation Section 4-22 © 2019 Alamo Group Inc. -
Page 65: Driving The Tractor And Snow Blower
Raising the implement exposes the auger which creates a potentially serious hazard and could cause serious injury or even death from objects thrown from the auger. SDX-102 05/19 Operation Section 4-23 © 2019 Alamo Group Inc. -
Page 66: Crossing Ditches And Steep Inclines
Ground contact also produces a severe shock load on the snow blower drive and resulting in possible damage and premature wear. OPS-SB-0024 SDX-102 05/19 Operation Section 4-24 © 2019 Alamo Group Inc. -
Page 67: Operating The Tractor And Snow Blower
Inspect the area for such objects before working in the area. Remove any such objects from the site. Never allow the implement to contact such objects. (STL-6) SDX-102 05/19 Operation Section 4-25 © 2019 Alamo Group Inc. -
Page 68: Foreign Debris Hazards
Do not put hands or feet under rotating auger. Auger contact can result in serious injury or even death. Stay away until all motion has stopped and the frame is securely blocked up. SDX-102 05/19 Operation Section 4-26 © 2019 Alamo Group Inc. -
Page 69: Pto Rpm And Ground Speed
Make sure that the blade is running at an even height at both ends. Scraper blade clearances of about 1/4” are sufficient for paved surfaces. SDX-102 05/19 Operation Section 4-27 © 2019 Alamo Group Inc. - Page 70 Do not operate the snow blower PTO drive in the fully raised position. Stop engine, disengage power take-off, and remove ignition key whenever leaving tractor operating position. SDX-102 05/19 Operation Section 4-28 © 2019 Alamo Group Inc.
- Page 71 PTO and wait for all implement rotation to come to a complete stop before proceeding to raise the implement. If implement is raised to high while the unit is running there is a possibility of damaging the driveline. SDX-102 05/19 Operation Section 4-29 © 2019 Alamo Group Inc.
-
Page 72: Shutting Down The Implement
Use extreme care to keep feet and hands out from under the implement and clear of any pinch points when disconnecting the unit from the tractor. SDX-102 05/19 Operation Section 4-30 © 2019 Alamo Group Inc. - Page 73 When the pin is loose and easy to rotate, remove the pin from the implement. Next remove both lower hitch pins. Remove PTO holder from storage, hook onto Top Link Pin, and lower PTO into storage position. SDX-102 05/19 Operation Section 4-31 © 2019 Alamo Group Inc.
-
Page 74: Snow Blower Storage
5. Store the implement in a clean, dry place with the implement resting securely on blocks or at ground level. 6. Keep the driveline’s yokes or hydraulic hoses from sitting in water, dirt and other contaminants. SDX-102 05/19 Operation Section 4-32 © 2019 Alamo Group Inc. -
Page 75: Transporting The Tractor And Snow Blower
Use extreme caution and avoid hard applications of the tractor brakes when towing heavy loads at road speeds. Never tow the implement at speeds greater than 20 MPH (32 kph). OPS-U- 0018 SDX-102 05/19 Operation Section 4-33 © 2019 Alamo Group Inc. -
Page 76: Transporting On Public Roadways
Make certain that the “Slow Moving Vehicle” (SMV) sign is installed in such a way as to be clearly visible and legible. When transporting the Equipment use the Tractor flashing warning lights and follow all local traffic regulations. (SG-6) SDX-102 05/19 Operation Section 4-34 © 2019 Alamo Group Inc. - Page 77 Do not exceed the legal speed limit set in your area for agricultural tractors. Always stay alert when transporting the tractor and implement on public roads. Use caution and reduce speed if other vehicles or pedestrians are in the area. SDX-102 05/19 Operation Section 4-35 © 2019 Alamo Group Inc.
- Page 78 Make certain that at least 20% of the tractor’s weight is on the front wheels to maintain safe steerage. Slow down on rough or uneven surfaces. (STI-01) SDX-102 05/19 Operation Section 4-36 © 2019 Alamo Group Inc.
-
Page 79: Hauling The Tractor And Implement
Ensure that the load will be in compliance with the legal limits set for the areas that will be traveled through. OPS-U- 0024 SDX-102 05/19 Operation Section 4-37 © 2019 Alamo Group Inc. - Page 80 If during transport a hard braking, sharp turning, or swerving action was performed, stop at the next safe location to inspect the security of the load. OPS-U- 0026 SDX-102 05/19 Operation Section 4-38 © 2019 Alamo Group Inc.
-
Page 81: Troubleshooting Guide
Drum does not throw snow Chute plugged Remove obstruction. Chute does not rotate Chute frozen Remove ice Leaking hydraulic hose Replace hose Hoses unhooked from tractor Hook hoses to tractor SDX-102 05/19 Operation Section 4-39 © 2019 Alamo Group Inc. -
Page 83: Maintenance Section
MAINTENANCE SECTION Maintenance Section 5-1 © 2019 Alamo Group Inc. -
Page 84: Lubrication
5. If the fan must be removed from the gearbox, antiseize must be added to the shaft prior to installation. 6. Gear case oil should meet the following specifications: API Service Classifications GL 5 Military Specification MIL L 2105C SDX-102 05/19 Maintenance Section 5-2 © 2019 Alamo Group Inc. -
Page 85: Grease Schedule
SAE Multi purpose grease containing 3 to 5 per cent molybdenum disulfide Below 0 C (32 F) use SAE (NLGI) #0 or #1 Above 0 C (32 F) use SAE (NLGI) #2 SDX-102 05/19 Maintenance Section 5-3 © 2019 Alamo Group Inc. -
Page 86: 1000 Rpm Reducer Gearbox Removal/Installation
3. Remove the four bolts that hold the Reducer Gearbox onto the coupler. NOTE: BE CAREFUL SUPPORT GEARBOX WHEN YOU REMOVE THE BOLTS. WILL ROTATE DOWN POTENTIALLY CAUSING INJURY. SDX-102 05/19 Maintenance Section 5-4 © 2019 Alamo Group Inc. - Page 87 2. Apply High Heat Silicone to the face of the coupler. 3. Press the Coupler into place on the Snowblower Gearbox. (The round side should go towards the chain case). SDX-102 05/19 Maintenance Section 5-5 © 2019 Alamo Group Inc.
- Page 88 When installed on the shaft, the gearbox will want to rotate downward. It may be easier to install Reducer Box in a downward orientation and rotate it up to meet the bolt holes. SDX-102 05/19 Maintenance Section 5-6 © 2019 Alamo Group Inc.
- Page 89 5. Tighten all four bolts. 8. Install cone over the spline shaft of the Reducer Box. 9. Replace all shielding before operation of the machine. SDX-102 05/19 Maintenance Section 5-7 © 2019 Alamo Group Inc.
- Page 90 5. Follow Reducer Gearbox installation instructions to complete the conversion. A new seal will be needed for installation into the coupler. A new Bearing Race should be used as well. SDX-102 05/19 Maintenance Section 5-8 © 2019 Alamo Group Inc.
-
Page 91: Instructions For Changing Rotation On 330-680 Parallel Gearboxes
4. Remove 10 bolts to separate gearbox halves. 5. Insert bar in slot provided on either side of gearbox to pry apart. 6. Lift out idler gear and bearing cones as one assembly and set aside. SDX-102 05/19 Maintenance Section 5-9 © 2019 Alamo Group Inc. - Page 92 8. Install idler assembly where input drive assembly was originally. 9. Remove existing seal in the cover plate removed earlier and replace it with plug #331-827 using proper driver. SDX-102 05/19 Maintenance Section 5-10 © 2019 Alamo Group Inc.
- Page 93 12. Apply a 1-16” bead of Loctite® 515 anaerobic flange sealant or equivalent to one of the machined surfaces just cleaned. 13. Reinstall cover carefully aligning dowel pins. (Gearbox halves should go together easily). DO NOT FORCE TOGETHER). SDX-102 05/19 Maintenance Section 5-11 © 2019 Alamo Group Inc.
- Page 94 MAINTENANCE 14. Install bolts previously removed and torque to 35 ft. lbs. 15. Turn input shaft to ensure there is no binding inside the gearbox. SDX-102 05/19 Maintenance Section 5-12 © 2019 Alamo Group Inc.
-
Page 95: Auger Drive Shear Plate
Under these conditions regrease the cross kits more frequently. Apply only one or two strokes from a hand type grease gun. If fittings are over lubricated seals may be damaged. SDX-102 05/19 Maintenance Section 5-13 © 2019 Alamo Group Inc. -
Page 96: Chute Ring
1/2”. If wear is found, a shim kit can be purchased from your local Schulte dealer. To install the shim kit: 1. Remove the 5/8” bolts holding the guide sleeves to the chute base. -
Page 97: Bolt Grades And Torque
Do not replace lock nuts with nuts and lock washers. Use only original equipment lock nuts. Recommended Torques in foot pounds for SAE Grade 5 bolts, based on dry assembly: SDX-102 05/19 Maintenance Section 5-15 © 2019 Alamo Group Inc. -
Page 98: Auger Drive Chain
BE SURE TO REPLACE RUBBER PLUGS. Leaving the plug holes open will result in snow entering the chain case potentially causing premature wear. SDX-102 05/19 Maintenance Section 5-16 © 2019 Alamo Group Inc. -
Page 99: Pto Shear Bolt
IMPORTANT: If the PTO shear bolt breaks immediately shut down the tractor and replace the shear bolt. 1. The shear bolts used on this Schulte snow blower and mounting kits are either Grade 2 or Metric Grade 8.8. Refer to the illustrations for help in identification of these grades of bolts. - Page 101 GENERAL STATEMENT AFFECTING ALL SCHULTE WARRANTY Schulte Industries Ltd. warrants to the original purchaser only, that in the event of any defect in material or workmanship in the product sold by Schulte Industries, the subject of this warranty (“the goods”) during the warranty period mentioned below the manufacturer will provide the coverage specified below.
- Page 102 • The Dealer must keep the failed part until the claim is processed, to allow Schulte Industries the option of further examination of the part.
- Page 104 SDX-102- 05/19 Part No. B102-010C Printed Canada...
Need help?
Do you have a question about the SDX-102 and is the answer not in the manual?
Questions and answers