Advertisement
Quick Links
Advertisement

Related Manuals for GRAPHTEC CE LITE-50


Summary of Contents for GRAPHTEC CE LITE-50
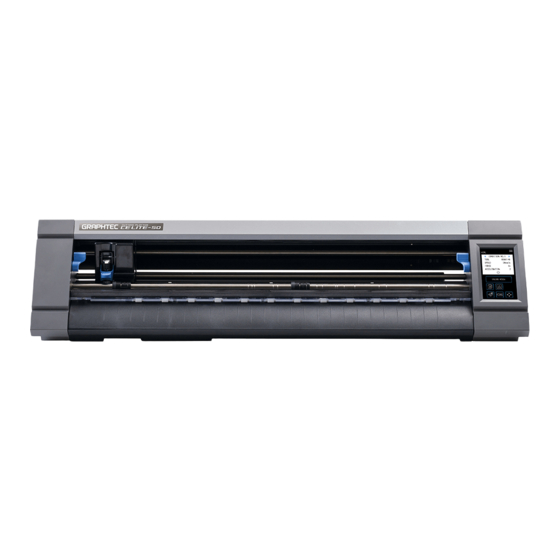
- Page 1 USER’S MANUAL CE LITE-50-UM-151...
-
Page 3: Introduction
Introduction Introduction Thank you for purchasing Cutting Plotter CE LITE-50. This device is a cutting plotter that realizes high-speed Please carefully read through this manual prior to use in order to ensure safe and proper use of the device. Notes on this Manual other comments or suggestions. - Page 4 Introduction Precautions on Handling the Cutter Blade Cutter Pen Cutter blade After Attachment to the Main Unit dangerous. Precautions After Turning the Power ON Notes regarding Warning Labels precautions listed. Tool carriage Notes regarding the Wording in This Manual media with the cutter pen.
- Page 5 Introduction Before Work Precautions when Using Curled Media...
- Page 6 Contents CONTENTS Introduction ..............
- Page 7 Contents ..........
- Page 8 Contents ........
- Page 9 Contents ....... . . Appendix ..........
- Page 11 Chapter 1 Notes Before Use Standard Accessories Names and Functions of Each Component Operation Panel Installing the Main Unit Media Size and Cutting Area Installing the Driver and Software Connecting and Turning ON the Power Connecting a Computer Settings when Turning the Power ON for the First Time...
- Page 12 Chapter 1 Notes Before Use Standard Accessories...
- Page 13 Chapter 1 Notes Before Use Names and Functions of Each Component Push roller Media holding roller (movable) Push roller positioning guide Tool holder Media set lever - left Tool carriage Push roller Media sensor Media set lever - right Cutter groove Operation panel Front Guide Roll media stocker...
- Page 14 Chapter 1 Notes Before Use Operation Panel Types of Screens and Operations HOME Screen and Functions of Buttons "MENU" button: "CONDITION NO. Selection" buttons: "CONDITION" button: setting screen. "LOAD MEDIA" button: The following screen is displayed when media is set. "UNLOAD MEDIA"...
- Page 15 Chapter 1 Notes Before Use Input Screen Number Input Drum Selection List Selection Rotate the drum to scroll through Touch the item you wish to select the list and select a setting value. from the list to set the item. Position Keys The tool carriage or media moves to each direction when the "...
- Page 16 Chapter 1 Notes Before Use Installing the Main Unit Installation Space used. media. Installation Space when Using Carrier Sheets 934mm 296mm 50mm 100mm 311mm transportation of the media. 934mm 50mm 50mm 100mm 50mm...
- Page 17 Chapter 1 Notes Before Use Media Size and Cutting Area Compatible Media Sizes Compatible Size Position of right side Media Width Media Set Lever ISO A/JIS A JIS B ISO B Inch Non-Standard 220.0mm 250.0mm 420.0mm 500.0mm 20inch Cutting Area Sheet Media Roll Media 10mm...
- Page 18 Do not connect this device and the computer with a USB cable before installing the printer driver. Connecting these prior to installation may prevent the printer driver from being properly installed. Installing Graphtec Pro Studio (Windows) URL: http://www.graphtec.co.jp/en/imaging/celite/support.html Installing Cutting Master 4 (Windows/Mac) URL: http://www.graphtec.co.jp/en/imaging/celite/support.html...
- Page 19 Chapter 1 Notes Before Use Connecting and Turning ON the Power AC Cable AC Adapter displayed. Then touch the...
- Page 20 Chapter 1 Notes Before Use Connecting a Computer start up. Computer USB Cable 1-10...
- Page 21 Chapter 1 Notes Before Use Settings when Turning the Power ON for the First Time Language Selection Selection of Unit for Length 1-11...
- Page 23 Chapter 2 Basic Operations Setting the Tool Setting the Media Set Levers Setting the Push Rollers Loading Sheet Media Con rming the CONDITION NO. (Cutting Condition) Precautions when Creating Data Sending Cutting Data Ordinary Care...
- Page 24 Chapter 2 Basic Operations Setting the Tool Adjusting the Blade Depth of the Cutter CAUTION Be careful when handling the cutter blade to avoid cutting your hands, etc. An excessive blade depth will damage the cutter blade and cutting mat or lead to wasteful consumption of media.
- Page 25 Chapter 2 Basic Operations Setting the Tool CAUTION Don't touch to the tool while it is moving, it is extremely dangerous. Be careful not to injure yourself with the cutter blade when setting the tool. Locking Lever Pull the locking lever to open the lock. Locking indicator Unlock...
- Page 26 Chapter 2 Basic Operations Setting the Media Set Levers Setting the Media Set Lever - Left Release Lock Setting the Media Set Lever - Right There are three lock positions for the media set lever - right. The lock position depends on the width of media. Lock 1 Release Lock 2...
- Page 27 Chapter 2 Basic Operations Setting the Push Rollers Positioning Groove Moving the Push Rollers Push Roller Click where it "clicks" into the positioning groove. After setting the push Tool carriage the left and right media set levers and slowly move the tool carriage different position or forcefully moving it may cause damage.
- Page 28 Chapter 2 Basic Operations Loading Sheet Media sheet media. Loading the Media Up Against the Push Rollers Raise the media set levers and release the push rollers. " mark.
- Page 29 Chapter 2 Basic Operations Evenly position the edge of the sheet media up against the push rollers. Pass the sheet media under the push roller positioning guide and load it so that it is parallel with the front guide. Edge of Sheet Media Push Roller Push Roller Edge of Sheet Media...
- Page 30 Chapter 2 Basic Operations Loading the Media upon Releasing the Push Rollers Raise the media set levers and release the push rollers. " mark. the push rollers. Pass the sheet media under the push roller positioning guide and load it so that it is parallel with the front guide.
- Page 31 Chapter 2 Basic Operations Unloading Sheet Media device.
- Page 32 Chapter 2 Basic Operations " and " 2-10...
- Page 33 Chapter 2 Basic Operations Precautions when Creating Data Notes regarding the Cutting Origin Position The position of the cutting origin will vary depending on the settings for "Cutting Area". Create cutting data in Tilt correction: Enabled Tilt correction: Disabled Tilt correction: Disabled Margin: Normal/Expanded Margin: Normal Margin: Expanded...
- Page 34 Chapter 2 Basic Operations Notes regarding the Cutting Area The cutting area will vary depending on the media and the settings for "Cutting Area". Create cutting data in Media: Sheet media Media: Sheet media Tilt correction: Enabled/Disabled, Margin: Normal Tilt correction: Enabled/Disabled, Margin: Expanded Cutting Area Cutting Area 30mm...
- Page 35 Chapter 2 Basic Operations Sending Cutting Data 2-13...
- Page 36 Chapter 2 Basic Operations Ordinary Care surface. Cutting Mat Push Roller Media Sensor alcohol or a diluted neutral detergent. roller unit that transports the media can cause the device to malfunction. with alcohol or a diluted neutral detergent. Storage Method humidity.
- Page 37 Chapter 3 Cutting along Printed Data chapter along with registration marks. What is Printing & Cutting? Simple Printing & Cutting Registration Mark Scanned Printing & Cutting Types and Arrangement of Registration Marks Flow of Creating Registration Marks to Cutting...
- Page 38 Chapter 3 Cutting along Printed Data What is Printing & Cutting? function according to the environment of use. Cutting Line Plot Simple Printing & Cutting Edge of Media Cutting Line Plot Registration Mark Scanned Printing & Cutting scanned with the sensor and cutting lines are made upon predicting the cutting positions of the printed data Registration Mark Cutting Line Plot...
- Page 39 Chapter 3 Cutting along Printed Data Simple Printing & Cutting printed media. " and " " and set the tool. Touch the printed media to make a sample cut. Deciding the Offset Volume the position at which you intended to make the cut and the position that was actually cut. Y Value –...
- Page 40 Chapter 3 Cutting along Printed Data Deciding the Distance Adjustment Volume shape that was cut. Intended Shape to be Cut Media Origin Shape Actually Cut Data Value Y Cut Value Y to the input screen. Input the values for the directions.
- Page 41 Chapter 3 Cutting along Printed Data Registration Mark Scanned Printing & Cutting cutting the outline of a printed shape or when re-cutting media. change the settings. " and " " and set the tool. Touch the " and " " to move the tool to the registration mark scan starting area.
- Page 42 Chapter 3 Cutting along Printed Data Types and Arrangement of Registration Marks URL: http://www.graphtec.co.jp/en/imaging/celite/support.html Registration Mark Shapes Registration Mark Type 1 Registration Mark Type 2 outside of the cutting area. The cutting area within of the registration marks. near the registration marks.
- Page 43 Chapter 3 Cutting along Printed Data Positions for Registration Mark Arrangement Registration marks are arranged on the edge of the media with a margin. Unit: mm Registration Mark Type 1 Registration Mark Type 2 Numbers within brackets "( )" are for when the margin is expanded 10 (5) 10 (5)
- Page 44 Chapter 3 Cutting along Printed Data Automatic Registration Mark Position Detection Registration Mark ScanStarting Position Transparent media...
- Page 45 Chapter 3 Cutting along Printed Data Flow of Creating Registration Marks to Cutting this chapter. Graphtec Pro Studio [1] Creating the registration marks the design. Margin As the printing position may vary depending on the printer used to print the margin.
- Page 46 Chapter 3 Cutting along Printed Data [2] Creating data for printing & cutting Registration Mark Type 1 Registration Mark Type 2 Cut...". ". Registration Mark Type 1 Registration Mark Type 2 Cutting Data [3] Printing the created data Print the created data. CAUTION Be careful to observe the following items as doing otherwise will lead to not being able to scan the registration marks and perform the cutting.
- Page 47 Chapter 3 Cutting along Printed Data [4] Cutting the printed media Registration Mark Type 1 Registration Mark Type 2 Load the printed media onto CE LITE-50. Click the "Cut Contour" icon. The "Cut Contour" screen will launch. In order to match the orientation in ".
- Page 48 Chapter 3 Cutting along Printed Data Cutting Master 4 [1] Creating the registration marks over the design. Margin As the printing position may vary depending on the printer used to print the margin. displayed when it is selected from the application launcher.
- Page 49 Chapter 3 Cutting along Printed Data [2] Creating data for printing & cutting Registration Mark Type 1 Registration Mark Type 2 created on separate layers. Cutting Data [3] Printing the created data Print the created data. CAUTION Be careful to observe the following items as doing otherwise will lead to not being able to scan the registration marks and perform the cutting.
- Page 50 Chapter 3 Cutting along Printed Data [4] Cutting the printed media Registration Mark Type 1 Registration Mark Type 2 Load the printed media onto CE LITE-50. launcher. In order to match the orientation in which the ". "CE LITE-50" for the model name and destination.
- Page 51 Chapter 3 Cutting along Printed Data Graphtec Studio [1] Creating the registration marks marks over the design. Margin registration marks. As the printing position may vary depending on the arrangement positions. Registration Mark Type 1 Registration Mark Type 2 [2] Creating data for printing & cutting...
- Page 52 [4] Cutting the printed media Registration Mark Type 1 Registration Mark Type 2 Load the printed media onto CE LITE-50. along. Registration Mark Type 1 Registration Mark Type 2 Move tool...
- Page 53 Chapter 4 Convenient Functions Cutting Roll Media Cutting using the Carrier Sheet Plotting with the Drawing Pen Cutting from a USB Memory Cutting Multiple Media using the Same Data (Copy Function) Cutting upon Specifying the Cutting Position Expanding the Cutting Area Aborting and Pausing during a Cut Withdrawing the Tool Carriage...
- Page 54 Chapter 4 Convenient Functions Cutting Roll Media detection. Assembling the Roll Media Stocker width of the roll media. Roll Media Stocker Guide Rail...
- Page 55 Chapter 4 Convenient Functions media on top of the rollers so that the media Roll Media Roller Knob Roller Roller Knob Roller...
- Page 56 Chapter 4 Convenient Functions Loading and Scanning Roll Media There are two types of ways to load roll media with this device. ROLL START EDGE ROLL CURRENT POSITION Loading the Media Up Against the Push Rollers " mark. Pull out the roll media and create slack in the roll media that is the same amount as the length used at the front of the main unit.
- Page 57 Chapter 4 Convenient Functions Evenly position the leading edge of the roll media up against the push rollers. front guide. Leading Edge of Roll Media Push Roller Push Roller Leading Edge of Roll Media Push Roller Front Guide Roll Media Roll Media Set to be parallel Align the left edge of the roll media with the "I"...
- Page 58 Chapter 4 Convenient Functions Loading the Media upon Releasing the Push Rollers " mark. When Scanning at the Edge of the Roll Media push rollers. Pass the roll media under the push roller positioning guide and load it so that it is parallel with the front guide.
- Page 59 Chapter 4 Convenient Functions Pull out the roll media and create slack in the roll media that is the same amount as the length used at the front of the main unit. Create slack equivalent to length being used When Scanning at the Edge of the Roll Media When Scanning the Roll Media at the Loaded Position loaded.
- Page 60 Chapter 4 Convenient Functions Setting the Page Length the media in place while cutting. screen.
- Page 61 Chapter 4 Convenient Functions Cutting using the Carrier Sheet Precautions sheet. Attaching the coated side will lower the adhesion of the carrier sheet and may void the carrier sheet of use. carefully. sunlight. when it is removed. Cutting Area and Cutting Direction 10mm 330.2mm 10mm...
- Page 62 Chapter 4 Convenient Functions Loading Media onto the Carrier Sheet Load the media so that it is parallel with the adhesive surface. getting caught on something. Peel the Separator Separator surface with adhesion. storage. Carrier Sheet Origin Marking Attach the media to the adhesive area of the carrier sheet. Media Attach the media so that it is straight in reference to the origin marking on the top left of the carrier sheet.
- Page 63 Chapter 4 Convenient Functions Loading the Carrier Sheet Loading the Carrier Sheet Up Against the Push Rollers Raise the media set levers and release the push rollers. " mark. Evenly position the leading edge of the carrier sheet up against the push rollers. Pass the sheet carrier sheet under the push roller positioning guide and load it so that it is parallel with the front guide.
- Page 64 Chapter 4 Convenient Functions Align the left edge of the carrier sheet with the "I" marking of the " " mark on the front guide. Front Guide Sheet Media / Carrier Sheet Marking Carrier Sheet The device pulls the carrier sheet in to set. CAUTION When the "CARRIER SHEET"...
- Page 65 Chapter 4 Convenient Functions Loading the Media upon Releasing the Push Rollers Raise the media set levers and release the push rollers. " mark. the push rollers. Pass the carrier sheet under the push roller positioning guide and load it so that it is parallel with the front guide.
- Page 66 Chapter 4 Convenient Functions Plotting with the Drawing Pen Setting the Drawing Pen in the Pen Adapter S (light gray): M (dark gray): L (black): Insert the drawing pen into the pen adapter from its rear side. Pen Adapter Fixing Screw Drawing Pen Pen Adapter Fixing Screw...
- Page 67 Chapter 4 Convenient Functions Setting the Pen Adapter Locking Lever Pull the locking lever to open the lock. Locking indicator Unlock Lock Insert the pen adapter to the tool holder while holding it. Locking Lever Locking Lever Push the locking lever until it clicks to hold the cutter pen. Click Locking indicator...
- Page 68 Chapter 4 Convenient Functions Load the media and send the cutting data from the computer. 4-16...
- Page 69 Chapter 4 Convenient Functions Cutting from a USB Memory Saving Data on a USB Memory Cutting upon Loading USB Memory Data the device. USB Memory Touch the " to move the tool to the cut starting position and touch the device will start cutting. 4-17...
- Page 70 Chapter 4 Convenient Functions Cutting Barcode-equipped Data on the media together with the design and registration marks. Starting Mark Barcode perform the cut. the device. USB Memory " to move the tool to the position of the starting mark and touch the CAUTION When the "OK"...
- Page 71 Chapter 4 Convenient Functions Cutting Multiple Media using the Same Data (Copy Function) memory. Copying Multiple Cuts on a Single Media Spacing for Copies Origin Copy Origin Copy Copy Spacing for Copies Copy Copy Touch the " to move the tool to the copy starting position and touch the 4-19...
- Page 72 Chapter 4 Convenient Functions " and " " to select the spacing for copies and CAUTION When the "Execute" is touched, the media and tool carriage will start moving. Be careful to avoid contact with your body or any object. 4-20...
- Page 73 Chapter 4 Convenient Functions Copying Repeatedly on Multiple Media heet media or the carrier sheet is used for this procedure. discharged. cutting the copy. CAUTION When the button corresponding to the media is touched, the media and tool carriage will start moving. Be careful to avoid contact with your body or any object.
- Page 74 Chapter 4 Convenient Functions Cutting upon Specifying the Cutting Position Original Origin New Origin Touch the " to move the tool to the position of the new origin and touch the origin. www.delinit.by 4-22...
- Page 75 Chapter 4 Convenient Functions Expanding the Cutting Area media. margin is changed. Sheet Media When margin is normal When margin is narrowed Push Roller Position Push Roller Position Cutting Area Cutting Area 10mm Roll Media When margin is normal When margin is narrowed Push Roller Position Push Roller Position Cutting Area...
- Page 76 Chapter 4 Convenient Functions Aborting and Pausing during a Cut the situation. "CHANGE SETTING" button: (Con rm) button: (Exit) button: Resumes the cutting process. 4-24...
- Page 77 Chapter 4 Convenient Functions Withdrawing the Tool Carriage Tool Carriage Home Point The media moves 4-25...
- Page 79 Chapter 5 Detailed Settings chapter. Individually Registering Settings for Cutting Conditions Adjusting the Cutting Quality Adjusting the Cutting Time Cutting Thick Media Performing Cut Tests Registration Mark Scan Settings Adjusting the Media Operation Setting Commands Setting the Operation Panel...
- Page 80 Chapter 5 Detailed Settings Individually Registering Settings for Cutting Conditions set and registered. TOOL: SPEED: FORCE: ACCELERATION: TANGENTIAL MODE: OVERCUT START: OVERCUT END: DISTANCE ADJUST: type and thickness of the media. Refer to the sections that follow for details on how to set each item. "...
-
Page 81: Cutter Pen
Chapter 5 Detailed Settings Adjusting the Cutting Quality "5.5 Performing Cut Tests". Selecting the Tool and Setting the Offset Value Cutter Pen Blade Position of Axis of Rotation Blade Tip of Tool Cutter Offset Value Touch the " and " " and the tool. - Page 82 Chapter 5 Detailed Settings Setting the Cutting Force Touch the setting screen. the " " and " " and " " to select the cutting Setting the Offset Force in the tangential mode. " and " " to select the offset www.delinit.by...
- Page 83 Chapter 5 Detailed Settings Setting the Condition Priority MANUAL: Cutting conditions sent from the software are invalidated while the conditions set with the operation panel are made valid. PROGRAM: Setting the Distance Adjustment Touch the setting screen. the " " and "...
- Page 84 Chapter 5 Detailed Settings Setting the Blade Tip Orientation Initialization Position initialized so that the initialization is performed at a position that will not scratch the cut. OUTSIDE: area. 2mm BELOW: OUTSIDE 2mm BELOW Blade Tip Orientation Blade Tip Orientation Initialization Position Initialization Position Cutting Origin...
- Page 85 Chapter 5 Detailed Settings Adjusting the Cutting Time and "moving speed when the tool is lifted". Setting the Speed Touch the the " " and " " and " " to select the speed Setting the Acceleration Touch the using the " " and " " and touch the "...
- Page 86 Chapter 5 Detailed Settings Setting the Tool Up Speed " and " " to select the moving...
- Page 87 Chapter 5 Detailed Settings Cutting Thick Media What is the Tangential Mode? The tangential mode is a function used to cleanly cut the corners when working with thick media. traveling even when cutting curves and corners. Tool Down (2) Tool movement Overcut (Start) (1) Tool traveling direction Tool Up...
- Page 88 Chapter 5 Detailed Settings Setting the Overcuts Touch the setting screen. the " " and " " and " " to select the setting " and " " to select the setting 5-10...
- Page 89 Chapter 5 Detailed Settings Performing Cut Tests 1 PIECE: 3 PIECES: Three " the setting values. Cutting 1 Test with the Setting Values " and " " to select the " and " " to move the tool to the cut starting position and touch the "...
- Page 90 Chapter 5 Detailed Settings Cutting 3 Tests to include Setting Values ± 1 " and " " to select the " and " " to move the tool to the cut starting position and touch " marks. Cutting Order CAUTION When the "OK"...
- Page 91 Chapter 5 Detailed Settings Registration Mark Scan Settings Setting the Scan Mode MODE 1: MODE 2: MODE 3: you wish to select. " and " selection with the 5-13...
- Page 92 Chapter 5 Detailed Settings displayed. " and " " to move the tool carriage Scan Starting Position to the scan starting position (any position in the top left 50mm 50mm The tool carriage will move and automatically detect the state of the media. media and then displayed on the screen.
- Page 93 Chapter 5 Detailed Settings Registration Mark Type 1 " " and " " to move the tool carriage to the scan starting position (the position of the red circle in Registration Mark Type 2 The tool carriage will move and automatically detect Registration the registration marks.
- Page 94 Chapter 5 Detailed Settings Correcting the Registration Mark Position coordinates at which the registration marks were scanned. Scanning the Printed Registration Mark for Correction and Entering the Correction Value position and the plotted position. screen. " and " " to move the tool to the registration mark scan starting area and touch the Registration Mark Scan Starting Area...
- Page 95 Chapter 5 Detailed Settings correction. " and " selection with the Adjusting after Cutting the Test Pattern (Registration Mark for Correction) registration mark. Load white media for cutting. " " " " " and " CAUTION When the "OK" is touched, the media and pen carriage will start moving.
- Page 96 Chapter 5 Detailed Settings " and " " to move the tool to the registration mark scan starting area and touch the Registration Mark Scan Starting Area Registration Mark for Correction Registration Mark for Correction CAUTION Distance Adjustment When the "OK" is touched, the media Value X and pen carriage will start moving.
- Page 97 Chapter 5 Detailed Settings Setting Automatic Registration Mark Position Detection automatic scanning of the registration marks. Registration Mark Type 1 Registration Mark Type 2 Registration Mark Registration Mark Scan Starting Area Scan Starting Area screen. 5-19...
- Page 98 Chapter 5 Detailed Settings Adjusting the Media Operation Setting the Pre Feed Operation placing traces of the rollers on the media. pre feed operation. CAUTION When the "Execute" is touched, the media and tool carriage will start moving. Be careful to avoid contact with your body or any object. 5-20...
- Page 99 Chapter 5 Detailed Settings Setting the Auto Pre Feed placing traces of the rollers on the media. input with the Setting the Initial Feed media is loaded. This setting has the effect of automatically performing the "pre feed operation" for preventing displacement of the media.
- Page 100 Chapter 5 Detailed Settings Setting the Media Width Detection screen. selected. selected. When "ON" is When "OFF" is CAUTION selected selected When setting it to "OFF", do not cut the data exceeding the set media size. The device cuts the outside of the media, so that the cutter pen and the cutting mat may be damaged.
- Page 101 Chapter 5 Detailed Settings 5-23...
- Page 102 Chapter 5 Detailed Settings Setting Commands Selecting the Command Setting the HP-GL Origin Point Setting the HP-GL Model Emulated 5-24...
- Page 103 Chapter 5 Detailed Settings Setting the GP-GL Step Size used. 5-25...
- Page 104 Chapter 5 Detailed Settings Setting the Operation Panel Perform advanced settings for the operation panel. Language Selection the selection with the Selection of Unit for Lengths Setting the Beep for Key Operation 5-26...
- Page 105 Chapter 6 Troubleshooting as well as how to plot the test pattern. Responding to Trouble Con rming Error Messages Con rming the Operation of the Main Unit Con rming the Main Unit Firmware Version...
- Page 106 Chapter 6 Troubleshooting Responding to Trouble When the device does not operate even when the power is turned ON Symptom Possible Cause Solution There is nothing displayed on the plugged in to the connector on the device coming to the AC outlet. Contact your sales representative or Operation is Irregular Symptom...
- Page 107 Chapter 6 Troubleshooting Error Messages GP-GL Command Errors Error No. Displayed Solution Touch the operating the device. The setting for the device the software will output to has changed. operating the device. E02004 The setting for the device the software will output to has changed.
- Page 108 Chapter 6 Troubleshooting Error No. Displayed Solution Check the program. Check the program. orders. Check the program. Check the program. command. ARMS Errors Error No. Cause Solution Reload the media. E04002 E04004 E04005 Reduce the amount of data. segment area registration marks. The test pattern cutting position is not fully contained Plot the test pattern upon moving the media more towards the center.
- Page 109 Chapter 6 Troubleshooting Plotting the Self Test Pattern Plot the self test pattern to check the operation of the device. screen. of the self test pattern will start. CAUTION When the "Execute" is touched, the media and tool carriage will start moving. Be careful to avoid contact with your body or any object.
- Page 110 Chapter 6 Troubleshooting Adjusting the Width Detection Sensor loaded. screen. of width detection sensor will start. CAUTION When the "Execute" is touched, the media and tool carriage will start moving. Be careful to avoid contact with your body or any object. Main Unit Diagnosis Test the sensors and switches.
- Page 111 Chapter 6 Troubleshooting Firmware Version www.delinit.by...
- Page 113 Appendix Standard Speci cations A.2 Supply Items A.3 Appearance Drawing A.4 Menu Tree A.5 List of Initial Values...
- Page 114 Appendix Item CE LITE-50 0.025 mm Repetition Precision Type of Cutter Interface Types of Commands (switched with operation panel or automatically switched Power Consumption Precision Guaranteed Environment pen thicknesses are included.
- Page 115 Appendix Supply Items Product Name Model No. Pen Adapter Cross Cutter www.delinit.by...
- Page 116 Appendix Appearance Drawing...
- Page 117 Appendix Menu Tree HOME MENU MENU page [TOOL] [TANGENTIAL MODE] [SPEED] [OVERCUT START] [FORCE] [OVERCUT END] [LOAD MEDIA] [ACCELERATION] [DISTANCE ADJUST] Load the Media Next Page...
- Page 118 Appendix HOME Previous Page [3 PIECES] [SELECT FILE]...
- Page 119 Appendix MENU [TOOL] [ARMS] [MODE 1] [SENSOR OFFSET ADJ.] [MODE 2] [MODE 3] [CHECK MARK SCAN] Next Page www.delinit.by...
- Page 120 Appendix MENU Previous Page [AREA] [MEDIA] [INTERFACE] [ADVANCE] [TEST]...
- Page 121 Appendix List of Initial Values HOME Screen Menu Item Setting Item Initial Value MENU Screen Menu Item Setting Item Initial Value AREA 0.0 mm 0.0 mm 50 cm...
- Page 122 Appendix Menu Item Setting Item Initial Value TOOL COND. (CONDITION NO.) Setting Screen Menu Item Setting Item Initial Value 0.0 mm 0.0 mm www.delinit.by A-10...
- Page 123 INDEX INDEX ......Cut Tests .......5-11 .
- Page 124 INDEX ........5-13 ....4-11 .
- Page 125 INDEX ............2-14 .
- Page 126 GRAPHTEC CORPORATION...
- Page 128 www.delinit.by...
Need help?
Do you have a question about the CE LITE-50 and is the answer not in the manual?
Questions and answers