Table of Contents
Advertisement
Quick Links
Advertisement
Table of Contents

Related Manuals for Bartscher Coffeeline G1/6L


Summary of Contents for Bartscher Coffeeline G1/6L
- Page 1 Coffeeline G1/6L - G2/11,5L - G3/17,5L - G2plus 190160 - 190161 - 190162 - 190163...
- Page 2 Bartscher GmbH Phone: +49 5258 971-0 Franz-Kleine-Str. 28 Fax: +49 5258 971-120 Technical Support Hotline: +49 5258 971-197 D-33154 Salzkotten Germany www.bartscher.com Version: 3.0 Date of preparation: 2021-04-07...
-
Page 3: Table Of Contents
Original instruction manual Safety ......................2 Explanation of Signal Words ..............2 Safety instructions..................3 Intended Use ................... 5 Unintended Use ..................5 General information ..................6 Liability and Warranty ................6 Copyright Protection ................6 Declaration of Conformity ................ 6 Transport, Packaging and Storage .............. -
Page 4: Safety
Safety Diese Bedi enungsanlei tung besc hrei bt di e Installation, Bedi enung und Wartung des Geräts und gilt als wic htige Infor mationsquelle und N achschl agewer k. Di e Kenntnis aller enthaltenen Sic herheits hinweis e und H andlungs anweisungen schafft die Vorauss etz ung für das sichere und s ac hger echte Ar beiten mit dem Gerät. D arüber hi naus müs sen die für den Ei ns atz ber eic h des G eräts geltenden ör tlichen Unfall verhütungs vorsc hriften und allgemeinen Sicherheits besti mmungen eing ehalten wer den. Dies e Bedi enungs anleitung is t Bes tandteil des Produkts und muss i n unmi ttelbarer N ähe des Ger äts für das In¬s tall ations-, Bedi enungs-, Wartungs- und R einigungspers onal jederzeit z ugänglich auf¬bewahrt werden. Wenn das Ger ät an eine dritte Pers on weiterg egeben wird, muss die Bedi enungsanlei tung mit ausgehändigt wer den. -
Page 5: Safety Instructions
Safety WARNING! The signal word WARNING warns against hazards that may lead to moderate or severe injuries or death if the hazards are not avoided. CAUTION! The signal word CAUTION warns against hazards that may lead to light or moderate injuries if the hazards are not avoided. , di e IMPORTANT! The signal word IMPORTANT indicates possible property damages,... - Page 6 Safety • Always completely unwind the power cord. • Never place the appliance or other objects on the power cord. • Always take hold of the plug to disconnect the appliance from the power supply. • Check the power cord regularly for damage. Do not use the appliance if the power cord is damaged.
-
Page 7: Intended Use
Safety Improper use • Unintended or prohibited use may cause damage to the appliance. • The appliance may only be used in a technically flawless condition, providing for safe use. • The appliance may only be used with connections in a technically flawless condition, providing for safe use. -
Page 8: General Information
General information General information Liability and Warranty All information and instructions in this instruction manual account for legal regulations in force, current level of technical engineering knowledge as well as our expertise and experience, developed over the years. If special models or additional options are ordered, or state-of-the-art technical solutions were implemented, the actual scope of delivery of the appliance may, in some circumstances, differ from descriptions and numerous drawings in this instruction manual. -
Page 9: Transport, Packaging And Storage
Transport, Packaging and Storage Transport, Packaging and Storage Delivery Check Immediately upon reception, check the delivery for completeness and possible shipping damage. In the case of visible transport damage refuse to accept the appliance or accept it conditionally. Mark and note the scope of damage in shipping documents/consignment list of the shipping company and lodge a complaint. -
Page 10: Technical Data
Technical Data Technical Data Technical Specifications Version / Characteristics • Appliance connection: ready to plug in • Version: high-pressure coffee machine • Control: electronic, knob, button • ON/OFF switch • Indicator light: heating up • Display: – 4 languages – date and time –... - Page 11 Technical Data Name: Coffee machine Coffeeline G1/6L 190160 Art. No.: Material: steel plate Number of boilers: Boiler volume, in litres: Number of brewing groups: Number of hot water taps: Number of steam taps: Dosing programs per brewing group: Connected load:...
- Page 12 Technical Data Name: Coffee machine Coffeeline G3/17,5L 190162 Art. No.: Material: steel plate Number of boilers: Boiler volume, in litres: 17,5 Number of brewing groups: Number of hot water taps: Number of steam taps: Dosing programs per brewing group: Connected load: 4,3 kW | 400 V | 50 Hz Dimensions (W x D x H), in mm: 967 x 580 x 523...
-
Page 13: List Of Components Of The Appliance
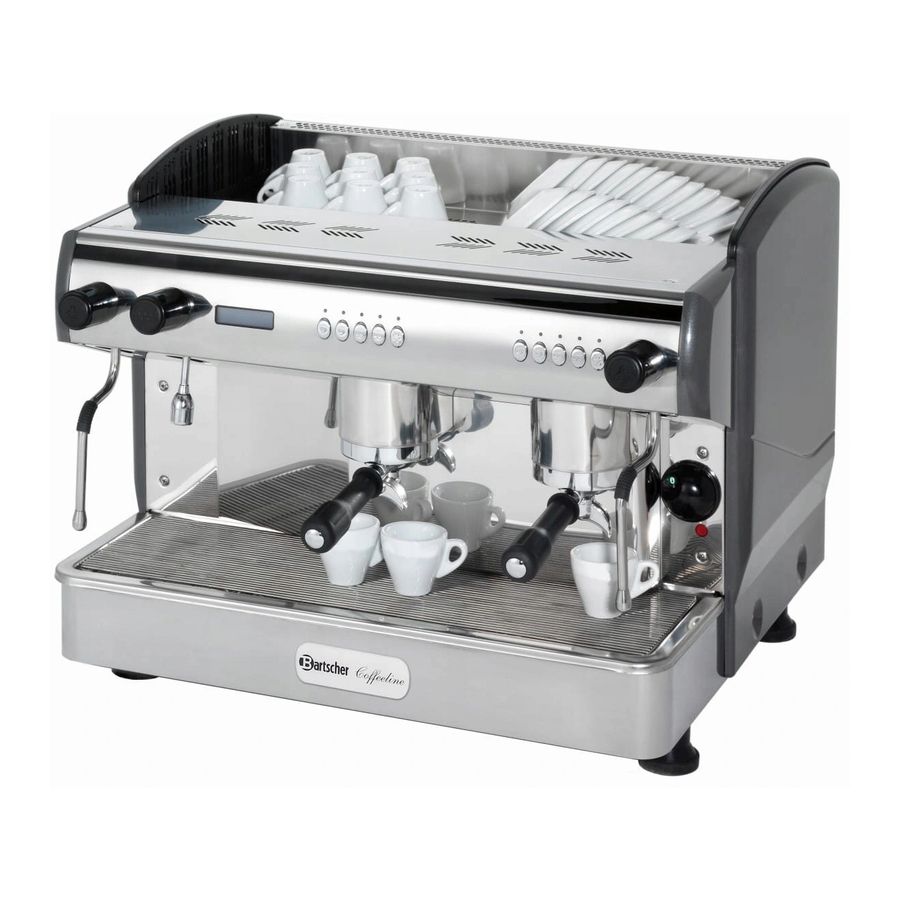
Technical Data List of Components of the Appliance 190160 (without display) Fig. 1 1. Steam tap 2. Beverage button 3. Space for placing cups / saucers 4. Hot water tap 5. Housing 6. Hot water outlet 7. Indicator light 8. Drip tray 9. -
Page 14: Functions Of The Appliance
Technical Data 190161 / 190162 / 190163 (with display) Fig. 2 1. Hot water tap 2. Display 3. Beverage button 4. Space for placing cups / saucers 5. Housing 6. ON/OFF switch 7. Indicator light 8. Height-adjustable feet (4 pcs) 9. -
Page 15: Installation And Operation
Installation and operation Installation and operation Installation CAUTION! Incorrect installation, positioning, operation, maintenance or misuse of the appliance may lead to personal injury or property damage. Positioning and installation, as well as repairs may be performed by authorised technical service only and in compliance with the applicable national law. - Page 16 Installation and operation – sufficiently large, and thus enabling usage of the appliance with no problems; – easily accessible; – well ventilated. • Maintain sufficient clearance from table edges. The appliance might turn over and fall down. • When in operation, the appliance may not be installed in a cabinet. •...
- Page 17 Installation and operation Power supply connection • Verify if technical data of the appliance (see rating plate) correspond with the local electric power grid specification. • Connect the appliance to a single, properly grounded mains socket with protective contact. Do not connect the appliance to a multi-socket. •...
- Page 18 Installation and operation Make sure the drain hose is not twisted and is routed below the drip tray over its entire length. Pressure and Temperature Pressure and temperature in the boiler are directly inter-dependent (see Fig. below). The appliance is equipped with manometer, which shows the state of the boiler. If the appliance is equipped with the display, it shows also the boiler temperature.
-
Page 19: Operation
Installation and operation Operation Before Use 1. Following installation, clean the appliance according to instructions in section 'Cleaning'. 2. Check if all connections are established correctly. Switching-On Fig. 5 1. Switch the appliance on with the disconnector. 2. Open the external water supply of the appliance. The appliance is featured with automatic water supply to the boiler. - Page 20 Installation and operation 4. Open the steam tap, to relieve air from the boiler. The red indicator lap indicates that the heating process is ion progress in the boiler. The indicator light goes off when the appliance reaches operating temperature. The appliance is ready for use.
- Page 21 Installation and operation Fitting the handle on the brewing group head Fig. 7 Fig. 8 1. Set the handle so that their 2. Fit the handle and rotate it counter- both side guides are aligned clockwise until it is set perpendicularly to the with slits in the brewing coffee machine.
- Page 22 Installation and operation Preparation of Espresso ATTENTION! For the handle to be always warm, keep it constantly fitted with the brewing group. It is very important for maintaining optimal temperature, being a condition for preparing the highest quality espresso. 1. Rotate the handle out and remove it out 2.
- Page 23 Installation and operation 5. Put one or two cups under the 6. Select appropriate option using outlet valves. beverage buttons. ATTENTION! Scalding or serious injuries caused by high-pressure hot water. Never remove the handle during the brewing process. When the brewing process is complete, wait for approx. 3 seconds before removing the handle.
- Page 24 Installation and operation 2. Immerse the steam nozzle in the milk container and make sure the nozzle is fully immersed. Depending on the needs, select the following steam nozzle positions: A – heating up milk B – frothing milk 3. Open the steam tap again to heat up or froth the milk.
- Page 25 Installation and operation 4. When the milk reaches the required 5. When the process is finished, direct temperature, close the steam tap the steam nozzle over the drip tray and remove the container. and open the steam tap for a couple of seconds to remove the milk left in the steam nozzle.
- Page 26 Installation and operation Electronic Control Panel Button Functions Fig. 11 1. 1x espresso 2. 2x espresso 3. 1x coffee 4. 2x coffee 5. Continuous operation button / hot water dispensing / programming of coffee amount dosing The control panel is designed for preparation of 4 standard beverages (which, if needed, may be programmed) and for selection of continuous mode (continuous operation).
- Page 27 Installation and operation Coffee machine without display (190160) – below 4 seconds: constant supply is activated (it is deactivated with another button press); – over 4 seconds: access to programming menu of coffee dispensing (see below). The brewing process lasts as long as the user does not stop the process through another button press.
- Page 28 Installation and operation 2. Press the option to be programmed: The pressed button and the button are still being lit. The brewing group starts to dispense espresso. 3. When a cup is filled up to the required level, press the selected button again to stop dispensing.
- Page 29 Installation and operation Remaining Functions of Programming Buttons Automatic hot water / steam (if it is active) Continuous operation Programming Standby (OFF) Fig. 12 Coffee Machine Modes The coffee machine may be operated in three available modes: Switched on The coffee machine is switched on and ready to brew espresso.
- Page 30 Installation and operation Access to Second Level Menu 1. When the appliance is switched on, press the continuous operation button from amongst the beverage buttons to the left, and hold it for 8 seconds until the dispensing Fig. 15 programming menu is displayed. All beverage buttons light up, and the continuous operation button starts to blink.
- Page 31 Installation and operation When the changes in the 'Set clock' menu are acknowledged, move to the coffee machine automatic on/off switching menu, by pressing the button (Fig. 18). Fig. 18 6. To change the time of automatic on/off switching, increase/reduce value (hours) with buttons, until the value is blinking.
- Page 32 Installation and operation 11. The day, on which the coffee machine will not be automatically switched on may be set (Fig. 20) by increasing or reducing the value with the use of the button. When the required value is reached, press the button to acknowledge it.
-
Page 33: Cleaning And Descaling
Cleaning and Descaling Cleaning and Descaling Safety Instructions for Cleaning • Before cleaning, disconnect the appliance from the power supply. • Leave the appliance to cool down completely. • Make sure water does not enter the appliance. Do not immerse the appliance in water or other liquids during cleaning. - Page 34 Cleaning and Descaling 1. Clean the brewing group and the holder only with a special powder for cleaning pressure coffee machines. Observe instructions of such a cleaning agent's manufacturer. 2. Rotate the handle out and remove it out of the brewing group. Special cleaning agent for cleaning Filter membrane pressure coffee machines.
- Page 35 Cleaning and Descaling WARNING! Risk of scalding by hot water under pressure. Never attempt to remove the holder until the group is in cleaning mode. When the cleaning process is complete, wait for approx. 3 seconds before removing the handle. ATTENTION! When the cleaning program is finished, remove the handle and have the water flow through the brewing group again to rinse all residues.
- Page 36 Cleaning and Descaling ATTENTION! Danger of scalding by hot water flowing at the sides of the holder. Exercise caution when performing cleaning with this method. ATTENTION! High-pressure water may sprinkle when the holder is rotated in completely, causing scaling or serious injuries.
-
Page 37: Descaling
Possible Malfunctions Descaling ATTENTION! If the water hardness exceeds 6°, connect water softener upstream of the appliance, to avoid malfunctions caused by limescale deposits. • If, despite a water softener installed upstream of the appliance, there would be limescale deposits inside the coffee machine, de-scaling should be performed by a service technician only. - Page 38 Possible Malfunctions Have the appliance maintenance performed To de-activate the alarm and reset the counter: – Switch the appliance off. – Press and hold at the same time the button. – Switch the appliance on. Change filter. To de-activate the alarm and reset the counter: –...
- Page 39 Possible Malfunctions Problem Cause Solution Coffee machine Plug is not properly Check if the plug is correctly does not start connected to a socket connected to a socket and if the socket operates correctly Safety switch connection Check the electric power supply and/or RCD mechanism is faulty...
-
Page 40: Disposal
Disposal Disposal Electrical Appliance Electric appliances are marked with this symbol. Electrical appliances must be disposed of and recycled in a correct and environmentally friendly manner. You must not dispose of electric appliances with household waste. Disconnect the appliance from the power supply and remove power cord from the appliance.
Need help?
Do you have a question about the Coffeeline G1/6L and is the answer not in the manual?
Questions and answers