Molecular Devices ImageXpress Pico Installation Manual
Automated cell imaging system
Hide thumbs
Also See for ImageXpress Pico:
- Installation manual (82 pages) ,
- Installation manual (88 pages) ,
- Calibration kit manual (33 pages)

Related Manuals for Molecular Devices ImageXpress Pico


Summary of Contents for Molecular Devices ImageXpress Pico
- Page 1 ImageXpress® Pico Automated Cell Imaging System Installation Guide 5063666 B June 2018...
- Page 2 For research use only. Not for use in diagnostic procedures. The trademarks mentioned herein are the property of Molecular Devices, LLC or their respective owners. These trademarks may not be used in any type of promotion or advertising without the prior written permission of Molecular Devices, LLC.
-
Page 3: Table Of Contents
Contents Safety Information Warnings, Cautions, Notes, and Tips Symbols on Instrument Labels Before Operating the Instrument Protective Housing Electrical Safety Moving Parts Safety Lifting Hazard Chemical and Biological Safety Cleaning and Maintenance Chapter 1: ImageXpress Pico Automated Cell Imaging System ImageXpress Pico System Features CellReporterXpress Software Features Theory of Operation Obtaining Support... - Page 4 ImageXpress Pico Personal Imaging System Installation Guide Appendix A: Instrument Specifications Instrument Dimensions Appendix B: Compatible Objectives Appendix C: Filter Cube Specifications Appendix D: Replacement Parts and Optional Extras Appendix E: Packing the Instrument for Transport Appendix F: Electromagnetic Compatibility...
-
Page 5: Safety Information
When warnings and cautions are displayed in this guide, be careful to follow the specific safety information related to them. The following user-attention statements can be displayed in the text of Molecular Devices user documentation. Each statement implies a particular amount of observation or... -
Page 6: Symbols On Instrument Labels
ImageXpress Pico Personal Imaging System Installation Guide Symbols on Instrument Labels Each safety label found on the instrument contains an alert symbol that indicates the type of potential safety hazard related to the label. The following table lists the alert symbols that can be found on Molecular Devices instruments. -
Page 7: Before Operating The Instrument
For products under the requirement of the WEEE directive, contact your dealer or local Molecular Devices office for the procedures to facilitate the proper collection, treatment, recovery, recycling, and safe disposal of the device. -
Page 8: Electrical Safety
Electrical Safety To prevent electrically related injuries and property damage, inspect all electrical equipment before use and immediately report all electrical deficiencies. Contact Molecular Devices Technical Support to service equipment that requires the removal of covers or panels. WARNING! HIGH VOLTAGE. -
Page 9: Moving Parts Safety
7. Connect the power cord into the power port. 8. Press the Power button to power on the instrument. Note: If the instrument still does not power on after you change the fuses, contact Molecular Devices Technical Support. See Obtaining Support on page 20 for details. -
Page 10: Lifting Hazard
ImageXpress Pico Personal Imaging System Installation Guide Lifting Hazard WARNING! LIFTING HAZARD The ImageXpress Pico System weighs approximately 38 kg (84 lb.). Use great care when lifting or moving the instrument. To prevent injury, use a minimum of two people to lift the instrument. -
Page 11: Cleaning And Maintenance
Perform only the maintenance tasks described in this guide. Any other maintenance tasks must be done by qualified Molecular Devices personnel only. Contact a Molecular Devices service engineer to inspect and perform a preventive maintenance service on the instrument each year. - Page 12 ImageXpress Pico Personal Imaging System Installation Guide 5063666 B...
-
Page 13: Chapter 1: Imagexpress Pico Automated Cell Imaging System
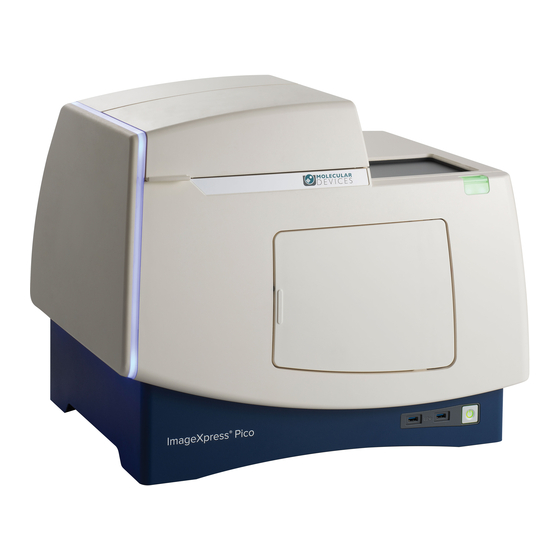
Chapter 1: ImageXpress Pico Automated Cell Imaging System The ImageXpress® Pico Automated Cell Imaging System by Molecular Devices® is an affordable all-in-one platform for automatically acquiring and analyzing images from fluorescently labeled biological samples in plates and slides. It enables you to increase the throughput of your image acquisition and analysis, allowing you to gain insights in minutes. -
Page 14: Imagexpress Pico System Features
One or more objectives is included with your initial purchase of the ImageXpress Pico System. After that, you can order additional compatible objectives exclusively from Molecular Devices. The following objectives are compatible with the ImageXpress Pico System: Magnification... - Page 15 Chapter 1: ImageXpress Pico Automated Cell Imaging System Sample (X-Y) Stage Plate Holder The plate holder is designed for scanning multi-well microplates in standard ANSI (SBS) formats with plastic or glass bottoms. It can accommodate other plate formats that have standard microplate footprint dimensions. For example, glass slides can be imaged using a slide adapter included in the accessory kit.
-
Page 16: Cellreporterxpress Software Features
ImageXpress Pico Personal Imaging System Installation Guide CellReporterXpress Software Features The CellReporterXpress Image Acquisition and Analysis Software by Molecular Devices is the user interface for the ImageXpress Pico System. You will use the CellReporterXpress Software to work with the ImageXpress Pico System and control all its functions. ... -
Page 17: Theory Of Operation
Chapter 1: ImageXpress Pico Automated Cell Imaging System Theory of Operation The ImageXpress Pico System uses the following components and functions: Fluorescence Imaging, see page 18 Excitation and Emission Filters, see page 18 Dichroic Mirror, see page 19 Objective Lenses, see page 20 5063666 B... - Page 18 ImageXpress Pico Personal Imaging System Installation Guide Fluorescence Imaging Fluorescence is a property of certain classes of molecules (fluorochromes, fluorescent proteins, or dyes) in which photons of a specific wavelength are absorbed (excitation), and, as a result, photons are emitted at a longer wavelength (emission) a very short time later.
- Page 19 Chapter 1: ImageXpress Pico Automated Cell Imaging System Dichroic Mirror In the ImageXpress Pico System, the dichroic mirror is in a filter cube. A dichroic mirror is a specially designed beam splitter that transmits light above a certain cutoff wavelength and reflects light at shorter wavelengths. This is the essential component that allows the construction of an epi-illumination fluorescence imaging system in which the illumination and imaging optical paths overlap at the objective lens.
-
Page 20: Obtaining Support
Press to access Help for the active screen. Technical Support You can contact Molecular Devices Technical Support by phone or submit a support request through the Knowledge Base. To find regional support contact information, visit www.moleculardevices.com/contact. You will need the instrument serial number and the software system ID. - Page 21 Chapter 1: ImageXpress Pico Automated Cell Imaging System The serial number is located on the back panel of the instrument. Additional Resources Web-based microscopy courses: www.leica-microsystems.com/science-lab www.ibiology.org/ibioeducation/taking-courses/ibiology-microscopy-short-course.html The Molecular Probes Handbook offers advice on fluorescent probes and can help you determine if there are better stains available for your analysis: www.lifetechnologies.com/us/en/home/references/molecular-probes-the- handbook.html 5063666 B...
-
Page 22: Product Documentation
ImageXpress Pico Personal Imaging System Installation Guide Product Documentation The following guides are available in the Knowledge Base on the Molecular Devices Support website at www.moleculardevices.com/support: CellReporterXpress Installation Guide CellReporterXpress IT Configuration Guide CellReporterXpress User Guide ImageXpress Pico Installation Guide ImageXpress Pico User Guide In addition, the CellReporterXpress Software includes context-sensitive Help that you can access from within the software. -
Page 23: Chapter 2: Setting Up The Imagexpress Pico System
Chapter 2: Setting Up the ImageXpress Pico System Package Contents The package contains the instrument and a SafeNet Sentinel CellReporterXpress USB hardware key (called a "dongle"), which is required to run the software. In addition, the package includes the following: Item Description Installation Guide Two (2) CAT6 Ethernet cables, 2 m (6.56 ft.) -
Page 24: Unpacking The Instrument
ImageXpress Pico Personal Imaging System Installation Guide Unpacking the Instrument The packaging is designed to protect the instrument during transportation. Carefully unpack the instrument. A foam transport lock is placed in the sample (X-Y) stage to protect the instrument from damage during shipment. You must remove the transport lock before you power on the instrument. - Page 25 Chapter 2: Setting Up the ImageXpress Pico System 4. Remove the accessory boxes and the foam supports. 5. Remove the foam packing from both ends and then remove the plastic bag from the instrument. 6. With one person on each end, lift the instrument to a dry, flat surface. CAUTION! Lift the instrument from the bottom;...
-
Page 26: Placing The Instrument
ImageXpress Pico Personal Imaging System Installation Guide Placing the Instrument Consider the following when setting up the instrument: Set the instrument on a stable, dry, flat surface. Avoid setting up the instrument near any sources of vibration, such as a centrifuge. -
Page 27: Connecting Cables
Chapter 2: Setting Up the ImageXpress Pico System Connecting Cables The power cord and Ethernet cable connect to the ports on the rear of the instrument. The Ethernet port enables you to connect the instrument to the host computer running the CellReporterXpress Software (in a standalone configuration) or to your network (in a network configuration or server configuration). - Page 28 ImageXpress Pico Personal Imaging System Installation Guide Standalone Configuration To connect cables for a standalone configuration: 1. Do the following to connect the supplied Ethernet cable: a. Connect one end of the Ethernet cable to the LAN1 port on the instrument.
-
Page 29: Powering On The Instrument
Chapter 2: Setting Up the ImageXpress Pico System Powering On the Instrument To power on the instrument: 1. Ensure the Ethernet cable is connected properly: For a standalone configuration, where the instrument is connected directly to the host computer, connect the Ethernet cable to the LAN1 port on the back of the instrument. - Page 30 ImageXpress Pico Personal Imaging System Installation Guide 5063666 B...
-
Page 31: Chapter 3: Installing The Cellreporterxpress Software
Chapter 3: Installing the CellReporterXpress Software At this point, you are ready to install the CellReporterXpress Software. The CellReporterXpress Software is the user interface for the ImageXpress Pico System. You will use the CellReporterXpress Software to work with the ImageXpress Pico System and control its functions. ... - Page 32 ImageXpress Pico Personal Imaging System Installation Guide 5063666 B...
-
Page 33: Chapter 4: Finishing Setup Of The Imagexpress Pico System
Note: The CellReporterXpress Software uses the Windows login credentials of the host computer to authenticate users. If the host computer does not maintain a constant connection to the network, Molecular Devices recommends that user accounts be Local accounts (and not Roaming or Domain accounts). If Domain accounts are required, the Host computer should remain connected to the domain network at all times. -
Page 34: Installing A Filter Cube
CAUTION! To prevent skin oils from damaging the optical coatings, Molecular Devices recommends that you wear powder-free disposable gloves when handling objectives and filter cubes. Molecular Devices precalibrates the filter cubes to specific slots in the turret. You must install the filter cubes as follows: Slot... - Page 35 Chapter 4: Finishing Setup of the ImageXpress Pico System To install a filter cube: 1. In the CellReporterXpress Software, on the Home Page, click Devices. 2. In the Available Acquisition Devices list, click Show Device Options to expand the details for the device where you want to install a filter cube. 3.
-
Page 36: Installing An Objective
CAUTION! With the instrument power on, do not manually rotate the objective turret. Manually rotating the objective turret can damage the instrument. Molecular Devices precalibrates the objectives to specific slots in the turret. You must install the objectives as follows:... - Page 37 Chapter 4: Finishing Setup of the ImageXpress Pico System To install an objective: 1. In the CellReporterXpress Software, on the Home Page, click Devices. 2. In the Available Acquisition Devices list, click Show Device Options to expand the details for the device where you want to install an objective. 3.
-
Page 38: Inserting The Plate Holder Or Slide Holder
ImageXpress Pico Personal Imaging System Installation Guide Inserting the Plate Holder or Slide Holder Open the sample door on the top of the instrument to insert the plate holder or slide holder in the sample (X-Y) stage. The sample (X-Y) stage has an A1 label to indicate its top left corner. - Page 39 Chapter 4: Finishing Setup of the ImageXpress Pico System Inserting a Plate Holder Like the sample (X-Y) stage, the plate holder also has an A1 label to indicate its top left corner. To insert the plate holder: 1. Press the button at the top right of the instrument to open the sample door. 2.
- Page 40 ImageXpress Pico Personal Imaging System Installation Guide Inserting a Slide Holder Like the sample (X-Y) stage, the slide holder also has an A1 label to indicate its top left corner. To insert the slide holder: 1. Press the button at the top right of the instrument to open the sample door.
-
Page 41: Appendix A: Instrument Specifications
Appendix A: Instrument Specifications The instrument must be installed on a level and stable surface. WARNING! If the instrument is used in a manner not specified by Molecular Devices, the protection provided by the equipment might be impaired. WARNING! The ImageXpress Pico System is an Equipment Class 1 product that relies on protective earth grounding for safe operation. - Page 42 ImageXpress Pico Personal Imaging System Installation Guide Item Description Reading Modes Fluorescence Transmitted Light (Brightfield) Colorimetric Objectives 20x (optional) 40x (optional) 63x (optional) Fluorescence Color Channels FITC DAPI (optional) TRITC (optional) CY5 (optional) Temperature Control 6°C (11°F) above ambient up to 40°C (104°F) Ambient Operating Conditions Temperature: 18°C to 30°C (59°F to 86°F)
-
Page 43: Instrument Dimensions
Appendix A: Instrument Specifications Instrument Dimensions Front View Item Description 67.8 cm (26.69 in.) 35.3 cm (13.90 in.) 55.1 cm (21.68 in.) 5063666 B... - Page 44 ImageXpress Pico Personal Imaging System Installation Guide Side View Item Description 45.3 cm (17.83 in.) 39.7 cm (15.63 in.) 5063666 B...
- Page 45 Appendix A: Instrument Specifications Top View Item Description 42.5 cm (16.73 in.) 19.5 cm (7.68 in.) 5063666 B...
- Page 46 ImageXpress Pico Personal Imaging System Installation Guide 5063666 B...
-
Page 47: Appendix B: Compatible Objectives
Appendix B: Compatible Objectives The following Leica objectives, which are available from Molecular Devices, are compatible with the ImageXpress Pico System: Numerical Working Correction Objective Magnification Aperture (NA) Distance Collar PL FLUOTAR 4x/0.13 0.13 17.0 mm HC PL FLUOTAR 10x/0.32 0.32 11.1 mm... - Page 48 ImageXpress Pico Personal Imaging System Installation Guide 5063666 B...
-
Page 49: Appendix C: Filter Cube Specifications
Appendix C: Filter Cube Specifications The following filter cubes, which are available from Molecular Devices, are compatible with the ImageXpress Pico System: Filter Wavelengths DAPI Excitation: 370/40 nm Emission: 450/60 nm Dichroic: 410 nm FITC Excitation: 465/40 nm Emission: 525/30 nm Dichroic: 500 nm TRITC Excitation: 530/45 nm... - Page 50 ImageXpress Pico Personal Imaging System Installation Guide 5063666 B...
-
Page 51: Appendix D: Replacement Parts And Optional Extras
Appendix D: Replacement Parts and Optional Extras For an up-to-date list of replacement parts and optional extras, go to www.moleculardevices.com. Compatible Objectives on page 47 for a list of compatible objectives. 5063666 B... - Page 52 ImageXpress Pico Personal Imaging System Installation Guide 5063666 B...
-
Page 53: Appendix E: Packing The Instrument For Transport
The packaging is designed to protect the instrument during transportation. Before transporting the instrument, carefully pack it in its original shipping box with all packing materials. If needed, contact Molecular Devices for a replacement shipping box. WARNING! LIFTING HAZARD. To prevent injury, use a minimum of two people to lift the instrument. - Page 54 ImageXpress Pico Personal Imaging System Installation Guide 8. With one person on each end, place the instrument in the bottom foam packing as shown below. WARNING! LIFTING HAZARD. To prevent injury, use a minimum of two people to lift the instrument.
- Page 55 Appendix E: Packing the Instrument for Transport 11. Seal the box for transportation. CAUTION! Keep the box upright during transport. Do not tip or tilt the box or place it on its side. Unpacking the Instrument on page 24for details on unpacking the instrument after transport.
- Page 56 ImageXpress Pico Personal Imaging System Installation Guide 5063666 B...
-
Page 57: Appendix F: Electromagnetic Compatibility
Appendix F: Electromagnetic Compatibility Regulatory for Canada (ICES/NMB-001:2006) This ISM device complies with Canadian ICES-001. Cet appareil ISM est confomre à la norme NMB-001 du Canada. ISM Equipment Classification (Group 1, Class A) This equipment is designated as scientific equipment for laboratory use that intentionally generate and/or use conductively coupled radio-frequency energy for internal functioning, and are suitable for use in all establishments, other than domestic and those directly connected to a low voltage power supply network which supply buildings used for domestic... - Page 58 The trademarks used herein are the property of Molecular Devices, LLC or their respective owners. ©2018 Molecular Devices, LLC. Specifications subject to change without notice. Patents: www.moleculardevices.com/productpatents All rights reserved. FOR RESEARCH USE ONLY. NOT FOR USE IN DIAGNOSTIC PROCEDURES...
Need help?
Do you have a question about the ImageXpress Pico and is the answer not in the manual?
Questions and answers