Akai MPC 3000 Operator's Manual
Midi production center
Hide thumbs
Also See for MPC 3000:
- Service manual (58 pages) ,
- Service manual (58 pages) ,
- Service manual (16 pages)

Related Manuals for Akai MPC 3000


Summary of Contents for Akai MPC 3000
- Page 1 MIDI PRODUCTION CENTER Software version 3.0 WARNING To prevent fire or shock hazard, do not expose this appliance to rain or moisture. Operator's Manual...
- Page 3 MIDI PRODUCTION CENTER...
- Page 5 MIDI Production Center Software version 3.0 Operator’s Manual By Roger Linn Copyright 1987-1994 Akai Electric Co., LTD. Document Revision date: May 1994...
- Page 6 WARNING!! To prevent fire or shock hazard, do not expose this appliance to rain or moisture. CAUTION: TO REDUCE THE RISK OF ELECTRIC SHOCK DO NOT REMOVE COVER (OR BACK). NO USER-SERVICEABLE PARTS INSIDE. REFER SERVICING TO QUALIFIED SERVICE PERSONNEL. THE SYMBOLS ARE RULED BY UL STANDARDS (U.S.A).
- Page 7 • Always disconnect the MPC3000 from the power supply by pulling on the plug, not the cord. • Allow only an “Akai Professional” dealer or qualified professional engineer to repair or reassemble the MPC3000. Apart from voiding the warranty, unautho- rized engineers might touch live internal parts and receive a serious electric shock.
- Page 8 THIS APPARATUS MUST BE EARTHED This equipment is fitted with an approved non-rewireable UK mains plug. To change the fuse in this type of plug proceed as follows: 1) Remove the fuse cover and old fuse. 2) Fit a new fuse which should be a BS1362 5 Amp A.S.T.A or BSI approved type. 3) Refit the fuse cover.
-
Page 9: Lithium Battery
LITHIUM BATTERY This product uses aLithium Battery for memory back-up. The lithium battery should only be replaced by qualified service personnel. improper handling may cause risk of explosion. FCC warning This equipment has been tested and found to comply with the limits for a Class A digital device, pursuant to Part 15 of the FCC Rules. -
Page 10: Front Panel
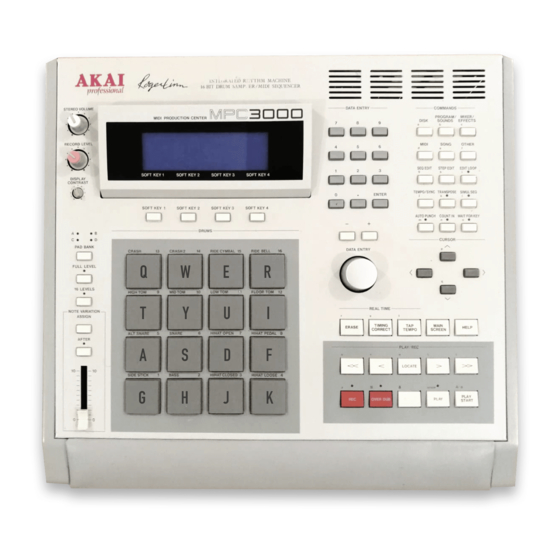
FRONT PANEL STEREO VOLUME MIDI PRODUCTION CENTER RECORD LEVEL SOFT KEY 1 SOFT KEY 2 DISPLAY CONTRAST SOFT KEY 1 SOFT KEY 2 PAD BANK CRASH CRASH2 FULL LEVEL 16 LEVELS HIGH TOM MID TOM NOTE VARIATION ASSIGN ALT SNARE SNARE AFTER SIDE STICK... -
Page 11: Table Of Contents
Table of Contents Chapter 1: Introduction ... 1 Welcome! ... 2 Features ... 3 What’s Different From the MPC60? ... 6 If You Already Know the MPC60 ... 8 Chapter 2: The Basics ... 13 Hooking Up Your System ... 14 Getting Around on the MPC3000 ... - Page 12 Copying Events ... 82 Copying an Entire Sequence to Another ... 84 Shifting the Timing of Many Notes ... 85 Global Editing of Note Event Data ... 86 Editing Note Velocity or Duration Data ... 87 Editing Note Number Assignment of Drum Note Events ... 89 Editing Note Variation Data of Drum Note Events ...
- Page 13 Loading, Erasing, or Renaming Files ... 173 Loading a SEQ File (Single Sequence) ... 175 Loading an ALL File (All Sequences and Songs) ... 177 Loading a SND File (Single Sound) ... 177 Loading a PGM File (Single Program and Sounds) ... 178 Loading an APS File (All Programs and Sounds) ...
-
Page 15: Chapter 1: Introduction
Chapter 1: Introduction Chapter 1: Introduction Page 1... -
Page 16: Welcome
Chapter 1: Introduction Welcome! Since its release in 1988, the MPC60 MIDI Production Center has earned a reputation not only as the world’s greatest drum machine but also as a powerful sequencer for those who desire an alternative to the complexity and confusion of computer sequencers. But over the years users asked for more: 16-bit stereo sampling, more sample memory, enhanced sound design features, faster sequence processing, enhanced sequence recording and editing... -
Page 17: Features
Chapter 1: Introduction Features The following is a summary of some of the advanced features of the MPC3000. General • Large 320-character LCD display (8 lines by 40 characters) with graphics. • Built-in 1.44 megabyte disk drive for storing both sequence and sound data. - Page 18 Chapter 1: Introduction • The Best Start feature automatically finds the point within a sound at which the drum strike begins, bypassing any dead space at the beginning of the sound which could cause playback delays. • Up to three sounds can be assigned to a MIDI note number or pad. The sounds can either play simultaneously, switch depending on note velocity, or switch depending on envelope decay (to simulate the MPC60’s hi-hat decay slider function).
- Page 19 Chapter 1: Introduction • Programmable tempo changes in mid-sequence or mid-song are supported. • Mid-sequence time signature changes are supported. • Auto Punch feature allows automated punch-in and/or punch-out at preset times within the sequence. • Two foot switch inputs allow functions such as Play/Stop and Punch In/Out to be remotely controlled.
-
Page 20: What's Different From The Mpc60
Chapter 1: Introduction What’s Different From the MPC60? The MPC3000 contains many changes and improvements over the MPC60. The major changes are listed below. Sound Generator Changes • Sampling resolution is increased from 12-bit non-linear to 16-bit linear. • Sampling rate is increased from 40 kHz to 44.1 kHz. •... - Page 21 Chapter 1: Introduction This allows independent send-level mixing to the internal effects generator, or for any one of the individual outputs to be used as a full external echo send mixer. • The Double Play feature has been removed. Instead, up to three sounds can be assigned to play from an incoming MIDI note number or pad.
-
Page 22: If You Already Know The Mpc60
Chapter 1: Introduction • The new Edit Note Number Assignment feature permits reassigning specific drum notes from one note number (instrument) to another. • The Count In feature may now be set to activate only before recording. • The Punch In feature may now be set to punch-in only or punch-out only. - Page 23 dynamic filter and other data. This is explained further in Chapter 6: “Creating and Editing Programs”. MPC60 SET files are replaced by the new Program files. In the MPC60, all sounds and sound assignments are saved in one large SET file. In order to change all pad assignments, it is necessary to load a new SET file.
- Page 24 Chapter 1: Introduction When MPC60 SEQ or ALL files are loaded, a screen is presented explaining that the pad assignments of drum notes will be converted to note number assignments and offering conversion options. For a more detailed explanation of how the MPC3000 uses note numbers, please refer to the beginning of chapters 6 and 11: “Creat- ing and Editing Programs”...
- Page 25 Chapter 1: Introduction New Note Variation system and revised 16 Levels function In the MPC60, the Hi-hat Decay Slider controlled decay time and sound selection for the hi-hat pad only. In the MPC3000, the new Note Variation Slider provides all functions of the hi-hat decay slider, but may be assigned to any pad and may alternately control either tuning, attack or filter frequency.
-
Page 26: Chapter 2: The Basics
Chapter 2: The Basics Chapter 2: The Basics Page 13... -
Page 27: Hooking Up Your System
Chapter 2: The Basics Hooking Up Your System The following diagram shows how to hook up the MPC3000 to a MIDI keyboard and two sound modules. MPC3000 POWER MULTI TIMBRAL MIDI SOUND MODULE MULTI TIMBRAL MIDI SOUND MODULE If you only want to use the MPC3000 as a drum machine for now, don’t connect the MIDI keyboard, the sound modules, or make any MIDI connections. -
Page 28: Getting Around On The Mpc3000
Getting Around on the MPC3000 Before you can use the MPC3000, you must learn how to use the cursor keys, data fields, command keys, the data entry keys and data entry control, the soft keys and the HELP key. While no disk is in the drive, turn the power on. After a few seconds, the LCD screen will display the following text: ============== Play/Record ============= Seq: 1-(unused) -
Page 29: The Numeric Keypad, Data Entry Control, And [+] & [-] Keys
Chapter 2: The Basics sequence. To the right of this field is another field containing the name for the selected sequence. The Play/Record screen is one of many display screens available on the MPC3000. Most of the panel keys present a unique screen, and each screen has its own unique data fields. -
Page 30: The Soft Keys
Chapter 2: The Basics the on-screen number will decrement. Continuously turning the data entry control will repeatedly increment or decrement the on- screen value. It is not necessary to press ENTER after turning the data entry control. There is a special type of data field called a choice field. Fields of this type do not contain numeric data, but rather a specific number of preset text selections, though only one can be active at a time. -
Page 31: The Help Key
Chapter 2: The Basics The HELP key Whenever this key is pressed and held down, the contents of the screen will be temporarily replaced by text explaining the function of the data field where the cursor is currently located. To return to the previous screen, release the HELP key. -
Page 32: Definitions: Sequence, Track, Song, Sound, Pad, Note Number, And Program
Definitions: Sequence, Track, Song, Sound, Pad, Note Number, and Program Here are some definitions of terms used in the MPC3000 that you should know: Sequence A sequence can be thought of as a segment of multitrack tape of variable length. Depending on the sequence contents, it could be a two-bar repeating drum pattern, an eight-bar verse, or an entire 200-bar multitrack composition with time signature and tempo changes. - Page 33 Chapter 2: The Basics Sound Each individual sampled recording in the MPC3000 is called a sound. A sound could be a recording of a single strike of a snare drum or cymbal, a sound effect, or a 30 second stereo recording of backing vocals.
- Page 34 select which drum will play—one key for bass drum, one for snare, one for high tom, etc. This system of using MIDI note numbers to select drums is used in the MPC3000’s sound assignment system. In programs (described below), sounds are assigned directly to one of 64 MIDI note numbers (35-98).
-
Page 35: Loading And Playing Sounds And Programs
Chapter 2: The Basics Loading and Playing Sounds and Programs All sounds and programs are held in RAM memory and are there- fore lost whenever the power is turned off. In order to play any sounds after turning the power on, you must load them in from disk. The procedure for loading files from disk is described in the “Saving To and Loading From Disk”... -
Page 36: Selecting Programs
Each of these 64 bank/pad combinations (A01-D16) is referred to as a pad. The 16 pads are dynamic—the harder you play them, the louder the sound will play. If desired, however, this touch sensitivity can be defeated. Press the FULL LEVEL key (the light goes on), and no matter how hard you play the pads, the sound will play at its maximum dynamic level. -
Page 37: The Note Variation Slider, Assign And After Keys
Chapter 2: The Basics 4. Repeat step 3, except select program 3 and play the sounds. Repeat this procedure to hear the other programs. 5. To return to the Play/Record screen, press MAIN SCREEN. The Note Variation Slider, ASSIGN and AFTER keys The Note Variation slider can be used in real time to change the tuning, attack, decay, or filter frequency for a sound played from a single pad. - Page 38 3. Press MAIN SCREEN to return to the Play/Record screen. 4. Play the selected pad while moving the Note Variation slider. Each time the pad is played, the selected parameter (tuning, attack, decay or filter) will change according to the slider posi- tion.
-
Page 39: The 16 Levels Key
Chapter 2: The Basics The AFTER key Note Variation information may be recorded into sequences. Each drum note in a sequence contains two pieces of data related to Note Variation: Normally, the slider only affects new notes—it has no effect on notes played back from sequences. - Page 40 Note • The field: This field is used to assign the 16 Levels function to one of the 64 possible note numbers (35-98). When 16 Levels mode is on, all 16 pads will play one sound but at 16 evenly spaced levels of either velocity, tuning, decay, attack, or filter frequency.
- Page 41 Chapter 2: The Basics the 16 pads will play the sound at no tuning change. Regardless of this center pad, higher numbered pads play higher chromatic tunings and lower numbered pads play lower chromatic tunings. In order to limit the entire tuning range of the 16 pads to within +/- one octave, only pads 4 through 13 can be selected.
-
Page 42: Chapter 3: Recording Sequences
Chapter 3: Recording Sequences... -
Page 43: How Sequences Are Organized
Chapter 3: Recording Sequences How Sequences are Organized A sequence can be thought of as a segment of multitrack tape of variable length. Depending on the sequence contents, it could be a two-bar repeating drum pattern, an eight-bar verse, or an entire 200-bar multitrack composition with time signature and tempo changes. - Page 44 Chapter 3: Recording Sequences beat number, and tick number. (A beat is the timing value of the lower half of the time signature. For example, in 4/4 time, a beat is one quarter note.) In bar.beat.tick fields, you enter the three parts separated by decimal points (.), followed by ENTER.
-
Page 45: The Main Screen Key & Play/Record Screen
Chapter 3: Recording Sequences The MAIN SCREEN Key & Play/Record Screen When the MPC3000 is first powered on, the LCD screen shows the following contents: ============== Play/Record ============= Seq: 1-(unused) Sig: 4/ 4 ============== Track Data ============== Trk: 1-(unused) Chn:OFF-(off) ===== Now:001.01.00 (00:00:00:00) ====== <Tk on/off>... - Page 46 2. Record ready: ==== Play/Record (Record ready) === In this mode, it is possible to “punch in” to Record or Overdub mode while playing the sequence. To punch in: while playing a sequence, hold both PLAY and either RECORD or OVERDUB simultaneously—the MPC3000 will immediately enter either Record or Overdub mode.
- Page 47 Chapter 3: Recording Sequences • The Active Tempo field ( ample): This is the active playing tempo. If the sequence contains tempo changes, this shows the active tempo at the current sequence position displayed in the • The Tempo Source field ( example): This is a choice field with two options: •...
- Page 48 displayed to the right of the word number of the bar to which the sequence loops back, move the cursor to the field to the right of the word and enter the new number. COMMENT: If the bar to loop to is bar number 1 and the sequence is in Record mode, the MPC3000 will automatically switch from Record to Overdub mode at the moment the sequence loops back—this will prevent...
- Page 49 Chapter 3: Recording Sequences • The Track On/Off field ( This choice field turns the output of the active track on ( ). Pressing SOFT KEY 1 toggles the field’s state between • The MIDI Channel/Port fields ( screen): There are actually two fields here, which together are used to determine which MIDI channel and MIDI output port the active track will output its data to.
- Page 50 fields allow the active track to play simultaneously through an additional channel/port combination. If no additional output chan- nel/port is desired, select • The Velocity% field ( Vel%:100 This is an overall output volume control for active track. However, unlike a normal volume control, this function actually scales the velocities of all notes that play from the track in real time, acting as a real-time dynamics control.
- Page 51 Chapter 3: Recording Sequences The first part is the bar number; the second is the beat number within the bar (the beat is equal to the denominator of the time signature); and the third is the tick number within the beat (there are 96 ticks to a quarter note).
-
Page 52: The Play/Record Keys
The Play/Record Keys These ten keys operate similarly to the transport keys on a tape recorder, with some very useful additions: • The PLAY START key: This key causes the active sequence to begin playing from the start of bar 1. •... - Page 53 Chapter 3: Recording Sequences It is also possible to punch-in to Record mode while playing. To do this: To punch-out of Record mode, simply press the RECORD key once, and the light above the RECORD key will turn off. • The REWIND [<<] and FAST FORWARD [>>] keys: Use these two keys to change the current position within the se- quence to either the previous or next bar boundary.
- Page 54 Edit Options” section in the “Editing Sequences” chapter of this manual. • The LOCATE key: This key is used to instantly move to a specific position within the active sequence. When pressed, the following screen is displayed: ================ Locate ================ Hit softkeys or LOCATE to go to markers: Marker A: 001.01.00 Marker B: 001.01.00...
-
Page 55: Sequence Recording Example 1: A Looped Drum Pattern
Chapter 3: Recording Sequences Sequence Recording Example 1: A Looped Drum Pattern The MPC3000 is both a linear-type sequencer and a pattern-ori- ented sequencer. The following examples use short, looped se- quences and are therefore examples of pattern-oriented recording. To record linearly, simply set the screen) to OFF. - Page 56 Overdub mode to avoid erasing your new notes. The notes you played will be heard at the position they were recorded, except that the Timing Correct function has automatically moved all of your notes to the nearest 1/16-note. (This can be defeated, as explained in “The TIMING CORRECT Key”...
-
Page 57: Sequence Recording Example 2: A Multitrack Sequence
Chapter 3: Recording Sequences Sequence Recording Example 2: A Multitrack Sequence The following is a step-by-step example of recording a multitrack sequence with a format of 4 bars of 4/4 time, containing the follow- ing tracks: Track 1: Drums Track 2: Percussion Track 3: Bass Track 4: Piano First, set up the instruments:... - Page 58 2. Press the ERASE key, then select SOFT KEY 2 <Initialize> ). The following screen will appear: ========== Initialize Sequence ========= Select sequence: 2-(unused) ===== General ===== Bars: Sig: 4/ 4 BPM:120.0 (SEQ) Loop:TO BAR ======================================== <Do it> 4. Enter 4 in the Bars field then press screen will reappear, showing that the sequence has been initial-...
- Page 59 Chapter 3: Recording Sequences the nearest value specified in the Timing Correct screen (in this case, 1/16-note). 5. Without stopping the sequence, record a 1/16-note hi-hat part by simultaneously holding the TIMING CORRECT key and the HIHAT CLOSED pad, varying the pressure on the pad as the sequence plays.
- Page 60 Type MIDI 2. Set the field to , indicating that this track will not play the internal drum sounds. 3. Set the field to 1A, indicating that track 3 will play through MIDI channel 1 and MIDI output port A. The ally two fields—move the cursor to the position indicated by the underline below and select 1: Chn:OFF...
- Page 61 Chapter 3: Recording Sequences 2. Set the play the internal drum sounds. 3. Set the MIDI channel 2 and MIDI output port A. 4. If you play the MIDI keyboard now, the synthesizer that is set to receive on MIDI channel 2 and port A should play a piano sound. If not, check the previous steps and your MIDI hookup.
-
Page 62: The Timing Correct Key: Correcting Timing Errors, Swing Timing
The TIMING CORRECT Key: Correcting Timing Errors, Swing Timing The MPC3000 corrects timing errors made as you are recording by moving notes to the nearest perfect timing location. For example, if the timing correct function is set to 1/16-notes, then all notes are moved to the nearest perfect 1/16-note. - Page 63 Chapter 3: Recording Sequences • The Swing% This field only appears if the Note Value field is set to either 1/16- or 1/8-notes. The swing feature is a variation of timing correction. Whereas normal timing correction moves your notes to perfect 1/16- or 1/8-note intervals, the swing feature moves your notes to swing- timing intervals.
- Page 64 set these two fields to EARLY, 1 tick. This would cause all new notes to be recorded onto 1/16-notes but at 1 tick earlier than normal. COMMENT: It is not possible for this function to shift the timing of notes without also correcting their timing. This also means that the range of shift depends on the current value field’s setting.
-
Page 65: The Note Repeat Feature
Chapter 3: Recording Sequences The Note Repeat Feature Another very useful feature of the TIMING CORRECT key is the ability to automatically repeat either drum or keyboard notes at a preset timing interval. This is useful in creating: • Drum rolls •... -
Page 66: Tempo And The Tempo/Sync Key
Tempo and the TEMPO/SYNC Key Many of the functions in the MPC3000 are associated with control- ling the playing tempo. First, there is the Tempo field in the Play/ Record screen (shown below in bold): ============== Play/Record ============= Seq: 1-(unused) Sig: 4/ 4 ============== Track Data ============== Trk: 1-(unused) - Page 67 Chapter 3: Recording Sequences tempo or the master tempo is currently active. It is a choice field with two options: • Tempo Display Mode field ( This field has the same function as the Tempo Display Mode field in the Play/Record screen: it determines whether the active tempo is displayed as Beats Per Minute or Frames Per Beat.
- Page 68 29.97 DROP (29.97 frames per second, drop frame): This is the standard for NTSC color television in the United States. Using this mode, the tempo range of the MPC3000 is from 59.7 to 6.0 FPB. COMMENT: In the MPC60 version 2 software, this selection was erroneously called 30DROP, although it was actually 29.97 frames per second drop frame time code.
-
Page 69: Mid-Sequence Tempo Changes
Chapter 3: Recording Sequences <SyncScreen> • The This screen is described in the chapter entitled “Syncing to Tape and Other Devices.” • The <TempoChanges> The function of this soft key is described in the following section. Mid-Sequence Tempo Changes This feature allows the tempo to change automatically at preset locations within a sequence. - Page 70 Bar# • The field: This field shows the location within the sequence where the currently displayed tempo change will occur. This is a bar.beat.tick field. • The %Change field: This field shows, as a percentage of the main starting tempo (either MASTER or SEQUENCE), the amount of tempo change that the currently displayed tempo will produce.
-
Page 71: The Tap Tempo Key
Chapter 3: Recording Sequences The TAP TEMPO Key The TAP TEMPO key allows the tempo to be set quickly by tapping two beats (1/4-notes) on the TAP TEMPO key. After two taps, the MPC3000 automatically assumes the two taps to be 1/4-notes and recalculates a new tempo to match those 1/4-notes. -
Page 72: The Wait For And Count In Keys
The WAIT FOR and COUNT IN Keys These two keys make the process of real-time sequence recording easier. The WAIT FOR KEY key This function is useful in the recording of keyboard sequences when your keyboard is not located close to the MPC3000. If Play, Record or Overdub mode is entered while the Wait For Key function is on, the sequence will not begin to play until a key is played on the MIDI keyboard. -
Page 73: The Auto Punch Key
Chapter 3: Recording Sequences The AUTO PUNCH Key The Auto Punch function allows Overdub or Record modes to be entered and exited automatically at preset times while playing. This can be very useful when you want to execute a very tight punch-in and there isn’t enough time to get from the console keys to the MIDI keyboard to play the new notes after the punch-in. - Page 74 Last Punch In= • The These two fields are indicators only—they cannot be manually changed. They are used to indicate the exact locations of the punch-in and punch-out that was last performed manually. • The <Turn on > soft key: Pressing this turns on the Auto Punch function, as indicated by the status light above the key.
-
Page 75: The Simul Sequence Key
Chapter 3: Recording Sequences The SIMUL SEQUENCE Key This function allows the MPC3000 to play two sequences simulta- neously. For example, you could use the active sequence to linearly record all of your keyboard tracks while simultaneously using the Simul Sequence to play a looped drum sequence. The Simul Se- quence can also play simultaneously with the active song, if song mode is active. -
Page 76: The Other Key
The OTHER Key The OTHER key gives you access to a number of additional features, many of which are related to sequence recording: • Metronome controls: Provides adjustments for the recording metronome and Count In function. • Foot Switches: Allows the two foot switch inputs to be assigned. •... - Page 77 Chapter 3: Recording Sequences • The Output This choice field determines which audio output the metronome will play through. The options are out 1) through Count IN • The This is a choice field with two options: Rate • The This choice field controls the note value of the metronome.
- Page 78 TIMING CORECT (Timing correct): Press to duplicate the function of pressing TIMING COR- RECT. This is very useful for hands-free use of the Note Repeat function. ‘ ’: Press to duplicate the function of turning the data entry control one step to the right. ‘...
-
Page 79: Initializing System Parameters
Chapter 3: Recording Sequences <Rec 16 chs> • The Pressing this soft key presents a screen used for setting up multi- channel recording. This is described in the section “The Record 16 Channels Function: Multichannel Recording”, later in this chapter. Initializing System Parameters There are a number of parameters in the MPC3000 that are not saved in SEQ, ALL, SND, PGM, or APS disk files. -
Page 80: The Record 16 Channels Function: Multichannel Recording
The Record 16 Channels Function: Multichannel Recording In its normal operating mode the MPC3000 can only record one track at a time. There is, however, a special mode of recording that allows you to record on all 16 MIDI channels at once. This is very useful when transferring sequences to the MPC300 from other sequencers. - Page 81 Chapter 3: Recording Sequences • The This is actually two fields—the upper and lower half of the time signature to be used for recording. When the selected sequence will be initialized to one bar of the time signature entered in these two fields. Drums on ch •...
- Page 82 • The field (time signature): This field shows the time signature entered in the previous screen. It is for display only and cannot be changed. • The Bars field This shows the total number of bars in the newly initialized se- quence, which is always initialized to 1 bar.
-
Page 83: Recording Midi System-Exclusive Data
Chapter 3: Recording Sequences Recording MIDI System-Exclusive Data The MPC3000 can record patch data or any other MIDI system- exclusive messages from external synthesizers directly into tracks. To do this, simply send the system-exclusive message to the MPC3000 while in Record, Overdub, or Step Edit mode, and it will be recorded into the active track, just the same as any other MIDI data. -
Page 84: Chapter 4: Editing Sequences
Chapter 4: Editing Sequence Chapter 4: Editing Sequences Page 71... -
Page 85: The Erase Key
Chapter 4: Editing Sequence The ERASE Key The ERASE key provides three main functions: • Erasing notes in real time while in Overdub mode • Erasing notes or other events while stopped • Initializing or deleting sequences Erasing Notes in Real Time While in Overdub Mode If the ERASE key is pressed and held while in Overdub mode, the top line of the Play/Record screen changes to the following for as long as ERASE is held:... - Page 86 Seqnc • The (sequence) field: In this field, enter the sequence number from which the data will be erased. The sequence name is shown to the right for convenience. • The Track field: This field specifies the track from which the data will be erased. The active track is automatically inserted here.
- Page 87 Chapter 4: Editing Sequence <Do it> • The Pressing this soft key performs the erasure specified by the data in the screen fields. After the erasure has been performed, the Play/ Record screen is redisplayed. • The <Initialize> This soft key is used to erase and initialize the entire sequence to specific values.
-
Page 88: Initializing A Sequence
========= Delete All Sequences ========= Pressing <Do it> will erase all sequences and set them to unused state as when power is turned on!!!! ======================================== <Do it> To delete all sequences, press Initializing a Sequence To erase a sequence and initialize it to preset values, press the ERASE key, followed by SOFT KEY 2 ( following screen will appear: ========== Initialize Sequence =========... - Page 89 Chapter 4: Editing Sequence Loop • The In this field enter the loop status ( number, if The “Track” section • The Track Any or all of the sequence’s tracks can be initialized. To enter the settings for each track, first select the track number in this field, then enter the initialization data for that track in the fields below.
-
Page 90: The Seq Edit Key
The SEQ EDIT Key The SEQ EDIT key provides access to many features related to sequence editing. Pressing it will display the following menu screen: ============= Edit Sequence ============ 1)View/chng T sig 2)Chng track order 3)Insert blank bars 8)Shift timing 4)Delete bars 5)Copy bars ========================================... -
Page 91: Rearranging The Track Order
Chapter 4: Editing Sequence Changing the time signature of a single bar To change the time signature of a specific bar, press Tsig> ======== Change Time Signature ========= Change the time signature of bar: from (If the new time sig is shorter, the end of the bar is truncated;... -
Page 92: Inserting Blank Bars Into A Sequence
To rearrange tracks, first enter the desired sequence number. Then enter the track number to be moved in the Before track moved track will be inserted before. Press move. Inserting Blank Bars Into a Sequence This feature inserts a specified number of blank bars into the current sequence. -
Page 93: Deleting Bars From A Sequence
Chapter 4: Editing Sequence Deleting Bars From a Sequence This function allows you to delete a specified number of bars from the active sequence. To use this function, select option 4 ( bars ) from the SEQ EDIT key menu. The following screen will be displayed: =========== Delete Bars ============ Sequence:12-Sequence_name___... -
Page 94: Copying Bars (All Tracks)
Copying Bars (All Tracks) This function allows you to copy a specified range of bars (across all tracks) from one sequence and insert the copied data at any point within the same sequence or any other sequence. In this mode of copying, the overall length of the destination sequence will always be increased. -
Page 95: Copying Events
Chapter 4: Editing Sequence Copying Events This function permits the copying of all events within a specified region of a single track to a different point in the same or another track in the same or another sequence. In this function, only the events from the source track are copied—no time signature or tempo data are copied. - Page 96 rightmost field. These are bar.beat.tick fields, enabling you to specify the region in units as small as one tick. Notes • The field: This field determines which notes will be copied. It appears in one of two ways depending on whether the selected track is a Drum track or a MIDI track: 1.
-
Page 97: Copying An Entire Sequence To Another
Chapter 4: Editing Sequence • The Copies This field specifies the number of repetitions of the copied data that will be added to the new sequence. • The Start The copied data can be added into the destination sequence and track starting at any location. -
Page 98: Shifting The Timing Of Many Notes
Over contents of seq • The This specifies the sequence whose contents will be replaced by the contents of the above specified sequence number. The lowest- numbered empty sequence is automatically inserted here when this screen is entered. <Do it> •... -
Page 99: Global Editing Of Note Event Data
Chapter 4: Editing Sequence • The This choice field is used to determine the direction of shift and has two options: EARLIER and LATER. • The Amount This field is used to determine the amount of shift in ticks. • The <Do it>... -
Page 100: Editing Note Velocity Or Duration Data
============ Edit Note Data ============ 1.Edit velocity/duration 2.Edit note number assignment 3.Edit note variation data ======================================== Select option: These options are described in the three sections below. Editing Note Velocity or Duration Data To edit the velocity or duration data of a group of notes in one operation, select 1 from the Edit Note Data menu. - Page 101 Chapter 4: Editing Sequence • The Edit This is a choice field with two options: It is used to select which of these two parameters will be affected. • The This is a choice field with four options: range of 0 to 127; the equivalent note name (C-2 to G8) is shown to the right of each field.
-
Page 102: Editing Note Number Assignment Of Drum Note Events
Value • The field: This field works in conjunction with the number that will be used to change the velocities or durations. • The <Do it> soft key: Pressing this soft key performs the edit specified in the above fields. Editing Note Number Assignment of Drum Note Events This feature affects Drum tracks only. -
Page 103: Editing Note Variation Data Of Drum Note Events
Chapter 4: Editing Sequence To notes • The This field determines the note number to which the selected drum notes will be reassigned. While the cursor is in this field, press the pad of the drum note to be changed to—its currently assigned note number and sound will appear in the field. - Page 104 Notes • The field: This field determines which notes will be affected. It cannot be accessed by the cursor. It can only be changed by pressing pads or receiving external MIDI notes. When the screen is first displayed, it appears as shown above with the word text (Hit pads) to the right.
-
Page 105: The Step Edit Key
Chapter 4: Editing Sequence The STEP EDIT Key The Step Edit function allows the contents of the active track to be edited in precise detail. When the Step Edit key is pressed, any notes or events that exist in the active track at the current sequence position are displayed on the screen as a series of data fields, which can then be edited. -
Page 106: Using Step Edit
• SOFT KEY 1 ( This soft key has one of two functions, depending on the current setting of the Edit Options screen (described below): • SOFT KEY 2 ( This soft key has one of two functions, depending on the current setting of the Edit Options screen: •... - Page 107 Chapter 4: Editing Sequence Of the five on-screen events, only the uppermost line can be edited. It is edited by moving the cursor to the desired field within the line and editing the field contents. This uppermost line is called the active event, and is preceded by a moved up to the active event line using the CURSOR UP and CURSOR DOWN keys.
-
Page 108: Step Edit Event Types
Step Edit Event Types The Step Edit screen can display up to five events, one on each line, that exist in the active track at the current format of the event line is different for each type of event. The following is a description of each event type: •... - Page 109 Chapter 4: Editing Sequence • The MIDI Note event >Note: 60(C.3 ) The fields are: • The Program Change event >Program_change The single field, MIDI program number. • The Pitch Bend event >Pitch_bend The single field, bend event. It is a signed field, with a range from -8192 to 8191. •...
- Page 110 • The Poly Pressure event >Poly_pressure There are three fields: 1. The Note Number field ( This is the note to which the pressure message applies. 2. The Note Name field ( This is the note name for the note number selected at the left.
- Page 111 Chapter 4: Editing Sequence • The Stereo Pan event >Stereo_pan This message is exclusive to the MPC3000 and is used to change the stereo mixer pan setting of a particular sound in mid-sequence. When the Record Live Changes feature is used (accessed by pressing MIXER/EFFECTS, then 4), many of these events are recorded into the active track to simulate a smooth and continuous mixer pan change.
-
Page 112: Step Edit Options
• The Tune Request event >Tune request This event type has no data fields. Step Edit Options Pressing the the following screen: =========== Step Edit Options ========== Event to insert:NOTES Auto step increment on key release:NO Duration of recorded notes:AS PLAYED Function of soft key 1&2:PASTE/CUT Function of '<' and '>' keys:NEXT EVENT ======= Step Edit Display Filter =======... - Page 113 Chapter 4: Editing Sequence Duration of recorded notes • The This field is used while in Step Edit mode to determine the method by which durations are assigned to notes recorded from a MIDI keyboard or the MPC3000 pads. This is a choice field and has two options: •...
- Page 114 1/16-notes will NOT be heard as you step through the sequence, because only notes existing in swung 1/16-note locations will be viewed. This same rule applies to the Shift Timing function: if the Amount field is set to 0 and you are editing a sequence that was recorded while it was set to any amount other than 0, none of the notes will be seen as you step through the sequence, because these...
-
Page 115: Step Recording
Chapter 4: Editing Sequence Step Recording Step Edit also makes it possible to record new notes from a MIDI keyboard while the sequence is not playing. To record a note while in Step Edit mode, move to the desired position within the sequence, then play and release the desired note on the MIDI keyboard. -
Page 116: The Edit Loop Key
The EDIT LOOP Key This function allows a specified number of bars within a sequence to repeat in a loop while playing or overdubbing. This allows for quick recording or editing of the looped section. Press EDIT LOOP and the following screen will be displayed: ============== Edit Loop =============== Number of Bars:2... -
Page 117: Using Edit Loop As An Undo Function
Chapter 4: Editing Sequence Using Edit Loop as an Undo Function Because the Edit Loop function allows you the option of ignoring all recording and editing that was done while Edit Loop was on, it serves very well as an undo function. For example, if you want to record a drum fill on bar 4 of a 4-bar sequence, but you aren’t sure if you want to keep it, following these steps will allow you to try the fill, then restore the sequence to its... -
Page 118: The Transpose Key
The first field (before the dash) sets the start of the region Chapter 4: Editing Sequence , is pressed. Also, the MPC3000 does (Play synth key to set amount) field: field: field is set to any value other than 0, the transpose is selected. -
Page 119: Transposing In Real Time While Playing
Chapter 4: Editing Sequence and the second field sets a location one tick after the last tick of the region to be transposed. <Transpose Permanent> • The Pressing this soft key causes the above-specified transposition to be made permanent by actually changing each of the note events within the specified region of the sequence. -
Page 120: Chapter 5: Song Mode
Chapter 5: Song Mode Chapter 5: Song Mode Page 107... -
Page 121: Overview
Chapter 5: Song Mode Overview One way to create a song in the MPC3000 is to record all of the parts in one long sequence, either playing the entire song manually or using the copy functions to duplicate repeating sections. Another way is use Song mode. -
Page 122: The Song Key And Song Mode Screen
The SONG Key and Song Mode Screen To enter Song mode, press the SONG key. The Song Mode screen will appear: =============== Song mode ============== Song: 1-(unused) Song starts at SMPTE#:00:00:00:00.00 ========= Contents of step: Sqnc: 1-(unused) Bars: 0 ===== Now:001.01.00 (00:00:00:00) ====== <Ins/Del>... - Page 123 Chapter 5: Song Mode SMPTE start • The This five-part field sets the SMPTE number associated with the exact beginning of the song. Also called SMPTE offset, this is the SMPTE number which, when the MPC3000 is syncing to SMPTE, denotes the beginning of the song.
- Page 124 === Insert Step === Ins before step: (This and all higher (This step will be steps will be moved up and a new step will be inserted.) =================== <Insert> To insert a new step into the song, enter the step number before which the new step will be inserted in the field, then press <Insert>...
-
Page 125: An Example Of Creating And Playing A Song
Chapter 5: Song Mode An Example of Creating and Playing a Song The following demonstrates how to use Song mode to create a song on the MPC3000: 1. Record some drum or MIDI data into sequences 1, 2, and 3. 2. - Page 126 COMMENT: Occasionally you may see the message lyzing sequence. Please wait... line of the screen, asking that you wait briefly while the MPC3000 does some thinking. This occurs after you make changes in the song, but only if the song contains a large number of different sequences.
-
Page 127: Converting A Song Into A Long Sequence
Chapter 5: Song Mode Converting a Song Into a Long Sequence Song mode is useful for quickly creating the format of a song. However, it is cumbersome compared to Sequence mode when fine- tuning the details of a complex song. It is therefore useful to create a song initially using Song mode, then convert that song into a long sequence. -
Page 128: Chapter 6: Creating And Editing Programs
Chapter 6: Creating and Editing Programs Chapter 6: Creating and Editing Programs Page 115... -
Page 129: What Are Programs
Chapter 6: Creating and Editing Programs What Are Programs? A program can be thought of as a drum set. It is a collection of up to 64 sound assignments with accompanying sound modifying parameters. When a sound is loaded into the MPC3000’s sound memory, it cannot be played by pads or from MIDI until it is as- signed within a program. - Page 130 The following is a graphical representation of how data is organized within programs: Program 24: Acoustic drum set Data for each note number: Program 3: Jazz drum set Program 2: Brushes drum set Program 1: Rock drum set Data for each note number: Pad: Note#: Attack: .
- Page 131 Chapter 6: Creating and Editing Programs Accessed by pressing the Note Variation ASSIGN key. This is described in the “Basics” chapter of the manual. How to create a program To create a program, either copy an existing program and modify it, or start a new one: 1.
-
Page 132: Selecting The Active Program, Assigning Sounds
Selecting the Active Program, Assigning Sounds A single screen allows the selection of the current program, as well as the creation of a program’s sound assignments. To access this screen, press the PROGRAM/SOUNDS key. The following menu screen will appear: ===== Programs ===== 1.Sel pgm, asn snds 2.Envel,veloc,tune.. - Page 133 Chapter 6: Creating and Editing Programs The Edit Sound Assignments section of the screen: • The Assign note Assign note sounds to MIDI note numbers. To assign a sound, first select the note number to be assigned (35-98) in the Then select the desired sound for that note number in the field.
- Page 134 Chapter 6: Creating and Editing Programs sounds. If this option is selected, the fifth and sixth lines appear as follows: ============ Select Program ============ Active program:24-PROGRAM NAME ========== Assign Note:37/A01 ========== Sound:Tiny tom Also play note:38/A06-Big snare drum Also play note:39/B16-Doomsday tom ======================================== <Play>...
- Page 135 Chapter 6: Creating and Editing Programs assignments. These fields are used to play one of three sounds depending on the velocity of the note received: 1. If the received note’s velocity is less than or equal to the value in the first the sound selected in the 2.
- Page 136 Chapter 6: Creating and Editing Programs ============ Select Program ============ Active program:24-PROGRAM NAME ========== Assign Note:37/A01 ========== Sound:Sound_name If over:1013,use:38/A06-Good snare drum If over:5000,use:39/B16-Some other drum ======================================== <Play> The fifth and sixth lines now contain four additional fields—two decay thresholds and two new note number assignments.
- Page 137 Chapter 6: Creating and Editing Programs Soft keys: • The <Play> Pressing this key has the same effect as playing the selected note number at full velocity. used. The advantage of this is that it is only necessary to adjust the volume and pan, for example, of the main sound in the mix instead of all three sounds.
-
Page 138: Envelope, Velocity Modulation, Tuning, Poly Mode
Envelope, Velocity Modulation, Tuning, Poly Mode To edit these program parameters, press the PROGRAM/SOUNDS key, then select option 2 and the following screen will appear: === Env,Veloc.. (Pgm:24 Note:37/A01) === ---Envel--- Attack: Decay : Dcy md:END ======================================== <Play> Each of the screen’s data fields and the soft key are explained below: The Title line: •... - Page 139 Chapter 6: Creating and Editing Programs Vel Mod • The Attack This field sets the amount of effect that note velocity has on attack time (0-100%). If set to 0, note velocity has no effect on attack; if set to higher values, attack time will increase as you play lower veloci- ties.
- Page 140 Chapter 6: Creating and Editing Programs MONO : Multiple plays of the sound use the same voice, terminating and restarting playback of the sound (no polyphonic overlap). This is useful for producing stutter- ing effects. NOTE OFF : When the pad is released (or a MIDI Note Off message is received), the sound is terminated.
-
Page 141: The Dynamic Filter
Chapter 6: Creating and Editing Programs The Dynamic Filter Each of the 32 voices in the MPC3000 has a 12 dB per octave dynamic resonant lowpass filter and a second envelope generator dedicated to modulating the filter frequency. All controls related to this filter and envelope generator are accessed by selecting option 3 from the initial PROGRAM/SOUNDS key menu, which presents the following screen:... - Page 142 Chapter 6: Creating and Editing Programs Reson • The (resonance) field: This is the resonance of the filter at the cutoff frequency. The range is from 0 (no resonance) to 15 (highest resonance). Raising this value accentuates changes in the filter frequency. The Filter Envelope section: •...
-
Page 143: Copying And Initializing Programs
Chapter 6: Creating and Editing Programs Copying and Initializing Programs Selecting option 4 from the initial PROGRAM/SOUNDS key menu presents the following menu screen, allowing programs to be copied or initialized: ======= Copy, Initialize Program ======= 1.Copy program Data of 1 Note 2.Copy 1 program over another 3.Initialize 1 program 4.Initialize all programs... - Page 144 Chapter 6: Creating and Editing Programs <Do it> 5. Press the soft key to perform the copy. If 2 is selected from the Copy, Initialize Program menu: ===== Copy 1 Program over Another ====== Copy from program:24-Program_name____ Copy program:24-Program_name____ ======================================== <Do it>...
- Page 145 Chapter 6: Creating and Editing Programs If 4 is selected from the Copy, Initialize Program menu: ======= Initialize All Programs ======== Press <Do it> to initialize all programs!! ======================================== <Do it> This feature initializes all programs to default values with no sounds assigned.
-
Page 146: Chapter 7: The Mixer/Effects Key
Chapter 7: The MIXER/EFFECTS Key Chapter 7: MIXER/EFFECTS Page 133... -
Page 147: The Stereo Output Mixer
Chapter 7: The MIXER/EFFECTS Key The Stereo Output Mixer The MPC3000 has a 64 channel stereo mixer, providing a unique volume and pan value for each of the 64 note number assignments (35-98) in the active program. To adjust the stereo mixer, press the MIXER/EFFECTS key, then select option 1. - Page 148 Chapter 7: The MIXER/EFFECTS Key its pad assignment, use the All Mix Data (Text) function, accessed by selecting option 3 from the initial MIXER/EFFECTS key menu. COMMENT: The data values used for the volume and pan displays are normally taken from the active program. Be- cause of this, whenever the active program is changed, the newly selected program’s stereo mix settings will immediately become active.
-
Page 149: The Individual Outputs/Effects Mixer
Chapter 7: The MIXER/EFFECTS Key The Individual Outputs/Effects Mixer In addition to the stereo outputs, the MPC3000 provides eight individual mix outputs and an internal effects generator. The mixer described in this chapter allows each of the sounds to be assigned to one of the eight assignable mix outputs or to the internal effects generator. - Page 150 Chapter 7: The MIXER/EFFECTS Key 3. Rotate the data entry control. Turning it will rotate through ten selections: The pad’s sound has no output assignment The pad’s sound is sent to individual output 1 The pad’s sound is sent to individual output 2 The pad’s sound is sent to individual output 3 The pad’s sound is sent to individual output 4 The pad’s sound is sent to individual output 5...
- Page 151 Chapter 7: The MIXER/EFFECTS Key • SOFT KEY 1: Even though no soft key functions are displayed on the screen, there is one active soft key: If SOFT KEY 1 is pressed while the triangular cursor is pointing downward???, the mixer changes to a mode in which all sliders or output assignments are moved simultaneously, indicated by 16 cursor triangles across the screen.
-
Page 152: Viewing The Mix Data In Text Form
Viewing the Mix Data in Text Form The graphic screens for the stereo mixer and individual outputs/ effects mixer (menu options 1 and 2) are normally used for the adjusting the stereo mix and individual outputs/effects mix. How- ever, an additional screen containing the same data in text form is also provided. - Page 153 Chapter 7: The MIXER/EFFECTS Key • The This is the current pan position for the selected sound within the stereo mix. The range is 50L to C to 50R. This is the same param- eter set by the graphic pan control in the Stereo Mix screen. The Indiv Out section: •...
- Page 154 Chapter 7: The MIXER/EFFECTS Key hardware mixing consoles. It provides the advantage of automatically changing the level to the individual out- puts or effects whenever the stereo volume is changed. The level of the Individual Outputs/Effects send is made completely independent of the stereo volume. Changing the stereo volume will have no effect on the Individual Outputs/Effects volume for the same sound.
-
Page 155: Mixer Source Select, Automated Mix
Chapter 7: The MIXER/EFFECTS Key Mixer Source Select, Automated Mix Selecting option 4 from the MIXER/EFFECTS menu presents a screen containing four fields that alter the performance of the mixer: ========= Mixer Source Select ========== Stereo mix:PROGRAM Indiv out / effect mix:PROGRAM Effects:PROGRAM =========== Automated Mixer ============ Record live mix changes:YES... - Page 156 Chapter 7: The MIXER/EFFECTS Key MASTER There is a set of stereo mix settings (volume and pan) that is stored within each APG (all programs) file and that applies globally to all sequences and programs. If MASTER is selected in this field, this set of global data is used in the mixer screen.
- Page 157 Chapter 7: The MIXER/EFFECTS Key MIDI continuous controllers, as a series of many discrete events (in this case, STEREO VOLUME, STEREO PAN, or OUTPUT/EFFECT VOLUME system exclusive events). These discrete events can be edited in detail in Step Edit mode. Real time mixer changes are not recorded.
-
Page 158: Effects Generator
Effects Generator The MPC3000 contains an internal effects generator capable of a number of delay effects. To access the settings of the effects genera- tor, select option 5 from the MIXER/EFFECTS menu screen. The following screen will appear: ============ Effects (Delay) =========== Delay 1= Delay 2= Delay 3=... - Page 159 Chapter 7: The MIXER/EFFECTS Key effects data, or to use a single master set of effects data so that the selected effect never changes. This choice may be made in the Mixer Source Select fields, accessed by pressing option 4 from the MIXER/EFFECTS menu. Page 146...
-
Page 160: Chapter 8: Creating And Editing Sounds
Chapter 8: Creating and Editing Sounds Chapter 8: Creating and Editing Sounds Page 147... -
Page 161: Sampling A New Sound
Chapter 8: Creating and Editing Sounds Sampling a New Sound This function is used to record new sounds into your MPC3000. All sampling is done in 16-bit linear format at the full 44.1kHz sam- pling rate, as with compact discs. To sample new sounds, press the PROGRAM/SOUNDS key to view the menu screen, then press 5 to select the Sample New Sound option. - Page 162 Chapter 8: Creating and Editing Sounds STEREO : Sampling is done in stereo, using both the left and right sampling inputs (or both parts of the signal arriving at the digital input). • The Monitor field: This choice field has two options: the sampling input is heard in the stereo mix outputs.
- Page 163 Chapter 8: Creating and Editing Sounds • The Meter This is a simulation of an analog record level meter. While this screen is present, the meter will constantly display the level of the signal at the input. If stereo sampling is active, then the screen changes to display two meters—one each for the left and right inputs.
- Page 164 Chapter 8: Creating and Editing Sounds As the screen explains, sampling is finished. The the screen shows the highest peak levels received during recording. You can now hear the new sound by pressing you don’t like it and want to sample again, press you want to keep it and give it a name, press the following screen will appear: ============ Name New Sound ============...
- Page 165 Chapter 8: Creating and Editing Sounds An example of sampling a new sound: The following is a step-by-step example of how to record a mono sound from the analog input: 1. Connect a mono audio signal source to the LEFT RECORD IN jack.
- Page 166 Chapter 8: Creating and Editing Sounds <Keep&name> If you liked it, press to keep it and go on to a screen that allows you to name the new sound. 8. The sound must be assigned to a note number within a program before it can be played by pads, sequences or the MIDI input.
-
Page 167: Editing A Sound
Chapter 8: Creating and Editing Sounds Editing a sound This function is used to edit a sound in your MPC3000. The avail- able editing features are: • Edit the sound’s parameter data, including: • Edit the sound’s sample data, including: To edit a sound, press the PROGRAM/SOUNDS key, then type 6. - Page 168 Chapter 8: Creating and Editing Sounds (ST) If the sound is stereo, will appear to the right of the sound name. Also, once a sound is selected, the Vol% , and Tune fields will immediately be updated to show the newly selected sound’s settings.
- Page 169 Chapter 8: Creating and Editing Sounds <Play> • The Pressing this soft key plays the selected sound, from soft start address to soft end address, at full velocity level through the stereo mix outputs, panned center. • The <Best st> This function automatically finds the point within a sound at which the drum strike begins, bypassing any dead space at the beginning of the sound which could cause play delays.
- Page 170 Chapter 8: Creating and Editing Sounds (the entire sound) ZONE (from the start to the end of the zone) TEMP (the current contents of the temporary storage area) BEFORE ZONE (the portion of the sound before the zone start) AFTER ZONE (the portion of the sound after the zone end) BEFR SOFT ST (the portion of the sound before the soft...
-
Page 171: Renaming, Copying, And Deleting A Sound
Chapter 8: Creating and Editing Sounds Renaming, Copying, and Deleting a Sound To rename, copy, or delete a sound, convert a stereo sound to mono, or delete all sounds, select option 7 from the PROGRAM/SOUNDS menu. The following screen will appear: ====== Rename, Copy, Delete Sound ====== Select sound:Sound_name ========================================... - Page 172 Chapter 8: Creating and Editing Sounds <Copy> • The soft key: Pressing this soft key causes a new field, appear below the Select sound ============== Copy Sound ============== Select sound:Sound_name Name for copy:Sound_name ======================================== <Do it> Enter the name for the copy in the the same method as editing the Sequence Name field in the Play/ Record screen.
- Page 173 Chapter 8: Creating and Editing Sounds Pressing Pressing screen, causes the screen to change to the following: ==== DELETE ALL SOUNDS FROM MEMORY ===== ARE YOU SURE YOU WANT TO DELETE ALL SOUNDS FROM MEMORY? ======================================== <DELETE ALL!> Pressing DELETE SOUND The entire stereo sound will be deleted.
-
Page 174: Triggering A Sound From An External Signal-The Audio Trigger
Triggering a Sound from an External Signal— the Audio Trigger This feature of the MPC3000 allows one of its internal sounds to be triggered by an external transient audio signal. The triggering is non-dynamic. If dynamic triggering or triggering of more than one sound is needed you must use an analog trigger-to-MIDI converter, available from various manufacturers. -
Page 175: Chapter 9: Saving To And Loading From Disk
Chapter 9: Saving to and Loading from Disk Chapter 9: Saving to and Loading from Disk Page 163... -
Page 176: Overview
Chapter 9: Saving to and Loading from Disk Overview The MPC3000 has a built-in 3-1/2" disk drive for storing data. This chapter describes the procedures for saving and loading the various types of files. Since the MPC3000 loses all sequence and sound data when the power is removed, it is important always to save any changes to disk before turning the power off. - Page 177 Chapter 9: Saving to and Loading from Disk To access the disk functions, press the DISK key. The following screen will appear: == Save to Disk == 1)A sequence 2)All seqs & songs 3)A sound 4)A program 5)All programs 6)System parameters Select option: This screen displays a list of disk options.
-
Page 178: Saving Files
Chapter 9: Saving to and Loading from Disk Saving Files There are six options in the DISK key menu for saving files: 1. Save a sequence 2. Save all sequences and songs 3. Save a sound 4. Save a program 5. -
Page 179: Saving An All File (All Sequences And Songs)
Free • The This shows the amount of free space on disk. <Do it> • The Pressing this soft key saves the selected sequence to disk. <Select disk> • The This soft key only appears if a hard disk is connected to the SCSI port. -
Page 180: Saving A Snd File (Single Sound)
Chapter 9: Saving to and Loading from Disk The fields and soft keys are: • The File name Enter the file name in this field. The name can be changed in the same manner as the Sequence Name field in the Play/Record screen. The file’s extension will be ALL. -
Page 181: Saving A Pgm File (Single Program & Sounds)
<Select disk> • The This soft key has the same function as in the Save Sequence screen described above. Saving a PGM File (Single Program & Sounds) To save a single program and all sounds used by that program, select 4 ( screen will appear: ========= Save a Program (PGM) ========= Program:19-Program name... -
Page 182: Saving An Aps File (All Programs And Sounds)
Chapter 9: Saving to and Loading from Disk Free • The This shows the amount of free space on the selected disk. • The <Do it> Press this key to save to disk the program file and each individual sound file used in the program. •... - Page 183 Chapter 9: Saving to and Loading from Disk 1. The All Programs and Sounds file (APS), which contains the data for all 24 programs and the names of all sounds in memory (but not the sound data itself), is saved. 2.
-
Page 184: Saving A Par File (System Parameters)
Chapter 9: Saving to and Loading from Disk <Select disk> • The This soft key has the same function as in the Save Sequence screen described above. Saving a PAR File (System Parameters) A number of parameters in the MPC3000 are not saved in SEQ, ALL, SND, PGM, or APS files. -
Page 185: Loading, Erasing, Or Renaming Files
Loading, Erasing, or Renaming Files This function is used to either load, erase, or rename files on the current disk. In the case of a load, the screens will guide you to load the file into the proper place, according to the file extension (the three letters after the period in a file name, e.g., To load, erase, or rename a file on disk, select 7 ( rename... - Page 186 Chapter 9: Saving to and Loading from Disk Disk • The This field only appears if a hard disk is connected to the SCSI port. It shows the active disk device, either the floppy drive or one of the hard disk partitions. It is for display only and cannot be edited. To change from floppy disk to hard disk or vice versa, you must press <Select disk>...
-
Page 187: Loading A Seq File (Single Sequence)
To select a different disk device, choose it in the press the When <Select it> redisplayed and the selected disk device will be active. Loading a SEQ File (Single Sequence) If a SEQ file is selected and following screen, in which you are asked which sequence number to load the sequence into: ===== Load a Sequence file (.SEQ) ====== Load into sequence:02-Sequence_name___... - Page 188 Chapter 9: Saving to and Loading from Disk =========== Load V2 SEQ File =========== Use the same assigments for loading SET or ST1 files. If confused, just load it. -------- Conversion Table ---------- MPC60 pad:HIHT (A01) Becomes note:56 (Gen MIDI:COWBELL ======================================== <Load it>...
-
Page 189: Loading An All File (All Sequences And Songs)
sure that the same settings are used when loading any MPC60 SET or ST1 files that you plan to use with the converted SEQ files. If you modify the conversion table from the factory-preset defaults, your changes will be retained in memory even after power is turned off, so that the next time you load an MPC60 sequence, it will be converted using your edited conversion assignments. -
Page 190: Loading A Pgm File (Single Program And Sounds)
Chapter 9: Saving to and Loading from Disk Loading a PGM File (Single Program and Sounds) If a PGM file is selected for load, an additional screen is presented, in which you are asked which program number (1-24) to load the program into: ============= Load Program ============= Program to load into: 1-PROGRAM_01... -
Page 191: Loading An Mpc60 Version 1 Or 2 Set Or St1 File
<Load it> Press followed by each sound file used in the APS file. (APS files contain a list of sound names but not sound data itself.) If one of the sound files to be loaded already exists in memory, that file won’t be loaded from disk. - Page 192 Chapter 9: Saving to and Loading from Disk ====== Load MPC60 SET or ST1 file ====== Load the file's assignments into Program:24-Program_name (Sounds will be added to memory.) ======================================== <Proceed> As the screen shows, all sounds contained in the SET file will be separated into individual sounds and added to the sound memory.
- Page 193 Chapter 9: Saving to and Loading from Disk Becomes note • The This field shows the note number to which the displayed pad name assignment will be converted. There is a unique note number assignment for each of the 32 MPC60 pad names. To change the note number assignment, edit the contents of this field.
-
Page 194: Loading A Par File (System Parameters)
Chapter 9: Saving to and Loading from Disk === Load One Sound From SET/ST1 File === Sound:BIG_SOUND ======================================== <Load it> The fields and soft keys are: • The Sound This field contains an alphabetical list of the sounds in the file. Use the data entry control to select one of the sounds. - Page 195 Chapter 9: Saving to and Loading from Disk sound files used by the PGM files). Next, the first ALL file (all sequences and songs) that is found will be loaded. To cause specific programs, sounds, sequences, and songs to load automatically when power is turned on, save a single APS file to a disk that contains the desired programs and sounds, then save an ALL file that contains the appropriate sequences and songs to the...
-
Page 196: Loading Sample Files From Akai S1000/S3000 Disks
Chapter 9: Saving to and Loading from Disk Loading Sample Files From Akai S1000/S3000 Disks This function allows the loading of sample files from disks formatted and saved on Akai S1000- or S3000-series samplers. Only sample files may be loaded—no program files or other file types may be loaded. - Page 197 Chapter 9: Saving to and Loading from Disk Loading stereo S1000/S3000 samples In the S1000 and S3000, stereo samples are stored on disk as two different mono sample files having the same name followed by (left side) or (right side). If a pair of these mono samples com- prising a stereo sample exists on the disk and one of them is se- lected, the screen appearance changes: ===== Load S1000/3000 Sample Files =====...
-
Page 198: Formatting A Floppy Disk
Chapter 9: Saving to and Loading from Disk Formatting a Floppy Disk This function is used to format a new disk or to completely erase an already-formatted disk. ALL DISKS MUST BE FORMATTED BEFORE THEY CAN BE USED IN THE MPC3000! Disks that are pre-formatted for MS-DOS computers will work, but they will save and load faster if you reformat them on the MPC3000. -
Page 199: Using A Scsi Hard Disk
Chapter 9: Saving to and Loading from Disk Using a SCSI Hard Disk The MPC3000’s SCSI port permits an external SCSI hard drive to be used for all disk save and load operations. A 25-pin D-type SCSI connector is used, which is compatible with hard drives used with the Apple Macintosh. - Page 200 Chapter 9: Saving to and Loading from Disk == Change Power-On SCSI Search Delay === Power-on SCSI search delay (secs):30 (If no hard disk attached, enter 0 to bypass delay at power-on.) ======================================== The single data field sets the amount of time that the SCSI port is scanned when the power is turned on.
- Page 201 Chapter 9: Saving to and Loading from Disk <Next screen> Now press . The display will change to the following: =========== Format Hard Disk =========== Enter number of partitions: 4 (A-D) Each partition will be 27 mbytes, for a total of 110 mbytes. ======================================== <Next screen>...
- Page 202 Chapter 9: Saving to and Loading from Disk To do this, select option 0 ( key menu. The following screen will appear: ============== Select Disk ============= Select disk, then press <Select it> to return to previous screen. Disk:HARD DISK PART A ======================================== <Select it>...
-
Page 203: Copying An Entire Floppy Disk
Copying an Entire Floppy Disk This feature permits an entire 1.4MB MPC3000 disk to be copied to another 1.4MB MPC3000 disk. This provides an easy way to back up your data disks. 793K disks, however, cannot be copied. To copy a disk, have both your original disk and a blank formatted disk available. - Page 204 Chapter 9: Saving to and Loading from Disk ============== Copy a disk ============= Insert disk to be copied TO, then press <Proceed>. ======================================== <Proceed> Remove the original disk and insert the blank formatted disk, then <Proceed> press destination disk. Please wait not been copied, the cycle of inserting the source disk, followed by the destination disk, will be repeated until all data have been copied.
-
Page 205: Chapter 10: Syncing To Tape And Other Devices
Chapter 10: Syncing to Tape and Other Devices Chapter 10: Syncing to Tape and Other Devices Page 193... -
Page 206: The Sync Screen
Chapter 10: Syncing to Tape and Other Devices The SYNC Screen To access the sync input and output settings, press the TEMPO/ SYNC key, followed by the screen will be displayed: ===== Sync In ====== Mode:MIDI CLOCK Shift early (ms):20 MIDI Input:2 Song pointer:ON ====================... - Page 207 Chapter 10: Syncing to Tape and Other Devices MIDI TIME CODE MIDI Time Code is similar to SMPTE timecode except that the timing information is converted into a signal that is sent over MIDI. As such, it cannot be recorded on tape. FSK24 This is the general-purpose tape sync code commonly used by inexpensive drum machines and sequencers.
- Page 208 Chapter 10: Syncing to Tape and Other Devices If the SMPTE option is installed and Mode field, the following screen is displayed: ===== Sync In ====== Mode:SMPTE Start:00:00:00:00.00 Frames:30 ==================== <SyncIn=ON > In this case, the fields are: sync and the other to other real-time MIDI messages, thus reducing the amount of data that has to flow on one MIDI cable.
- Page 209 Chapter 10: Syncing to Tape and Other Devices (30 frames per second, non-drop): This is the old NTSC standard for black and white television, and is the most popular stan- dard for SMPTE-based music production in the U.S. and Japan. To assure widest compatibility for your recordings, use this standard if you are working in this field.
- Page 210 Chapter 10: Syncing to Tape and Other Devices FSK24 displayed: ===== Sync In ====== Mode:FSK24 Shift early (ms):20 ==================== <SyncIn=ON > In this case, the field is: 1/4 NOTE CLICKS screen will be displayed: ===== Sync In ====== Mode:1/4 NOTE CLICKS Shift early (ms):20 Starts at:THIS BAR ====================...
- Page 211 Chapter 10: Syncing to Tape and Other Devices Regardless of which sync mode is selected, there is one soft key in the Sync In section: <SyncIn=ON > • The soft key: Pressing this soft key turns the sync input on or off. The soft key text shows the current state.
- Page 212 Chapter 10: Syncing to Tape and Other Devices Start= • The field: This is the SMPTE timecode number at which the generated time code will start. The four parts of the field are hours, minutes, seconds and frames. Normally, this should be set to 00:00:00:00.
-
Page 213: Syncing To Tape And Other Devices: Examples
Syncing to Tape and Other Devices: Examples This section provides step-by-step examples of how to sync to each of the five sync signals. Syncing to MIDI Clock To generate MIDI clock with Song Position Pointer: 1. In the Sync screen, set the section) to the MIDI port that you want the sync signal to be sent from ( 2. - Page 214 Chapter 10: Syncing to Tape and Other Devices 1. Connect the SYNC OUT jack of the MPC3000 to the input of one track of your multitrack tape recorder. 2. Access the Generate SMPTE screen by pressing TEMPO/SYNC, then the <GenSMPTE> 3.
- Page 215 Chapter 10: Syncing to Tape and Other Devices sequence you intend to use is selected before setting this param- eter. 7. Press the MAIN SCREEN key to return to the Play/Record screen. 8. Play the tape from a point just before the beginning of the SMPTE timecode.
-
Page 216: Syncing To Midi Time Code
Chapter 10: Syncing to Tape and Other Devices SMPTE location where you want your song to start. If you don’t know, use 00:00:10:00.00. This will cause your song to start at a location 10 seconds after the start of the SMPTE code you re- corded in the example above. - Page 217 Chapter 10: Syncing to Tape and Other Devices acceptance of SMPTE, and is still used by many drum machines and sequencers. If you don’t have the SMPTE option, FSK24 provides a very good alternative. FSK24 sync code is generated in real time as the MPC3000 plays. Remember that FSK24 sync code contains tempo information, so it is important that the tempo is properly set before the FSK sync tone is recorded to tape.
-
Page 218: Syncing To 1/4-Note Clicks
Chapter 10: Syncing to Tape and Other Devices Syncing to 1/4-note Clicks This method of syncing uses any cleanly recorded, percussive sound playing on 1/4-notes as a sync source. This allows you to add sequenced parts to a recording that contains no sync track. For example, the sync track could consist of a drummer recording a track of 1/4-note drumstick clicks throughout the song. -
Page 219: Chapter 11: Midi Functions
Chapter 11: MIDI Function Chapter 11: MIDI Functions Page 207... -
Page 220: Assigning Pads To Note Numbers
Chapter 11: MIDI Function Assigning Pads to Note Numbers In the MPC3000, sounds in programs and drum notes in sequences are assigned not to pad numbers but to MIDI note numbers in the range 35-98. Each of the 64 pad/bank combinations (A01-D16) is assigned to a unique MIDI note number (35-98) and it is the pad’s assigned note number that is sent to the sound generator, se- quencer, and/or MIDI output when the pad is played. - Page 221 Assigning pads to note numbers is done in the following screen, accessed by pressing the MIDI key then selecting option 1 from the menu: ====== Assign Pads to Note Numbers ===== Mode:PROGRAM Pad:A01 = Note:37 (Gen MIDI:SIDE STICK ) ======================================== The fields are: •...
-
Page 222: Midi Receive Channel, Local Mode, Soft Thru, Note Variation Controller Assign And Sustain Pedal Processing
Chapter 11: MIDI Function MIDI Receive Channel, Local Mode, Soft Thru, Note Variation Controller Assign and Sustain Pedal Processing Selecting option 2 from the MIDI key menu will display a screen that provides access to a variety of MIDI-related parameters: ============= MIDI Routing ============= Active track receive channel:ALL Local mode:ON... - Page 223 they aren’t. If you are using a single keyboard synthesizer (the keyboard and sound generator are together in one unit), this field should be set to (or set the keyboard’s Local Control to OFF). In this case, there is no need for incoming MIDI notes to be immedi- ately sent out to the synthesizer’s sound generator because it is already receiving notes directly from its keyboard.
- Page 224 Chapter 11: MIDI Function The MPC3000 eliminates these problems by specially processing sustain pedal messages. If the duration On message during record, it will NOT record it. Instead, any notes that are currently pressed will be internally held on, even after they are released, until a Sustain Off message is received.
-
Page 225: Midi Input Filter
MIDI Input Filter Selecting option 3 from the MIDI key menu presents the MIDI Input Filter screen, which allows specific types of MIDI events to be either received or ignored by the MPC3000: ===== Sound Generator Input Filter ===== MIDI volume:RECEIVE Prog change:IGNORE ======= Sequencer Input Filter ========= Event:NOTES... - Page 226 Chapter 11: MIDI Function While one of these event types is selected, the displays either sequences, or from the MIDI input data stream when encountered. To change the status of a particular event, first select the event in the field, then set the •...
- Page 227 Min change field is used to thin out the event data for the above specified event types, thereby reducing the total number of events that will be recorded into tracks. It works by only recording events that have changed more than a specified amount since the last received event of the same type.
-
Page 228: Turning All Notes Off
Chapter 11: MIDI Function Turning All Notes Off Occasionally, a note from an externally-connected synthesizer may stick on. This may be due to sending the synthesizer too much data, or switching an external MIDI switching box at the wrong time, or many other reasons. -
Page 229: The Midi Implementation Charts
The MIDI Implementation Charts This section contains the MIDI implementation charts for the MPC3000. There are two charts—one for the sequencer section, and one for the pad and sound generator section. These charts are useful to determine if any incompatibilities exist between the MPC3000 and your other MIDI instruments. - Page 230 Chapter 11: MIDI Function Model: MPC3000 (sequencer section) Function Basic Default Channel Channel Default Mode Messages Altered Note Number True Voice Velocity Note ON Note OFF After Key’s Touch Ch’s Pitch Bender Control 0-127 Change Prog Change True# System Exclusive System :Song Pos :Song Sel...
-
Page 231: Appendix
Appendix Appendix Page 219... -
Page 232: Technical Specifications
Appendix Technical Specifications General • Display: 320 character (240 x 64 dot graphic) LCD • Disk drive: 3.5 inch HD (1.44MB formatted) • CPU: V53 @ 16MHz • Dimensions: 440(W) x 121(H) x 405(D) mm • Weight: 9 kg • Power requirements: Sound Generator •... - Page 233 Appendix • Level of 8 individual outputs: 6dBm, 600 • Sync/Trigger input level: 0.5V p-p level (with input control at maximum) • Sync output level: 2.5V p-p, impedance 600 • MIDI inputs: 2 (mergeable) • MIDI outputs: 4 (independent) • SCSI port: 1 (Apple 25-pin D-type SCSI connector) •...
-
Page 234: Answers To Frequent Questions
Appendix Answers to Frequent Questions If you discover a problem in your MPC3000, we would appreciate it if you would please read the relevant section of the manual to make sure you correctly understand the operation before you before call your Akai representative. - Page 235 1. Erase any unnecessary events from the sequence. For example, erase any channel pressure, poly pressure and system exclusive events if you are not using them. Many keyboards send out large amounts of channel pressure messages while playing, which are recorded into your tracks.
- Page 236 Appendix If you ever forget these instructions, just press the from MIDI> MIDI key and selecting option 2. I want to use the MPC3000’s pads to program drum parts on an external sequencer, but I can’t get any of the MIDI outputs to send note-on messages when I play the pads.
-
Page 237: Contents Of Disk Files
Contents of Disk Files The following is a list of the contents of each of the six file types. The SEQ (sequence) file Sequence name (file name is used) Loop status (END or TO BAR) and Sequence tempo SMPTE offset List of tempo changes Active track number For each track:... - Page 238 Appendix The PGM (single program) file Program name (file name is used) For each of the 64 pads (A01-D16): For each of the 64 note numbers 35-98: Note variation data: Program mixer data (for each of the 64 note numbers 35-98): Program effects settings The APS (all programs and sounds) file Program data for each of the 24 programs (see above)
- Page 239 Appendix The PAR (system parameters) file (Play/Record screen) For each of the 64 MIDI output channel/port combinations: • MIDI channel name (16 Levels screen) Parameter select for 16 levels (velocity or note variation) (Tempo screen) Master tempo Tempo display mode (BPM or FPB) Frames per second (24, 25, 29.97 drop or 30) Tempo source (master or sequence) Tap averaging count (2, 3 or 4 taps)
- Page 240 Appendix (Auto Punch screen) all settings (Initialize Sequence screen) all settings (Erase screen) all settings (Sample New Sound screen) Input (analog or digital) Mode (stereo, mono-left or mono-right) Monitor setting (on/off) Record length Record threshold Pre-record time (Copy Events screen) Mode select (merge or replace) (Edit Velocity/Duration screen) Edit Velocity Or Duration select...
-
Page 241: Mpc3000 Options
MPC3000 Options This section describes the various options available for the MPC3000. To purchase any of these items, contact your Akai re- tailer. These options should be installed only by an authorized Akai retailer or service center. The SMPTE Option The I-0055 SMPTE option gives your MPC3000 the ability to play in sync to externally received SMPTE sync signals in one of four frame formats: 24, 25, 29.97 drop, and 30. -
Page 242: The Video Output Option
Appendix There are four possible combinations: • Akai standard 2MB board + a pair of 1MB SIMMs: 4MB total • Akai standard 2MB board + a pair of 4MB SIMMs: 10MB total • Akai EXM3008 8MB board + a pair of 1MB SIMMs: 10MB total •... -
Page 243: Index
Index Index Page 231... - Page 244 Index + and – keys 17 16 LEVELS key 26 Active Track, defined 35 All Notes Off 216 Analyzing Sequence message 223 Answers to frequent questions 222 Appendix 219 Audio Trigger 161 AUTO PUNCH key 60 Example 61 Bar.beat.tick fields 30 Basic Operations 13 Choice Fields 17 Command keys 16...
- Page 245 Partitions of hard disk 188 Renaming files 173 S1000/S3000 files, loading 184 S1000/S3000 stereo files, loading 185 Saving a PAR file (system parameters) 172 Saving a sequence 166 Saving a single program (and its sounds) 169 Saving a single sound 168 Saving an ALL file (all sequences and songs) 167 Saving an APS file (all programs and sounds) 170 Saving files 166...
- Page 246 Index MIDI Tracks 30, 35 Mix Data, setting all channels at once 141 Mix, automated 143 Mixer source select 142 MIXER/EFFECTS Key 133 Mixers, text view 139 Multichannel Sequence Recording 67 Note Number Assignment, globally editing 89 Note Number, defined 20 Note Repeat 52 Note Variation 16 LEVELS key 26...
- Page 247 Stereo Mixer 134 Switching sounds depending on Envelope Decay 122 The MIXER/EFFECTS Key 133 Tuning 126 Velocity modulation of attack, start address & volume 126 Velocity Switching between sounds. 121 Volume Envelope 125 Punching in and out 33, 39, 40 Record 16 Channels 67 RECORD key 39 Record Level Control 152...
- Page 248 Index Record Ready mode 32 Recording 29, 39 Recording with multiple tracks, example 44 Recording, example 42 SEQ EDIT key 77 Shift Timing 85 Step Editing (visual editing) 92 Step Recording 102 Ticks 30 Track, defined 19 Transposing 105 Shift Timing 85 Shift Timing (in Timing Correct) 50 SIMUL SEQ key 62 Soft Keys 17...
- Page 249 Swing 50 Sync 1/4 note clicks 198 1/4 note clicks, syncing to 206 1/4-note clicks 195 FSK24 195, 198 FSK24, syncing to 204 MIDI clock 194, 195 MIDI clock, generating 199 MIDI clock, syncing to 201 MIDI time code 194, 197 MIDI time code, syncing to 204 Outputting sync 199 SMPTE 194, 196...
- Page 250 Index Undo, using Edit Loop key 104 Velocity modulation of attack, start address & volume 126 Velocity or duration data, globally editing 87 Video output option 230 WAIT FOR KEY key 59 [<<] and [>>] keys 40 [<] and [>] keys 40 Page 238...
-
Page 251: Software Update
SOFTWARE UPDATE MIDI PRODUCTION CENTER Software version 3.1 WARNING To prevent fire or shock hazard, do not expose this appliance to rain or moisture. Operator's Manual... - Page 252 New Features of Version 3.1 Saving and Loading Standard MIDI Files ... 1 Loading Sample Files From Akai S1000/S3000 CD-ROMs or Hard Disks ... 5 Connecting Multiple SCSI Devices, Making a SCSI Device Active Without Recycling Power ... 7 MIDI Machine Control ... 10 Sending MIDI Time Code In Real Time While Playing ...
-
Page 253: Saving And Loading Standard Midi Files
Saving and Loading Standard MIDI Files MPC3000 sequences may be saved to floppies as Standard MIDI Files, and Standard MIDI Files may be loaded from floppies into MPC3000 sequences. This permits the transfer of sequences between the MPC3000 and any MS- DOS/Windows or Macintosh sequencer. - Page 254 MPC3000 Software Update Version 3.1 Operator’s Manual Saving a Standard MIDI File To save a standard MIDI file, go to the “Save a Sequence” screen by pressing DISK, then 1: ============ Save a Sequence =========== Seq:23-Sequence_name Disk:SCSI DISK PART A Save as:MIDI FILE TYPE 1 ======================================== <Do it>...
- Page 255 MPC3000 Software Update Version 3.1 Operator’s Manual Loading a Standard MIDI File In order to load a MIDI file, it must exist on a MS-DOS/Windows floppy disk formatted to either 1.44 MB or 720 KB. (The MPC3000’s 1.44 MB floppy disk format is the same as MS-DOS/Windows 1.44 MB floppy disks.) It must have a standard eight character MS-DOS/Windows filename with a three letter extension of either MID, SMF or MFF.
- Page 256 MPC3000 Software Update Version 3.1 Operator’s Manual 2. ONE PER MIDI OUTPUT: In this option is selected, one track is created for each channel/port assignment in use within the MIDI file, and all events are mapped to tracks with the same channel/port assignment, regardless of their original track numbers.
-
Page 257: Loading Sample Files From Akai S1000/S3000 Cd-Roms Or Hard Disks
Loading Sample Files From Akai S1000/S3000 CD-ROMs or Hard Disks Earlier versions of the MPC3000 system software supported the loading of sample files from S1000 or S3000 formatted floppy disks. Now, sample files may also be read from S1000/S3000 hard disks or CD-ROMs. To load a sample file from an S1000/S3000 hard disk or CD-ROM, first you must connect the hard disk or CD-ROM drive to the SCSI port and make it active (recognized by the MPC3000 as ready for use). - Page 258 MPC3000 Software Update Version 3.1 Operator’s Manual • The Volume field: On S1000 or S3000 hard disks or CD-ROMs, each partition may contain up to 100 volumes, in which the actual files are contained. Volumes act as directo- ries— files are contained within volumes, and volumes are contained within partitions.
-
Page 259: Connecting Multiple Scsi Devices, Making A Scsi Device Active Without Recycling Power
Connecting Multiple SCSI Devices, Making a SCSI Device Active Without Recycling Power In previous versions of the system software, the only way to make a SCSI hard disk active (recognized as ready for use by the MPC3000) was to turn the MPC3000’s power on while the SCSI disk was connected and turned on. - Page 260 MPC3000 Software Update Version 3.1 Operator’s Manual Only addresses 0 - 6 may be used for external SCSI devices. Address 7 cannot be used because it is the address of the MPC3000. • The SCSI device address to make active field: This field determines which SCSI address will be made active when the power is turned on or when <Make active>...
- Page 261 MPC3000 Software Update Version 3.1 Operator’s Manual • The <Make active> soft key: Press this soft key to make the connected SCSI hard disk active. Whenever the MPC3000 is turned on, it automatically performs the same function as pressing this soft key. In either case, the Status field will subsequently show that the hard disk is active.
-
Page 262: Midi Machine Control
MPC3000 Software Update Version 3.1 Operator’s Manual MIDI Machine Control MIDI Machine Control (abbreviated “MMC”) is a standard system of commu- nication over MIDI that allows the MPC3000 to remotely control the trans- port of an MMC-compatible audio or video recorder. By using MIDI Machine Control, the MPC3000 can remotely play, record, stop or reposition an exter- nal recorder. - Page 263 MPC3000 Software Update Version 3.1 Operator’s Manual “<<”, “<”, LOCATE, “>”, and “>>”: In addition to their normal MPC3000 functions, these keys cause MMC “Locate” commands to be sent out, repositioning the external recorder. RECORD + PLAY pressed together: This does not enter record mode on the MPC3000’s sequencer.
-
Page 264: Sending Midi Time Code In Real Time While Playing
MPC3000 Software Update Version 3.1 Operator’s Manual Sending MIDI Time Code In Real Time While Playing The MPC3000 may now send MIDI Time Code out over MIDI in real time as a sequence or song plays. MIDI Time Code is an industry-standard for send- ing SMPTE time code data over MIDI. -
Page 265: Midi Sample Dump
MIDI Sample Dump MIDI Sample Dump is an industry-standard format for transferring sample data between sampling devices over MIDI. To use this feature, you must first connect the MPC3000 to the external sampler using either one or two MIDI cables: Using one MIDI cable: This is called “open loop”... - Page 266 MPC3000 Software Update Version 3.1 Operator’s Manual Receiving a MIDI sample dump from an external sampler To receive a MIDI Sample Dump, make sure that the receive screen is show- ing. If not, press <Send/recv>. The screen fields and soft keys are de- scribed below: •...
- Page 267 MPC3000 Software Update Version 3.1 Operator’s Manual field to the sound number (in the external sampler) that you want trans- ferred. Then, press <Send req>. Immediately, the MPC3000 sends out a “dump request” message to the external sampler, telling it to start sending the specified sound number.
- Page 268 MPC3000 Software Update Version 3.1 Operator’s Manual • The MIDI input, MIDI output, and MIDI channel fields, and the <Send/recv> soft key: These fields and soft key operate exactly as in the receive screen described in the previous section. • The Sound field: In this choice field, select the sound to be sent from an alphabetical list of sounds in memory.
-
Page 269: Saving Program Or Aps Files Without Sounds, Optional Overwriting Of Sounds During Program Save Or Load
Saving Program or APS Files Without Sounds, Optional Overwriting of Sounds During Program Save or Load In previous system software versions, three conditions existed that are now enhanced: When a program was saved to disk, all sounds used by the program were automatically saved to disk at the same time. - Page 270 MPC3000 Software Update Version 3.1 Operator’s Manual Two new fields exist: • The Save field: Program files contain no sound data so when saving a program, the sounds used by the program are normally also saved at the same time. This choice field permits the option of saving the program file by itself without the accom- panying sound files.
- Page 271 MPC3000 Software Update Version 3.1 Operator’s Manual Two new fields exist: • The Save field: Program files contain no sound data, so when saving a program the sounds used by the program are normally also saved at the same time. This choice field permits the option of saving the program file by itself without the accom- panying sound files.
- Page 272 MPC3000 Software Update Version 3.1 Operator’s Manual A new field exists: • The Replace same sounds in memory field: This choice field has two options: 1. NO(FASTER): When loading a program (and its sounds), if a sound file exists in memory with the same name as one of the sounds to be loaded, the sound is not overwritten by the sound on disk, and the program will use the sound of the same name already in memory.
-
Page 273: New Sound Edit Options- Delete Before Soft Start And Delete After Soft End
New Sound Edit Options— Delete Before Soft Start and Delete After Soft End In previous system software versions, the Edit a Sound screen enabled the deletion of any portion of a sound by setting the beginning and end of a “zone”, then deleting it. -
Page 274: Improved Speed Of Saving To Hard Disk
MPC3000 Software Update Version 3.1 Operator’s Manual Improved Speed of Saving to Hard Disk In previous system software versions, saving to hard disk was slow. In this version, the speed of saving to hard disk has been greatly improved. Page 22... - Page 276 AKAI ELECTRIC CO., LTD. Electronic Musical Instrument Div. 940912 Imprimé au Japan...
Need help?
Do you have a question about the MPC 3000 and is the answer not in the manual?
Questions and answers