CARDIOSTRONG TX30 Assembly And Operating Instructions Manual
For more information, please visit cardiostrong.com, sport-tiedje.com

Related Manuals for CARDIOSTRONG TX30


Summary of Contents for CARDIOSTRONG TX30
- Page 1 Assembly and Operating Instructions max. 120 kg ~ 60 Min. 84 kg L 175.7 | B 79.1 | H 141.3 CSTTX30.01.01 Art. No. CST-TX30 Treadmill TX30...
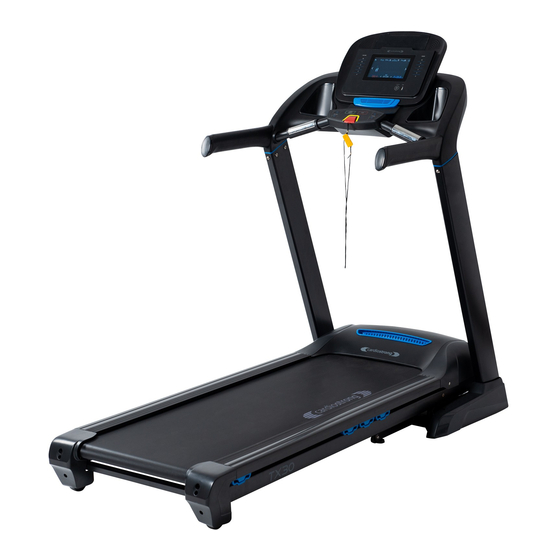
- Page 2 TX30...
-
Page 3: Table Of Contents
Content GENERAL INFORMATION Technical Data Personal Safety Electrical Safety Set-Up Place ASSEMBLY General Instructions Scope of Delivery Overview Assembly OPERATING INSTRUCTIONS Console Display Button Functions Programmes 3.3.1 Quick Start Programme 3.3.2 Manual Programme 3.3.3 Pre-set Programmes 3.3.4 Heart Rate Control Programmes 3.3.5 Fitness-Test STORAGE AND TRANSPORT General Instructions... - Page 4 DISPOSAL RECOMMENDED ACCESSORIES ORDERING SPARE PARTS Serial Number and Model Name Parts List WARRANTY CONTACT TX30...
- Page 5 With cardiostrong® fitness equipment, the focus is on what sport is all about: maximum performance! Therefore, the equipment is developed in close consultation with athletes and sports scientists.
- Page 6 This notice indicates potentially hazardous situations which, if not avoided, will result in death or serious injuries! NOTICE This notice indicates further useful information. Retain these instructions in a safe place for future reference, maintenance or when ordering replacement parts. TX30...
-
Page 7: General Information
GENERAL INFORMATION Technical Data LCD - Display of: Training time Speed Calories Distance Steps Heart rate (when using the hand pulse sensors or a chest strap) Programmes in total: Manual programme (Quick Start): Target programmes: Pre-set programmes: Heart rate controlled programmes: User-defined programmes: Motor type: DC motor... -
Page 8: Personal Safety
Make sure that nobody is within the range of motion of the equipment during training so as not to endanger you or other persons. ࣑ ATTENTION Do not insert any objects of any kind into the openings of the device. TX30... -
Page 9: Electrical Safety
Electrical Safety ⚠ DANGER In order to reduce the risk of an electric shock, always unplug the equipment from the mains socket immediately after your workout, before assembly or dismantling, and before maintenance or cleaning. Do not pull on the cable. ⚠... -
Page 10: Set-Up Place
(over 70%) like swimming pools. A floor protective mat/equipment underlay can help to protect high-quality floor coverings (parquet, laminate, cork, carpets) from dents and sweat and can help to level out slight unevenness. Recommended free zone: TX30... -
Page 11: Assembly
ASSEMBLY General Instructions ⚠ DANGER Do not leave any tools, packaging materials such as foils or small parts lying around, as otherwise there is a danger of suffocation for children. Keep children away from the equipment during assembly. ⚠ WARNING The treadmill is equipped with high- pressure shock absorbers that can cause the treadmill to suddenly open if handled... -
Page 12: Scope Of Delivery
In the event of complaints, the contractual partner must be contacted directly. ⚠ CAUTION If parts of the scope of delivery are missing or damaged, the assembly must not be carried out. Console unit TX30... - Page 13 Hardware package...
-
Page 14: Overview
Overview TX30... -
Page 15: Assembly
Assembly Before assembly, take a close look at the individual assembly steps shown and carry out the assembly in the order given. NOTICE First loosely screw all parts together and check that they fit properly. Tighten the screws using the tool only when you are instructed to do so. Step 1: Checking the Scope of Delivery Take all parts that are included in the scope of delivery out of the box and place them on the... - Page 16 Assembly of the Upright Posts Attach the two upright posts (85) to the main frame with four bolts (86), four spring washers (87) and four spring washers (88) each. ATTENTION Be careful not to pinch the cables in the following step. TX30...
- Page 17 Step 3: Assembly of the Console Unit Connect the cable of the right upright post (23) to the cable of the console unit (108). ࣑ ATTENTION Be careful not to pinch the cables during the next step. Place the console unit on both upright posts (85). Mount the console unit to both upright posts (85) with three bolts (86), three spring washers (87), and three spring washers (88) on each side.
- Page 18 Mount the covers (68) to both sides of the treadmill with two screws (69) on each side. Remove the packaging fixed plate (77) by removing both screws (78). NOTICE: Do not dispose of the packaging fixed plate and screws. Assemble it once you want to transport the treadmill in folded condition. TX30...
- Page 19 Step 5: Alignment of the Feet If the floor is uneven, you can stabilize the treadmill by turning the two setting screws under the main frame. ⚠ WARNING The treadmill is equipped with high-pressure shock absorbers that can cause the treadmill to suddenly open if handled incorrectly.
-
Page 20: Operating Instructions
To enable the safety key to detach from the contact point of the cockpit in the event of a fall, the safety key clip must be firmly attached to your clothing! Make sure that the safety key is not accessible to children. TX30... -
Page 21: Console Display
Console Display Display Description Display of the current speed in km/h Display range: 0.8–18 km/h SPEED Setting range: 0.8-18 km/h (Adjustable in steps of 0.1 km/h increments) PULSE Display of the current heart rate in beats per minute Display of the current inclince level INCLINE Display range: 0–15 Setting range: 0–15 (Adjustable in steps of 1) -
Page 22: Button Functions
Possible options are: 3, 5, 7, 9, 11, and 13. For example, by tapping 7, the treadmill will automatically adjust the speed to 7 km/h. NOTICE The quick keys will be displayed km/h. In mph, the values will be displayed as follows: 2, 4, 5, 6, 8 and 10 mph. TX30... -
Page 23: Programmes
Programmes In total, 23 programmes are available to you: Quick Start programme: 1 Manual programme: 1 Pre-set programmes: 17 Heart rate controlled programmes: 2 User-defined programmes: 2 3.3.1 Quick Start Programme To start the programme, tap the Quick Start button. The treadmill will start with a speed of 0.8 km/h. -
Page 24: Pre-Set Programmes
By selecting your weight, your calory, and heart rate value can be calculated more precisely. Tap “Start/Pause”, to start the training. Tap “Start/Pause”, to pause the training. 10. Tap ”Stop” to stop the training. After the training ends, a summary of your training values will be shown. TX30... - Page 25 P-01: Long, Slow Distance (40 min. default) This is a great training for everyone. Beginners start with an easy workout and include this programme in their weekly workouts to maximize cardiovascular endurance. On days that follow a hard, intensive workout, this program is ideal for experienced users. P-02: Short Interval (20 min.
- Page 26 A varying exercise intensity with constantly changing interval training that starts at a light pace and increases to a moderate/intensive pace. This brings variety and offers great fitness benefits. Constantly varying intensities have a very positive effect on improving brain fitness, according to brain research. TX30...
- Page 27 P-08: Uphill Climb (30 min. default) Incrementally increase your training intensity with this workout. During this training, you want to stimulate your body in order to improve your circulatory system and maximise muscle cell growth. Your body will be able to train over a longer period of time and will profit from the high intensity. P-09: Pyramid Climb (30 min.
- Page 28 The uphill walk has been designed to start slow and gradually increase to a peak intensity then with a quick decrease back to a recovery level. You will maximize calorie burn during the peak intensity levels while allowing your body to exercise for longer periods. TX30...
- Page 29 3.1.1 Custom User Programmes There are two user programmes that provide you with the ability to build custom programme profiles for your specic workout requirements. These programmes are saved by the console and can be selected like the other pre-set programmes. Tap “Pre-set Programmes”...
-
Page 30: Heart Rate Control Programmes
By selecting your weight, your calory, and heart rate value can be calculated more precisely. Press “Start/Pause” to start the training. Press “Start/Pause” to pause the training. Press ”Stop” to end the training. After the training ends, a summary of your training values will be shown. TX30... -
Page 31: Fitness-Test
Heart Rate Control Programme (Interval) Provides a anaerobic endurance training by exercising at a high target heart rate and a low recovery heart rate. NOTICE After a 3 minute warm-up period, the Treadmill will automatically adjust the incline level or speed to the selected maximum target heart rate, depending on the selected mode. -
Page 32: Storage And Transport
Do not lift the treadmill by the running mat or the rear transporting wheels. These parts do not lock and are difficult to grab. NOTICE The treadmill is foldable and thus saves space when it is stored. It also makes it easier to transport. TX30... -
Page 33: Folding Up The Treadmill
4.3.1 Folding Up the Treadmill WARNING ⚠ Do not connect the equipment to the power supply when it is folded up. Try not to operate the equipment when it is folded up. The running surface must have come to a complete stop before folding. CAUTION ⚠... -
Page 34: Troubleshooting, Care And Maintenance
Use a suitable chest strap (see Wrong position of chest No pulse display RECOMMENDED ACCESSORIES). strap Reposition chest strap and/or Chest strap defective or moisten electrodes battery empty Changing batteries Pulse display defective Check if pulse display by hand pulse possible TX30... -
Page 35: Error Codes And Troubleshooting
Error Codes and Troubleshooting The electronics of the equipment continuously carries out tests. In case of deviations, an error code appears on the display and normal operation is stopped for your safety. E1 error code after 3-8 seconds of use This error code will most likely be caused by an insufficient cable connection or by an issue with the speed sensor. -
Page 36: Care And Maintenance
¼ turn anticlockwise. Then observe the mat for about 30 seconds, as the change is not immediately visible. Repeat this procedure until the running mat is straight again. If the running mat cannot be adjusted, please contact your contract partner. TX30... -
Page 37: Re-Tensioning The Running Mat
5.4.2 Re-tensioning the Running Mat If the running mat slips over the rollers during operation (if this is the case, there is a noticeable jerk during running), the running mat must be re tightened. In most cases, the slipping is caused by stretching of the mat through use. This is perfectly normal. NOTICE Re-tensioning is carried out using the same adjusting screws that are used for adjustment. -
Page 38: Maintenance And Inspection Calendar
The materials can be recycled as per their symbols. Through the reuse, recycling of materials or other forms of recovery of old equipment, you make an important contribution to the protection of the environment. TX30... -
Page 39: Recommended Accessories
RECOMMENDED ACCESSORIES To make your training experience even more efficient and pleasant, we recommend that you add suiting accessories to your fitness equipment. This could be a floor mat, for example, which makes your fitness equipment stand more securely and also protects the floor from falling sweat, but it could also be additional handrails on some treadmills or silicone spray to keep moving parts in good shape. -
Page 40: Ordering Spare Parts
It's located on a white sticker. The exact position of this sticker is shown in the following illustration. Enter the serial number in the appropriate field. Serial number: Brand / Category: cardiostrong / treadmill Model Name: treadmill TX30 Article Number: CST-TX30 TX30... -
Page 41: Parts List
Parts List Name Qty. Welding treadmill frame Motor seat frame DC motor (DC180V 2.0HP) Socket head bolts M8x16 Socket head bolts M8x12 Inner socket head screws M8x55 Spring washer Ø8x21 Washer Ø8x 16 Motor cover Motor cover insert 1 Motor cover insert 2 Cross trough pan head self-drilling screw ST4.2x13 Socket head bolts M5x16 Washer Ø5x1... - Page 42 Cross trough pan head self-drilling screw ST4.8x16 Rear wheel Socket head bolt M8x45 Hexagon lock nut M8 Spring washer Ø 8x1.6 Frame holder Incline Holder Socket head bolt M10x35 Spring washer Ø10x2 Hexagon lock nut M10 left down cover right down cover TX30...
- Page 43 Cross trough pan head self-drilling screw ST4.2x13 wheel Socket head bolt M8x40 Spring washer Ø8x1.6 Hexagon lock nut M8 Adjust the floor mat big rubber mat Cross trough pan head self-drilling screw ST4.8x25 Packaging fixed plate Cross trough pan head screw M6x 16 cylinder(775x480-37KG) Socket head bolt M8x35 Socket head bolt M8x50...
- Page 44 Cross trough pan head screw M5x16 Left arm insert II Cross trough pan head self-drilling screw ST4.8x13 Right arm Right arm insert I Right arm insert II Heart Rate base "Cross trough pan head self-drilling screw ST2.9x16" Safety key Console overlay Quick key overlay TX30...
- Page 45 Exploded Drawing...
- Page 46 TX30...
-
Page 47: Warranty
WARRANTY Training equipment from cardiostrong® is subject to strict quality control. However, if a fitness equipment purchased from us does not work perfectly, we take it very seriously and ask you to contact our customer service as indicated. We are happy to help you by phone via our service hotline. - Page 48 For that reason, we also want to resolve your queries quickly and in a straightforward manner. Thus, please always keep your customer number and the serial number of the faulty equipment handy. TX30...
-
Page 49: Contact
CONTACT TECHNICAL SUPPORT TECHNICAL SUPPORT & SERVICE TECHNICAL SUPPORT & SERVICE �� �� �� +49 4621 4210-900 80 90 16 50 +33 (0) 172 770033 +49 4621 4210-945 +49 4621 4210-933 �� +49 4621 4210-698 �� �� info@fitshop.dk service-france@fitshop.fr �� technik@sport-tiedje.de ��... - Page 50 The company employs numerous sports scientists, fitness trainers and competitive athletes. Visit us also on our social media platforms or our blog! TX30...
- Page 52 Treadmill TX30...
Need help?
Do you have a question about the TX30 and is the answer not in the manual?
Questions and answers