CARDIOSTRONG TX70 Assembly And Operating Instructions Manual
For more information, please visit cardiostrong.com, sport-tiedje.com

Related Manuals for CARDIOSTRONG TX70


Summary of Contents for CARDIOSTRONG TX70
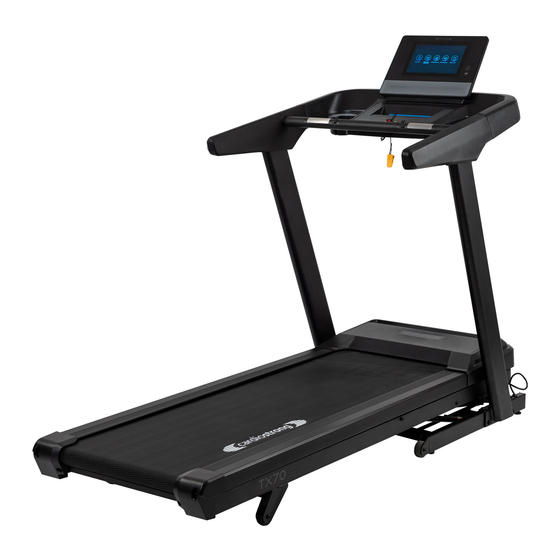
- Page 1 Assembly and Operating Instructions max. 150 kg ~ 60 Min. 109 kg L 186 | B 89 | H 142 CSTTX70.01.05 Art. No. CST-TX70 Treadmill TX70...
- Page 2 TX70...
-
Page 3: Table Of Contents
Content GENERAL INFORMATION Technical Data Personal Safety Electrical Safety Set-Up Place ASSEMBLY General Instructions Scope of Delivery Assembly OPERATING INSTRUCTIONS Console Display Button Functions Home Screen Buttons Programmes 3.4.1 Quick Start Programme 3.4.2 Manual Programme 3.4.3 Pre-set Programmes 3.4.4 Custom User Programmes 3.4.5 Heart Rate Control Programmes 3.4.6 Fitness-Test Mirror Function (Screencasting) - Page 4 Care and Maintenance 5.4.1 Adjusting the Running Mat 5.4.2 Re-tensioning the Running Mat 5.4.3 Lubricating the Running Mat Maintenance and Inspection Calendar DISPOSAL RECOMMENDED ACCESSORIES ORDERING SPARE PARTS Serial Number and Model Name Parts List Exploded Drawing WARRANTY CONTACT TX70...
- Page 5 Train at home no matter what the weather or time of the day. cardiostrong fitness equipment offers training programmes and a variety of equipment for all training levels and all training goals. Further information can be found at www.sport-tiedje.com or www.cardiostrong.de.
- Page 6 This notice indicates potentially hazardous situations which, if not avoided, will result in death or serious injuries! NOTICE This notice indicates further useful information. Retain these instructions in a safe place for future reference, maintenance or when ordering replacement parts. TX70...
-
Page 7: General Information
GENERAL INFORMATION Technical Data TFT - Display of: Training time Speed Calories Distance Steps Heart rate (when using the hand pulse sensors or a chest strap) Programmes in total: Manual programme (Quick Start): Target programmes: Pre-set programmes: Heart rate controlled programmes: User-defined programmes: Motor type: DC motor... -
Page 8: Personal Safety
Make sure that nobody is within the range of motion of the equipment during training so as not to endanger you or other persons. ࣑ ATTENTION Do not insert any objects of any kind into the openings of the device. TX70... -
Page 9: Electrical Safety
Electrical Safety DANGER ⚠ In order to reduce the risk of an electric shock, always unplug the equipment from the mains socket immediately after your workout, before assembly or dismantling, and before maintenance or cleaning. Do not pull on the cable. ⚠... -
Page 10: Set-Up Place
(over 70%) like swimming pools. A floor protective mat/equipment underlay can help to protect high-quality floor coverings (parquet, laminate, cork, carpets) from dents and sweat and can help to level out slight unevenness. Recommended free zone: TX70... -
Page 11: Assembly
ASSEMBLY General Instructions ⚠ DANGER Do not leave any tools, packaging materials such as foils or small parts lying around, as otherwise there is a danger of suffocation for children. Keep children away from the equipment during assembly. ⚠ WARNING The treadmill is equipped with high- pressure shock absorbers that can cause the treadmill to suddenly open if handled... -
Page 12: Scope Of Delivery
In the event of complaints, the contractual partner must be contacted directly. CAUTION ⚠ If parts of the scope of delivery are missing or damaged, the assembly must not be carried out. TX70... -
Page 13: Assembly
Assembly Before assembly, take a close look at the individual assembly steps shown and carry out the assembly in the order given. NOTICE First loosely screw all parts together and check that they fit properly. Tighten the screws using the tool only when you are instructed to do so. If you have difficulty recognising the graphics, we recommend that you open and/or download the PDF instructions stored in the webshop on your end device (e.g. - Page 14 Remove the M10*45 screw (7) and M10*70L screw (8) and the M10 washers (9) from the base frame (2). Fix the console mast (4) with the screws and washers removed before . Repeat the steps on the left side. NOTICE No wiring is required on the left side. TX70...
- Page 15 Step 3: Mounting the console unit Connect the cable from the console mast (4) with the cable of the console unit (5). ࣑ ATTENTION Take care not to pinch the cables in the following step. Place the console unit (5) on the two console masts (3 & 4). Fix the console unit (5) on the console masts (3 &...
- Page 16 Step 4: Mounting the console Part 1 Connect the cables of the console unit (5) with their counterparts on the console (6). ࣑ ATTENTION Take care not to pinch the cables in the following step. TX70...
- Page 17 Step 5: Mounting the console Part 2 Fix the console (6) with two M8*30L screws (13) and two M8 washers (12).
- Page 18 Remove the two screws on the console (6). Fix the red cable on the right side of the console (6) with one of the screws removed before. Fix the two green/yellow cables on the left side of the console (6) with the second screw removed before. TX70...
- Page 19 Step 7: Mounting the console Part 4 Fix the cover (7) with a total of two M4*10L screws (14).
- Page 20 Step 8: Removing the transport lock Remove the fuse by removing the two screws. ࣑ NOTICE Do not dispose of the fuse and its screws. Fasten it if you want to transport the treadmill in the folded state. TX70...
- Page 21 Step 9: Alignment of the Feet If the floor is uneven, you can stabilize the treadmill by turning the two setting screws under the main frame. ⚠ WARNING The treadmill is equipped with high-pressure shock absorbers that can cause the treadmill to suddenly open if handled incorrectly.
-
Page 22: Operating Instructions
To enable the safety key to detach from the contact point of the cockpit in the event of a fall, the safety key clip must be firmly attached to your clothing! Make sure that the safety key is not accessible to children. TX70... -
Page 23: Console Display
Console Display Display Description Display of the current speed in km/h Display range: 0.8–20 km/h SPEED Setting range: 0.8-20 km/h (Adjustable in steps of 0.1 km/h increments) PULSE Display of the current heart rate in beats per minute Display of the current inclince level Display range: 0–15 INCLINE Setting range: 0–15 (Adjustable in steps of 1) -
Page 24: Button Functions
Possible options are: 3, 5, 7, 9, 11, and 13. For example, by tapping 7, the treadmill will automatically adjust the speed to 7 km/h. NOTICE The quick keys will be displayed km/h. In mph, the values will be displayed as follows: 2, 4, 5, 6, 8 and 10 mph. TX70... -
Page 25: Home Screen Buttons
Home Screen Buttons A. Quick Start This program allows you to start exercising and use your desired incline or speed and time. B. Manual This program allows you to set a desired workout time as well as age and weight. C. -
Page 26: Programmes
The treadmill will start with a speed of 0.8 km/h and an incline level of 0. The defined values will count up, all other values will count down. NOTICE: You can adjust the incline and speed during the workout. After the training ends, a summary of your training values will be shown. TX70... -
Page 27: Pre-Set Programmes
3.4.3 Pre-set Programmes Pre-set programmes is sub-divided into four categories: Weight Loss, Sport Training, and Healthy Living. The custom user category will be expanded upon in chapter 3.3.4. A total of 17 pre-defined profile programs are available, which differ in duration, intensity and intensity changes. When selecting the program, you can decide whether the intensity changes by changing the incline value or the speed. - Page 28 Note that this workout involves alternating between simple recovery and high intensity intervals. Feel comfortable during your workout knowing that after a high intesity training, there will always be a recovery training. This workout improves your overall aerobic endurance while maximizing the development of your anaerobic fitness. TX70...
- Page 29 Advanced Programmes: P-04: Long Interval (40 min. default) These exercises are amazing to maximise your calories consumption and improve your anaerobic fitness. Just like the moderate intervals, after every high-intensity interval comes a recovery interval - for an incrementally increasing training intensity. P-05: Negative Interval 1 (30 min.
- Page 30 Start at a level you are comfortable with and gradually increase the intensity during each max interval to bring yourself to a higher intensity each time. During the higher intensity intervals, burn the maximum amount of calories while working to improve your anaerobic fitness. TX70...
- Page 31 P-13: Steady Pace (40 min. default) Improve your fitness and stimulate your body to burn more fat. This is an ideal support to improve your endurance. Most exercises of this type focus on maintaining the muscle load throughout the workout. Your goal is to train at an intensity that goes from low over moderate to high throughout your workout.
-
Page 32: Custom User Programmes
Set your desired speed and incline value for all of the 20 segments during the training. Press “Start/Pause” to start the training. Press “Start/Pause” to pause the training. Press ”Stop” to end the training. After the training ends, a summary of your training values will be shown. TX70... -
Page 33: Heart Rate Control Programmes
3.4.5 Heart Rate Control Programmes ⚠ WARNING Your training equipment is not a medical device. The heart rate measurement of this equipment may be inaccurate. Various factors can affect the accuracy of the heart rate measurement. The heart rate measurement serves only as a training aid. NOTICE A chest strap is required to use the heart rate controlled programmes. -
Page 34: Fitness-Test
There are two fitness tests available for you to take. The Rockport Fitness Test and the Navy Fitness Test. The Rockport Fitness test is a test that requires you to walk 1 mile as quickly as you can without running. The Navy Fitness Test requires you to run 1.5 miles as quickly as you can. TX70... -
Page 35: Mirror Function (Screencasting)
Mirror Function (Screencasting) The mirror function of the console allows you to transfer the screen contents of your mobile device to the display of the treadmill via WiFi. There are two ways to start the mirror function: 3.5.1 Start Mirror Function via the Main Menu When setting up your treadmill for the first time, perform the following steps (these are also shown on the screencasting setup page). -
Page 36: Start Mirror Function During Workout
The mirror function is still active in the background. As soon as you switch back to the menu of the mirror function, the screen of the mobile device is displayed again. To completely disconnect the mobile device, end the transmission on your mobile device. TX70... -
Page 37: Storage And Transport
STORAGE AND TRANSPORT General Instructions ⚠ WARNING The storage location should be chosen so that improper use by third parties or children can be prevented. If your equipment does not have transportation wheels, the equipment must be disassembled before transportation. ࣑... -
Page 38: Folding Up The Treadmill
To release the hydraulic brake lock, use your left foot to push the upper part of the hydraulic brake slightly forward until the lock releases and the treadmill can be pulled back. Keep holding the treadmill. The hydraulic brake lowers itself gently downwards. Once the treadmill has lowered 2/3, you can let go of the treadmill. TX70... -
Page 39: Troubleshooting, Care And Maintenance
TROUBLESHOOTING, CARE AND MAINTENANCE General Instructions ⚠ WARNING Do not make any improper changes to the equipment. CAUTION ⚠ Damaged or worn components may affect your safety and the life of the equipment. Therefore, immediately replace damaged or worn components. In such a case, contact the contract partner. -
Page 40: Error Codes And Troubleshooting
Turn off the device for 30 seconds and turn it on again. Check whether the incline function works. If the problem still occurs, check all cable connections made during installation and turn the device on again. In case the problem can not be fixed, please contact Sport-Tiedje for technical support. TX70... -
Page 41: Care And Maintenance
Care and Maintenance The most important maintenance measure is the care of the running mat. This includes adjustment, re tensioning and lubrication of the running mat. Damage resulting from insufficient or neglected care is not covered by the warranty. You should therefore carry out maintenance checks at regular intervals. -
Page 42: Re-Tensioning The Running Mat
Continue turning the belt by hand so that the entire surface between the endless belt and the running plate is lubricated. Wipe off the excess lubricating oil or silicone spray. NOTICE This maintenance must also be carried out after prolonged non-use of the equipment. TX70... -
Page 43: Maintenance And Inspection Calendar
Maintenance and Inspection Calendar To avoid damage from body sweat, the equipment must be cleaned with a damp towel (no solvents!) after each training session. The following routine tasks must be performed at the specified intervals: Part Weekly Monthly Quarterly Display console Tension of the running mat Lubrication of the running mat... -
Page 44: Recommended Accessories
Alternatively, you can also use the QR code provided. Of course, you can also contact our customer service: by telephone, e-mail, in one of our branches or via our social media channels. We will be happy to advise you! chest strap floor mat chest strap contact gel silicone spray towels TX70... -
Page 45: Ordering Spare Parts
It's located on a white sticker. The exact position of this sticker is shown in the following illustration. Enter the serial number in the appropriate field. Serial number: Brand / Category: cardiostrong / treadmill Model Name: treadmill TX70 Article Number: CST-TX70... -
Page 46: Parts List
Parts List Name Qty. Supplier No. (01) 8000004601 Main frame set-TX70 8000004733 Main frame-TX70 342008003001802 Desk isolator-18t 342008003001501 Desk isolator-15t 331808205602301 Wheel-Ma600 511408004000114 Pan head hexagon socket screw 541108016150114 Washer 531208000800114 Nylon nut 521204112700114 "Truss head cross self tapping screw "... - Page 47 Sleeve 331410002003301 Pulley 530010001000112 511212003200134 Hexagonal socket screw 541113026200114 Washer 531212001200114 Nylon nut (05) 8000004512 Supporting post set L-TX70 8000004513 Supporting post L-TX70 5000000631 "Pan head hexagon socket screw " 5000000565 Pan head hexagon socket screw 541110020150114 Washer (06) 8000004566...
- Page 48 3000001373 Handrail L-TX70 511408001500134 Pan head hexagon socket screw 542108016150114 Arc washer 541108016150114 Washer (09) 8000004580 Handrail set R-TX70 3000001374 Handrail R-TX70 4000001153 Cable-7P 511408001500134 Pan head hexagon socket screw 542108016150114 Arc washer 541108016150114 Washer (10) 8000004571 Console bracket set-TX70...
- Page 49 531408000800111 T-nut 511408003500114 Pan head hexagon socket screw 511208003500114 Hexagonal socket screw 541108014150114 Washer (14) 8000000625 Incline motor set 4000000172 Incline motor 511610004500114 Hexagonal cap screw 511610006200114 Hexagonal cap screw 541110020150114 Washer 531210001000114 Nylon nut (16) 8000004596 Motor set 4000001035 Drive motor 8000004600 Motor bracket...
- Page 50 Conducting Foil (21) 83T220600003 Roller Set 207117060006002 Front Roller Set 207217050006001 Rear Roller Set 512207906400115 Hexagonal socket screw 541108016150114 Washer (22) 2000003694 Running belt (23) 2000003596 Siderail (24) 8000004584 Motor cover set-TX70 3000001364 Motor cover-TX70 512506401300114 Flat head corss screw TX70...
- Page 51 591210150050011 Adhensive tape (25) 8000004589 End cap set-TX70 3000001381 End cap L-TX70 3000001382 End cap R-TX70 521204112700114 "Truss head cross self tapping screw" 591210150050011 Adhensive tape (29) 2000000952 Drive belt (30) 8000002876 Power cord...
-
Page 52: Exploded Drawing
Exploded Drawing TX70... -
Page 54: Warranty
WARRANTY Training equipment from cardiostrong® is subject to strict quality control. However, if a fitness equipment purchased from us does not work perfectly, we take it very seriously and ask you to contact our customer service as indicated. We are happy to help you by phone via our service hotline. - Page 55 Warranty Conditions For the warranty to be valid, the following steps must be taken: Please contact our customer service by email or phone. If the product under warranty has to be sent in for repair, the seller bears costs. After expiry of the warranty, the buyer bears the costs of transport and insurance.
-
Page 56: Contact
�� Mo - Fr 08:00 - 18:00 09:00 - 18:00 09:00 - 18:00 Please find a detailed overview including address and opening hours for all stores of the Sport-Tiedje Group in Germany and abroad on the following website: www.sport-tiedje.com/en/stores TX70... - Page 57 LIVE FITNESS WEBSHOP AND SOCIAL MEDIA Sport-Tiedje is Europe’s largest specialist store www.sport-tiedje.co.uk for home fitness equipment with currently over www.sport-tiedje.de/blog 70 stores and one of the world’s most renowned online mail order companies for fitness equipment. Private customers order via the 25 www.facebook.com/SportTiedje web shops in the respective national language or have their desired equpiment assembled on...
- Page 58 Nota’s Notes TX70...
- Page 60 Treadmill TX70...
Need help?
Do you have a question about the TX70 and is the answer not in the manual?
Questions and answers