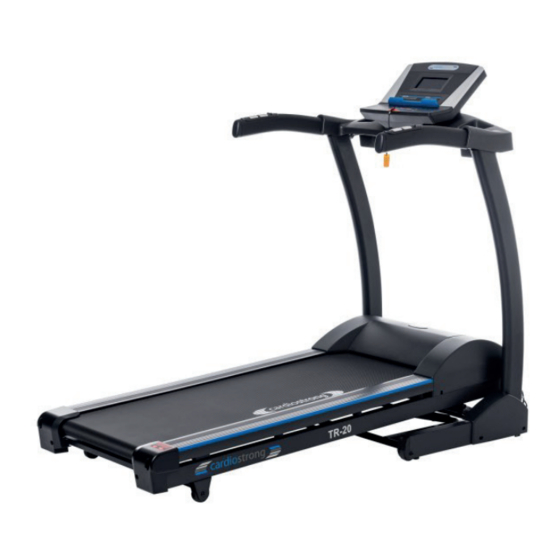
CARDIOSTRONG TR20 Assembly And Operating Instructions Manual
For more information, please visit cardiostrong.com, sport-tiedje.com
Hide thumbs
Also See for TR20:
- Assembly and operating instructions manual (60 pages) ,
- Assembly and operating instructions manual (52 pages)

Related Manuals for CARDIOSTRONG TR20


Summary of Contents for CARDIOSTRONG TR20
- Page 1 Assembly and Operating Instructions CSTTR20.03.03 Art. No. CST-TF70 Treadmill TR20...
- Page 2 TR20...
-
Page 3: Table Of Contents
Content GENERAL INFORMATION Technical Data Personal Safety Electrical Safety Set-Up Place ASSEMBLY General Instructions Scope of Delivery Assembly instructions OPERATING INSTRUCTIONS Console display Button functions Programs 3.3.1 Preset programs 3.3.2 MAN. - Manual program 3.3.3 User defined programs 3.3.4 Heart rate controlled training Equipment settings STORAGE AND TRANSPORT General Instructions... - Page 4 RECOMMENDED ACCESSORIES ORDERING SPARE PARTS Serial Number and Model Name Parts List Exploded Drawing WARRANTY CONTACT TR20...
- Page 5 With cardiostrong® fitness equipment, the focus is on what sport is all about: maximum performance! Therefore, the equipment is developed in close consultation with athletes and sports scientists.
- Page 6 This notice indicates potentially hazardous situations which, if not avoided, will result in death or serious injuries! NOTICE This notice indicates further useful information. Retain these instructions in a safe place for future reference, maintenance or when ordering replacement parts. TR20...
-
Page 7: General Information
GENERAL INFORMATION Technical Data LCD display of: time speed distance calories incline heart rate Motor output: 2 HP continuous output (DC motor) Speed range: 1 - 16 km/h (0.1 km/h steps) Speed quick keys: 6 Incline range: 1 - 10 % (in 0.5 % steps) Incline quick keys: 6 Total number of training programmes: Manual programmes:... -
Page 8: Personal Safety
Make sure that nobody is within the range of motion of the equipment during training so as not to endanger you or other persons. ड ATTENTION Do not insert any objects of any kind into the openings of the device. TR20... -
Page 9: Electrical Safety
Electrical Safety DANGER ⚠ In order to reduce the risk of an electric shock, always unplug the equipment from the mains socket immediately after your workout, before assembly or dismantling, and before maintenance or cleaning. Do not pull on the cable. ⚠... -
Page 10: Set-Up Place
10°C and 35°C). The equipment should not be used outdoors or in rooms with high humidity (over 70%) like swimming pools. A floor protective mat/equipment underlay can help to protect high-quality floor coverings (parquet, laminate, cork, carpets) from dents and sweat and can help to level out slight unevenness. TR20... -
Page 11: Assembly
ASSEMBLY General Instructions ⚠ DANGER Do not leave any tools, packaging materials such as foils or small parts lying around, as otherwise there is a danger of suffocation for children. Keep children away from the equipment during assembly. ⚠ WARNING The treadmill is equipped with high-pressure shock absorbers that can cause the treadmill to suddenly open if handled incorrectly. -
Page 12: Scope Of Delivery
In the event of complaints, the contractual partner must be contacted directly. ⚠ CAUTION If parts of the scope of delivery are missing or damaged, the assembly must not be carried out. (13) (12) (11) (10) TR20... - Page 13 Console Frame Bottle holder Rear transport wheel Handle Rear cover Hot key (incline) Safety key Console mast Pulse handle Motor cover Hot key (speed) Height compensation Tool and screw sets Included in the hardware bag: Preassembled screws: 13, 17 mm 6 mm 5 mm (Screws must be removed &...
-
Page 14: Assembly Instructions
Assembly of the console masts Fold up the console mast (1-1). Mount the two M10x60L screws with nuts (1-2). Mount the two M10x60L screws with nuts (1-3). Place the cover on and mount it with four M4x10L screws (1-4). 2-2a TR20... - Page 15 Step 2: Mounting the handrails Align the handrails. Mount the handrails with two M8x70L screws. 2-2a 2-2b...
- Page 16 Step 3: Connect the console Connect the plugs from the console with those from the console mast. Carefully place the excess cable in the crossbar of the console mast. TR20...
- Page 17 Step 4: Mounting the consoles Place the bottle holders on the main console (4-1). Place the entire cockpit on the designated shelf, softly press the covering on the sides so that it sits correctly (4-2). Take the screws 6x #8x0.625‘‘L and 4x M4x10L and screw them into the designated holes (4-3). Now thighten all the screws and bolts.
- Page 18 The device must not be connected to a multiple socket, otherwise it cannot be guaranteed that the device will be supplied with sufficient power. Technical errors can result. Plug the power plug into a wall outlet that complies with the instructions in the chapter on electrical safety. TR20...
-
Page 19: Operating Instructions
OPERATING INSTRUCTIONS NOTICE Familiarise yourself with all the functions and setting options of the device before starting training. Have the proper use of this product explained to you by a specialist. SAFETY KEY WARNING ⚠ For your safety, the device is equipped with an EMERGENCY STOP function. The equipment can only be operated if the safety key is correctly attached to the contact point of the cockpit. -
Page 20: Console Display
Heart rate SPEED Speed in km/h or mph DISTANCE Training distance in km or miles PROG. Indicates preset program on P01 to P17, U01 to U02, H01 toH02. Age for the HR programs WEIGHT Weight for exact calorie calculation TR20... -
Page 21: Button Functions
Button functions With MODE/ENTER, you can select any value that you need to set the program, e. g., program, level, time and your weight MODE (for more exact calculation of burnt calories). MODE serves to change between the training display. ·... -
Page 22: Programs
Please note that this training includes a change between a simple recovery and high intensity interval. Feel comfortable while training, because the next recovery interval always follows. This training improves your general aerobic endurance and simultaneously maximizes the development of your anaerobic fitness level. TR20... - Page 23 Advanced programs: P-04: Long interval (40-minute default) These exercises are perfect to maximize calorie consumption and improve anaerobic fitness. Just as with moderate intervals, you have recovery intervals after every high intensity - for constantly increasing training intensity. P-05: Negative interval 1 (30-minute default) This program offers all the advantages of training with an even speed and motivates you to achieve a gradually higher, consistent training intensity and allows you to then slowly decrease the training...
- Page 24 Improve your fitness and stimulate your body to burn more fat. It is ideal support to improve your endurance. Most exercises of this type focus on maintaining load during the entire training. Your goal is to train with a low, moderate to high, moderate intensity throughout the entire workout. TR20...
- Page 25 P-14: Long, slow distance (40-minute default) A great workout for everyone! Beginners have an easy start and should do this training at least once a week in order to maximize their cardiovascular endurance. It is also ideal for experienced users who use this training on days that follow hard, intense training.
-
Page 26: Man. - Manual Program
Set time. Set the time with the arrow buttons and confirm with ENTER. Enter weight. Enter the weight with the arrow buttons to better calculate the calories and confirm with ENTER. Start. Press START. Once the program has been set, go to U-1 or U-2 and press START. TR20... -
Page 27: Heart Rate Controlled Training
3.3.4 Heart rate controlled training ⚠ WARNING Your training equipment is not a medical device. The heart rate measurement of this equipment may be inaccurate. Various factors can affect the accuracy of the heart rate measurement. The heart rate measurement serves only as a training aid. In this program, you have to set a heart rate that the console will maintain during training. -
Page 28: Equipment Settings
1 indicates that the treadmill will start at the speed init at which the treadmill was set before the pause button was 0 or 1 pressed. Press SPEED up or down to change this. Press MODE/ ENTER to accept the entry and go to the next display. TR20... -
Page 29: Storage And Transport
STORAGE AND TRANSPORT General Instructions ड ATTENTION Make sure that the equipment is protected from moisture, dust and dirt in the selected storage location. The storage location should be dry and well ventilated and have a constant ambient temperature between 5°C and 45°C. WARNING ⚠... -
Page 30: Folding Mechanism
Make sure that the hydraulic brake is correctly locked and tilt the treadmill forward. Make sure that you are standing safely and make sure that the locking mechanism is secure pulling equipment backwards and it does not move. TR20... -
Page 31: Unfolding The Treadmill
4.3.2 Unfolding the Treadmill ड ATTENTION Make sure that nothing is standing next to or on top of the treadmill that can be spilled or thrown or that makes it impossible to unfold the treadmill. Stand behind the treadmill and push the device slightly forward towards the display. To release the hydraulic brake lock, use your left foot to push the upper part of the hydraulic brake slightly forward until the lock releases and the treadmill can be pulled back. -
Page 32: Troubleshooting, Care And Maintenance
WLAN, the room mowers, robot vacuum etc.) Unsuitable chest strap suitable chest strap (see No pulse display recommended accessories) Position of the chest strap incorrect Reposition chest strap and/or moisten electrodes Batteries empty Change batteries TR20... -
Page 33: Error Codes And Troubleshooting
Error codes and troubleshooting The electronic system from the treadmill does tests continuously. If there are deviations, an error code is displayed and the normal operation will be stopped for your safety. Please contact Sport-Tiedje for technical customer service. Error codes description: E1 - speed error E2 - error reading memory E6/E7 - incline error... - Page 34 Silicone symbol is illuminated on the console: Lubricate the machine with 100% pure silicone. Then press speed down and START at the same time until the symbol goes out. TR20...
-
Page 35: Care And Maintenance
Care and Maintenance The most important maintenance measure is the care of the running mat. This includes adjustment, re tensioning and lubrication of the running mat. Damage resulting from insufficient or neglected care is not covered by the warranty. You should therefore carry out maintenance checks at regular intervals. -
Page 36: Re-Tensioning The Running Mat
Continue turning the belt by hand so that the entire surface between the endless belt and the running plate is lubricated. Wipe off the excess lubricating oil or silicone spray. NOTICE This maintenance must also be carried out after prolonged non-use of the equipment. TR20... -
Page 37: Maintenance And Inspection Calendar
Maintenance and Inspection Calendar To avoid damage from body sweat, the equipment must be cleaned with a damp towel (no solvents!) after each training session. The following routine tasks must be performed at the specified intervals: Part Weekly Monthly Quarterly Half-yearly Yearly Display console... -
Page 38: Recommended Accessories
Alternatively, you can use the QR code provided. Of course, you can also contact our customer service: by telephone, e-mail, in one of our branches or via our social media channels. We will be happy to advise you! chest strap fl oor mat chest strap contact gel silicone spray towels TR20... -
Page 39: Ordering Spare Parts
It's located on a white sticker. The exact position of this sticker is shown in the following illustration. Enter the serial number in the appropriate field. Serial number: Brand / Category: cardiostrong / treadmill Model Name: TR20 Article Number: CST-TR20-3... -
Page 40: Parts List
Handlebar - L 2 8000003215 Handlebar - R 3 83T061105004 Incline quick buttons Set 4 83T061205004 Speed quick button Set 5 753049030405003 Foam 6 326213006001004 Handrail end cap (07) 8000003216 Console bracket set 1 8000003217 Console bracket 2 511408001500114 Screw TR20... - Page 41 (08) 8000003218 Folding Shock set 1 2000002731 Fold shock locking tube 2 210130007134502 Folding Shock 3 203TA0150030B04 Ball Screw 4 550140260410115 Twin Spring 5 511208007500114 Hexagonal socket screw 6 541108016150114 Washer 7 531208000800114 (09) 8000003219 Running Deck set 1 2000000985 Running Deck 2 511408002500114 Screw...
- Page 42 5 541108016150114 Washer 6 531208000800114 (15) 8000003220 Motor set 1 2000002733 Motor bracket 2 4000000304 Motor 2.0hp 3 205213828628501 Core 4 551320220450131 Tension Spring 5 511810007500111 Carriage screw 6 541210020200114 Rubber Washer 7 341001102500701 Washer 8 341001102501101 Washer TR20...
- Page 43 9 531210001000114 Nylon Nut 10 511208001500115 Hexagonal socket screw 11 544182016200115 Spring Washer 12 541108016150114 Washer 13 541110026200114 Washer 14 512607913000111 Screw 15 532207900800111 Nylon Nut (16) 80TA11101601000 Sensor Set 1 592400000000009 Speed sensor bracket 2 405503470210001 SENSOR 3 521204101000114 Socket (17) 8000002873...
- Page 44 Side Cover Set 1 311TB3200111003 Side Cover-Left 2 311TB3200101003 Side Cover-Right 3 511504001000114 Screw (29) 8000001068 Bottle holder set 1 3000000373 Bottle holder-Left 2 3000000374 Bottle holder-Right 3 521204115900114 Screw (31) 8000002876 Power Cord Buckle (32) 2000000952 Drive belt TR20...
-
Page 45: Exploded Drawing
Exploded Drawing... - Page 46 TR20...
-
Page 47: Warranty
WARRANTY Training equipment from cardiostrong® is subject to strict quality control. However, if a fitness equipment purchased from us does not work perfectly, we take it very seriously and ask you to contact our customer service as indicated. We are happy to help you by phone via our service hotline. - Page 48 For that reason, we also want to resolve your queries quickly and in a straightforward manner. Thus, please always keep your customer number and the serial number of the faulty equipment handy. TR20...
-
Page 49: Contact
CONTACT TECHNICAL SUPPORT TECHNICAL SUPPORT & SERVICE TECHNICAL SUPPORT & SERVICE �� �� �� +49 4621 4210-900 80 90 16 50 +33 (0) 172 770033 +49 4621 4210-945 +49 4621 4210-933 �� +49 4621 4210-698 �� �� info@fitshop.dk service-france@fitshop.fr �� technik@sport-tiedje.de ��... - Page 50 The company employs numerous sports scientists, fitness trainers and competitive athletes. Visit us also on our social media platforms or our blog! TR20...
- Page 52 Treadmill TR20...
Need help?
Do you have a question about the TR20 and is the answer not in the manual?
Questions and answers