Table of Contents
Advertisement
Quick Links
Advertisement
Table of Contents

Related Manuals for Allen-Bradley Ultra1500


Summary of Contents for Allen-Bradley Ultra1500
- Page 1 Simple Motion Control Connected Components Building Block Quick Start...
- Page 2 Labels may be on or inside the equipment, for example, a drive or motor, to alert people that surfaces may reach dangerous temperatures. Rockwell Automation, Allen-Bradley, MicroLogix, PanelView, RSLogix 500, Ultra1500, and TechConnect are either trademarks or registered trademarks of Rockwell Automation, Inc. Trademarks not belonging to Rockwell Automation are property of their respective companies.
- Page 3 Where to Start Follow the path below to complete your Simple Motion Control application. Connected Components Building Blocks, publication CC-QS001 Chapter 1 Ultra1500 Drive Integration Chapter 2 System Validation and Application Tips Chapter 3 Control Program Integration 3Publication CC-QS008B-EN-P - December 2009...
- Page 4 Where to Start Notes: Publication CC-QS008B-EN-P - December 2009...
-
Page 5: Table Of Contents
Follow These Steps ........12 Connect to the Ultra1500 Drive via Ultraware ....12 Reset the Drive to Factory Settings . - Page 6 Table of Contents Notes: Publication CC-QS008B-EN-P - December 2009...
-
Page 7: Preface
The Simple Motion Control Connected Component Building IMPORTANT Block uses predefined configurations in the Ultra1500 drive (such as gear ratio and output ratio) and the MicroLogix 1400 controller (such as pulse train output, high speed counters, and input filters) to create a functional connected component solution. -
Page 8: Conventions Used In This Manual
Preface Conventions Used in This This manual uses the following conventions Manual Convention Meaning Example Check or uncheck To activate or deactivate a checkbox. Check Disable Keying. Click the left mouse button once while the cursor is positioned Click Click Browse. on object or selection. -
Page 9: Additional Resources
PanelView Component Operator Terminals User Provides information on using the PanelView Component HMI terminals. Manual, publication 2711C-UM001 Ultra1500 Digital Servo Amplifiers User Manual, Provides information on installing the Ultra1500 drive, including wiring and publication 2092-UM001 configuration options. Ultraware Software User Manual, publication... - Page 10 Preface Notes: Publication CC-QS008B-EN-P - December 2009...
-
Page 11: Introduction
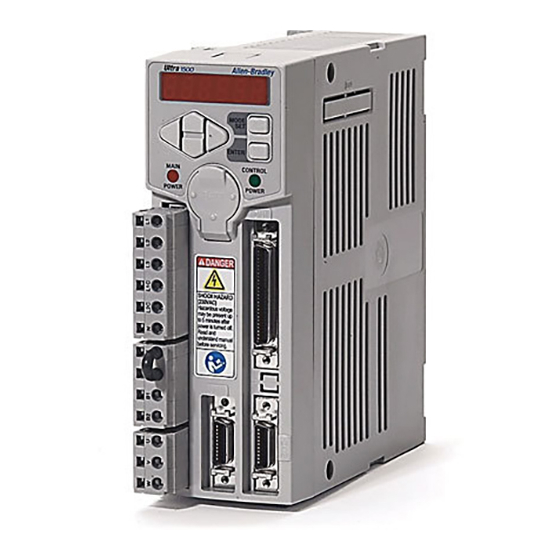
Chapter Ultra1500 Drive Integration Introduction In this chapter, you configure the Ultra1500 drive parameters as necessary for the MicroLogix 1400 controller to communicate with the drive. (Configuration is done by using your personal computer connected to the drive.) The Ultra1500 drive communicates with the MicroLogix 1400 controller by using discrete I/O connections, including Pulse Train Output step/direction signals. -
Page 12: Follow These Steps
Windows-based application that allows drive configuration to be done offline and saved to disk. By using the Ultraware software, your personal computer can be connected to the Ultra1500 drives with the Ultra1500 serial interface cable (catalog number 2090-DAPC-D09xx). - Page 13 Consult the Ultra1500 drive user manual for further information. Your Ultra1500 drive must be listed in the On-Line Drives section, as shown above. If it is not listed in the On-Line Drives section, then your Ultra1500 drive is still offline.
-
Page 14: Reset The Drive To Factory Settings
Ultra1500 Drive Integration Reset the Drive to Factory Settings To be sure that the Ultra1500 drive is at a known starting point, you must reset the drive to its factory settings. To reset the Ultra1500 drive to factory settings, perform the following steps. -
Page 15: Configure The Drive Operation Mode Parameter
Configure the Drive Operation Mode Parameter Ultra1500 drives can be configured to run in a variety of operational modes. This Building Block requires the Ultra1500 drives to be configured in Follower mode. In Follower mode, a position command is provided by external step and direction inputs. -
Page 16: Configure The Drive Encoder Output Parameters
In your case, this means the number of PTO Counts to Encoder Counts. The MicroLogix 1400 controller application code is based on a 1:109 gear ratio and must be set accordingly, otherwise the Ultra1500 drive may misinterpret the PTO counts output from the MicroLogix 1400 controller, resulting in unexpected motion. -
Page 17: Configure The Drive Digital Input Parameters
The MicroLogix 1400 controller application code uses digital input 1 to enable the Ultra1500 drive and digital input 2 to clear the Ultra1500 drive’s faults. If either digital input is configured incorrectly, you will not be able to employ this functionality. -
Page 18: Save The Drive Parameters
Ultra1500 drive is ready. If this digital output is configured incorrectly, the MicroLogix 1400 controller will always consider the Ultra1500 drive to be not ready and will not allow enable, move, jog, and user program functions to be executed on the Ultra1500 drive. -
Page 19: Introduction
Introduction In this chapter, you validate that communication is occurring as intended between the MicroLogix 1400 controller and the Ultra1500 drives, as well as between the MicroLogix 1400 controller and the PanelView terminal. The operation of the sample screens for Simple Motion Control Program mode and Operator mode is described as well. -
Page 20: Follow These Steps
RSLogix Control and PanelView Component HMI Programs for your particular application. Additionally, Chapter 1 of this document should be completed for each of your Ultra1500 drives. The RSLogix Control and PanelView Component HMI Programs must be the same version (1-axis, 2-axis, or IMPORTANT 3-axis) for the Simple Motion Control Building Block to function correctly. - Page 21 The Simple Motion Control ladder logic should now be constantly communicating with the drive via discrete I/O. 2. Make sure that the Ultra1500 drive is ready by verifying that the Ultra1500 drive operator interface shows ‘rdY’ in the 3 least significant characters.
- Page 22 Axis, not necessarily the discrete I/O connections. If the Axis Status is not correctly representing the Ultra1500 drive status (for example, Axis is Not Ready or Axis is Faulted), check the Ultra1500 drive I/O configuration in Ultraware (see...
-
Page 23: Configure Pvc Terminal-To-Controller Communication
Ultra1500 drive appropriately via discrete I/O. Since the controller program is continually updating status data from all of the Ultra1500 drives into its data table via discrete I/O, the PVc application is monitoring the latest drive status data. -
Page 24: Understanding The Network Overview Screen Functionality
Understanding the Network Overview Screen Functionality Since you have already verified that communication between the MicroLogix 1400 controller and the Ultra1500 drive is working, each axis in your application (1-axis, 2-axis, or 3-axis depending on your configuration) should display as being ‘Disabled’ on the Network Overview screen once the PVc application is running. - Page 25 System Validation and Application Tips Chapter 2 If, instead, you get a yellow banner message like this, then the PVc application is still not able to communicate with the MicroLogix 1400 controller over the Ethernet network at the configured IP address. If you get the yellow banner message, use RSLogix programming software and your web browser to verify that the MicroLogix 1400 controller’s IP address that is configured for channel 1 matches the one in the PVc application.
-
Page 26: Test The Simple Motion Control Functionality
2. Notice that the button in the lower right corner displays ‘Program’. This indicates that the Simple Motion Control CCBB is currently in Program mode. While the Simple Motion Control screen is in Program mode, the commands sent to the Ultra1500 drive by IMPORTANT the PLC are done so through the Axis User Program via broadcast or program commands. - Page 27 Relative Speed Feedback The Relative Speed Feedback displays a calculated speed value that is based on the delta Relative Position Feedback over time. This is a derived relative speed and does not represent the actual Ultra1500 drive speed feedback. The Relative Position and Relative Speed Feedbacks are not used to close the Ultra1500 drive position or IMPORTANT velocity loops and should not be used to trim speed or fine-tune position.
-
Page 28: Navigate The Operator Mode Screen
) disappears, because the screen must be changed back to Program mode before leaving the Simple Motion Control screen. While the Simple Motion Control screen is in Operator mode, the commands sent to the Ultra1500 drive by IMPORTANT the PLC are done so through this screen. You can enable and disable the drive as well as execute a jog at a custom speed and direction. -
Page 29: Test The Operator Mode Functionality
Follow this procedure to test your axis by using the Simple Motion Control Operator mode functionality. 1. Verify that the motor is disconnected from the load (open shaft) and is safe to jog. 2. Enable the Ultra1500 drive by pressing Enable. Publication CC-QS008B-EN-P - December 2009... - Page 30 Chapter 2 System Validation and Application Tips The Ultra1500 drive should now be enabled and maintaining position. The Ready and Enabled indicators should be green and the Jog, Forward, and Reverse buttons should now be active. The three least significant characters of the Ultra1500 drive operator interface should show ‘run’.
-
Page 31: Test The Program Mode Functionality
E.030 explains that your motor feedback cable is not connected properly, or in this case, not at all. This screen provides the same description for that particular fault as found in the Ultra1500 drive user manual. 11. Press in the upper right corner to go back to the Operator mode screen. - Page 32 4. Verify the Simple Motion Control Program mode operation by watching the MicroLogix 1400 Axis User Program send the axis program commands to the Ultra1500 drive. The drive should enable and disable appropriately and the motor should move and jog as expected.
- Page 33 You have now completed testing all the Simple Motion Control Program mode functionality. Be sure to complete the Test the Operator Mode Functionality Test the Program Mode Functionality IMPORTANT sections for all Ultra1500 drives in your system. Additional Resources Refer to page 9 for a listing of product and information resources.
- Page 34 Chapter 2 System Validation and Application Tips Notes: Publication CC-QS008B-EN-P - December 2009...
-
Page 35: Introduction
• Verify that the MicroLogix 1400 controller, Ultra1500 drive, and PanelView terminal have power applied to them. • Verify that the MicroLogix 1400 controller, Ultra1500 drive, and PanelView terminal are all properly configured and communicating correctly as explained in Chapter 2 of this document. -
Page 36: What You Need
Operation, page 38 Review the Program Mode Commands, page 39 Customize the Axis User Program Ladder Logic, page 41 Customize the Machine Control Ladder Logic, page 42 Alter the Ultra1500 Drive Follower Gear Ratio, page 44 Publication CC-QS008B-EN-P - December 2009... -
Page 37: Review The Ladder Logic Structure
STI Control) that are specific to CCBB functionality as well as an additional four ladder routines (Axis Calculation, Axis Command, Axis Monitor, and Axis User Program) for each Ultra1500 drive axis. These routines are briefly described below. Consult the ladder logic comments for further information. -
Page 38: Review The Modes Of Operation
Chapter 3 Control Program Integration Review the Modes of Operation As explained in the previous chapter, the Simple Motion Control CCBB has two modes of operation, Program mode and Operator mode. Each mode has its own Status and Command PLC tags and ladder logic, and HMI interlocking keeps each mode mutually exclusive. -
Page 39: Review The Program Mode Commands
Control Program Integration Chapter 3 Review the Program Mode Commands There are two types of Simple Motion Control Program mode commands: Axis commands and Broadcast commands. Axis commands are executed on a particular axis and each axis has its own control tags, status tags, routine, and so forth. - Page 40 One-time command that starts the Axis User Program if it is not already in process. • AX#_CMD_PROG_START • BDCST_CMD_PROG_START Fault Reset Command One-time command that turns ON the Ultra1500 drive's fault reset I/O. This resets the Axis. • AX#_CMD_PROG_CLR_FLT • BDCST_CMD_PR_CLR_FLT Forward Command One-time command that turns OFF the Ultra1500 drive's directional I/O.
-
Page 41: Customize The Axis User Program Ladder Logic
Chapter 3 Table 0.1 Commands Command Description Reverse Command One-time command that turns ON the Ultra1500 drive's directional I/O. This places the Ultra1500 drive in a reverse direction for future move and jog commands. • AX#_CMD_PROG_REV • BDCST_CMD_PROG_REV Trapezoidal Profile Command One-time command that sets the Axis Move profile to trapezoidal for future move commands. -
Page 42: Customize The Machine Control Ladder Logic
Chapter 3 Control Program Integration The Axis User Program can be structured as desired, but for more complicated motion control, using a state machine (sequencer) is strongly recommended. In general, state machines provide an easier approach to motion control programming and troubleshooting because of their step-by-step nature. If you want to use a state machine, use the AX#_CMD_PROG_SEQ as your state machine value in the Axis IMPORTANT User Program. - Page 43 Control Program Integration Chapter 3 Although the Machine Control routine can be structured as desired, it contains sample ladder logic for Machine Clear Faults, Machine Start and Machine Stop operations. Table 0.2 Ladder Logic Examples Example Description Machine Clear Faults Example The Machine Clear Fault example in the Machine Control routine uses the Broadcast command functionality to clear all of the axis faults at the same time.
-
Page 44: Alter The Ultra1500 Drive Follower Gear Ratio
Gear Ratio parameter and thus some very small error can be expected with each PTO based move. If your application requires a higher degree of precision, a different Ultra1500 drive Follower Gear Ratio can be chosen, but there are application tradeoffs that are explained below. - Page 45 Control Program Integration Chapter 3 PTO counts to motor encoder counts. The error is very small (a few encoder counts per move) and is repeatable, but this may not be acceptable for all applications. For the Simple Motion Control CCBB, the Encoder Resolution is set to 131072 [counts/rev] for TL motors and the Maximum PTO Frequency is set to 100kHz for the MicroLogix 1400.
- Page 46 6. If the actual move distance and move speed were not as expected, return to step 1. Note that this process affects only the particular axis whose AX#_CALC routine and Ultra1500 drive IMPORTANT Follower Gear Ratio were changed. If more than one axis needs to be altered, perform this process for each axis.
- Page 48 Rockwell Automation Rockwell Automation provides technical information on the Web to assist you in using its products. At http://support.rockwellautomation.com, you can find technical Support manuals, a knowledge base of FAQs, technical and application notes, sample code and links to software service packs, and a MySupport feature that you can customize to make the best use of these tools.
Need help?
Do you have a question about the Ultra1500 and is the answer not in the manual?
Questions and answers