Table of Contents
Advertisement
ENGLISH
1 (97)
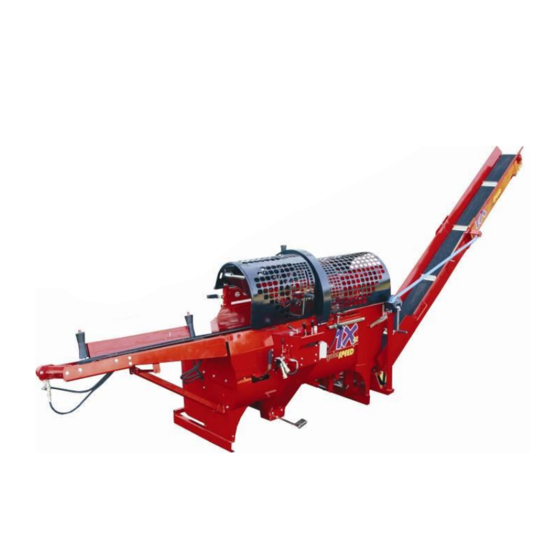
Hakki Pilke 42
EASY
LOG SPLITTER
- Instructions for assembly, operation,
and maintenance
- EU Declaration of Conformity
- Safety instructions
- List of spare parts
- Terms of guarantee
Valimotie 1, FI-85800 Haapajärvi, Finland
tel.+358 8 772 7300, fax +358 8 772 7320
info@maaselankone.fi
www.maaselankone.fi
The operator must read and understand
these instructions before operating the
log splitter!
Hakki Pilke 42 Easy
Original
Version 5
Advertisement
Table of Contents

Related Manuals for Hakki Pilke Easy 42 Series


Summary of Contents for Hakki Pilke Easy 42 Series
- Page 1 - Terms of guarantee Valimotie 1, FI-85800 Haapajärvi, Finland tel.+358 8 772 7300, fax +358 8 772 7320 info@maaselankone.fi www.maaselankone.fi The operator must read and understand these instructions before operating the log splitter! Hakki Pilke 42 Easy Original Version 5...
-
Page 2: Table Of Contents
3.3 Power cord of the electronic measuring device (optional)............10 Electrically-powered ........................10 4 STARTING THE Hakki Pilke 42 Hydro LOG SPLITTER ........11 4.1 Selecting the power source for a tractor- and electrically-powered (combi) log splitter ..11 Power source: electricity ........................ 11 4.1 Start and Stop buttons ...................... - Page 3 Assembly of the cutting in 42 hydro ................77 LIST OF SPARE PARTS .................... 86 Manufacturer: Maaselän Kone Oy ................94 TECHNICAL SPECIFICATIONS ................95 TERMS OF GUARANTEE ......Virhe. Kirjanmerkkiä ei ole määritetty. Hakki Pilke 42 Easy Original Version 4...
-
Page 4: General Safety Instructions
1 GENERAL SAFETY INSTRUCTIONS To avoid injury to anyone nearby, always be extra cautious and aware when operating the Hakki Pilke 42 hydro log splitter or when connecting it to a power source, such as a tractor. Do not operate the splitter while under the influence of alcohol or drugs, or if you are exhausted, drowsy, or unable to control your bodily movements. -
Page 5: Warning Symbols
SHUT DOWN BEFORE BEWARE OF MOVING PARTS RISK OF ENTANGLEMENT WITH MAINTENANCE THE CARDAN SHAFT DO NOT GO UNDER THE BEWARE OF THE SPLITTING RISK OF CRUSHING CONVEYOR BLADE MAX CONVEYOR TILT ANGLE Hakki Pilke 42 Easy Original Version 4... - Page 6 READ THE MANUAL BEFORE USE USE PROTECTIVE EQUIPMENT USE PROTECTIVE EQUIPMENT Scale MAX RPM ALWAYS GRAB A LOG BY THE SIDES HYDRAULIC OIL LEFT ROTATION CHAIN OIL LIFTING POINT FOR FORKLIFT EMERGENCY STOP Hakki Pilke 42 Easy Original Version 4...
-
Page 7: Set-Up Preparations
Figure 211 When viewed from the back, the log splitter must stand completely straight! Figure 212 Hakki Pilke 42 Easy Original Version 4... -
Page 8: Dispose Of The Packaging In An Environmentally Responsible Manner
2.2 Dispose of the packaging in an environmentally responsible manner! Figure 221 1. Mount the sawdust conveyor on the log splitter. Figure 222 2. Mount the output conveyor crank. Note the screw thread. Figure 223 3. Remove the support. Hakki Pilke 42 Easy Original Version 4... -
Page 9: Test Run Preparations And Test Run
Check that the shaft is properly locked into the splined shaft of the angle transmission! Attach the chain that prevents the guard from rotating to the base of the angle transmission (Figure 310). Hakki Pilke 42 Easy Original Version 4... -
Page 10: Push Bar And Draw Bars
Electrically- Tractor-powered Check that the plug powered clean before connecting it to the tractor socket. Hakki Pilke 42 Easy Original Version 4... -
Page 11: Starting The Hakki Pilke 42 Hydro Log Splitter
11 (97) 4 STARTING THE Hakki Pilke 42 Hydro LOG SPLITTER Never start the log splitter before all the necessary preparations have been carried out. The operator must read and understand all the instructions, maintenance, and safety insructions in this manual before operating the log splitter. -
Page 12: Start And Stop Buttons
Use the red button (Figure 420) to stop the log splitter. Power source: tractor A tractor-powered log splitter is started and stopped from the tractor cabin. For more information, refer to the operator's manual of your tractor. Hakki Pilke 42 Easy Original Version 4... -
Page 13: Log Splitter Controls
5.A External hydraulics, connectors a1, a2. Maximum pressure: 180 bar. Operating lever J: operating positions j1-j2 5.B Output conveyor and splitting blade control. Four operating positions: b1 and b2: turn the output conveyor; b4 and b3: lift and lower the splitting blade. Hakki Pilke 42 Easy Original Version 4... - Page 14 5.H Start and stop the output conveyor rotation. h1: start the rotation. h2: stop the rotation. 5.I Adjust the output conveyor speed. Turn the button to the right (+) to increase the speed and to the left (-) to decrease the speed. Hakki Pilke 42 Easy Original Version 4...
-
Page 15: Input Conveyor
6.1.1. Turn the winch crank (B) into the direction of the arrow enough to release the winch belt (A) some 10 cm (3.9 in.). NOTE! Check that there are no people or animals under the conveyor! Hakki Pilke 42 Easy Original Version 4... - Page 16 The input conveyor must be free of people and animals when it is being lowered. 6.1.3 Lower the input conveyor slowly with the winch while directing the support into the hole in the frame. Figure 613 Hakki Pilke 42 Easy Original Version 4...
- Page 17 6.1.5 To lift the input conveyor to the transport and storage position, perform the lowering steps in reverse order. Note! Make sure that the table and support are locked into place in the transport and storage position. Hakki Pilke 42 Easy Original Version 4...
-
Page 18: Output Conveyor
Figure 711 7.1-1.Turn the winch crank (B) into the direction of the arrow enough to release the winch belt (A) some 10 cm (3.9 in.). Hakki Pilke 42 Easy Original Version 4... - Page 19 Hold the locking handle d up and, while holding handle C, lower the conveyor until the winch belt tightens. Once the belt is tight, release your grip of handle d. Hakki Pilke 42 Easy Original Version 4...
- Page 20 7.1-4 Check that the locking latch of the output conveyor’s extension is not in the wrong position. If the latch is visible, use the winch to lift the output conveyor slightly and turn the latch beneath the conveyor. See Figure 714. Hakki Pilke 42 Easy Original Version 4...
- Page 21 7.1-6 The lever that prevents the output conveyor belt from folding. Turn the lever to the side of the conveyor (the right side when viewed from the winch). If you fail to turn the lever, it may damage the output conveyor belt. Hakki Pilke 42 Easy Original Version 4...
-
Page 22: Lifting The Output Conveyor Into The Transport And Storage Position
To lift the output conveyor into the transport and storage position, perform the lowering steps in reverse order. Remember the following: Figure 721 7.2-1 Raise the splitting guard before you lift the folded output conveyor into the transport and storage position. Hakki Pilke 42 Easy Original Version 4... - Page 23 7.1-6. When lifting, you must first turn this lever against the output conveyor (Figure 722). This prevents the belt from rolling down and being damaged. Figure 723 7.2-3 After folding and lifting the conveyor, check that the locking latch locks it into vertical position. Hakki Pilke 42 Easy Original Version 4...
-
Page 24: Splitting And Cutting Guards
Never drop the guard down, but lower it steadily and slowly. The cutting guard cannot be lowered directly from the lifting handle. You must support the cutting guard from the lifting handle while lifting the locking lever. Hakki Pilke 42 Easy Original Version 4... -
Page 25: Operating Position
Figure 820 shows the lifting handles of the cutting and splitting guards, as well as the handle of the log press roll head from which the log press can be lifted, if necessary. Hakki Pilke 42 Easy Original Version 4... -
Page 26: Cutting Mode Measuring Device And Adjustment
Move the rear edge of the device to the desired measurement. Lock the device into place with the Reflecting locking bolt. sticker and tracing ray transmitter Figure 922 Figure 923 Hakki Pilke 42 Easy Original Version 4... -
Page 27: Cutting Mode
You can also start splitting mode with the foot switch (5E, p.12). Use the splitting mode control lever to reset the splitting mode or to stop the resetting. (5D, p. 12). Figure 111 Hakki Pilke 42 Easy Original Version 4... -
Page 28: Manual - Set Off With The Foot Switch
Figure 112) Splitting mode control lever positions: Normal position (middle) Stop the resetting (left). Reset splitting (right) Figure 112 Hakki Pilke 42 Easy Original Version 4... -
Page 29: Hydro
The splitting system is equipped with an automatic speed valve. It decreases the selected thrust, but shortens the total splitting time by about a third. As resistance increases, normal thrust is turned on automatically. Hakki Pilke 42 Easy Original Version 4... -
Page 30: Splitting Blade
To replace the blade, perform the steps in reverse order. Always hold the blade from the back, and never the sharpened side! THE BLADE WEIGHS about 15 KG (4-part) Figure 13.2b Figure 13.2a Hakki Pilke 42 Easy Original Version 4... -
Page 31: Test Run
14.2-m. Test the conveyor start and stop levers (see h1-h2). If you discover any faults, even minor ones, during the test run, you must determine the cause and fix the problem before using the log splitter. Hakki Pilke 42 Easy Original Version 4... -
Page 32: Safe Operation Of The Output Conveyor
- the conveyor is in the transport position if it is being moved more than 5 metres (16.4 in.). - NOTE! there is enough space above when the log splitter is moved so that the conveyor fully upright. Hakki Pilke 42 Easy Original Version 4... -
Page 33: Processing Firewood
Note! Perform the test at slow speeds not exceeding 300 RPM. 15.1-B2. if the log splitter's hydraulic oil overheats for some reason, the machine must be stopped until the oil has cooled down. Hakki Pilke 42 Easy Original Version 4... -
Page 34: Processing Logs
WARNING! Before cutting the log, check that its shape or branches are suitable for cutting and that no danger or damage will ensue. NOTE!The saw must be on (the blade must rotate) before it is pressed against the log. Hakki Pilke 42 Easy Original Version 4... -
Page 35: Normal Splitting
16.1-2. Correct the position of the cut log so that it can be split. 16.1-3. Close the splitter guard. 16.1-4. Restart splitting mode using the foot switch. After splitting, feed more logs into the cutter and continue processing. Hakki Pilke 42 Easy Original Version 4... -
Page 36: Removing Logs From The Cutting Blade
REASON: The smaller log that is placed in the splitting groove may suddenly get plunged into the guards and cause damage or personal injury. A slanted or sideways stuck log must be removed using a blunt instrument. Hakki Pilke 42 Easy Original Version 4... -
Page 37: Cutting The Last Piece Of A Log
Lift the splitting groove guard up. b. Place the log you want to re-split in the splitting groove. c. Close the splitting groove guard. d. Start the splitting mode with the foot switch. Hakki Pilke 42 Easy Original Version 4... -
Page 38: Finishing Work
- Store the log splitter in the transport position on level ground so that the machine cannot topple over. Never store the log splitter on slanting ground! - Store the log splitter in a location where nothing can crash into it by accident. Hakki Pilke 42 Easy Original Version 4... -
Page 39: Log Splitter Maintenance
Fax +358 8 772 7320 email: info@maaselankone.fi www.maaselankone.fi WARNING! DO NOT USE A DEFECTIVE LOG SPLITTER! Remember lubrication! The maintenance of the lubrication nipples and other targets of the 42 log splitter that need to be greased! Hakki Pilke 42 Easy Original Version 4... -
Page 40: Maintenance Of The Optical Log Measuring Device
Place the blade in a location where you can safely sharpen it. If you start the sharpening with a grinder, shield your eyes and carry out the sharpening so that the blade does not overheat. Finish the sharpening with a file and make the bevels according to the figure. Hakki Pilke 42 Easy Original Version 4... -
Page 41: Maintenance Of The Input Conveyor
Figure 204b Hakki Pilke 42 Easy Original Version 4... -
Page 42: Adjusting The Tightness Of The Output Conveyor's Belt And Other Maintenance
Also remember other parts that need lubrication, for example the lubrication nipple of the shaft of the output conveyor's lateral turn (Figure 205b)! Hakki Pilke 42 Easy Original Version 4... -
Page 43: Tightening And Changing The Flange, Blade Chain
(Figure 2016c). Figure 2061c Hakki Pilke 42 Easy Original Version 4... -
Page 44: The Correct Tightness Of The Chain
4. Tighten the chain sufficiently from the tightening bolt (Figure Figure 2063 2061b) 5. Tighten the fastening bolts of the flange sufficiently while holding the flange up. Hakki Pilke 42 Easy Original Version 4... -
Page 45: Sharpening The Blade Chain
Remove twists from Clean the flange groove Keep the chain at the the flange with a flat and the lubricating oil correct operation tightness so that the file channel flange does not wear Hakki Pilke 42 Easy Original Version 4... -
Page 46: Lubrication
Change the hydraulic oil filter once every working season Order numbers: Other lubrication targets are marked with little, yellow stickers. 97348 Filter insert Add vaseline to the marked spots 97349 Complete filter every 100 hours. Hakki Pilke 42 Easy Original Version 4... -
Page 47: Lubricating The Blade Chain
EP 80 / 90 The oil check eyelet is behind the angle transmission. There is enough oil in the angle removing oil transmission if oil spills out from the eyelet. Figure 20112 Hakki Pilke 42 Easy Original Version 4... -
Page 48: Operation Of The Cutting Mechanism
2. Drive head up, the trigger bar (Figure 2012b) lifts the starting lever (1C) and the starting lever disc (1A) turns the splitting valve push rod (1B) into the splitting position (Figure 2012d). Hakki Pilke 42 Easy Original Version 4... - Page 49 (Figure 2012h), which has moved the push rod to the reversing position (Figure 2012i). Return shaft Left arrow: slide return Right arrow: push rod to the middle position Figure 2012h Figure 2012g Hakki Pilke 42 Easy Original Version 4...
- Page 50 2d. The slide has returned and the slide rod (Figure 2012j) has moved the push rod back to the initial position. Figure 2012j the slide in its initial position Figure 2012k The initial position of the push rod Hakki Pilke 42 Easy Original Version 4...
-
Page 51: The Safety Mechanism Of The Log Splitter
Figures 1-3 the pushing rod of the splitting valve is security-locked, and in picture 4 it is in operation, because rod B has moved bar X to the right and shifted the safety mechanism into the operation position. Hakki Pilke 42 Easy Original Version 4... -
Page 52: Increasing The Force Of The Output Conveyor
Test. If the force is still not enough, add another ¼ of a turn. If you want to decrease force, twist the shaft counterclockwise (upwards). Tighten the locking screw. Figures 20151 Hakki Pilke 42 Easy Original Version 4... -
Page 53: Increasing The Force Of The Input Conveyor
Increasing the force of the input conveyor is carried out in the same way as that of the output conveyor, see Chapter 20.15. The location of the adjustment valve is behind the machine, to the left of the valve mechanism (Figure 20161). Figure 20161 Hakki Pilke 42 Easy Original Version 4... -
Page 54: Adjusting The Length Of The Splitting Motion
Shifting to the left: Shifting to the left: Returning the bar is moved to a later stage Returning halts sooner Shifting to the right: Shifting to the right: Returning the bar is advanced Returning halts later Hakki Pilke 42 Easy Original Version 4... -
Page 55: Maintenance Table
Lubrication Lubrication oil V-belts Check and B42.5 Angle transmission replace 2061 necessary 0,404” 71/1,6 Cutting blade Sharpen as Control necessary Machine Clean Wash In conjunction with storage Electric motor Clean Electrical Clean equipment Hakki Pilke 42 Easy Original Version 4... - Page 56 56 (97) Hakki Pilke 42 Easy Original Version 4...
- Page 57 57 (97) Hakki Pilke 42 Easy Original Version 4...
- Page 58 58 (97) Hakki Pilke 42 Easy Original Version 4...
-
Page 59: Power Transmission (Combi) Of 42 Hydro
59 (97) Power transmission (combi) of 42 hydro Hakki Pilke 42 Easy Original Version 5... -
Page 60: Assembly Of The Angle Transmission And Hydraulic Pump (Combi)
60 (97) Assembly of the angle transmission and hydraulic pump (Combi) Hakki Pilke 42 Easy Original Version 5... -
Page 61: Power Transmission Of A Tractor-Powered 42 Hydro Log Splitter
61 (97) Power transmission of a tractor-powered 42 hydro log splitter Hakki Pilke 42 Easy Original Version 5... -
Page 62: Bearing Housing And Extension Shaft Of The Electric Motor (Combi)
62 (97) Bearing housing and extension shaft of the electric motor (combi) Hakki Pilke 42 Easy Original Version 5... -
Page 63: Assembly Of The Electric Motor (Combi)
63 (97) Assembly of the electric motor (combi) Hakki Pilke 42 Easy Original Version 5... - Page 64 64 (97) Hakki Pilke 42 Easy Original Version 5...
- Page 65 65 (97) Hakki Pilke 42 Easy Original Version 5...
-
Page 66: Wood Length Limiter, Mechanical
66 (97) Wood length limiter, mechanical Hakki Pilke 42 Easy Original Version 5... -
Page 67: Power Transmission Of An Electrically-Powered 42 Hydro Log Splitter
67 (97) Power transmission of an electrically-powered 42 hydro log splitter Hakki Pilke 42 Easy Original Version 5... - Page 68 68 (97) Hakki Pilke 42 Easy Original Version 5...
- Page 69 69 (97) Hakki Pilke 42 Easy Original Version 5...
- Page 70 70 (97) Hakki Pilke 42 Easy Original Version 5...
- Page 71 71 (97) Hakki Pilke 42 Easy Original Version 5...
- Page 72 72 (97) Hakki Pilke 42 Easy Original Version 5...
- Page 73 73 (97) Hakki Pilke 42 Easy Original Version 5...
- Page 74 74 (97) Hakki Pilke 42 Easy Original Version 5...
- Page 75 75 (97) Hakki Pilke 42 Easy Original Version 5...
-
Page 76: Saw Unit Of 42 Hydro
76 (97) Saw unit of 42 hydro Hakki Pilke 42 Easy Original Version 5... -
Page 77: Assembly Of The Cutting In 42 Hydro
77 (97) Assembly of the cutting in 42 hydro Hakki Pilke 42 Easy Original Version 5... - Page 78 78 (97) Hakki Pilke 42 Easy Original Version 5...
- Page 79 79 (97) Hakki Pilke 42 Easy Original Version 5...
- Page 80 80 (97) Hakki Pilke 42 Easy Original Version 5...
- Page 81 81 (97) Hakki Pilke 42 Easy Original Version 5...
- Page 82 82 (97) Hakki Pilke 42 Easy Original Version 5...
- Page 83 83 (97) Hakki Pilke 42 Easy Original Version 5...
- Page 84 84 (97) Hakki Pilke 42 Easy Original Version 5...
- Page 85 85 (97) Hakki Pilke 42 Easy Original Version 5...
-
Page 86: List Of Spare Parts
Eccentric adjuster (2x32 GS) 60668 Wood length guard 60670 Wood length guard 60698 Left articulated shaft guard 60675 Stiffener wood length spring 60680 Sawdust box (vacuum connection, OPTIONAL) 60915 Splitting blade adjustment cylinder Hakki Pilke 42 Easy Original Version 5... - Page 87 Hexagonal screw DIN 933 M8x20 96163 Hexagonal screw DIN 933 M8x25 96186 Lock screw DIN 603 M10x25 96189 Lock screw DIN 603 M12x40 96199 Hex nut DIN 934 M10 96200 Hex nut DIN 934 M12 Hakki Pilke 42 Easy Original Version 5...
- Page 88 ITEM Attaching shaft of the table extension 61161 60180 Inputing table 61108 Input conveyor locking 60420 Front cage 60440 Complete wood press 60610 Winch attaching plate 60690 Pincher roll of the inputing conveyor Hakki Pilke 42 Easy Original Version 5...
- Page 89 Table extension 60281 95001 Keel roll 61105 Pincher roll of the inputing conveyor 60294 Pressure roller shaft 60304 Tail roll clip plate 60305 Tail roll clip plate 96145 Hexagonal screw DIN 931 M12x30 Hakki Pilke 42 Easy Original Version 5...
- Page 90 Conveyor rubber baffle fastening rod 09200a Rubber baffle fastening rod 60888 Guard 60885 Hydraulic pipe conveyor (top) 10725 Conveyor pincher roll guard 95063 Bearing unit UCF205 97334 Hydraulic motor MSEPM50CD 97082 Hose conveyor's end Hakki Pilke 42 Easy Original Version 5...
- Page 91 Automatic acceleration valve 61138 Starting lever 95015 Pressure spring 61146 Valve bushing 61147 Valve mandrel 96309 Valve bolt 97522 DF5-3 selector valve 60744 Foot pedal rod 95022 Pressure spring Ø22x2.5 L=140 97479 Ball joint Hakki Pilke 42 Easy Original Version 5...
- Page 92 Arm control Ø80,70- 50 37,028m Plunger Ø 70 61117 Cylinder liner Ø80 , 70 97368 Sealing series D70-50 96144 Hexagonal screw DIN 961 M12x20 61115 Cylinder Ø73, 63 (complete) 60590 Cylinder Ø80, 70 (complete) Hakki Pilke 42 Easy Original Version 5...
- Page 93 Optical wood measuring device 60650 Fastening pipe Wood measuring device 47550 95197 Light cell 96312 Hex nut DIN 934 M4 96313 Bottom plate DIN 125 A4 95199 Reflecting sticker 95033 Knurled head screw M8-20 Hakki Pilke 42 Easy Original Version 5...
-
Page 94: Manufacturer: Maaselän Kone Oy
Address: Valimotie 1, 85800 Haapajärvi, Finland Declares that Serial number:………………………….. Hakki Pilke 42 Easy is compatible with relevant regulations of the Machine Directive (2006/42/EC) is compatible with the following other EC-Directives: EMC-Directive 2004/108/EC and Low Voltage Directive 2006/95/EC Place, time: Haapajärvi 5.11.2012... -
Page 95: Technical Specifications
- - conveyor belt width 250 mm Sound power level 108 dB A-weighted sound pressure level at the operator's place 96 dB Optional extras: - Log elevator - Dispensing log holder - Hydraulic inputing table Hakki Pilke 42 Easy Original Version 5... - Page 96 The guarantee is void if the ownership of the machine is transferred to a third party during the guarantee period The guarantee is void if any of the machine’s seals have been broken Hakki Pilke 42 Easy Original Version 5...
- Page 97 This guarantee certificate indicates our responsibilities and obligations in full and it excludes all other responsibilities. Hakki Pilke 42 Easy Original Version 5...
Need help?
Do you have a question about the Easy 42 Series and is the answer not in the manual?
Questions and answers