Table of Contents
Advertisement
English
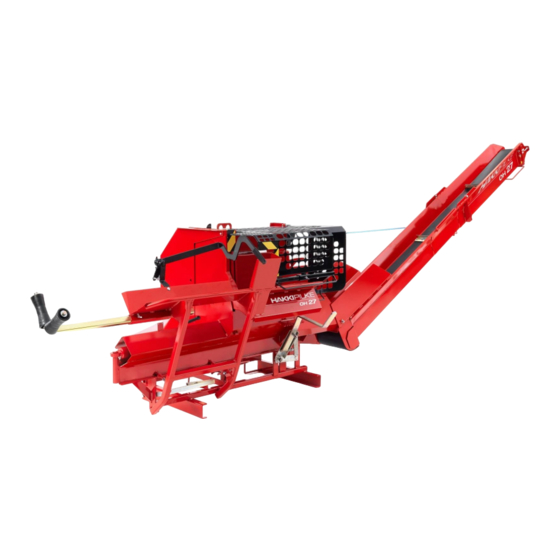
Hakki Pilke
OH 27
LOG SPLITTER
– Instructions for assembly, operation and maintenance
– EU Declaration of Conformity
– Safety instructions
– Warranty terms
The operator must read and understand these
instructions before operating the log splitter!
MAASELÄN KONE OY
Valimotie 1, 85800 Haapajärvi
tel.08-7727300, fax.08-7727320
info@maaselankone.fi
www.maaselankone.fi
Advertisement
Table of Contents

Subscribe to Our Youtube Channel
Related Manuals for Hakki Pilke OH 27


Summary of Contents for Hakki Pilke OH 27
- Page 1 English Hakki Pilke OH 27 LOG SPLITTER – Instructions for assembly, operation and maintenance – EU Declaration of Conformity – Safety instructions – Warranty terms The operator must read and understand these instructions before operating the log splitter! MAASELÄN KONE OY Valimotie 1, 85800 Haapajärvi...
-
Page 2: Table Of Contents
The setting must be approx. 0.7 mm....................27 Installing the Conveyor Drive Belt ....................30 Tightening Angular Gear Drive Belts in Model TR60 ..............31 Belt tightness: ............................. 31 Tightening Angular Gear Drive Belts in Model TRS60 ..............31 Hakki Pilke 27 Original Version 5-2014... - Page 3 Storing the Machine ........................... 36 Technical Specifications: ........................37 EU DECLARATION OF CONFORMITY OF MACHINE.............. 38 Manufacturer: Maaselän Kone Oy ..................... 38 Guarantee terms ..........................38 The guarantee covers .................... 39 The guarantee does not cover ................39 Hakki Pilke 27 Original Version 5-2014...
-
Page 4: General Safety Instructions
The Hakki Pilke Firewood Processor is designed for making firewood of lopped trees and other lopped and pre-processed wood, such as pre-cut logs. Do not process wood material that has been processed in any other way, such as construction waste. -
Page 5: Warning Symbols
TIME IN THE WORK AREA SHUT DOWN BEFORE BEWARE OF MOVING RISK OF ENTANGLEMENT MAINTENANCE PARTS WITH THE CARDAN SHAFT RISK OF CRUSHING DO NOT GO UNDER THE BEWARE OF THE CONVEYOR SPLITTING BLADE MAX CONVEYOR TILT ANGLE Hakki Pilke 27 Original Version 5-2014... - Page 6 READ THE MANUAL BEFORE USE PROTECTIVE USE PROTECTIVE EQUIPMENT EQUIPMENT Scale MAX RPM ALWAYS GRAB A LOG BY THE SIDES LEFT ROTATION HYDRAULIC OIL RIGHT ROTATION LIFTING POINT FOR LIFTING POINT FOR HOOK EMERGENCY STOP FORKLIFT Hakki Pilke 27 Original Version 5-2014...
- Page 7 The following figure on the left shows the lifting points for a line or chain. The figure on the right shows the lifting points for a forklift fork. Always insert one of fork prongs through the frame preventing sideslip. Lifting points. Hakki Pilke 27 Original Version 5-2014...
-
Page 8: Commissioning A New Machine
4. Install the adjustment lever of the splitting blade onto the joint pin on the machine frame. Add the washer and lock the parts in place with a split cotter. Hakki Pilke 27 Original Version 5-2014... -
Page 9: Conveyor Work Position
Conveyor Work Position 1. Make sure that the winch is locked to the removal conveyor and that hook latch is intact as shown below. Hook latch Hakki Pilke 27 Original Version 5-2014... - Page 10 7. Adjust the conveyor to the desired inclination with the winch and lock the extension with the lock at the bottom of the conveyor. 8. Turn the belt holder to the side of the conveyor. Hakki Pilke 27 Original Version 5-2014...
-
Page 11: Conveyor Transport Position
11 (39) Conveyor Transport Position Bring the conveyor into the transport position by reversing the steps described in section “Conveyor Work Position”. Always ensure that conveyor is in the transport position before transporting the machine. Hakki Pilke 27 Original Version 5-2014... -
Page 12: The Machine From The Front
Control level of splitting hydraulics Release pedal Splitting adjustment lever The Machine from the Rear Oil filter Filling cap of the oil tank Oil tank Conveyor drive belt Hydraulic valve and cover splitting mechanism Angular gear Hakki Pilke 27 Original Version 5-2014... -
Page 13: Connecting The Machine To A Tractor
The maximum power requirement of the machine is 7.5 kW, and the articulated shaft should be dimensioned accordingly. The following figure shows the tractor attachment points. Push arm attachment point Lift arm attachment points Hakki Pilke 27 Original Version 5-2014... -
Page 14: Electrically Driven Firewood Processor
The machine must absolutely not be operated if this cover is not in place. Machine contact Position of the cover when powered by an electrical motor Hakki Pilke 27 Original Version 5-2014... -
Page 15: Start And Stop Buttons
An electrically driven machine must always be stopped for transportation. In order to prevent children and other outsiders from starting the machine, the electrical cable must always be disconnected during breaks or at the end of firewood processing. Hakki Pilke 27 Original Version 5-2014... -
Page 16: Operation And Control Of A Hydraulic Splitting System
When the control lever pushed REVERSE position, the splitting cylinder retracts to its initial position. This function is used if the cylinder is not able to split the wood and the cylinder must be reversed. Hakki Pilke 27 Original Version 5-2014... -
Page 17: Starting The Splitting Movement
Remove the blade for sharpening making firewood of logs without splitting them. Reassemble the blade by carrying out the process in reverse order. Hakki Pilke 27 Original Version 5-2014... -
Page 18: Wood Length Adjustment
Emergency Stop The lower part of the machine has an emergency stop pedal at the operator's position. If a dangerous situation occurs during machine operation, push the pedal down as shown in the following figure. Hakki Pilke 27 Original Version 5-2014... - Page 19 After removing the danger, activate the machine by releasing the locking latch and by lifting the emergency stop pedal to its upper position. Release the locking latch by lifting the lifting bolt diagonally upwards! Lift the emergency stop pedal to its upper position! Hakki Pilke 27 Original Version 5-2014...
-
Page 20: Test Run
- arrange the work site so that: - it is even and there is enough space for working; - the trees are at an appropriate distance from the machine; - familiarise yourself with safe working practices. Hakki Pilke 27 Original Version 5-2014... -
Page 21: Processing The Firewood
The cut wood remains in the trough formed by the cradle and the machine frame. 8. Calmly pull back the cross-cut cradle. 9. The cut wood drops down into the splitting chute and hits the automatic splitting release lever, which triggers the hydraulic splitting movement. Hakki Pilke 27 Original Version 5-2014... -
Page 22: Safety Precautions For Cutting Trees
- Cutting several thin trees at one time in a bunch is absolutely forbidden! - Stopping the cutting blade by pressing an object or a piece of wood against its side or teeth is forbidden. Hakki Pilke 27 Original Version 5-2014... - Page 23 2. Support the pushing with your left hand. - It is absolutely forbidden to use a cracked blade. LOOK OUT for blades that become exposed from the cover during cutting. Hakki Pilke 27 Original Version 5-2014...
-
Page 24: Splitting The Last Cut Piece Of Wood
5. Lower the splitting chute cover and move the splitting control lever to the In operation position. 6. Start the splitting movement with the splitting pedal. Hakki Pilke 27 Original Version 5-2014... -
Page 25: Using The Conveyor
- if the machine is moved to another place at the chopping site, ensure the machine or conveyor does not hit the pile of chopped firewood; - the lower end of the conveyor and splitting chute is kept free of wood waste. Hakki Pilke 27 Original Version 5-2014... -
Page 26: Finishing The Work
- no extra items can be carried on top of the machine and conveyor. Machine Maintenance Note! The machine must always be disconnected from the power source (articulated shaft, electrical cable or both) before service!!! Hakki Pilke 27 Original Version 5-2014... -
Page 27: Cutting Blade
If you are using a hard blade, only have it serviced by a professional. Pre-stressing the Blade If the blade has lost its pre-stressing, take it to a professional with expertise in pre-stressing blades. Hakki Pilke 27 Original Version 5-2014... - Page 28 28 (39) Blade removal 1. Remove the upper part of the blade cover Joint pin by removing its joint pin. 2. Remove the two cradle inclination adjustment nuts. 3. Fell down the cradle. Hakki Pilke 27 Original Version 5-2014...
- Page 29 7. Lift the cross-cut cradle and put its two adjustment nuts in place. 8. Adjust the cradle to the correct angle (page 6). Note! Always use the machine with blades complying with EN 847- 1:1997! Hakki Pilke 27 Original Version 5-2014...
-
Page 30: Installing The Conveyor Drive Belt
5. Attach the cover to the machine frame with a bolt and nut. Note! When installing the belt, remove the belt retaining bolt if necessary! Hakki Pilke 27 Original Version 5-2014... -
Page 31: Tightening Angular Gear Drive Belts In Model Tr60
15 to 20 mm when pushed down between the pulleys. 4. Tighten the locking of the adjustment. Tightening Angular Gear Drive Belts in Model TRS60 Locking Belt tightening (electric motor) Belt tightening Angular gear belt locking Hakki Pilke 27 Original Version 5-2014... -
Page 32: Machine Lubrication
Splitting Mechanism Splitting control lever The splitting mechanism is located in front of the cross-cut cradle. The mechanism can be adjusted by removing the cover and its locking bolts. Hakki Pilke 27 Original Version 5-2014... -
Page 33: Operation
However, the joint lever to its extreme left position. stops against the splitting release lever, which has dropped down, and the joint lever stays in its centre position. Hakki Pilke 27 Original Version 5-2014... -
Page 34: Adjustments
NOTE! Adjust the extreme positions of the splitting movement so that the joint lever will work and make the splitting beam reverse from the splitting blade all the way to its initial position. Hakki Pilke 27 Original Version 5-2014... -
Page 35: Disturbances In The Splitting Mechanism, Their Reparation And Prevention
Remove its cover box and valve spool will break. replace the ball joint with a new one. whole splitting system will be paralysed if the ball joint breaks. Hakki Pilke 27 Original Version 5-2014... -
Page 36: Hydraulic System Pressure Adjustment
Max. pressure is 180 bar. Remember the locking! Storing the Machine The machine must be stored in a covered place where it is protected from collisions. Hakki Pilke 27 Original Version 5-2014... -
Page 37: Technical Specifications
Maximum noise level at the operator’s position <130 dB (126 dB) Weighted acceleration of hand vibration <2.5 m/s VAT number FI 0550899-7 MAASELÄN KONE OY VALIMOTIE 1 85800 HAAPAJÄRVI, FINLAND +358 (0) 8 7727300 Hakki Pilke 27 Original Version 5-2014... -
Page 38: Eu Declaration Of Conformity Of Machine
Address: Valimotie 1, FI-85800 Haapajärvi, Finland Declares that Serial number:………………………….. Hakki Pilke 27 is compatible with relevant regulations of the Machine Directive (2006/42/EC) is compatible with the following other EC-Directives: EMC-Directive 2004/108/EC and Low Voltage Directive 2006/95/EC EC standards inspection certificate number: 31/2010... -
Page 39: The Guarantee Covers
This guarantee certificate indicates our responsibilities and obligations in full and it excludes all other responsibilities. Hakki Pilke 27 Original Version 5-2014...
Need help?
Do you have a question about the OH 27 and is the answer not in the manual?
Questions and answers