Table of Contents
Advertisement
Advertisement
Table of Contents

Related Manuals for YUNEEC TYPHOON H3


Summary of Contents for YUNEEC TYPHOON H3
- Page 1 USER MANUAL V1.0...
-
Page 2: Table Of Contents
CONTENTS Product Profile ..............Introduction ..............Specifications ..............Overview ................. Aircraft ................Charging ................Installing the Battery ............Unfolding the Arms ............Compass Calibration ............ Installing the Propellers ..........Placement Before Takeoff ..........Powering ON/OFF ............Binding ..........................Binding the Aircraft and ST16S ........ - Page 3 IONL1 PRO Camera Instructions ........Gallery Function ............. Appendix ................Upgrading the Firmware ..........LED Status Indication ............. Disclaimer ................ Collection and Processing of Data ........ Battery Warnings and Usage Guidelines ...... General Safety Precautions and Warnings ....Camera Usage Warnings ..........
-
Page 4: Product Profile
4K video resolution, a PX4-based ight controller, ight modes from Follow Me and Point of Interest to Curve Cable Cam. Relevant core areas of the TYPHOON H3 have been completely redesigned to provide more reliability and power for your everyday needs. - Page 5 ESC Power (max) ESC Voltage 12V~20V Flight Battery Type LIPO 4S Capacity 5250mAh Voltage 15.2V Energy 79.8Wh Net Weight 20.5oz (580g) Charger SC4000-4H Charging Time Approx. 1.5h-2h Max Charging Current Max Discharging Rate ST16S Ground Station Product Name Personal Ground Station ST16S Model Android™...
- Page 6 Weight 13.2oz (375g) Operating Temperature 32° to 104°F (0° to 40°C) Storage Temperature 14° to 122°F (-10° to 50°C) SD Card Max/Min Capacity 128GB Gimbal Stabilization 3-axis (tilt, roll, pan) Angular Vibration Range ±0.02° Detachable Mount Max Angular Velocity Pitch: 30°/s, Yaw: 120°/s Camera Controllable Range Pitch: -110°...
-
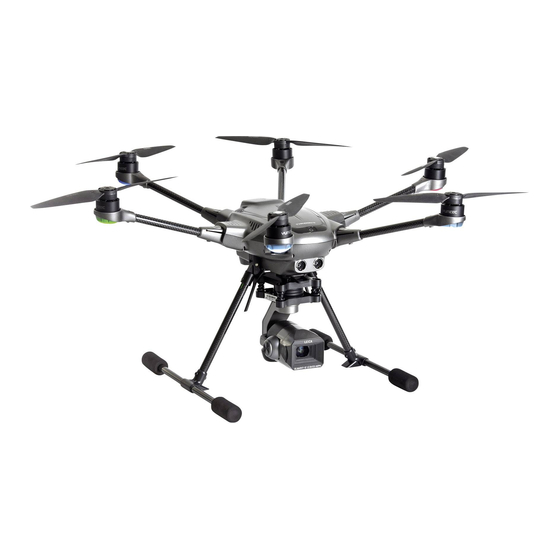
Page 7: Overview
Overview TYPHOON H3 ION L1 PRO Power Switch Camera Lens Sonar USB Port Retractable Landing Gear Micro SD Card Slot 5GHz Antenna ST16S Flight Mode Selection Switch Start/Stop Motor Button Elevator/Pitch Control (Mode2)/ Gimbal Pan Mode Switch Throttle/Altitude Control (Mode 1) -
Page 8: Installing The Battery
A solid green LED indicates the battery is fully charged. Alternating blinking and solid blue LED lights indicates Error. Be certain to never completely drain a TYPHOON H3 battery. Batteries should be stored at 30-50% charge, and never stored at full charge. -
Page 9: Compass Calibration
], select the Compass Calibration. STEP 3: Lift the TYPHOON H3 airframe straight and level. When the LEDs on two motors start to blink green as illustrated, turn it forward as shown by the red arrow until a tone is heard and the two LEDs turn off. -
Page 10: Placement Before Takeoff
Never attempt to operate TYPHOON H3 nearby tall buildings/obstructions that do not offer a clear view of the sky (a minimum clearance of 100°). Be sure to place the TYPHOON H3 on a level and stable surface before powering ON the TYPHOON H3 Aircraft and the ST16S Ground Station. -
Page 11: Binding
The aircraft and ST16S Ground Station are already bound out of factory. There is no need to bind them. Pilot can follow the steps below if binding is needed. STEP 1: Power on the TYPHOON H3. After initialization completes, the two LEDs on rear arms will blink blue. -
Page 12: ()*+,*-- Option 2 )
So, if TS06 you move the right stick to the left, the TYPHOON H3 will tilt to the left and thus move to the left. That TS07 is assuming that the nose is pointing away from you. -
Page 13: Flight Control Sensitivity Function
2.Interface introduction. 1)The curve on the left is the throttle Exp curve; < Flight Control Settings Angle Mode EXP Reset 2)The middle curve is the direction Exp curve turn left forward/right 3)The curve on the right is the Exp curve shared by aileron and elevator 4)The parameters of the current curve are marked down... -
Page 14: Cruise Control Function In Angle Mode
1) If we slide the attitude sensitivity slider to the right, the attitude control of the aircraft will become more sensitive, and it will take shorter time for the aircraft to reach the desired attitude from hovering state; oth- erwise, if we slide to the left, the attitude control of the aircraft will become more sluggish, and it will take longer for the aircraft to reach the desired atti- tude from hovering state;... -
Page 15: Rtl Mode
Return to Land) Mode. In RTL Mode the GPS connectivity will y back TYPHOON H3 in a straight line in the direction of the pilots’ current location, and automatically land within 13-26ft (4-8m) of the pilot. It can be helpful for pilots that lose orientation during ight. -
Page 16: Manual Mode
After the aircraft arrives to the home point and begins to descend, it will turn its tail pointing to the pilot. CAUTION: You must be certain there is no obstacle in the RTL ight path otherwise TYPHOON H3 may come into contact with them and crash. WARNING: RTL Mode only works when TYPHOON H3 has a suitable GPS signal/lock. -
Page 17: Smart Mode
No- y zone. 2.Low battery , the drone will switch to Home mode or Auto Landing mode. The Typhoon H3 drifts away from the wind when the pilot is not steering. Crashes are also NOTICE: excluded from the guarantee. -
Page 18: Drone Settings
IV. When the Distance between the Drone and pilot is longer than 8m ,Push the S4 switch to the front the drone will enter the Smart mode. There is a green S shows on the Flight mode indicator , and the rear motor led will also turn green. - Page 19 II. Safety Setting The maximum relative ight height of the aircraft can be set in the safety settings. Before unlocking, the height setting range is 20-120m; after unlocking, the height setting range is 20-500m. 1.Setup method Directly slide the maximum relative ight height set- ting slider to set the maximum relative ight height.
-
Page 20: Task Mode
TASK mode won't be activated. CCC (Curve Cable Cam) Curve Cable Cam allows you to create an invisible route for TYPHOON H3 to y along. Once the pilot sets the points, TYPHOON H3 will y the set coordinates while remembering the heading. -
Page 21: Follow Me
Journey function enables TYPHOON H3 to capture the perfect aerial sel e or any scenic shot much easier and faster. Depending on the pilot's desired Journey setting, TYPHOON H3 will go up, out and return. Distance Tap Journey to enter the journey function. 98.4 ft 32.8 ft... -
Page 22: Poi
The pilot can pause the the task by tapping it. Orbit When Orbit Me is enabled, TYPHOON H3 ies a circular path around the pilot. Press ORBIT to enter the Orbit me function. The center point will be the position where the ST16S is by default. Set an ideal radius by controlling the joystick. -
Page 23: Landing
There are three ways to land the aircraft: 1. Position the TYPHOON H3 above the area where you would like to land. Lower down the retract- able landing gear, and then slowly lower the left-hand stick to below the center position. TYPHOON H3 will descend slowly and land. -
Page 24: Remote Controller
TYPHOON H3 and allow it to cool to ambient/room temperature before recharging. NOTICE: If the signal of the remote control is lost, TYPHOON H3 will automatically return to the home point and hold its position (with a suitable GPS signal/lock) over the home position (except for low battery). -
Page 25: Proportional Control Rate Slider
Proportional Control Rate Slider The Proportional Control Rate Slider located on the right side of the ST16S Ground Station allows you to set the overall climb/de- High Speed scend and directional control rates. Fly low and slow initially. Slow (Low Speed) position, the lowest Low Speed control rates, is ideal for precision ight. -
Page 26: General Settings
III. Aux (B2) key user custom function Users can customize the function of the key 1. None, there will be no change in settings after pressing. 2. Photo mode: click the circle in front of photo mode to de ne the function of this key to the switch func- tion of photo mode. - Page 27 It also show the camera model, district type and built date for further check. 3) Realsense Version The Typhoon H3 do not carry with the Realsense module so the rmware version should shows N/A. Remote Controller 1) System It shows the controller’...
-
Page 28: Camera Control
Video recording must be stopped to take still photos. It will take approximately 1-2 sec- onds to capture a still photo and before another image may be taken. Always stop recording video before powering down TYPHOON H3 to avoid loss of video CAUTION: data. - Page 29 4. Scroll to the bottom of the directory and click on the gimbal control setting menu. 5. Enter the gimbal control setting interface as shown in the gure below. 6. Setup of the Expo Curve setting of the tilt con- trol of the gimbal.
- Page 30 (far away from the origin on both sides) we can found that the curve is very steep, the gimbal tilt an- gular acceleration will be much bigger than before. This means when you already have a big differ- ence input and even if you only give more or less input a little bit, it will course large gimbal tilt veloc- ity increase or decrease.In other words the steeper the curve is the more sensitive you will feel.
-
Page 31: Ionl1 Pro Camera Instructions
IONL1 PRO Camera Instructions Quick preview of I. interface description camera parameters Camera / video mode switch 1. Photo mode interface description Shutter button Camera settings menu Photo mode selection menu Quick preview of 2. Video mode page description camera parameters Camera / video mode switch Video button Camera settings menu... - Page 32 The default exposure mode of the camera is auto exposure, so the switch on the right side of the ISO is auto mode by default. In auto mode, the ISO cannot be adjusted manually. The ISO can only be ad- justed manually after the auto mode is turned off.
- Page 33 Exposure compensation In auto exposure mode, the user can adjust the light and shade of the picture by sliding the exposure compensation value slider. Photo / video parameter setting Click the camera setting menu, pop up a dialog box, and select "landscape icon" or "play key icon" to enter the photo / video parameter setting page.
- Page 34 2. Enter video parameter setting menu in video recording mode 2.1 Video format ION-L1 PRO gimbal camera provides the following video formats for users to choose from H264 coded format H265 coded format 4K 4096X2160 24/25/30/48/50/60frame 4K 4096X2160 24/25/30frame 4K 3840X2160 24/25/30/48/50/60frame 4K 3840X2160 24/25/30frame 2.7K 2720X1530 24/25/30/48/50/60frame 2.7K 2720X1530 24/25/30/48/50/60 frame...
- Page 35 5. White Balance The ION-L1 PRO gimbal camera provides the fol- lowing white balance modes to choose. Click the custom menu, the color temperature slider will pop up below, and the user can choose the camera white balance setting within the range of 2000K to 12000k.
- Page 36 7. Picture mode 7.1 Picture mode menu in photo mode The ION-L1 PRO gimbal camera provides the fol- lowing white balance modes to choose. In Photo mode, ION L1 PRO gimbal camera pro- vides ve modes: normal, vivid, WDR, B&W and custom.
- Page 37 9. Gridlines Turn on the gridline switch, and the gridline auxiliary user composition will appear on the screen. 10. Histogram Turn on the histogram switch, and the expo- sure histogram will appear on the screen to assist the user to judge the exposure. 11.
- Page 38 12. Anti-Flicker This function will enable the camera to shoot a stable picture under the stroboscopic light source (such as incandescent lamp). The options are automatic, 50Hz and 60Hz. The user can choose according to the actual needs to achieve the best picture effect. 13.
-
Page 39: Gallery Function
Gallery Function The main function of Gallery preview enables UAV to see the pictures and videos taken by itself on the remote control without pulling out the SD card in the camera. It realizes that UAV can check the aerial effect of its own aerial photos without landing, so that users can quickly reshoot for the unsatis- factory photos or videos, greatly improving the ef ciency of aerial photos of UAV. - Page 40 NOTICE: the Delete button in the gallery will only delete the screenshot / recording le stored in the remote control, and will not delete the le stored in the SD card. 3. Photo Preview Click the photo to be enlarged and previewed in non editing state to enter the preview of single photophoto.
-
Page 41: Appendix
4. Video Preview Click the video to enlarge the preview in the non editing state to enter the preview of a single video Click the back button in the upper left corner to return to the upper menu, click the information icon in the upper right corner to display the screen recording information (time and resolution);... - Page 42 STEP 1: Tap the system settings icon[ ] on the right top of the screen, and then select the icon ). Scroll down and tap Check for updates. STEP 2: Choose an available WiFi, input the pass- word and tap OK. STEP 3: When Available Updates displayed on the screen, tap the Download icon.
-
Page 43: Led Status Indication
LED Status Indication All the LEDs mentioned are numbered as shown. The color of the icon indicates the color of the LED. indicates the LED ashing. indicates the LED solid on. STATUS Initiate Compass Calibration Accelerometer/ Gyro Calibration Completed During Initialization The Aircraft is in Binding Mode Calibration Failed Binding Failed... -
Page 44: Disclaimer
Disclaimer Yuneec International (China) Co., Ltd shall not be held liable for any damage, injury or for use of the product in violation with legal regulations, especially in the following circumstances: Damage and/or injury as well violation of legal regulations resulting from a failure to comply with the operating instructions or the instructions at www.yuneec.com, product information, user manual and... -
Page 45: Collection And Processing Of Data
Yuneec. We may also collect information which user send to other users, and the recipients and senders of such information. -
Page 46: General Safety Precautions And Warnings
from approximately 40–120 ° F (5–49 ° C). Do not store the battery or aircraft in a hot garage, car or direct sunlight. If stored in a hot garage or car the battery can be damaged or even catch re. Never leave batteries, chargers and power supplies unattended during use. -
Page 47: Camera Usage Warnings
(including, but not limited to, chargers, rechargeable batteries, etc.). Camera Usage Warnings NOTICE For the latest product information, please check our of cial website: www.yuneec.com. WARNING Do not expose the lens of the camera to extreme light sources. -
Page 48: Ic Radiation Exposure Statement For Canada
5G Wi : 5560-5580MHz (27dBm), 5680-5700MHz (27dBm) EU Compliance Statement Hereby, Yuneec International (China) Co., Ltd. declares that this device is in compliance with the essen- tial requirements and other relevant provisions of the RED Directive 2014/53/EU. The full text of the EU Declaration of Conformity is available at the following internet address: http://yuneec/de-downloads Please visit the address above and enter corresponding product page.
Need help?
Do you have a question about the TYPHOON H3 and is the answer not in the manual?
Questions and answers