Zoom X5 User Manual
Zoom user's manual adsl modem x5
Hide thumbs
Also See for X5:
- User manual (68 pages) ,
- Quick start manual (7 pages) ,
- Firmware upgrade (2 pages)
Table of Contents
Advertisement
Quick Links
Download this manual
See also:
User Manual
Advertisement
Table of Contents

Related Manuals for Zoom X5


Summary of Contents for Zoom X5
-
Page 1: Adsl Modem
ADSL Modem U S E R ’ S M A N U A L... - Page 2 NOTICE NOTICE NOTICE NOTICE This document contains proprietary information protected by copyright, and this Manual and all the accompanying hardware, software, and documentation are copyrighted. No part of this document may be photocopied or reproduced by mechanical, electronic, or other means in any form.
-
Page 3: Table Of Contents
3.5 U ’ PDATING THE IRMWARE 4 REMOVING THE X5 MODEM... 40 APPENDIX A: FRONT AND BACK PANEL DATA... 41 APPENDIX B: ONLINE GAMING AND THE X5... 43 ® SING WITH SING WITH APPENDIX C: CONFIGURING YOUR BROWSER ... 46 APPENDIX D: MACINTOSH AND LINUX USERS: CONFIGURING TCP/IP SETTINGS ... -
Page 4: Installation Instructions
Installation Instructions 1.1 Important! Before you Begin Before installing your X5 ADSL modem, you must have DSL service enabled on your telephone line. To do this, you need to sign up with a DSL service provider. They will arrange to have... - Page 5 Service Provider VPI VCI Encapsulation Belgium—ADSL Office Belgium—Turboline Denmark—Cybercity, Tiscali 0 France (1) France (2) Iceland—Islandssimi Iceland—Siminn Italy Netherlands—MX Stream Portugal Saudi Arabia (1) Saudi Arabia (2) Saudi Arabia (3) Saudi Arabia (4) Saudi Arabia (5) Saudi Arabia (6) Spain—Albura, Tiscali Spain—Colt Telecom, Ola Internet Spain—EresMas, Retevision 8...
-
Page 6: Package Contents
Network Interface Card (NIC) or a Windows 98/98SE/2000/Me/XP computer equipped with a USB port. A telephone wall jack to plug the X5 unit into. The associated phone line must be DSL enabled. 1.3 Quick Start Instructions Your computer should be on. -
Page 7: Windows Users
X5 unit and share Internet access. Macintosh and Linux users: You can use the X5’s four Ethernet jacks to connect multiple computers and share Internet access. To Connect via the Ethernet Option 1 1 1 1 Macintosh and Linux Users: You do not need to run the CD-ROM software. - Page 8 The unit performs a startup sequence—the front panel LINK light blinks. (For reference, we have included a table on page 42 that defines the X5’s front panel lights.) When the LINK light changes from blinking to solid, turn your computer back on and proceed to Establishing Communication with the X5 (page 10).
- Page 9 Zoom Web Console icon resides on your desktop. 2 2 2 2 Now connect the hardware. All connections originate from the X5’s back panel. (For reference, we have included a table that defines these back panel ports, or jacks; see page 41.) a a a a Plug one end of the included power adapter into the unit’s POWER jack and the other end into a power strip...
- Page 10 The unit performs a startup sequence—the front panel LINK light blinks. (For reference, we have included a table on page 42 that explains the meaning of the X5’s front panel lights.) Note: You may see a Found New Hardware box indicating the progression of the installation;...
- Page 11 Type the following letters, the X5’s default User Name and Password. User Name= admin Password= zoomadsl Remember: The User Name and Password letters are case- sensitive. Tip: If the Network Password box doesn’t display, perform the following in this order: a a a a Recheck all connections.
- Page 12 Flash and Reboot. Once the reboot is complete and the unit has reset itself (when the front panel’s LINK light remains on steady again), your X5 is ready to use. You can open another Web browser or use the one that is already open to access the Internet.
-
Page 13: Using Phone Filters
For all other devices on the DSL-enabled line, plug the device’s phone cord into the filter’s PHONE end, and plug the filter’s LINE end into the wall jack. Some X5 models come with filters, and more can be purchased from a retailer or service provider. -
Page 14: Advanced Setup Options
2.1 How To Use the Advanced Options All the Advanced Configuration settings are accessible from the Advanced Setup page. Click its icon at the top of the X5’s main interface page. (If you have exited from the X5 and have forgotten how to establish communication with it, refer to page 10.) -
Page 15: Wan Settings
IMPORTANT: Every time you make changes to an Advanced Setup page, you must click the Save Changes button and then the Write Settings to Flash and Reboot button. A Confirm page displays; click the button to complete the process. If not, any changes will be lost when you navigate to another page. - Page 16 ADSL Modem User’s Manual...
- Page 17 Permanent VC (Virtual Circuit) Settings Your service provider will supply the Permanent Virtual Circuit (PVC) setting for your basic Internet connection. You can define additional PVCs for services such as telephony or to connect to a managed Virtual Private Network (VPN) if available in your area. Consult your service provider.
-
Page 18: Default Gateway
Encapsulation The Encapsulation mode, like the VPI and VCI numbers, is specified by your service provider (see Permanent VC Settings, page 17). Encapsulation This mode is supplied by your service provider (reference table appears on page 5). Bridge The Bridge option is disabled by default. You should enable it only if your service provider instructs you to. -
Page 19: Dhcp (Dynamic Host Configuration Protocol)
User Name Supplied by your service provider. Password Supplied by your service provider. Service Name Optional; supplied by your service provider. Disconnect Time ADSL connection will be dropped after the ADSL line is idle for a certain amount of time (measured in seconds). -
Page 20: Lan Settings
2.3 LAN Settings By modifying your LAN ADSL setup and DHCP settings, you can limit the number of DHCP addresses assigned by the X5. To change your settings, from the Advanced Setup page click the LAN Settings button. LAN IP Address X5’s IP address. -
Page 21: Nat Firewall
LAN users to share the one public IP address. Both NAPT and NAT are transparent to end users. Your X5’s NAT firewall is enabled by default; the default setting is dynamic NAPT—everything is automatic. With dynamic NAPT, anyone can use the public IP address (that is, the modem’s WAN IP address). -
Page 22: Virtual Server (Port Forwarding)
The port number identifies the logical channel being used; for instance, port 21 is associated with FTP (File Transport Protocol). If a port is not opened, the X5 will block and discard the packets. - Page 23 Fill in the Properties dialog box by entering the following addresses. IMPORTANT: You must complete all four fields. IP address Subnet mask Default gateway (X5’s LAN IP address) Preferred DNS server c c c c Click OK. Chapter 2: Advanced Setup Options 10.0.0.16...
- Page 24 2 2 2 2 Navigate back to the X5’s Advanced Setup page and click the Virtual Server button. The ID number is a convenient way to refer to a particular computer. Public Port Inbound port from the Internet. Private Port Inbound port from the modem to the LAN.
-
Page 25: Dmz
NetMeeting that uses dynamic ports. Or you may want to use the computer to play games over the Internet, and you want others to be able to initiate games with you. Because of the X5’s firewall, without a DMZ you would always have to be the one to initiate a game. - Page 26 Fill in the Properties dialog box by entering the following addresses. IMPORTANT: You must complete all four fields. IP address Subnet mask Default gateway (X5’s LAN IP address) Preferred DNS server c c c c Click OK. 10.0.0.16 255.255.255.0 10.0.0.2...
- Page 27 IP address 10.0.0.16 in the DMZ Host IP field. Then click Save Changes and Write Settings to Flash and Reboot. IMPORTANT: Outside users who want to access the X5’s DMZ need to use the X5’s WAN IP address (supplied by your ISP), not the LAN IP address. If you don’t know the WAN IP address, you can find it...
-
Page 28: Dns
2.7 DNS Typically, you should not need or want to change your DNS settings. Should your service provider instruct you to make changes, however, from the Advanced Setup page, click the DNS button. DNS Proxy Selection Default is Use Auto Discovered DNS Servers Only. -
Page 29: Adsl Configuration
From the dropdown list, select the option you want using the table above for reference. If your provider instructed you to select Use User- Configured DNS Servers Only or Auto Discovery + User Configured, in the User Configuration field you need to type in the preferred and alternate DNS server IP addresses that your provider has given you. -
Page 30: Route Table
2.9 Route Table The X5 includes a routing table function for users who want to set up an additional network (or networks) residing on a different subnet than the X5. Without a route table, any computer residing on an additional subnet would be invisible to the modem. The route table acts as a map for the modem, so that it directs traffic to the correct subnet location. - Page 31 Choices are enter a static IP address or select an interface type from a dropdown list. —Select Interface As you add entries to the Route Table, the X5 automatically assigns sequential ID numbers. To manually configure entries for your X5’s Route Table, follow these steps.
-
Page 32: Miscellaneous
2.10 Miscellaneous From the Advanced Setup page, click the Miscellaneous Configuration button. This page allows you to change your X5 configuration and set up an IGMP proxy, for example, or enable the X5’s PPP Half Bridge feature. ADSL Modem User’s Manual... - Page 33 PPP Half Bridge Disabled by default. Enabling this feature forces the DHCP server to duplicate the X5’s WAN IP address to one local client computer; thus, only one computer on the LAN can access the Internet at a time. Chapter 2: Advanced Setup Options...
-
Page 34: System Administration
3.1 Monitoring System Status If you want to check the overall system status, click the System Status icon at the top of the X5’s main interface page. (If you have exited from the X5 and have forgotten how to establish communication with it, refer to page 10.) -
Page 35: Monitoring Adsl Status
3.2 Monitoring ADSL Status If you want to check the status of your ADSL connection, click the ADSL Status icon at the top of the X5’s main interface page. From here, you can verify whether your ADSL connection is active or not (ADSL Line State Status will read SHOWTIME). - Page 36 Under Status, you will see WAN Status, ATM Status, PPP Status, TCP Status, and MAC Table Status buttons. Clicking any of these buttons displays pertinent information. Note: You can’t make changes to the ATM or TCP Status pages; you can make changes to the PPP and WAN Status pages.
-
Page 37: Performing System Administration Tasks
(see page 38). View System Log. Click this button to view a log of system activity. Perform a Diagnostic Test. The X5’s user interface uses a few basic buttons, which are listed in the table below. Button Function... -
Page 38: Resetting The Unit To Its Default Settings
3.4 Resetting the Unit to Its Default Settings If you have changed the system settings on your X5 unit and want to restore them to the factory default settings, you can do so in one of two ways: You can perform a software reset or a “hard” reset. -
Page 39: S Firmware
Note: This process may take up to a minute. VERY IMPORTANT! Do not turn off the X5 or unplug it while you are upgrading the firmware or while the unit is in download mode. -
Page 40: Removing The X5 Modem
Follow the steps below. 1 1 1 1 From the desktop, select Start | Programs | Zoom ADSL Modem | Uninstall. 2 2 2 2 When prompted to confirm your choice, click Yes. -
Page 41: Appendix A: Front And Back Panel Data
Appendix A Front and Back Panel Data Back Panel The table below defines the purpose of the X5’s back panel ports, or jacks. Port Description Port to connect the unit to the ADSL telephone wall jack. Port to connect the unit to the USB port of a computer. -
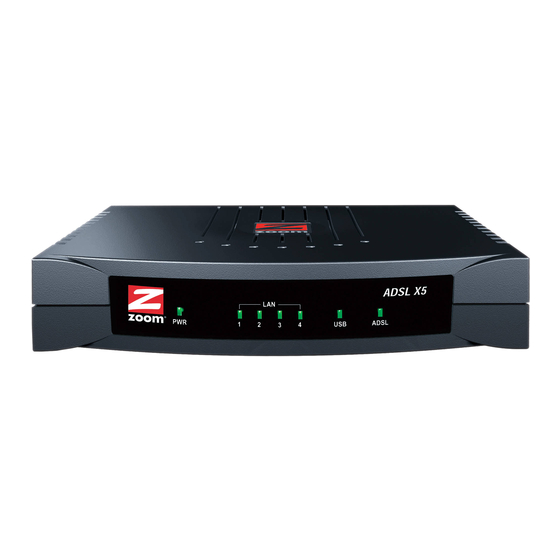
Page 42: Front Panel
Front Panel The table below defines the X5’s front panel lights and how to interpret them. Light Description Lights when power switch on back panel is turned on. LINK Blinks when unit is performing its startup sequence; stays on solid when unit is connected to the ADSL line. -
Page 43: Appendix B: Online Gaming And The X5
Connect the X5 and the Xbox: Using the straight-through Ethernet cable that came with your X5 modem, plug one end into the X5’s Ethernet jack and the other end into the Xbox’s jack. Insert the Xbox Communicator module into the Xbox Controller expansion slot (top slot) and then insert the headset plug into the Communicator module. -
Page 44: Using Your X5 With Play Station ® 2
6. Note: You must plug the PlayStation unit into a computer to configure it and you must use the X5’s Ethernet option. Be sure to enter the login User Name and Password supplied by your ISP on the X5’s Basic Setup page. - Page 45 Your game manual should list which ports must be opened. If you need additional guidance opening up ports, please refer to the Virtual Server (Port Forwarding) section of this manual on page 22. Appendix B: Online Gaming with Your X5...
-
Page 46: Appendix C: Configuring Your Browser
Appendix C Configuring Your Browser An Internet browser is a program used to find and display Web pages. To find a page, the browser must connect to the Internet. This Appendix describes how to configure some of the most common Internet browsers. If you are using another browser, please consult the documentation that came with it. - Page 47 5 5 5 5 You will see the following dialog box. Make sure that I want to set up my Internet connection manually, or I want to connect through a local area network (LAN) is selected, and click OK. 6 6 6 6 When the next dialog box appears, change the selection to I connect through a local area network (LAN) and click Next.
- Page 48 7 7 7 7 A dialog box describing your LAN Internet configuration displays. Uncheck the box Automatic discovery of proxy server and click Next. 8 8 8 8 You will be prompted whether you want to set up an email account.
-
Page 49: Netscape Navigator
Netscape Navigator 1 1 1 1 On the desktop, click the Netscape Navigator icon, and then from the Edit menu, select Preferences. 2 2 2 2 In the Preferences dialog box, click the Advanced option, and then click Proxies. 3 3 3 3 Select the option Direct connection to the Internet and click OK. -
Page 50: Appendix D: Macintosh And Linux Users: Configuring Tcp/Ip Settings
Appendix D Macintosh and Linux Users: Configuring TCP/IP Settings If you are using the Linux operating system, or if you are using a Macintosh computer, you must ensure that your computer’s network, or TCP/IP, settings are configured correctly. Otherwise, you will not be able to connect to the Internet. Windows automatically configures your network settings, so you don’t have to perform this additional task. - Page 51 In the Configurations dialog box, click Duplicate. 4 4 4 4 The Duplicate Configuration dialog box appears. Type a name, such as “Zoom ADSL Modem,” and click OK. 5 5 5 5 The Configurations dialog box appears again. Highlight your new configuration—in our example, Zoom ADSL Modem—and click Make Active.
- Page 52 From the Location: drop-down list box, select New 2 2 2 2 Location…. In the box, type a name of your choosing, such as “Zoom ADSL Modem,” and click OK. Under the Configure drop-down tab, choose Built-in 3 3 3 3 Ethernet or Ethernet.
- Page 53 Click Save and close the Network pane. 5 5 5 5 Linux TCP/IP Settings The instructions for setting up boot-time DHCP vary dramatically by distribution, so you may want to refer to your particular version’s documentation. Note: If you have other network cards installed, you will need to pick distinct Ethernet identifiers for each (eth0, eth1, eth2, etc.).
- Page 54 BROADCAST=172.16.31.255 IPADDR=172.16.16.55 NETMASK=255.25.240.0 NETWORK=172.16.16.0 Note: If your computer won’t always be on a network with working DNS at boot-time, set ONBOOT=no. If you don’t, RedHat 6.2 (and possibly other versions) might hang. To activate the card by hand when you have attached your computer to the network, at root, run the command: /sbin/ifup eth0.
-
Page 55: Appendix E: Troubleshooting
Support tips: www.zoom.com. PROBLEM: I installed the software and connected the X5 modem to my phone line, but I cannot connect to the Internet. SOLUTION: Make sure you’ve securely connected the RJ-11 phone cord from the wall jack to the DSL modem connector on the back of your computer. - Page 56 SOLUTION: Your computer’s TCP/IP properties might not be set correctly. Both the Default Gateway IP address and the DNS server IP address must match the LAN IP address of the modem. (See page 23 for an illustration of the Windows TCP/IP dialog box.) PROBLEM Why do I hear static or noise when I’m using my telephone?
-
Page 57: Appendix F: Regulatory Information
Appendix F Regulatory Information U.S. FCC Part 68 Statement This equipment complies with Part 68 of the FCC rules and the requirements adopted by the ACTA. The unit bears a label on the back which contains among other information a product identifier in the format US:AAAEQ##TXXXX. If requested, this number must be provided to the telephone company. -
Page 58: Declaration Of Conformity
message. Facsimile modem boards manufactured on and after December 13, 1995, must comply with the requirements of this section. This equipment cannot be used on public coin phone service provided by the telephone company. Connection to Party Line Service is subject to state tariffs. Contact your state public utility commission, public service commission, or corporation commission for more information. - Page 64 2793-A 27301 ©2003...
Need help?
Do you have a question about the X5 and is the answer not in the manual?
Questions and answers