Table of Contents
Advertisement
Quick Links
Advertisement
Table of Contents

Subscribe to Our Youtube Channel
Related Manuals for Zoom 1064 Series


Summary of Contents for Zoom 1064 Series
- Page 1 ADSL X4...
- Page 2 NOTICE This document contains proprietary information protected by copyright, and this Manual and all the accompanying hardware, software, and documentation are copyrighted. No part of this document may be photocopied or reproduced by mechanical, electronic, or other means in any form. The manufacturer does not warrant that the hardware will work properly in all environments and applications, and makes no warranty or representation, either expressed or implied, with respect...
-
Page 3: Table Of Contents
... 4 VERVIEW ... 5 NSTALLATION NSTRUCTIONS ... 5 MPORTANT EFORE EGIN X4 ... 7 NSTALLING THE ... 7 INDOWS NSTALLATION ACINTOSH AND INUX NSTALLATION X4 S ... 21 EMOVING THE OFTWARE ... 22 NIVERSAL LUG AND ... 22 ... 23 TATUS ONITORING ... -
Page 4: Overview
Overview The X4 is an ADSL modem and a gateway/router all contained in one device. The ADSL modem gives you a connection to the Internet through your Internet service provider. The gateway/router provides an interface between the Internet and your own local network. It also includes an advanced firewall, which allows you to control Internet access from your local network, and which protects your local network from unwanted Internet traffic. -
Page 5: Installation Instructions
To do this, you need to sign up with an ADSL service provider. (Your service provider may refer to “ADSL service” as “DSL service.”) Package Contents Your package contains the items shown below: Zoom X4 ADSL Modem Phone Cord Ethernet Cable Chapter 1: Installation Instructions... -
Page 6: You Will Also Need
The CD contains the installation software, documentation, warranty, and Customer Support information. If anything is missing or damaged, please contact Zoom Customer Support or your retailer or distributor. In addition, the package may include: • Phone-jack adapter to adapt the phone cord to a particular phone jack (certain countries only) •... -
Page 7: Installing The X4
Installing the X4 Macintosh and Linux users: please go to page 9. Windows Installation If you have already installed the X4 using the multilingual Installation Assistant on the CD, or if you are connecting the X4 directly to a hub or network device, skip this section and begin with Chapter 2, Status Monitoring, on page 23. - Page 8 Close all open programs, including antivirus software or pop- up blockers. Insert the supplied CD into the CD drive of your computer. The CD should start automatically. (If the CD does not start automatically, on the desktop, click the Start button, click Run, and then type E:\setup.exe, where E is the letter of your CD drive.) Windows Vista:...
-
Page 9: Macintosh And Linux Installation
Windows Vista: If a message tells you that Windows can't verify the publisher of the driver software, select Install this driver software anyway. If you are prompted to enter your user name and password, remember that they are case-sensitive: When you complete the installation and setup, click Finish to update your modem and close the Install Assistant. - Page 10 computer, you also have the option of connecting to your computer’s USB port. However, we recommend that Windows users connect to an Ethernet jack if one is available. If you are using a computer’s Ethernet port: Plug one end of the Ethernet cable into the modem’s ETHERNET LAN port and plug the other end into your computer’s Ethernet port.
- Page 11 DSL light should blink once. If the POWER light does not turn on, make sure there is power at the wall outlet or power strip where you plugged in the power cube. Turn the computer on. If you are using the USB port, you may see a Found New Hardware box indicating the progress of the installation.
-
Page 12: Establishing Communication
You must set up the X4 so that it can communicate with your Internet service provider. To do this, you use the Zoom Configuration Manager. Follow these two steps to log in to the Zoom Configuration Manager: Open your Web browser and, in its address bar, type http://10.0.0.2 if you are using the Ethernet jack or... - Page 13 The Zoom Configuration Manager opens and displays its Basic Setup page. Use this Web page to configure the modem so it can connect with your Internet service provider. You can configure the X4 manually or you can have the modem automatically configure itself.
- Page 14 Select AUTOMATICALLY if neither of the special circumstances mentioned above fits your situation. When this option is selected, the screen changes to show automatic configuration options. Do the following: Select the Enable option button, then click Save Changes. The page changes to the Autodetect page and a Start button appears.
- Page 15 Autodetect page and notice that the Encapsulation setting has changed from bold to regular text. (These are NOT the same User Name and Password you that you used earlier to open the Zoom Configuration Manager.) Tip: If you do not know your Login Name and Password, contact your service provider and tell them that you misplaced the information.
- Page 16 Manually configuring the modem requires that you log in to the Zoom Configuration Manager and enter information on its Basic Setup page. (If you need help logging in, see page 12.) On the Basic Setup page, ensure that the MANUAL option button is selected.
- Page 17 User Name (usually your email address or the characters preceding the @ sign in your email address) and a Password. (These are NOT the same User Name and Password you that you used earlier to open the Zoom Configuration Manager.) Tip:...
-
Page 18: If You Did Not Connect
Important! If you plan to use a static IP address, you must manually configure the X4 from the WAN Configuration page and not the Basic Setup page. For more information, see Using Static IP Addressing on page 19. Typically, you must make arrangements with (and pay) your Internet service provider for a static IP address. -
Page 19: Using Static Ip Addressing
IP provider specifically instructed them to use static IP addressing should change this setting. Click the Advanced Setup icon the Zoom Configuration Manager to open the Advanced Setup page. Click the WAN Configuration button, located in the Configuration group. - Page 20 Enter the appropriate information on the WAN Configuration page. Use the table below as a guide. For this setting… Do this… Current Select Enabled from the drop-down list. Connection (That is, click the arrowhead far right of the box to view the items in the list, then select Enabled.) Encapsulation Select your service provider’s...
-
Page 21: Removing The X4 Software
X4. From your Windows desktop, click the Start button, point to Programs, then point to Zoom ADSL Modem, then select Uninstall X4 ADSL Modem. When prompted to confirm your choice, click Yes. -
Page 22: Universal Plug And Play
There is no setup for you to do. If You Need Help Zoom has many Technical Support services available to its customers. You can access these services in a variety of ways: •... -
Page 23: Status Monitoring
Most users can skip this chapter, as it is primarily for advanced users and for those who are instructed by their Internet service provider or Zoom Technical Support to verify settings, usually for troubleshooting. If you are using an access point or a network hub, you can monitor your X4 from any of the computers that are connected to the access point or hub. -
Page 24: Monitoring System Status
Monitoring System Status If you want to check the overall system status, click the System Status icon at the top of any page in the Zoom Configuration Manager. (If you forgot how to log in to the Zoom Configuration Manager, see page 12.) -
Page 25: Monitoring Adsl Status
If you want to check the status of your ADSL connection, click the ADSL Status icon at the top of the Zoom Configuration Manager. (If you forgot how to log in to the Zoom Configuration Manager, see page 12.) The ADSL Status page provides information about your ADSL connection. -
Page 26: Advanced Setup Options
Advanced Setup Options The options that are set by default when the X4 is installed are sufficient for most users. However, those that want or need to change the X4’s settings can do so using the Advanced Setup page. This chapter explains how to specify advanced options. The information in this chapter applies to you if: •... -
Page 27: How To Use The Advanced Options
Advanced Setup page. To access this page, click the Advanced Setup icon at the top of any page in the Zoom Configuration Manager. (If you forgot how to log in to the Zoom Configuration Manager, see page 12.) -
Page 28: Configuration Buttons
Tip: If you plan to specify advanced options, you can view detailed information about each option in the online help. To open the help, click the button for the settings you want to specify (for example, the Firewall button to open the Firewall Configuration page), then click the Help icon at the top of the screen to open a help topic specifically about the page you are viewing. - Page 29 This button… Opens a page that lets you… IP Filtering Set up rules to control the forwarding of incoming and outgoing data between your LAN and the Internet and within your LAN. For example, you can create IP filter rules to block attempts by certain computers on your LAN to access certain types of data or Internet locations.
- Page 30 This button… Opens a page that lets you… Specify whether the X4 can communicate with other routing devices and, if so, on which interfaces. It also lets you specify how long routes remain in memory. Specify the settings that control the connection between the X4 modem and your Ethernet jack or USB port (depending on which you used to connect the modem).
-
Page 31: Status Buttons
Status Buttons The buttons in the Status group are typically used for maintenance and troubleshooting. The following table lists each button in the Status group and gives a brief description of the settings you can specify. Click a button below, then click the Help icon at the top of the screen to open an online help topic about the page you are viewing. -
Page 32: Administration Buttons
The buttons in the Administration group are typically used for administrative tasks, such as diagnostic testing, upgrading firmware, changing your Zoom Configuration Manager password, etc. Click a button below, then click the Help icon at the top of the screen to open an online help topic about the page you are viewing. -
Page 33: Changing Your Wan Settings
Changing Your WAN Settings Use the WAN Configuration page to change your Wide Area Network (WAN) settings and to specify a static IP address (if you have arranged/paid for one). To open this page, click the WAN Configuration button on the Advanced Setup page. Important! If you want to use static IP addressing, see Using Static IP Addressing on page 19 for information on how to do this. -
Page 34: Changing Your Firewall Settings
Changing Your Firewall Settings Use the Firewall Configuration page to change the X4’s firewall settings. To open this page, click the Firewall button in the Configuration section of the Advanced Setup page. When you install the X4, a firewall is automatically established to offer your computer protection as you use the Internet. -
Page 35: Changing User Names And Passwords
User Configuration button, located in the Administration group on the Advanced Setup page. When you installed the X4 and tried to open the Zoom Configuration Manager, you were prompted for a User Name and Password in order to gain access. (The default name and password were supplied to you on page 12.) - Page 36 User Configuration page. Click Write Settings to Flash. In addition, you can also create additional logins (that is, user names and passwords) with varying degrees of access to the Zoom Configuration Manager. For more information about managing logins, click the Help icon at the top of the screen while you are on the User Configuration page.
-
Page 37: Backing Up Your Configuration
This feature may be especially useful when you receive firmware updates from Zoom. Installing the update may overwrite your customized settings with default values. Before you update the firmware, backup your configuration. Then, after the firmware has been updated, restore your configuration. -
Page 38: To Restore A Configuration
To restore a configuration On the Backup/Restore Config page, click Browse and navigate to the file containing the configuration to which you want the X4 restored. Click Upload. For more information about backing up and restoring your customized settings, click the Help icon at the top of the screen while you are on the Backup/Restore Config page. -
Page 39: Restoring Default Settings
If you can open your Web browser and access your X4’s user interface, do the following to perform a software reset: Log into the Zoom Configuration Manager and click the Advanced Setup icon to open the Advanced Setup page. (See page 12 if you need help logging in.) In the Administration section, click the Reboot button. -
Page 40: Using Ip Filters
Using IP Filters Use the IP Filter Configuration page to set up IP filters to allow or block traffic coming into your computer from the Internet. To open this page, click the IP Filtering button in the Configuration section of the Advanced Setup page. To filter Internet traffic, you must define one or more rules (that is, criteria you want the information to meet before it can proceed). -
Page 41: Adsl Internet Settings Tables
We post updated tables on our Web site. If your country is not listed in the tables below, please consult www.zoom.com Note to USA customers If your ADSL service provider is not shown below, first use the settings for Service Provider Not Shown at the bottom of the table. - Page 42 Service Provider VPI VCI Encapsulation SBC (3) Socket (1) Socket (2) Socket (3) Sonic Sprint (Embarq) (1) Sprint (Embarq) (2) Uniserve Verizon (1) Verizon (2) Service Provider Not Shown Table B: Countries Other Than The USA Service Provider VPI VCI Encapsulation Australia-Telstra Argentina-Telecom Argentina-Telefonica...
- Page 43 Service Provider VPI VCI Encapsulation Jamaica (3) Jamaica (4) Kazakhstan Mexico Netherlands-BBNED Netherlands-MX Stream Portugal Saudi Arabia (1) Saudi Arabia (2) Saudi Arabia (3) Saudi Arabia (4) Saudi Arabia (5) Saudi Arabia (6) Spain- Albura, Tiscali Spain- Colt Telecom, Ola Internet 0 Spain -EresMas, Retevision Spain-Knet Comunicaciones S.L.
-
Page 44: Appendix B. Front And Back Panels
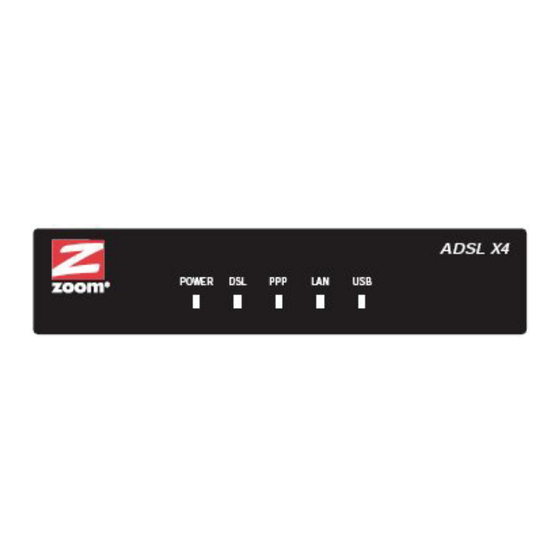
Appendix B Front and Back Panels The front panel of the X4 looks like this: The following table describes the LEDs on the front panel. Description POWER Lights when the X4 is plugged into a power source. Blinks when the X4 is trying to connect to your ADSL service. - Page 45 The back panel of the X4 looks like this: Port or Description button Connects the modem to the ADSL telephone wall jack. Connects the modem to the USB port of a Windows computer. RESET Resets the modem to its factory settings. To reset, insert a paper clip and press the button three times.
-
Page 46: Tcp/Ip Network Settings
Appendix C TCP/IP Network Settings If you are using a Macintosh or Linux computer, you must ensure that your computer’s TCP/IP network settings are configured properly. Otherwise, you will not be able to connect to the Internet. Note: If you are using a Windows computer, you do not have to configure the TCP/IP settings. -
Page 47: Mac Os X
Macintosh TCP/IP Settings How you configure your Macintosh computer’s network settings differs, depending on your Mac OS. For OS X, follow the instructions below. Otherwise, go to page 48. Mac OS X From the Dock, choose System Preferences and then Network to display the Network pane. - Page 48 Mac OS 7.6.1 - 9.2.2 From the Apple menu, choose Control Panels and then TCP/IP to display the TCP/IP Window. Under Connect via:, select Ethernet built-in. Under Configure:, select Using DHCP Server. Do not enter anything in the DHCP Client ID field. Close the TCP/IP Window.
-
Page 49: Linux Tcp/Ip Settings
Linux TCP/IP Settings The instructions for setting up boot-time DHCP vary dramatically by distribution, so you may want to refer to your particular version’s documentation. Note: If you have more than one network card installed, you will need to pick distinct Ethernet identifiers for each (eth0, eth1, eth2, and so forth). -
Page 50: Windows Tcp/Ip Settings
Windows TCP/IP Settings How you configure your Windows computer’s network settings differs, depending on your operating system. Windows XP Open the Internet Protocol (TCP/IP) Properties dialog box. From the desktop, click the Start button, point to Control Panel, and then click Network and Internet Connections. -
Page 51: Windows 2000
Windows 2000 Open the Internet Protocol (TCP/IP) Properties dialog box. From the desktop, click the Start button, point to Settings, then Network and Dial-up Connections. Right-click the Local Area Connection icon, and select Properties. Select your NIC card’s TCP/IP entry (it should include “TCP/IP”... - Page 52 Windows 98/Me Open the Internet Protocol (TCP/IP) Properties dialog box. From the desktop, click the Start button, point to Settings, then Control Panel. Double-click the Network icon to display the Network dialog box. Select your NIC card’s TCP/IP entry (it should include “TCP/IP”...
-
Page 53: Appendix D. Troubleshooting
ADSL Username and Password correctly. (Note that this is NOT the username and password you used to log into the Zoom Configuration Manager on page 12.) If you had the modem automatically configure its settings, open the Basic Setup page, ensure that MANUAL is selected, then select 7 from the Virtual Circuit drop-down list. - Page 54 If you manually configured your modem, open the Basic Setup page, ensure that MANUAL is selected, then enter the correct Username and Password in the boxes provided. Click Save Changes and Write Settings to Flash. • Verify that your service provider’s ADSL connection is functioning properly.
- Page 55 Windows XP Windows 98/Me/2000 On the Welcome to the New Connection Wizard dialog box, click Next. (If you see a Location Information dialog box, click Cancel and then when asked if you are sure you want to cancel, click Yes to return to the Welcome dialog box.) On the Network...
- Page 56 ADSL connection. Problem I cannot log into the Zoom Configuration Manager. I have typed http://10.0.0.2 or http://10.0.0.3 (depending on whether I am using the X4’s Ethernet jack or USB port), but I am not prompted for a User Name and Password.
- Page 57 • If you are using a Windows computer, perform a Release/Renew operation: Windows 2000/XP: From the desktop, click the Start button, then point to Programs, point to Accessories, and then select Command Prompt. Type ipconfig /all and press the Enter key on your keyboard. In the subsequent dialog box, make sure the NIC adapter is highlighted in the drop-down list, click Renew and then click Release.
-
Page 58: Appendix E. Regulatory Information
Appendix E Regulatory Information U.S. FCC Part 68 Statement This equipment complies with Part 68 of the FCC rules and the requirements adopted by the ACTA. The unit bears a label on the back which contains among other information a product identifier in the format US:AAAEQ##TXXXX. - Page 59 U.S. FCC Part 15 Emissions Statement This equipment has been tested and found to comply with the limits for a Class B digital device, pursuant to part 15 of the FCC Rules. These limits are designed to provide reasonable protection against harmful interference in a residential installation. This equipment generates, uses and can radiate radio frequency and, if not installed and used in accordance with the instructions, may cause harmful interference to radio communications.
-
Page 60: Safety Notices
Safety Notices CAUTION: To reduce the risk of fire, use the supplied phone cord or an AWG 26 or larger UL-listed or CSA-certified telecommunication line cord. Do not use this product near water – for example, in a wet basement or near a swimming pool. -
Page 61: Declaration Of Conformity
Le constructeur déclare sous son entière responsabilité que ce matériel est conforme à la Directive 1999/5/EC via les documents ci-dessous. Ce produit a reçu le marquage CE. Hiermit erklärt Zoom die Übereinstimmung des Gerätes modem mit den grundlegenden Anforderungen und den anderen relevanten Festlegungen der Richtlinie 1999/5/EC. Dieses Produkt ist das gekennzeichnete CE.
Need help?
Do you have a question about the 1064 Series and is the answer not in the manual?
Questions and answers