Zoom ADSL X5 User Manual
Zoom user's guide hub/switch adsl x5
Hide thumbs
Also See for ADSL X5:
- User manual (64 pages) ,
- Quick start manual (7 pages) ,
- Firmware upgrade (2 pages)
Table of Contents
Advertisement
Quick Links
Advertisement
Table of Contents

Related Manuals for Zoom ADSL X5


Summary of Contents for Zoom ADSL X5
- Page 1 ADSL X5 R ’ S...
- Page 2 NOTICE NOTICE NOTICE NOTICE This document contains proprietary information protected by copyright, and this Manual and all the accompanying hardware, software, and documentation are copyrighted. No part of this document may be photocopied or reproduced by mechanical, electronic, or other means in any form. The manufacturer does not warrant that the hardware will work properly in all environments and applications, and makes no warranty or representation, either expressed or implied, with respect...
-
Page 3: Table Of Contents
...4 VERVIEW 1: I HAPTER NSTALLATION NSTRUCTIONS X5... 8 NSTALLING THE X5 S EMOVING THE OFTWARE NIVERSAL LUG AND ... 28 2: S HAPTER TATUS ONITORING ? ... 29 ONITOR TATUS ONITORING YSTEM TATUS ADSL S ONITORING TATUS 3: A HAPTER DVANCED ETUP... -
Page 4: Overview
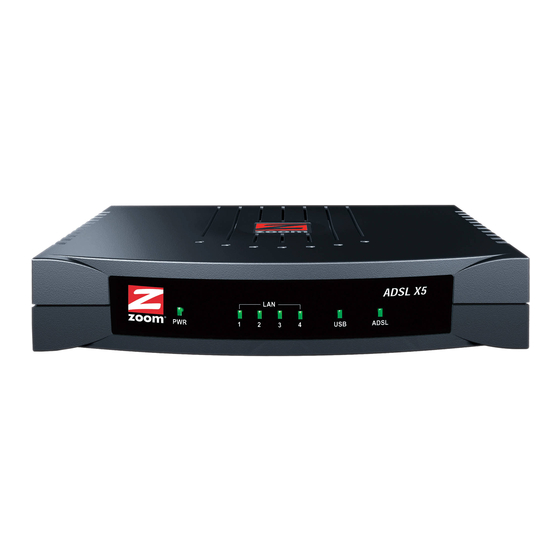
Overview The X5 integrates an ADSL modem, a router, and a four-port switch in one device. It includes an advanced firewall, which allows you to control Internet access from your local network, and which protects your local network from unwanted Internet traffic. With four LAN ports (labeled 1, 2, 3, 4), the X5 supports the direct connection of up to four computers with Ethernet ports. -
Page 5: Installation Instructions
Quick Start booklet provided for Windows users), you can skip this chapter and begin with Chapter 2. Package Contents Your package contains the items shown below: Zoom X5 ADSL Modem Phone Cord Ethernet Cable The CD contains the installation software, documentation, warranty, and Customer Support information. -
Page 6: Before You Begin
If anything is missing or damaged, please contact Zoom Customer Support or whoever sold you the modem. In addition, the package may include: Phone-jack adapter to adapt the phone cord to a particular phone jack (certain countries only) ADSL line filter(s) (certain models only) -
Page 7: Chapter 1: Installation
[Optional] Network device: You can connect a network device (such as a wireless access point, router, hub, or switch) to the X5 modem. If you plan to connect a network device, be aware that you must first connect at least one of your computers directly to the X5. -
Page 8: Installing The Removing The X5 Software
Because the back panel of the X5 modem has one USB port and four LAN (Ethernet) ports, only one computer can be connected using a USB port. Note, however, that we recommend you connect your computers using Ethernet ports, if possible. ADSL X5 User's Guide... - Page 9 If you will be connecting a network device (such as a wireless access point, router, hub, or switch): You must install the software on a Windows computer that will be directly connected to the X5. This means that if you have a network device, you should choose a computer to connect to the modem (the actual physical connection will be made later in this user’s guide) and install the software on it.
- Page 10 4 4 4 4 Click Installation Wizard. 5 5 5 5 Click ADSL X5 Modem to start the software installation, then click Next when prompted. 6 6 6 6 When the installation is complete, click Finish, then click Exit. 7 7 7 7 Close any applications that may be open, then remove the CD from the CD-ROM drive.
- Page 11 2 2 2 2 Connect the modem to the computer’s Ethernet jack. If you are using a Windows computer, you have the option of connecting your computer’s USB port. However, Windows users should only be connecting to a USB port if your computer does not have an Ethernet port or if you plan to plug five computers directly to the X5 modem.
- Page 12 For each filter, plug the phone or fax machine’s cord into the filter’s PHONE end and plug the filter’s LINE end into the wall jack. Congratulations! You have installed the hardware. Now, continue with the next section, Establishing Communication. ADSL X5 User's Guide...
- Page 13 See Macintosh TCP/IP Settings on page 51 or Linux TCP/IP Settings on page 53 for instructions. You must set up the X5 so that it can communicate with your Internet service provider. To do this, you must use the Zoom Configuration Manager. 1 1 1 1...
- Page 14 2 2 2 2 The Zoom Configuration Manager opens and displays its Basic Setup page. Use this Web page to configure the modem so it can connect with your Internet service provider. You can configure the X5 manually or you can have the modem automatically configure itself.
- Page 15 Depending on your situation, do the following: ! Select MANUALLY if one or both of the following are true: " You already have the VPI, VCI, and Encapsulation settings from your Internet service provider. " You have a static IP address that you plan use with the X5.
- Page 16 Basic Setup icon at the top of the screen and try to manually configure the modem, as explained in Configuring the X5 Manually on page 19. When your Encapsulation setting appears, click it to continue with the process. (Note that yours may be something other than PPPoE.) ADSL X5 User's Guide...
- Page 17 Autodetect page and notice that the Encapsulation setting has changed from bold to regular text. (These are NOT the same User Name and Password you that you used earlier to open the Zoom Configuration Manager.) Tip: If you do not know your Login Name and Password, contact your service provider and tell them that you misplaced the information.
- Page 18 X5, continue with Connecting Additional Computers to the Internet on page 24. Otherwise, you are done with this user’s guide. Enjoy your X5! Important! If you did not connect, see Appendix D: Troubleshooting on page 57. ADSL X5 User's Guide...
- Page 19 The auto configuration process was unable to find your settings. Manually configuring the modem requires that you log in to the Zoom Configuration Manager and enter information on its Basic Setup page. (If you need help logging in, see page 13.) 1 1 1 1 On the Basic Setup page, ensure that the MANUAL option button is selected.
- Page 20 User ID or User Name (usually your email address or the characters preceding the @ sign in your email address) and a Password. (These are NOT the same User Name and Password you that you used earlier to open the Zoom Configuration Manager.) Tip:...
- Page 21 6 6 6 6 Click Save Changes and then Write Settings to Flash. Once the process is complete, the X5’s ADSL light should remain on steady (this should take about 15 seconds). 7 7 7 7 Verify that your Internet connection is working. Open your Web browser (e.g., Internet Explorer or Netscape Navigator) and try to connect to a familiar Web address.
- Page 22 1 1 1 1 Click the Advanced Setup icon at the top of any page in the Zoom Configuration Manager to open the Advanced Setup page. 2 2 2 2 Click the WAN Configuration button, located in the Configuration group.
- Page 23 3 3 3 3 Enter the appropriate information on the WAN Configuration page. Use the table below as a guide. For this setting… Do this… Current Select Enabled from the drop-down list. Connection (That is, click the arrowhead far right of the box to view the items in the list, then select Enabled.) Encapsulation Select your service provider’s...
- Page 24 Internet connections supported by the modem to 253. Note: Depending on how many computers/network devices you plan to connect, you may need to purchase additional Ethernet cables. The X5 comes with one Ethernet cable and one USB cable. ADSL X5 User's Guide...
- Page 25 Once your initial computer has been successfully connected to the Web, you can now connect the other computers and/or a network device. To connect additional computers directly to the X5, see the next section. To connect a network device to the X5, see page 26. To Connect Additional Computers 1 1 1 1 Shut down the computer you want to add to the X5.
- Page 26 Web browser (e.g., Internet Explorer or Netscape Navigator) on each computer using your network and try to connect to a familiar Web address. Congratulations! You have connected your network device to the Internet. You are done with this user’s guide. Enjoy your X5! ADSL X5 User's Guide...
- Page 27 X5. 1 1 1 1 From your Windows desktop, click the Start button, point to Programs, then point to Zoom ADSL Modem, then select Uninstall X5 ADSL Modem. 2 2 2 2 When prompted to confirm your choice, click Yes.
-
Page 28: If You Need Help
SmartFacts Tip: From time to time, Zoom may release improved firmware. This is also available at www.zoom.com , along with upgrade instructions. We recommend that you check our Web site periodically for updates. Call our support office in the United States at (561) 241-7170 or in the United Kingdom at 44 (0)1276 704440. -
Page 29: Chapter 2: Statusm
Most users can skip this chapter, as it is primarily for advanced users and for those who are instructed by their Internet service provider or Zoom Technical Support to verify settings, usually for troubleshooting. If you are using network device (such as a wireless access point, router, hub, or switch), you can monitor your X5 from any of the computers that are connected to your network. -
Page 30: Monitoring System Status
Monitoring System Status If you want to check the overall system status, click the System Status icon at the top of any page in the Zoom Configuration Manager. (If you forgot how to log in to the Zoom Configuration Manager, see page 13.) -
Page 31: Monitoring Adsl Status
If you want to check the status of your ADSL connection, click the ADSL Status icon at the top of the Zoom Configuration Manager. (If you forgot how to log in to the Zoom Configuration Manager, see page 13.) The ADSL Status page provides information about your ADSL connection. -
Page 32: Etup Options
Using IP Filters on page 44 for more information. Using IP Filters Using IP Filters Advanced Setup Advanced Setup Advanced Setup How To How To How To Changing Changing Changing Changing Your Changing Your Changing Your Changing Changing Changing ADSL X5 User’s Guide... -
Page 33: Chapter 3: Advanceds
Advanced Setup page. To access this page, click the Advanced Setup icon at the top of any page in the Zoom Configuration Manager. (If you forgot how to log in to the Zoom Configuration Manager, see page 13.) - Page 34 Internet locations. You can also block or allow incoming access to computers on your LAN. This page displays the current filters and lets you edit and add filters. Table continues on the next page… ADSL X5 User’s Guide...
- Page 35 This button… Opens a page that lets you… DHCP Specify Dynamic Host Configuration Protocol (DHCP) settings to enable network administrators to centrally manage the assignment and distribution of IP information to computers on a network. When you enable DHCP on a network, you allow a device (such as your X5’s router or a router located with your Internet service provider) to assign temporary IP addresses to your...
- Page 36 IPoA Status Configure an Internet Protocol over ATM (IPoA) interface on the ADSL/Ethernet router. An IPoA interface can be used to exchange IP packets over the ATM network, without using an underlying Ethernet over ATM (EOA) connection. ADSL X5 User’s Guide...
- Page 37 The buttons in the Administration group are typically used for administrative tasks, such as diagnostic testing, upgrading firmware, changing your Zoom Configuration Manager password, etc. The following table lists each button in the Administration group and gives a brief description of the settings you can specify.
-
Page 38: Ettings
For more information about changing your WAN Configuration settings, click the Help icon at the top of the screen while you are on this page. This opens the online help and displays a topic containing detailed information about the WAN Configuration page. ADSL X5 User’s Guide... -
Page 39: Settings
Changing Your Firewall Settings Use the Firewall Configuration page to change the X5’s firewall settings. To open this page, click the Firewall button in the Configuration section of the Advanced Setup page. When you install the X5, a firewall is automatically established to offer your computer protection as you use the Internet. -
Page 40: Passwords
User Configuration button, located in the Administration group on the Advanced Setup page. When you installed the X5 and tried to open the Zoom Configuration Manager, you were prompted for a User Name and Password in order to gain access. (The default name and password were supplied to you on page 13.) -
Page 41: Onfiguration
7 7 7 7 Click Write Settings to Flash. In addition, you can also create additional logins (that is, user names and passwords) with varying degrees of access to the Zoom Configuration Manager. For more information about managing logins, click the Help icon at the top of the screen while you are on the User Configuration page. - Page 42 For more information about backing up and restoring your customized settings, click the Help icon at the top of the screen while you are on the Backup/Restore Config page. This opens the online help and displays a topic containing detailed information about this process. ADSL X5 User’s Guide...
-
Page 43: Resetting Defaults
1 1 1 1 Log into the Zoom Configuration Manager and click the Advanced Setup icon to open the Advanced Setup page. (See page 13 if you need help logging in.) 2 2 2 2 In the Administration section, click the Reboot button. -
Page 44: Using Ip Filters
For more information about setting up IP filters, click the Help icon at the top of the screen while you are on the IP Filter Configuration page. This opens the online help and displays a topic containing detailed information about this process. ADSL X5 User’s Guide... -
Page 45: Table
We post updated tables on our Web site. If your country is not listed in the tables below, please consult www.zoom.com Note to USA customers If your ADSL service provider is not shown below, first use the settings for Service Provider Not Shown at the bottom of the table. - Page 46 1483 Bridged IP LLC SNAP 1483 Bridged IP LLC SNAP PPPoA VC-MUX PPPoE LLC PPPoA VC-MUX PPPoA VC-MUX PPPoE LLC PPPoE LLC PPPoE LLC 1483 Bridged IP LLC 1483 Routed IP LLC 1483 Bridged IP LLC 1483 Routed IP LLC ADSL X5 User’s Guide...
- Page 47 Table B (Continued): Countries Other Than The USA Service Provider VPI VCI Encapsulation Spain-Albura, Tiscali Spain-Colt Telecom, Ola Internet Spain-EresMas, Retevision Spain-Telefonica (1) Spain-Telefonica (2), Terra Spain-Wanadoo (1) Spain-Wanadoo (2) Spain-Wanadoo (3) Sweden-Telenordia Sweden-Telia Switzerland Turkey(1) Turkey(2) UK (1) UK (2) Venezuela-CANTV Vietnam Appendix A: ADSL Internet Settings Tables...
-
Page 48: Ack Panels
Note: If the light fails to switch from blinking to steady after a minute or two, check with your ADSL provider that the ADSL connection is activated, or refer to Appendix D: Troubleshooting on page 57. ADSL X5 User’s Guide... -
Page 49: Appendix B: Front Andb
The back panel of the X5 looks like this: The following table describes each item on the panel. Port Description ADSL Jack to connect the modem to the ADSL telephone wall jack. Port that can connect the modem to a USB port of a Windows computer. -
Page 50: Appendix C: Tcp/Ip N
If you are using Macintosh, see Macintosh TCP/IP Settings on page 51. If you are using Linux, see Linux TCP/IP Settings on page 53. If you are using Windows, see Windows TCP/IP Settings on page 54. ADSL X5 User’s Guide... -
Page 51: Etwork Settings
Macintosh TCP/IP Settings How you configure your Macintosh computer’s network settings differs, depending on your Mac OS. For OS X, follow the instructions below. Otherwise, go to page 52. Mac OS X 1 1 1 1 From the Dock, choose System Preferences and then Network to display the Network pane. - Page 52 DHCP Client ID field. 4 4 4 4 Close the TCP/IP Window. You will be asked if you want to save the changes. Click Save. 5 5 5 5 Continue with Establishing Communication on page 13. ADSL X5 User’s Guide...
- Page 53 Linux TCP/IP Settings The instructions for setting up boot-time DHCP vary dramatically by distribution, so you may want to refer to your particular version’s documentation. Once you have followed the instructions for your Linux system, continue with Establishing Communication on page 13. Note: If you have more than one network card installed, you will need to pick distinct Ethernet identifiers for each (eth0, eth1, eth2, and so...
- Page 54 ! If you are using a static IP address: Ensure that Use the following IP address and Use the following DNS server addresses are selected and that the correct IP address, Subnet mask, Default gateway, and Preferred DNS server values appear. ADSL X5 User’s Guide...
-
Page 55: Windows 2000
Windows 2000 1 1 1 1 Open the Internet Protocol (TCP/IP) Properties dialog box. a a a a From the desktop, click the Start button, point to Settings, then Network and Dial-up Connections. b b b b Right-click the Local Area Connection icon, and select Properties. - Page 56 Specify an IP address is selected and that the correct IP Address and Subnet Mask values appear. On the DNS Configuration tab, ensure that Enable DNS is selected and that something appears in the Host box. (If not, enter ADSL X5 User’s Guide...
-
Page 57: Appendix D: Troubleshooting
Appendix D Troubleshooting The following are some problems you may experience and some possible solutions to remedy the situation. Problem My X5’s ADSL light continually blinks and does not stay solidly lit. Solution There are several issues that could cause this problem. Check these items: Ensure that the phone cord is firmly plugged into the wall jack and the ADSL jack on the back of the X5 (not the PHONE... - Page 58 ADSL Username and Password correctly. (Note that this is NOT the username and password you used to log into the Zoom Configuration Manager on page 13.) ! If you had the modem automatically configure its settings, open the Basic Setup page, ensure that MANUAL is selected, then select 7 from the Virtual Circuit drop-down list.
-
Page 59: Information
! If you are using Windows, see Windows TCP/IP Settings on page 54. Problem I cannot log into the Zoom Configuration Manager. I have typed http://10.0.0.2 or http://10.0.0.3 (depending on whether I am using the X5’s Ethernet jack or USB port), but I am not prompted for a User Name and Password. - Page 60 X5 software be installed. Run the installation CD (as explained in Installing the Software on 8), reboot the computer, then try to connect to a familiar Web address to ensure that the Internet connection is made. ADSL X5 User's Guide...
- Page 61 Problem The computer on which I installed the X5 software is connected to the Web, but the computers connected through my network device cannot access the Internet. Solution The problem is most likely with your network device (such as a wireless access point, router, hub, or switch).
-
Page 62: Appendix E: Configuring
If you are using an earlier version of one of these browsers, the configuration may be slightly different from below. In those cases—or if you are using another browser altogether—configure the browser to use a network connection (this might be called a “Local Area Network” or “broadband” connection). ADSL X5 User's Guide... -
Page 63: Configuring Internet Explorer
Configuring Internet Explorer The following instructions are for Internet Explorer Version 5.0 or later. (If you do not have this version, you can get a free upgrade from Microsoft Corp. If you are not sure what version you have, open Internet Explorer and from the Help menu, choose About Internet Explorer. - Page 64 Internet Mail Account dialog box select No, then click Next. On the Completing the New Connection Wizard dialog box, uncheck the To connect to the Internet immediately, select this box… check box (if it appears) and click Finish. ADSL X5 User's Guide...
- Page 65 Configuring Netscape Navigator The following instructions are for Netscape Navigator Version 7.2. (If you do not have Version 7.2, you can get a free upgrade from Netscape Communication Corp. If you are not sure what version you have, open Netscape Navigator and from the Help menu, choose About Netscape.
-
Page 66: Appendix F: Regulatory
This equipment generates, uses and can radiate radio frequency and, if not installed and used in accordance with the instructions, may cause harmful interference to radio communications. ADSL X5 User's Guide... - Page 67 However, there is no guarantee that interference will not occur in a particular installation. If this equipment does cause harmful interference to radio or television reception, which can be determined by turning the equipment off and on, the user is encouraged to try to correct the interference by one or more of the following measures: Reorient or relocate the receiving antenna.
- Page 68 3524-A 27341 ©2004...
Need help?
Do you have a question about the ADSL X5 and is the answer not in the manual?
Questions and answers