Table of Contents
Advertisement
Quick Links
Advertisement
Table of Contents

Related Manuals for daisalux LPS24 Series

Summary of Contents for daisalux LPS24 Series
- Page 1 USER MANUAL Centralised emergency lighting device LPS24 V20200515-F8...
- Page 2 V20200515-F8...
-
Page 3: Table Of Contents
8.2.1.4. Fails 8.2.2. Test 8.2.2.1. Function test 8.2.2.2. Duration test 8.2.2.3. Capacity test 8.2.3. Config 8.2.3.1. System 8.2.3.2. Dry contacts 8.2.3.3. Auxiliary inputs 8.2.3.4. Gateway board 8.2.4. Outputs 8.2.4.1. Circuits 8.2.4.2. Luminaires (ELC) 8.2.5. Actions 8.2.5.1. Actions 8.2.5.2. Scenes www.daisalux.com... - Page 4 10.2.5. Overload on the device: 10.3. Luminaire faults: 10.3.1. Faulty ELC luminaires: 10.3.2. ELC luminaires not installed: 10.4. Battery Problems: 10.4.1. Battery duration fault: 10.4.2. Reversed battery connection: 11. Accessories 11.1 LPSLan/LPSWeb/ModBus 11.2 DR-3 11.3 Remote controls Appendix A. Cable lengths B. SCH www.daisalux.com...
-
Page 5: General Information
• Incorrect installation. 1.3. Parts Defective components may only be replaced by original DAISALUX parts. Safety requirements cannot be guaranteed parts other than those mentioned are used. No warranty, service or liability is admitted if improper parts are used. -
Page 6: Safety Instructions
2.2. Repairs Any repairs that require opening the centralised power unit must only be carried out by authorised DAISALUX personnel. 3. Transport and storage 3.1. Review on delivery Caution: carefully examine the centralised power unit at the reception point to ensure that transport was correct and there is no external damage. -
Page 7: Product Description
LPS24 – USER MANUAL 4. Product description . The DAISALUX LPS system is a class I centralised power unit to provide power supply and monitor up to 150 safety and emergency exit luminaires. The LPS system includes: • Battery for 0.5h, 1h, 2h 1.5h, 3h, 6h or 8 hours of emergency lighting. User configurable. -
Page 8: Design And Structure Of The Lps Centralised Power Unit
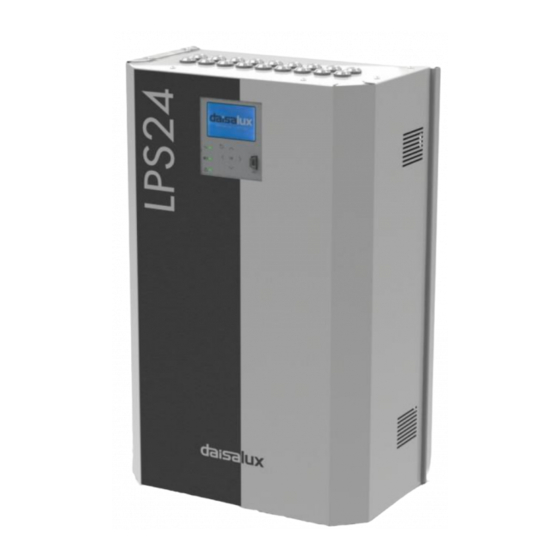
LPS24 – USER MANUAL 4.1. Design and structure of the LPS centralised power unit LPS24-26 LPS24-65 1. Cable input 2. Connections 3. Control Panel 4. Converter: 230 or 110VAC/24VDC 5. Battery Type of centralised power unit: uninterruptible www.daisalux.com... -
Page 9: Control Panel
Flashing amber LED (500ms ON, 1.5s OFF) End of discharge log indicator. Eliminated on confirming that the notification has been read. Alternate green and red LED (250ms each Bootloader start up, waiting for activation LED) sequence. Flashing red LED (500ms ON, 1.5s OFF) Zoning in progress. www.daisalux.com... -
Page 10: Technical Data
7.2 A 2.3 A 2.3 A 5.7 A 5.7 A Consumption A power < 3 A < 5.2 A < 3 A < 5.2 A Dimensions: 400 x 200 x 400mm 400 x 200 x 600mm Elevation schematic: Size: www.daisalux.com... -
Page 11: Assembly
The batteries are not installed when the centralised power units are supplied. 6.1. Centralised power unit LPS24-26 LPS24-65 www.daisalux.com... -
Page 12: Battery
Then connect the battery cables and terminals supplied. When connecting the battery, check that: - the screws are well tightened, - the polarity is correct. To do this, see the label on their connection area. RECT. BAT 2 BAT 1 LPS24-26 LPS24-65 www.daisalux.com... -
Page 13: Electrical Connections
(PE). Observe the maximum lengths depending on the cable section specified in A. Cable length The luminaires are connected to the + and - terminals, which are duplicated in the centralised power unit; i.e. it has two outputs for each circuit. To configure the luminaires 8.2.4.2. Luminaires www.daisalux.com... -
Page 14: Auxiliary Inputs (Aux1
To switch on all the luminaires in case of remote network failure, the “AUX” (auxiliary inputs) must be connected to the DR-3 “NO” (normally open) contact (three-phase power detector). The DR-3 must be connected in serial form as shown in the image below to monitor more than one remote fault: www.daisalux.com... -
Page 15: Remote Fault Connection To Several Lps24 Devices
• Device with active auxiliary switched on DBR switch on active • Device with active DBR switched on Zoning on course • Device running luminaire zoning Battery is running • Alarm for next end of active discharge down Contactor open • Battery contactor open www.daisalux.com... - Page 16 • Voltage on both batteries not symmetrical Battery fuse failure • Fault in the battery’s fuses Duration test required • The duration test period has elapsed without a test having been performed Dry contacts: < 230V AC/ 30V DC; < 0,5A www.daisalux.com...
-
Page 17: Input 0
Regulation by potentiometer 6.3.6. Remote control (TELEM) The device has a remote input for connecting a Daisalux remote control. This input provides a remote control for the device so that it can be restarted when in standby or set to standby when there is a power failure at its input. -
Page 18: Lpslan
• Place the LPS centralised power unit in standby mode (there are two modes). → Centralised power unit on standby - Through the display: 8.2.5.1 Actions - Using the remote control: 6.3.6 Remote control Removing the battery fuse is recommended before moving the centralised power unit once it is switched off. www.daisalux.com... -
Page 19: Switching On The Lps Centralised Power Unit
If there is a power supply fault during zoning, the process will end and the system will switch on all connected luminaires. Zoning must be performed during start-up or whenever a new ELC series luminaire connected device (replacements extensions) or whenever luminaires are moved from one circuit to another. www.daisalux.com... -
Page 20: Use Of The Centralised Power Unit
Use the < or v buttons to decrease the value and the > or ʌ buttons to increase the value. Press and hold to change the values faster. Press ← to cancel edit mode and discard changes , or press OK to finalise edit mode and confirm the changes. www.daisalux.com... -
Page 21: System
• Wrong connected: no battery connected to a device is detected, check fuses and battery wiring • open: battery open or in bad state • overvoltage: battery voltage very high • undervoltage: low battery voltage • OK: battery correct www.daisalux.com... -
Page 22: Rectifier
Indicates the date (mm/dd/yy) and result of the last functional test performed. • Circuits failure: test ended by a fault detected in a circuit • Battery failure: test ended by a fault detected in the battery • Ok: test finished correctly • -: no test has been carried out www.daisalux.com... -
Page 23: Duration Test
The interval is a maximum of one year from the last duration test carried out or one month from the current date. The test will be performed at the established test time. www.daisalux.com... -
Page 24: Capacity Test
It enables a capacity test to be ordered or cancelled if it is running. One option or another or none is displayed depending on the status of the device To order the capacity test, simply configure the current to the desired battery discharge rate and from there “Run test”. www.daisalux.com... -
Page 25: Config
For further information about dry contacts and the alerts available see section 6.3.4 Overview OK Main menu > Config Dry C DRY CONTACTS >Contact number: *Operation mode: normal *System working ✔ *Mains failure System Dry C. AuxIn Gatew www.daisalux.com... -
Page 26: Auxiliary Inputs
With associated action >Input number: select (with < and >) the number of the auxiliary input to edit or view its configuration. Activation: defines how the auxiliary input should be to run the configured action (open or short circuit). www.daisalux.com... -
Page 27: Gateway Board
It is not displayed if the LPSLan module does not have WiFi connectivity WiFi Security: Choose the wireless security network type: Wifi WEP or WPA/WPA2. It is not displayed if the LPSLan module does not have WiFi connectivity www.daisalux.com... -
Page 28: Outputs
• ELC: this setting must be used if luminaires from the Daisalux ELC series are connected to the device. Enables communication with the luminaires through the power cables and configure them from the unit’s display. In alert it provides output voltage according to the polarity shown on the terminals and in test or emergency reverses the polarity of the outputs. - Page 29 Only available for “beacons type” circuits. DBR min dimming: minimum percentage of dimming during DBR activation. Only available for “beacons type” circuits. DBR max dimming: maximum percentage of dimming during DBR activation. Only available for “beacons type” circuits. www.daisalux.com...
-
Page 30: Luminaires (Elc)
The first digit is the circuit number in which the luminaire is zoned and the second digit (from 1 to 32) is the identifier of the luminaire within the circuit. LPSLan available only if the accessory is installed. www.daisalux.com... -
Page 31: Actions
(see section 12.1.1). Only displayed if the safety conditions necessary for testing the circuits are given. Stop buzzer: stops the audible alarm for 30 minutes to be able to operate with a faulty device more comfortably. www.daisalux.com... -
Page 32: Scenes
INFORMATION 1123 Version: Reference: LPS24-26 Battery: BAT-PB-6-XB-E1 Rectifier: AC/DC-650-27 Contact: www.daisalux.com Displays the LPS24 unit’s serial number Version: Displays the LPS24 control unit’s firmware version Reference: shows the unit’s reference Battery: shows the battery reference Rectifier: shows the rectifier’s reference... -
Page 33: Appendix
Command executed User command executed Password: 0000 Request the password required to edit the value or execute the order Low security The device estimates that the installation requires maintenance Very low security The device estimates that the installation is unsafe www.daisalux.com... -
Page 34: Maintenance
• Tightening of screws associated with alternating AC terminals • Tightening of battery connections • Tightening the output terminals. • Tightening the auxiliary and power free contact terminals. • General tightening of the screws. Use isolated tools and avoid short circuits www.daisalux.com... -
Page 35: Electrical Checks
• Run a circuit test to verify that the error is external. • Call Daisalux technical service if the same error persists. • If the fault is rectified, check the wiring and that the power connected to said outlet does not exceed the limits stipulated in this manual. -
Page 36: Regulation Fault
• Check that the cables (L-N-PE) that go from the card to the rectifier are connected correctly. Warning: high voltage. • If the fault persists, call Daisalux technical service. 10.2.3. Functional test fault: If the device indicates a functional test fault, proceed as follows: •... -
Page 37: Elc Luminaires Not Installed
From the LPSWeb the device status can be viewed and certain aspects of its operation configured, as well as the centralised luminaires on the Daisalux ELC series connected to it. For a detailed description of the operating mode, consult the LPSWeb manual. -
Page 38: Dr-3
See information about connection in 6.3.3.1 or 6.3.3.2 Remote fault 11.3 Remote controls DAISALUX remote controls are designed to command an installation of devices and emergency equipment using the ON/OFF button on the front panel. The basic operation in the absence of POWER is: •... -
Page 39: Sch
LPS24 – USER MANUAL B. SCH www.daisalux.com...
Need help?
Do you have a question about the LPS24 Series and is the answer not in the manual?
Questions and answers