Table of Contents
Advertisement
Advertisement
Table of Contents

Related Manuals for Dentsply Sirona CEREC SpeedFire


Summary of Contents for Dentsply Sirona CEREC SpeedFire
- Page 1 01.2020 New as of: CEREC SpeedFire Operating Instructions English...
-
Page 2: Table Of Contents
Table of contents Dentsply Sirona Operating Instructions CEREC SpeedFire Table of contents General data ......................Dear Customer,.................... Contact data....................General information about this operating manual ........General conventions and structure of the document ........1.4.1 Structure of the document.............. 1.4.1.1 Identification of the danger levels ......... - Page 3 Dentsply Sirona Table of contents Operating Instructions CEREC SpeedFire 3.2.8 Start of ................... 3.2.9 Cancel.................... 3.2.10 Preheat ..................Standards/ approvals/ certifications ............. Technical data....................Electromagnetic compatibility ..............3.5.1 Electromagnetic emission .............. 3.5.2 Interference immunity ..............3.5.3 Working clearances ............... Transport and commissioning.................
- Page 4 Table of contents Dentsply Sirona Operating Instructions CEREC SpeedFire Operation ........................ Loading the furnace for sintering ..............Starting the glazing process................. 5.2.1 Loading the furnace for glazing............5.2.2 Using the glazing spray..............5.2.2.1 Preparing the restoration ..........5.2.2.2 Fixing the restoration to the restoration holder .....
-
Page 5: General Data
Operating Instructions CEREC SpeedFire 1.1 Dear Customer, General data Dear Customer, Thank you for purchasing your CEREC SpeedFire high-temperature furnace from Dentsply Sirona. It will support you with your work for many years, as it was developed and built with state-of-the-art technology. -
Page 6: General Information About This Operating Manual
1 General data Dentsply Sirona 1.3 General information about this operating manual Operating Instructions CEREC SpeedFire General information about this operating manual Observe the Operating Instructions Please familiarize yourself with the unit by reading through these Operating Instructions before putting it into operation. It is essential that you comply with the specified warning and safety information. -
Page 7: General Conventions And Structure Of The Document
Dentsply Sirona 1 General data Operating Instructions CEREC SpeedFire 1.4 General conventions and structure of the document General conventions and structure of the document 1.4.1 Structure of the document 1.4.1.1 Identification of the danger levels To prevent personal injury and material damage, please observe the warning and safety information provided in these instructions for use. -
Page 8: Formats And Symbols Used
1 General data Dentsply Sirona 1.5 Scope of these Operating Instructions Operating Instructions CEREC SpeedFire 1.4.1.2 Formats and symbols used The formats and symbols used in this document have the following meaning: Prerequisite Requests you to do something. 1. First action step 2. -
Page 9: Warranty And Liability
Exclusion of liability If the operator does not meet the obligation to carry out such maintenance or fault messages are ignored, Dentsply Sirona or its authorized dealer does not assume any liability for damage caused. 65 71 165 D3639... -
Page 10: Intended Use
The CEREC SpeedFire is suitable for sintering, painting and glazing ceramics and for painting and glazing glass ceramics. Only heat treatment processes sent as a job to the unit from the Dentsply Sirona CAD/CAM software may be performed. Heat treatments must be applied exclusively to the restorations and materials assigned by the software. -
Page 11: Legend
Dentsply Sirona 1 General data Operating Instructions CEREC SpeedFire 1.8 Legend Legend Year of manufacture 20XX "Hot surface" symbol "Warning of hand injuries" symbol Warning of hand injuries in the vicinity of devices with closing me- chanical parts. Product disposal symbol (see "Disposal [→ 59]"). - Page 12 1 General data Dentsply Sirona 1.8 Legend Operating Instructions CEREC SpeedFire Symbols on the packaging Take note of the following symbols on the packaging: Protect from moisture Fragile; handle with care Do not stack Temperature during storage and transport Relative humidity during storage and transport...
-
Page 13: Safety Instructions
In order to ensure product safety, this device may be operated only with original Dentsply Sirona accessories or third-party accessories expressly approved by Dentsply Sirona. In particular, only the power cable also supplied or the corresponding original spare part may be used with the unit. -
Page 14: In Case Of Damage
2 Safety instructions Dentsply Sirona 2.2 Connecting the unit Operating Instructions CEREC SpeedFire 2.1.5 In case of damage In case of noticeable malfunctions or damage, stop using the instrument immediately and notify your authorized dealer or the manufacturer. Connecting the unit Perform connection by following the directions given in the present operating instructions. -
Page 15: Patient Environment
1500mm 59” 59” 1500mm 59” CEREC SpeedFire is a laboratory device and may not therefore be used in the patient environment (A). This applies to all possible patient positions (B) during the examination or treatment. 65 71 165 D3639 D3639.201.01.08.02 01.2020... -
Page 16: Ventilation Slots
2 Safety instructions Dentsply Sirona 2.5 Ventilation slots Operating Instructions CEREC SpeedFire Ventilation slots Under no circumstances may the ventilation slots on the rear of the unit be covered, since otherwise the air circulation will be obstructed. This can cause the unit to overheat. -
Page 17: Insulation Material Of The Furnace Chamber
Dentsply Sirona 2 Safety instructions Operating Instructions CEREC SpeedFire 2.7 Insulation material of the furnace chamber WARNING Risk of burns due to objects falling out As there is a serious risk of burns in this case, it is essential to install a fire-proof table and floor covering. -
Page 18: Product Description
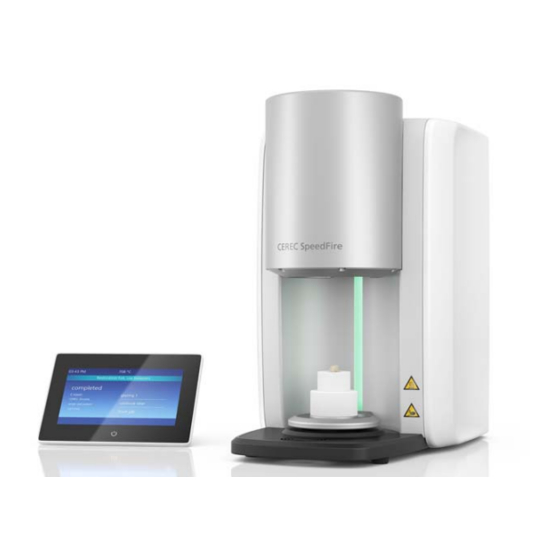
3 Product description Dentsply Sirona 3.1 Main components of the product Operating Instructions CEREC SpeedFire Product description Main components of the product Basic unit Basic unit Bottom door insulation CEREC SpeedFire Control panel Top door insulation Start button Rear of the basic unit... - Page 19 Dentsply Sirona 3 Product description Operating Instructions CEREC SpeedFire 3.1 Main components of the product Rear side of the control panel Connector plug for the 2x USB communication control panel "Ethernet" connection for 65 71 165 D3639 D3639.201.01.08.02 01.2020...
-
Page 20: Explanation Of The Symbols
3 Product description Dentsply Sirona 3.2 Explanation of the symbols Operating Instructions CEREC SpeedFire Explanation of the symbols 3.2.1 Main screen Temperature of the furnace chamber Settings Information Start Overview of received jobs (job list) Preheat Multi-select option: Selection of several jobs Status information field and information on next step 3.2.2... -
Page 21: Job Archive
Dentsply Sirona 3 Product description Operating Instructions CEREC SpeedFire 3.2 Explanation of the symbols 3.2.3 Job archive The "Job Archive" contains new, processed, deleted and canceled jobs. You can permanently delete the jobs or send them to the job list again. -
Page 22: Back
3 Product description Dentsply Sirona 3.2 Explanation of the symbols Operating Instructions CEREC SpeedFire Basic settings You can select the unit of temperature, the time, date and language here. Archive settings The job history is limited to the last 50 retrievable jobs and the last 25 fully processed jobs. -
Page 23: Cancel
3.2.10 Preheat This can be used to preheat the furnace to 400 °C. The preheating serves to speed up the glazing process, e.g. of the Dentsply Sirona CEREC Tessera The temperature of 400°C is maintained for 30 min so that the... -
Page 24: 3.3 Standards/ Approvals/ Certifications
3 Product description Dentsply Sirona 3.3 Standards/ approvals/ certifications Operating Instructions CEREC SpeedFire Standards/ approvals/ certifications CE mark This product bears the CE mark in accordance with the provisions of Council Directive 2006/42/EC (machinery directive). As such, the following standards apply: DIN EN ISO 12100:2011-03, DIN EN 61010-1:2011-07 and DIN EN 61326-1:2013-07. -
Page 25: Technical Data
Dentsply Sirona 3 Product description Operating Instructions CEREC SpeedFire 3.4 Technical data Technical data Model designation: CEREC SpeedFire Type of protection against electric shock: Protection Class I device Degree of protection against ingress of water: Ordinary device (without protection against ingress of... -
Page 26: Electromagnetic Compatibility
Electromagnetic compatibility Observance of the following information is necessary to ensure safe operation regarding EMC aspects. CEREC SpeedFire complies with the requirements for electromagnetic compatibility (EMC) according to DIN EN 61326-1:2006-10. CEREC SpeedFire is hereinafter referred to as "UNIT". 3.5.1... -
Page 27: Interference Immunity
Dentsply Sirona 3 Product description Operating Instructions CEREC SpeedFire 3.5 Electromagnetic compatibility 3.5.2 Interference immunity The UNIT is intended for operation in the electromagnetic environment specified below. The customer or user of the UNIT should make sure that it is used in such an environment. - Page 28 3 Product description Dentsply Sirona 3.5 Electromagnetic compatibility Operating Instructions CEREC SpeedFire Remark 2 These guidelines may not be applicable in all cases. The propagation of electromagnetic waves is influenced by their absorption and reflection by buildings, objects and persons.
-
Page 29: Working Clearances
Dentsply Sirona 3 Product description Operating Instructions CEREC SpeedFire 3.5 Electromagnetic compatibility 3.5.3 Working clearances Recommended working clearances The UNIT is intended for operation in an electromagnetic environment, between portable and mobile RF where radiated RF interference is checked. The customer or the user of... -
Page 30: Transport And Commissioning
4.1 unpacking Operating Instructions CEREC SpeedFire Transport and commissioning unpacking All products from Dentsply Sirona are carefully checked prior to shipment. Please perform an incoming inspection immediately after delivery. 1. Check the delivery note to ensure that the consignment is complete. -
Page 31: Scope Of Delivery And Accessories
In order to ensure product safety, this device may be operated only with original Dentsply Sirona accessories or third-party accessories expressly approved by Dentsply Sirona. In particular, only the power cable also supplied or the corresponding original spare part may be used with the unit. -
Page 32: Setup/Connection
4 Transport and commissioning Dentsply Sirona 4.5 Setup/connection Operating Instructions CEREC SpeedFire Setup/connection 4.5.1 Transportation without packaging Transportation without packaging CAUTION Damage to the unit or risk of injury during transport without packaging There is a danger of the unit falling down if it is grasped by its plastic housing. -
Page 33: Connecting The Unit To The Power Supply And Existing Network
Dentsply Sirona 4 Transport and commissioning Operating Instructions CEREC SpeedFire 4.5 Setup/connection 4.5.3 Connecting the unit to the power supply and existing network Connecting the unit to the power supply Only use the power cord supplied in the package for connecting to the mains. -
Page 34: Wlan Configuration
4 Transport and commissioning Dentsply Sirona 4.6 Commissioning Operating Instructions CEREC SpeedFire 4.5.4 WLAN configuration Use the USB WLAN adapter also supplied as an option for wireless connection of the unit to an existing network. 1. Inset the adapter into one of the existing USB slots on the control panel. -
Page 35: Switching The Unit On And Off
Dentsply Sirona 4 Transport and commissioning Operating Instructions CEREC SpeedFire 4.6 Commissioning 4.6.2 Switching the unit ON and OFF Switch on the unit NOTE Only switch on the unit once you have connected the network cable. 1. Use the main switch on the rear of the unit to switch it on. - Page 36 4 Transport and commissioning Dentsply Sirona 4.6 Commissioning Operating Instructions CEREC SpeedFire CAUTION The unit must not be operated without door insulation. 1. Insert the positioning pin into the hole of the furnace door. 2. Start by placing the bottom door insulation on the positioning pin.
-
Page 37: Installing And Configuring The Unit
Prerequisites for transferring the jobs to the CEREC SpeedFire: -CEREC SpeedFire is turned on, - CEREC SpeedFire is configured and connected as a device in the software, - CEREC SpeedFire is activated as a production unit for the case. -
Page 38: Installing The Unit
You must establish a connection to your CEREC recording unit before you can operate the unit. The CEREC SpeedFire can be operated with both a static as well as an automatically assigned IP address. In the factory the unit is always configured with a static IP address. -
Page 39: Manual Unit Search
Dentsply Sirona 4 Transport and commissioning Operating Instructions CEREC SpeedFire 4.6 Commissioning 4.6.4.3 Manual unit search ü The unit must be switched on. ü The unit must be directly connected to the existing network with the network cable. 1. Start the CEREC SW software. -
Page 40: Main Screen Following Startup Of The Unit
4 Transport and commissioning Dentsply Sirona 4.6 Commissioning Operating Instructions CEREC SpeedFire 4.6.6 Main screen following startup of the unit Once connected successfully, the start screen for the unit’s software is displayed. In this view you shall receive various information on the device status and operation. -
Page 41: Job List And Multi-Select
Once jobs have been successfully processed in your CEREC MC, MC X, MCXL or Primemill, the heat treatment jobs are automatically sent to the furnace. A CEREC SpeedFire must be connected for the automatic transfer of jobs. All jobs are displayed in the main view of the furnace app. Here you can select your job based on the restoration preview, material, patient ID, processing date or tooth number and start the process. -
Page 42: Selecting The Job And Starting The Process
4 Transport and commissioning Dentsply Sirona 4.6 Commissioning Operating Instructions CEREC SpeedFire 4.6.8 Selecting the job and starting the process NOTE Only use approved materials Only materials that can be selected from the material dialog in the CEREC SW software or for which a heat treatment program is saved after selection are allowed for heat treatment. -
Page 43: Operation
Dentsply Sirona 5 Operation Operating Instructions CEREC SpeedFire 5.1 Loading the furnace for sintering Operation Loading the furnace for sintering NOTE Maximum Observe restoration size Observe the maximum Furnace chamber size when loading the furnace. - Diameter: 38 m m... - Page 44 5 Operation Dentsply Sirona 5.1 Loading the furnace for sintering Operating Instructions CEREC SpeedFire CAUTION Damage to furnace and deposited items As the furnace opens automatically after the process, the furnace and deposited items can be damaged if these instructions are not followed.
-
Page 45: Starting The Glazing Process
Dentsply Sirona 5 Operation Operating Instructions CEREC SpeedFire 5.2 Starting the glazing process Starting the glazing process See "Using the glazing spray [→ 48]" for how to use the glazing spray. 1. Select the job. 2. Select the process. 3. Load the furnace (see "Loading the furnace for glazing [→ 47]"). - Page 46 5 Operation Dentsply Sirona 5.2 Starting the glazing process Operating Instructions CEREC SpeedFire Glaze arrangement Manufacturer Material Dentsply Sirona ● CEREC Zirconia ● CEREC Zirconia meso ● inCoris TZI C ● inCoris TZI ● CEREC Blocs C ● CEREC Blocs C PC ●...
-
Page 47: Loading The Furnace For Glazing
Dentsply Sirona 5 Operation Operating Instructions CEREC SpeedFire 5.2 Starting the glazing process 5.2.1 Loading the furnace for glazing NOTE Maximum Observe restoration size Observe the maximum Furnace chamber size when loading the furnace. - Diameter: 38 m m - Height: 20 mm The restoration (including with the Glazing Support Single/Multi Unit) must not exceed this length (38 ... -
Page 48: Using The Glazing Spray
5 Operation Dentsply Sirona 5.2 Starting the glazing process Operating Instructions CEREC SpeedFire 5.2.2 Using the glazing spray 5.2.2.1 Preparing the restoration The restoration must be dry and free of impurities. Use the glazing spray supplied in the package for the glazing, and take the CEREC SpeedPaste for fixing the restoration to the restoration holder. -
Page 49: Crystallization / Glazing Process Ips E.max Cad
Dentsply Sirona 5 Operation Operating Instructions CEREC SpeedFire 5.3 Crystallization / glazing process IPS e.max CAD Crystallization / glazing process IPS e.max CAD 1. Select the job. 2. Select the process. - "Crystallize" with or without using IPS e.max CAD Crystall./Glaze Spray - "Crystallize/glaze"... -
Page 50: Restoration Preparation For Crystallization/Glazing
Follow the additional instructions on the Ivoclar Vivadent flowchart "IPS e.max CAD Step-by-step for CEREC SpeedFire". Fixing the restoration with the "Glazing Support Single Unit" / "Glazing Support Multi Unit" and IPS Object Fix Putty/Flow... - Page 51 Dentsply Sirona 5 Operation Operating Instructions CEREC SpeedFire 5.3 Crystallization / glazing process IPS e.max CAD the door insulation; otherwise, these may collide with the furnace chamber. For multi-jobs, a maximum of two individual tooth restorations can be positioned together in the furnace.
-
Page 52: Vita Suprinity® Pc Crystallization/Glazing Process
Only load the furnace with approved materials, which must be assigned uniquely to the heat treatment job in the furnace. For crystallization, combination firing (crystallization / glazing) and glaze firing, only the supplied CEREC SpeedFire restoration holders "Glazing support single unit" or "Glazing support multi unit". IMPORTANT The less CEREC SpeedPaste used, the better. -
Page 53: Fireproof Tray With Integrated Fan
Fireproof tray with integrated fan 1. As soon as the processes have completed, use the fireproof tray of the CEREC SpeedFire to support your restoration while it is still hot and cool it to room temperature. Use tweezers to help you unload the furnace. -
Page 54: Care And Maintenance
6 Care and maintenance Dentsply Sirona 6.1 Insulation material of the furnace chamber Operating Instructions CEREC SpeedFire Care and maintenance Insulation material of the furnace chamber CAUTION Handling and disposing of the insulating material Abrasion of insulating material in the furnace door area may occur, which is visible as white dust. -
Page 55: Replacing The Main Fuses
Dentsply Sirona 6 Care and maintenance Operating Instructions CEREC SpeedFire 6.2 Replacing the main fuses Replacing the main fuses WARNING Electric shock Disconnect the power plug at the unit end before replacing the fuses. NOTE Fuse type The main fuses F1 and F2 are of the T12.5 A 250 V type. They are available under the REF 65 81 891. -
Page 56: Replacing The Filter
6 Care and maintenance Dentsply Sirona 6.3 Replacing the filter Operating Instructions CEREC SpeedFire Replacing the filter Depending on the degree of contamination, the filter fleece should be replaced regularly. 1. Unscrew the 2 screws (A) on the rear side. -
Page 57: Care, Cleaning, And Disinfecting Agents
Dentsply Sirona 6 Care and maintenance Operating Instructions CEREC SpeedFire 6.4 Care, cleaning, and disinfecting agents Care, cleaning, and disinfecting agents The cleaning agents and disinfectants approved by Sirona for the product surfaces are: ● Alpro – PlastiSept – PlastiSept wipes ●... -
Page 58: Service Options
7 Service options Dentsply Sirona 7.1 Temperature test Operating Instructions CEREC SpeedFire Service options Temperature test The temperature test is used to check the correct temperature for the furnace and is initiated by Customer Service in exceptional cases. The temperature test is only carried out on the instructions of the Customer Service Center. -
Page 59: Disposal
Dentsply Sirona 8 Disposal Operating Instructions CEREC SpeedFire 8.1 Disposal Disposal Disposal In accordance with Directive 2012/19/EU and national disposal regulations regarding old electrical and electronic devices, please be advised that such items must be disposed of in a special way within the European Union (EU). -
Page 60: Index
Index Dentsply Sirona Operating Instructions CEREC SpeedFire Index Application, 10 Unpacking, 30 Building installation, 13 Ventilation slots, 16 CE mark, 24 Customer Service Center, 5 Disposal of old electrical and electronic devices, 59 enretec GmbH, 59 furnace chamber size, 43, 47, 50, 52 Fuse Fuse type, 55 Replacement, 55 Intended use, 10 Maintenance, 9, 13... - Page 62 We reserve the right to make any alterations which may be required due to technical improvements. © Sirona Dental Systems GmbH Sprache: englisch Printed in Germany D3639.201.01.08.02 01.2020 Ä.-Nr.: 128 919 Sirona Dental Systems GmbH 65 71 165 D3639 Fabrikstr. 31 Order No ...
Need help?
Do you have a question about the CEREC SpeedFire and is the answer not in the manual?
Questions and answers