Table of Contents
Advertisement
Advertisement
Table of Contents

Related Manuals for KaVo LUX 540 LED U


Summary of Contents for KaVo LUX 540 LED U
- Page 1 Instructions for use KaVoLUX 540 LED U / T...
- Page 2 Distributed by: Manufacturer: KaVo Dental GmbH Kaltenbach & Voigt GmbH Bismarckring 39 Bismarckring 39 D-88400 Biberach D-88400 Biberach Phone +49 (0) 7351 56-0 www.kavo.com Fax +49 (0) 7351 56-1488...
-
Page 3: Table Of Contents
Instructions for use KaVoLUX 540 LED U / T Table of contents Table of contents 1 User instructions ........................ 6 1.1 User guide ........................6 1.1.1 Abbreviations ..................... 6 1.1.2 Symbols ......................6 1.1.3 Target group ..................... 6 1.2 Service ......................... 7 1.3 Terms and conditions of warranty.................. - Page 4 Instructions for use KaVoLUX 540 LED U / T Table of contents 4.4.2 Primus 1058....................... 49 4.4.3 Primus 1058 Life....................54 4.4.4 ESTETICA Standard 1063 / Comfort 1065 / Sensus 1066........58 4.4.5 Globus 1078 S, Status 1080 TM/C ................ 61 4.5 Ceiling assembly of the KaVoLUX 540 LED T..............
- Page 5 Instructions for use KaVoLUX 540 LED U / T Table of contents 10.2Guidelines and manufacturer's statement - Electromagnetic immunity ........ 105 10.3Guidelines and manufacturer's statement - Electromagnetic immunity ........ 106 10.4Recommended protective clearances between portable and mobile HF telecommunication devices and the KaVoLUX 540 LED .................. 108 5 / 110...
-
Page 6: User Instructions
Instructions for use KaVoLUX 540 LED U / T 1 User instructions | 1.1 User guide 1 User instructions 1.1 User guide Requirement Read these instructions before the initial startup to prevent misuse and dam- age. 1.1.1 Abbreviations Explanation brevi- ation Instructions for use Care instructions... -
Page 7: Service
For further information, please visit: www.kavo.com 1.3 Terms and conditions of warranty KaVo provides the final customer with a warranty that the product cited in the handover certificate will function properly and guarantees zero defects in the material or processing for a period of 12 months from data of purchase, subject... -
Page 8: Damage In Transit
Terms and Conditions, Art. 28). Outside Germany Note KaVo shall not be held liable for damage arising from transportation. The shipment must be checked on arrival. If the packaging is visibly damaged on delivery, please proceed as follows: 1. The recipient of the package must record the loss or damage on the delivery receipt. -
Page 9: Information On The Packaging: Storage And Transportation
Instructions for use KaVoLUX 540 LED U / T 1 User instructions | 1.4 Transportation and storage 1.4.3 Information on the packaging: Storage and transportation Note Please keep the packaging in case you need to return the product for servi- cing or repair. -
Page 10: Safety
NOTICE In cases which – if not prevented – could lead to material damage. 2.2 Safety instructions DANGER Explosion hazard. Risk of fatal injury. ▶ Do not use KaVo product in areas subject an explosion hazard. 10 / 110... - Page 11 KaVo KEY Laser III or KEY Laser 3+ can lead to the unintentional activation of the KaVo KEY Laser III and KEY Laser 3+. ▶ When using the KaVo KEY Laser III or the KEY Laser 3+, switch the operat- ing light to laser mode.
-
Page 12: Disposal
If you have any questions regarding proper disposal of the KaVo product, please contact the KaVo branch. 2.4 Information on electromagnetic compatibility... -
Page 13: Disposal Of Electronic And Electrical Devices
2 10 Information about electromagnetic compatibility, Page 105 Note KaVo cannot guarantee the compliance of accessories, cables, and other components not supplied by KaVo with the EMC requirements of IEC 60601-1-2 (DIN EN 60601-1-2). 2.5 Disposal of electronic and electrical devices... -
Page 14: Product Description
KaVo accepts liability for the safety, reliability, and performance of components supplied by KaVo, provided: ▪ installation, instructions, expansions, adjustments, changes or repairs were carried out by technicians trained by KaVo or third parties authorised by KaVo, or by the personnel of authorised distributors. 14 / 110... - Page 15 ▪ Current accident prevention regulations. Regular servicing and safety checks are essential for the permanent assurance of the operating and functional safety of the KaVo product and for the preven- tion of damage and hazards. Testing and maintenance intervals: Maintenance must be performed once a year, the safety checks at intervals of 2 years.
-
Page 16: Operating Light Kavolux 540 Led U
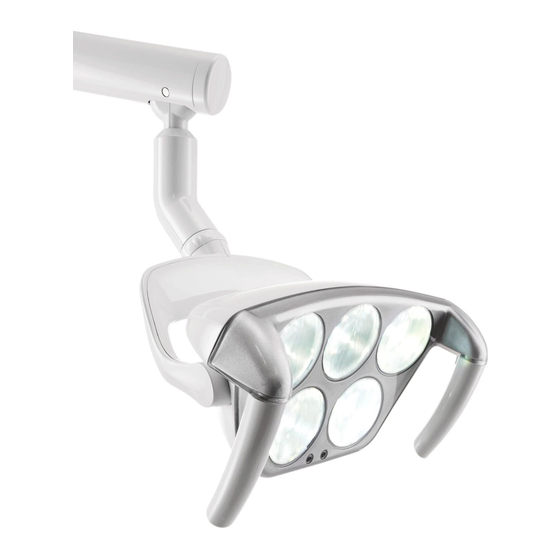
Note The KaVoLUX 540 LED U operating light is only suitable for mounting to the KaVo treatment centre ESTETICA E80, E70, E50 and E50 Life, as it can be directly controlled via the treatment centre. Components of the KaVoLUX 540 LED U: ①... -
Page 17: Operating Light Kavolux 540 Led T
Note The KaVoLUX 540 LED T operating light is designed exclusively for ceiling in- stallation and mounting to the KaVo treatment centres Primus 1058 / 1058 Life, Status 1080, Globus 1078, ESTETICA Sensus 1066, ESTETICA Comfort 1065, ESTETICA Standard 1063, ESTETICA E30 as well as for mounting to DSEclinical dental simulation units. - Page 18 Instructions for use KaVoLUX 540 LED U / T 3 Product description | 3.4 Dimensions and swing range Dimensions (in mm) Swing ranges (in mm) 18 / 110...
-
Page 19: Rating Plates
Instructions for use KaVoLUX 540 LED U / T 3 Product description | 3.5 Rating plates 3.5 Rating plates There is one rating plate for the treatment unit and, in the case of ceiling mounting, one additional rating plate for the ceiling mounting kit, The rating plate of the operating light is located on the top side of the swivel arm. -
Page 20: Technical Data And Requirements
Instructions for use KaVoLUX 540 LED U / T 3 Product description | 3.6 Technical data and requirements 3.6 Technical data and requirements Photobiological safety (IEC 62471) Risk group 1 (low risk) The products are safe under the majority of meth- ods of application, except for the case of prolonged exposition with potentially direct eye exposure. -
Page 21: Overview Of Use
Instructions for use KaVoLUX 540 LED U / T 3 Product description | 3.7 Overview of use Environmental conditions Operating environment / temperat- +10°C to +40°C Relative humidity 30 % to 75 % Air pressure 700 to 1060 hPa Max. elevation for operation max. -
Page 22: Accessories
(office configur- ation) for KaVo units or third-party units (xx)* = technically possible, but KaVo recommends the KaVoLUX 540 LED U version 3.8 Accessories Mat.No. Material summary 1.009.4132 Mirror for KaVoLUX 540 LED 1.002.4489... -
Page 23: Assembly
Instructions for use KaVoLUX 540 LED U / T 4 Assembly | 4.1 Packaging 4 Assembly 4.1 Packaging 4.1.1 Transportation and storage The packaging consists of styrofoam and is itself packaged in Superwell card- board. The instructions printed on the outside are for transportation and stor- age, and have the following meaning: 1. - Page 24 Instructions for use KaVoLUX 540 LED U / T 4 Assembly | 4.1 Packaging Length: 1,100 mm Width: 600 mm Height: 470 mm Gross weight: approx. 25 kg Net weight: approx. 18 kg 2. Stay bar Length: 930/1300 mm Width: 280 mm Height: 230 mm...
-
Page 25: Removal From The Packaging
Instructions for use KaVoLUX 540 LED U / T 4 Assembly | 4.1 Packaging 4.1.3 Removal from the packaging CAUTION Spring is tensioned. Risk of injury. Hold the swivel arm and spring arm firmly while removing the cable tie. Note The spring arm and swivel arm are joined together with a cable tie to prevent the operating light from damage when it is being removed from the pack- aging and during installation. - Page 26 Instructions for use KaVoLUX 540 LED U / T 4 Assembly | 4.1 Packaging ▶ Push the operating light into the mounting pole. ▶ Do not loosen the cable tie until the swivel arm has been installed. ▶ Do not remove the protective sheath until the swivel arm has been in- stalled.
-
Page 27: Requirements For Mounting
Instructions for use KaVoLUX 540 LED U / T 4 Assembly | 4.2 Requirements for mounting 4.2 Requirements for mounting 4.2.1 Mounting the backstop to the swivel arm Mounting the backstop to the swivel arm ▶ Mount the silicone cover ①. ▶... -
Page 28: Requirements For Ceiling Mounting
Instructions for use KaVoLUX 540 LED U / T 4 Assembly | 4.3 Assembly of the KaVoLUX 540 LED U ▪ Connect the lines 4.2.3 Requirements for ceiling mounting For ceiling mounting, a ceiling mounting set is required along with a stay bar with a cover that corresponds to the ceiling height. - Page 29 Instructions for use KaVoLUX 540 LED U / T 4 Assembly | 4.3 Assembly of the KaVoLUX 540 LED U ▶ Removing the rear service flap. ▶ Remove the cover of the connection point. ▶ Unscrew the cover ①. ▶ Loosen screw ② below the main switch. ▶...
- Page 30 Instructions for use KaVoLUX 540 LED U / T 4 Assembly | 4.3 Assembly of the KaVoLUX 540 LED U ▶ Ensure that the protective earth screw ⑥ and fastening screws ⑤ and ⑦ do not reach into the light holder. Note When the mounting rod extends into the light holder, it can damage the paint.
- Page 31 Instructions for use KaVoLUX 540 LED U / T 4 Assembly | 4.3 Assembly of the KaVoLUX 540 LED U Install the swivel arm ▶ Install the washer ① (Mat. no. 10090807) with the notch facing down- wards onto the attachment of the lamp mounting pole (Mat. no. 10093860).
-
Page 32: Estetica E70 / Estetica E80
Instructions for use KaVoLUX 540 LED U / T 4 Assembly | 4.3 Assembly of the KaVoLUX 540 LED U Final tasks ▶ Mount caps on the swinging and spring arm. ▶ Run function test. ▶ Perform the safety check according to the treatment centre. ▶... - Page 33 Instructions for use KaVoLUX 540 LED U / T 4 Assembly | 4.3 Assembly of the KaVoLUX 540 LED U Install the mounting pole 33 / 110...
- Page 34 Instructions for use KaVoLUX 540 LED U / T 4 Assembly | 4.3 Assembly of the KaVoLUX 540 LED U ▶ Remove device cladding (see assembly instructions of the treatment unit). ▶ Slide the cover ring ① onto the mounting pole. ▶...
- Page 35 Instructions for use KaVoLUX 540 LED U / T 4 Assembly | 4.3 Assembly of the KaVoLUX 540 LED U ▶ Plug the control and supply cables ① into the line adapter ②. ▶ Plug the control cable ④ (X87) into slot ⑤ (X87) on the central control PCB. ▶...
- Page 36 Instructions for use KaVoLUX 540 LED U / T 4 Assembly | 4.3 Assembly of the KaVoLUX 540 LED U ① CAN circuit device / ② CAN circuit patient chair Setting the CAN circuit device ▶ Select the device type with the serial number from the following table and adjust the switch setting on the relevant printed circuit board.
-
Page 37: Estetica E70/E80 Vision
Instructions for use KaVoLUX 540 LED U / T 4 Assembly | 4.3 Assembly of the KaVoLUX 540 LED U ▶ To check the CAN resistance, measure between connections X86.A1 and X86.A2. ð The resistance value must be 60 Ohm. Note No adjustments need to be made to the CAN circuit patient chair The follow- ing table will provide full information. - Page 38 Instructions for use KaVoLUX 540 LED U / T 4 Assembly | 4.3 Assembly of the KaVoLUX 540 LED U Installing the light mounting pole Note The holder ② for the lamp mounting pole is not a top stop for the lamp mounting pole.
- Page 39 Instructions for use KaVoLUX 540 LED U / T 4 Assembly | 4.3 Assembly of the KaVoLUX 540 LED U ▶ Remove the cover ring ① and slide over the light mounting pole. ▶ Insert the mounting pole into the light holder up to the end stop ②. ▶...
- Page 40 Instructions for use KaVoLUX 540 LED U / T 4 Assembly | 4.3 Assembly of the KaVoLUX 540 LED U ▶ Route the control and supply cables through the unit to the central control PCB and plug into the slot on the central control PCB ① (X12). Final tasks ▶...
-
Page 41: Activate Kavolux 540 Led U In Service Mode
Instructions for use KaVoLUX 540 LED U / T 4 Assembly | 4.3 Assembly of the KaVoLUX 540 LED U 4.3.4 Activate KaVoLUX 540 LED U in service mode Note The treatment light must be activated in service mode to activate the KaVoLUX 540 LED U operating light on the treatment centres ESTETICA E50/E50 Life/E70/E80. - Page 42 Instructions for use KaVoLUX 540 LED U / T 4 Assembly | 4.3 Assembly of the KaVoLUX 540 LED U disnf. kit ENABLED ① Index 1 to 39 ② Bit 0 or 1 Function key Description Reduce index Increase index Set index to 0 Change note bit ESTETICA E50/E50 Life...
- Page 43 KaVoLUX 540 LED U operating light on the treatment units ESTETICA E70/E80. Note The KaVo Service Tester (Mat. no. 10032212) is required to make adjust- ments in service mode. ▪ Service tester: Service tester I²C Mat. no. 1.003.2212...
- Page 44 Instructions for use KaVoLUX 540 LED U / T 4 Assembly | 4.3 Assembly of the KaVoLUX 540 LED U ESTETICA E80 to SN 10100000 Note The note bit OP light LED must be set to "1" in service mode U04 Index 28 to activate the KaVoLUX 540 LED U operating light on the treatment units ESTETICA E70/E80.
-
Page 45: Assembly Of The Kavolux 540 Led T
Instructions for use KaVoLUX 540 LED U / T 4 Assembly | 4.4 Assembly of the KaVoLUX 540 LED T 4.4 Assembly of the KaVoLUX 540 LED T 4.4.1 ESTETICA E30 WARNING Electrical power. Death or injury from electric shock. ▶... - Page 46 Instructions for use KaVoLUX 540 LED U / T 4 Assembly | 4.4 Assembly of the KaVoLUX 540 LED T ▶ Put the washer onto the lamp mounting pole. ▶ Thread the cover ② over the lamp mounting pole. ▶ Connect the supply cable and protective conductor using the insertion tool ①...
- Page 47 Instructions for use KaVoLUX 540 LED U / T 4 Assembly | 4.4 Assembly of the KaVoLUX 540 LED T ▶ Insert the swivel arm of the operating lamp into the lamp mounting pole. ▶ Connect the protective conductor ③. ▶...
- Page 48 Instructions for use KaVoLUX 540 LED U / T 4 Assembly | 4.4 Assembly of the KaVoLUX 540 LED T ▶ Pull back the excess lengths of the protective conductor and supply lines through the multimedia opening of the lamp mounting pole ①. ▶...
-
Page 49: Primus 1058
Instructions for use KaVoLUX 540 LED U / T 4 Assembly | 4.4 Assembly of the KaVoLUX 540 LED T Final tasks ▶ Mount caps on the swinging and spring arm. ▶ Run function test. ▶ Perform the safety check according to the treatment centre. ▶... - Page 50 Instructions for use KaVoLUX 540 LED U / T 4 Assembly | 4.4 Assembly of the KaVoLUX 540 LED T Install the mounting pole ▶ Remove the unit covers ①. ▶ Loosen screws ③ on the disinfection container and remove the container ④. ▶...
- Page 51 Instructions for use KaVoLUX 540 LED U / T 4 Assembly | 4.4 Assembly of the KaVoLUX 540 LED T Note When the mounting rod extends into the light holder, it can damage the paint. Screw in the depth stop screw ⑧ completely. ▶...
- Page 52 Instructions for use KaVoLUX 540 LED U / T 4 Assembly | 4.4 Assembly of the KaVoLUX 540 LED T Operating light automatic, On/OFF function via the AP positions of the treat- ment centre: The operating light is connected via the DCA relay. Note ERGOcom light may not be connected to the DCA relay (X28) if this connec- tion is possible.
- Page 53 Instructions for use KaVoLUX 540 LED U / T 4 Assembly | 4.4 Assembly of the KaVoLUX 540 LED T KaVoLUX 540 LED T KaVoLUX 540 LED T 53 / 110...
-
Page 54: Primus 1058 Life
Instructions for use KaVoLUX 540 LED U / T 4 Assembly | 4.4 Assembly of the KaVoLUX 540 LED T Final tasks ▶ Mount caps on the swinging and spring arm. ▶ Run function test. ▶ Perform the safety check according to the treatment centre. ▶... - Page 55 Instructions for use KaVoLUX 540 LED U / T 4 Assembly | 4.4 Assembly of the KaVoLUX 540 LED T ▶ Lift the hood ③ and take it off towards the front. ▶ Unscrew the screws ① - ⑧. ▶ Dismantle the side panels ①, ②. ▶...
- Page 56 Instructions for use KaVoLUX 540 LED U / T 4 Assembly | 4.4 Assembly of the KaVoLUX 540 LED T ▶ Ensure that the protective earth screw ⑥ and fastening screws ⑤ and ⑦ do not reach into the light holder. Note When the mounting rod extends into the light holder, it can damage the paint.
- Page 57 Instructions for use KaVoLUX 540 LED U / T 4 Assembly | 4.4 Assembly of the KaVoLUX 540 LED T Install the swivel arm ▶ Install the washer ① (Mat. no. 10090807) with the notch facing down- wards onto the attachment of the lamp mounting pole (Mat. no. 10093860).
-
Page 58: Estetica Standard 1063 / Comfort 1065 / Sensus 1066
Instructions for use KaVoLUX 540 LED U / T 4 Assembly | 4.4 Assembly of the KaVoLUX 540 LED T Final tasks ▶ Mount caps on the swinging and spring arm. ▶ Run function test. ▶ Perform the safety check according to the treatment centre. ▶... - Page 59 Instructions for use KaVoLUX 540 LED U / T 4 Assembly | 4.4 Assembly of the KaVoLUX 540 LED T Note In the operating lights ESTETICA Standard 1063 / Comfort 1065 / Sensus 1066, the lamp support Mat. no. 07404711 is not mounted as a standard and must be fitted subsequently.
- Page 60 Instructions for use KaVoLUX 540 LED U / T 4 Assembly | 4.4 Assembly of the KaVoLUX 540 LED T Note When the mounting rod extends into the light holder, it can damage the paint. Firmly hold the mounting pole when inserting! ▶...
-
Page 61: Globus 1078 S, Status 1080 Tm/C
Instructions for use KaVoLUX 540 LED U / T 4 Assembly | 4.4 Assembly of the KaVoLUX 540 LED T ▶ Route the supply line (24 V AC) to the low voltage distributor circuit board and connect to the terminal strip X14 (polarity is not relevant). Final tasks ▶... - Page 62 Instructions for use KaVoLUX 540 LED U / T 4 Assembly | 4.4 Assembly of the KaVoLUX 540 LED T Note When the mounting rod extends into the light holder, it can damage the paint. Firmly hold the mounting pole when inserting. Screw in the depth stop screw ⑥...
- Page 63 Instructions for use KaVoLUX 540 LED U / T 4 Assembly | 4.4 Assembly of the KaVoLUX 540 LED T ▪ Contact 2: blue wire ▪ Black wire is free Final tasks ▶ Mount caps on the swinging and spring arm. ▶...
-
Page 64: Ceiling Assembly Of The Kavolux 540 Led T
Instructions for use KaVoLUX 540 LED U / T 4 Assembly | 4.5 Ceiling assembly of the KaVoLUX 540 LED T 4.5 Ceiling assembly of the KaVoLUX 540 LED T Note Follow the instructions of the building department and building code. The quality of the ceiling must meet the load bearing ability for buildings in accordance with DIN 1055 page 3. - Page 65 Instructions for use KaVoLUX 540 LED U / T 4 Assembly | 4.5 Ceiling assembly of the KaVoLUX 540 LED T ▶ Position washers ③ and nuts ④ on the thread of the back of the anchor. ▶ Screw the nuts tight so that the anchors grip the masonry. ▶...
- Page 66 Instructions for use KaVoLUX 540 LED U / T 4 Assembly | 4.5 Ceiling assembly of the KaVoLUX 540 LED T ▶ Screw off the hex-head nut at the arrow. Screw on the other two hex-head nuts ⑧ until the grub screws are flush with the nuts.
- Page 67 Instructions for use KaVoLUX 540 LED U / T 4 Assembly | 4.5 Ceiling assembly of the KaVoLUX 540 LED T 67 / 110...
- Page 68 Instructions for use KaVoLUX 540 LED U / T 4 Assembly | 4.5 Ceiling assembly of the KaVoLUX 540 LED T ▶ Route the supplementary protective conductor ⑧ and mains cable ⑨ through the borehole and through the stay bar until only the five-core end of the mains cable is protruding from the borehole.
- Page 69 Instructions for use KaVoLUX 540 LED U / T 4 Assembly | 4.5 Ceiling assembly of the KaVoLUX 540 LED T Note The conductor sheath may only extend 2 mm into the protective sleeve. ▶ Draw the mains cable through cover ② (Mat. no. 1.004.5488). ▶...
- Page 70 Instructions for use KaVoLUX 540 LED U / T 4 Assembly | 4.5 Ceiling assembly of the KaVoLUX 540 LED T ▶ With the stay bar ⑥ rotate the immediate plate ⑤ to the end of the slots so that the two arrows on the intermediate pate and ceiling adapter point in the same direction.
- Page 71 Instructions for use KaVoLUX 540 LED U / T 4 Assembly | 4.5 Ceiling assembly of the KaVoLUX 540 LED T ▶ Insert the plug of the cable ceiling adapter into the jack X2. ▶ Connect the supply cable of the operating light to the terminal (U KaVoLUX 540), the polarity is irrelevant.
-
Page 72: Centro-Mounting Of The Kavolux 540 Led
Instructions for use KaVoLUX 540 LED U / T 4 Assembly | 4.6 Centro-mounting of the KaVoLUX 540 LED ▶ Move the entire cover into position, and lock the small cover with the three stud bolts. 4.6 Centro-mounting of the KaVoLUX 540 LED To be able to mount the KaVoLUX 540 LED on the Centro stand, the routing of the lines in the swivel arm of the light needs to be changed. - Page 73 Instructions for use KaVoLUX 540 LED U / T 4 Assembly | 4.6 Centro-mounting of the KaVoLUX 540 LED ▶ Remove the 4 Phillips head screws ① and pull the aluminium insert ② out of the swivel arm. ▶ Route the lines ③ over the aluminium insert ② and pass them through the hole downwards.
-
Page 74: Mechanical Settings
Instructions for use KaVoLUX 540 LED U / T 5 Mechanical settings | 5.1 Adjusting the swinging arm brake 5 Mechanical settings 5.1 Adjusting the swinging arm brake Note The swinging arm brake determines the ease with which the swinging arm rotates. -
Page 75: Setting The Light Head Brakes
Instructions for use KaVoLUX 540 LED U / T 5 Mechanical settings | 5.3 Setting the light head brakes 5.3 Setting the light head brakes Note All movements of the light head can be set using different brakes. 5.3.1 Setting the rotary motion und 3D joint movement Note The cover ⑤... -
Page 76: Adjusting The Light Head Brake
Instructions for use KaVoLUX 540 LED U / T 5 Mechanical settings | 5.3 Setting the light head brakes ▶ Use the adjusting screw ③ to set the smooth running of the 3D joint mo- tion. ▶ Snap the cover ⑤ into place. 5.3.2 Adjusting the light head brake Note The smooth running of the operating light head can be set using two brakes. - Page 77 Instructions for use KaVoLUX 540 LED U / T 5 Mechanical settings | 5.3 Setting the light head brakes Fine adjustment ▶ Pivot the light head upwards until the orifice in the cover of the cross slot adjustment screw ① is visible. ▶...
-
Page 78: Operation
KaVo KEY Laser III or KEY Laser 3+ can lead to the unintentional activation of the KaVo KEY Laser III and KEY Laser 3+. ▶ When using the KaVo KEY Laser III or the KEY Laser 3+, switch the operat- ing light to laser mode. -
Page 79: Operation Of The Treatment Light Kavolux 540 Led U
▪ Dimmed light: approx. 4,000 Kelvin; equivalent to the light of a halogen op- erating light ▪ Laser mode: Light mode with no detrimental effect on the KaVo KEY Laser III, the KEY Laser 3+ or the KaVo DIAGNOdent When operated In dimmed mode, the LED lamp functions according to a dimmed halogen lamp. -
Page 80: Setting The Brightness
Instructions for use KaVoLUX 540 LED U / T 6 Operation | 6.1 Operation of the treatment light KaVoLUX 540 LED U ▶ Hold your hand just in front of the sensor. ð Treatment light is switched on, Display LED shining. ▶... -
Page 81: Switch On Composave Mode
Instructions for use KaVoLUX 540 LED U / T 6 Operation | 6.1 Operation of the treatment light KaVoLUX 540 LED U 6.1.4 Switch on COMPOsave mode When operated In dimmed mode, the LED lamp functions according to a dimmed halogen lamp. The colour temperature is approx. 4,000 K and the composite can harden prematurely. -
Page 82: Setting The Brightness Of The Dimmer (Composave Mode Or Normal Light)
Instructions for use KaVoLUX 540 LED U / T 6 Operation | 6.1 Operation of the treatment light KaVoLUX 540 LED U 6.1.5 Setting the brightness of the dimmer (COMPOsave mode or normal light) Note The brightness of the light is set in five stages using the "Dim treatment light"... - Page 83 6 Operation | 6.1 Operation of the treatment light KaVoLUX 540 LED U In laser mode, another light mode is generated, which has no negative influ- ence on the KaVo KEY Laser III, the KEY Laser 3+ or the KaVo DIAGNOdent. Sensor KaVoLUX 540 LED ▶...
-
Page 84: Operation Of The 3D Joint
Instructions for use KaVoLUX 540 LED U / T 6 Operation | 6.2 Operation of the treatment light KaVoLUX 540 LED T 6.1.8 Operation of the 3D joint ▶ Turn the switching ring to the left until it snaps into place. ð... -
Page 85: Turning The Operating Light On And Off
Instructions for use KaVoLUX 540 LED U / T 6 Operation | 6.2 Operation of the treatment light KaVoLUX 540 LED T 6.2.1 Turning the operating light On and Off Requirement The mains switch is activated during ceiling mounting The treatment unit is switched on during mounting action on the unit (see In- structions for use treatment unit ) Sensor KaVoLUX 540 LED ▶... -
Page 86: Changing Between Composave Mode Res. Dimmed Light And Normal Light
Instructions for use KaVoLUX 540 LED U / T 6 Operation | 6.2 Operation of the treatment light KaVoLUX 540 LED T 6.2.3 Changing between COMPOsave mode res. dimmed light and normal light ▶ Press the "Mode/colour temperature" button ð The treatment light switches from COMPOsave mode to dimmed normal light. -
Page 87: Setting The Brightness Of The Dimmer
Instructions for use KaVoLUX 540 LED U / T 6 Operation | 6.2 Operation of the treatment light KaVoLUX 540 LED T ▶ Press the "Dim operating light" button once again. ▶ Hold your hand in front of the sensor for 2 sec. ð... - Page 88 In laser mode, another light mode is generated, which has no negative influ- ence on the KaVo KEY Laser III, the KEY Laser 3+ or the KaVo DIAGNOdent. Sensor KaVoLUX 540 LED ▶ Press the „operating light“ button and the "operating light dimming" button on the operating light simultaneously.
-
Page 89: Operation Of The 3D Joint
Instructions for use KaVoLUX 540 LED U / T 6 Operation | 6.2 Operation of the treatment light KaVoLUX 540 LED T 6.2.8 Operation of the 3D joint ▶ Turn the switching ring to the left until it snaps into place. ð... -
Page 90: Rehabilitation Methods According To Din En Iso 17664
Instructions for use KaVoLUX 540 LED U / T 7 Rehabilitation methods according to DIN EN ISO 17664 | 7.1 General care instructions 7 Rehabilitation methods according to DIN EN ISO 17664 7.1 General care instructions CAUTION Blinding and dazzling due to damaged glass cover of operating light. Scratches on the glass cover of the operating light could lead to scattering of the light. -
Page 91: Cleaning And Disinfecting The Handles
Instructions for use KaVoLUX 540 LED U / T 7 Rehabilitation methods according to DIN EN ISO 17664 | 7.3 Cleaning and disinfecting the handles 7.3 Cleaning and disinfecting the handles ▶ Remove the handles by pressing the spring-loaded catches. ▶... -
Page 92: Safety Check - Test Instructions
Instructions for use KaVoLUX 540 LED U / T 8 Safety check - Test instructions | 8.1 Mounting the device 8 Safety check - Test instructions 8.1 Mounting the device Note The test instructions for the KaVoLUX 540 LED U / T to be mounted to devices are described in the instructions for use of the respective treatment unit The measurement of the protective earth, defined in the instructions for use... - Page 93 Note KaVo offers a medical device book for keeping an inventory and recording es- sential master data on the medical device. The medical device book is only available in German (Mat. no. 0.789.0480).
- Page 94 Instructions for use KaVoLUX 540 LED U / T 8 Safety check - Test instructions | 8.2 Ceiling mounting Note Each individual device in an ME system, which has a separate connection to the power supply mains, or which can be connected to or separated from the power supply mains without the aid of a tool, must be checked individually.
-
Page 95: Instructions For The Safety Check
Instructions for use KaVoLUX 540 LED U / T 8 Safety check - Test instructions | 8.2 Ceiling mounting Functional test Medical device function test as well as testing of all safety shutdowns with refer- ence to accompanying documentation/instructions for use. Test intervals ▪... - Page 96 Instructions for use KaVoLUX 540 LED U / T 8 Safety check - Test instructions | 8.2 Ceiling mounting ▪ Condition of the control panels ▪ Condition of the operating light ▪ Connection of the power connection provided by the treatment centre Check of safety-related labels for legibility and completeness ▶...
- Page 97 L & N on the power input board need not be disconnected. The adapter cable ② is included in the delivery of the KaVo measuring cable and is required for older treatment centres that are not equipped with an X2 connector.
- Page 98 ▶ Remove the connector X2 from the mains plate and plug into the the matching connector X2 of the measuring line (Mat. no. 0.411.8811). ▶ Plug the second connector X2 of the KaVo measuring line into the mains plate (X2).
- Page 99 Instructions for use KaVoLUX 540 LED U / T 8 Safety check - Test instructions | 8.2 Ceiling mounting Connect accessible conductive parts [ACP] to protective earth conductor (PE) ACP = accessible conductive parts Note Additional measuring points ACP X must be taken into consideration in the presence of accessories.
- Page 100 Instructions for use KaVoLUX 540 LED U / T 8 Safety check - Test instructions | 8.2 Ceiling mounting Protective earth measurement Scan the ceiling adapter of the treatment light with the probe ① Base plate for the ceiling adapter ②...
- Page 101 Instructions for use KaVoLUX 540 LED U / T 8 Safety check - Test instructions | 8.2 Ceiling mounting Scan the light head of the treatment light KaVoLUX 540 LED with the probe ① Fastening screw of the handle sup- port when the gripping sleeve has been removed Equipment leakage current - Alternative measuring...
- Page 102 ▶ Name, date and signature of test engineer There is a copy of a test report template at the end of the chapter on Safety Checks. KaVo recommends the use of this template. Note Following testing, repair or adjustment, it must be verified whether the ME equipment or ME system has been restored to the state that is required for the intended usage before it is employed once again.
-
Page 103: Test Protocol For The Safety Check
Instructions for use KaVoLUX 540 LED U / T 8 Safety check - Test instructions | 8.2 Ceiling mounting 8.2.3 Test protocol for the safety check Unit leakage current - replacement measurement Leakage current of applied part - replacement measurement 103 / 110... -
Page 104: Eliminating Disturbances
Instructions for use KaVoLUX 540 LED U / T 9 Eliminating disturbances 9 Eliminating disturbances Note If disturbance arises, a technician authorised by KaVo must be engaged for the remedial action. Malfunction Cause Remedy ▶ Have the device checked by an authorised Treatment light with Defective. -
Page 105: 10Specifications On The Electromagnetic Compatibility In Accordance With En 60601-1-2
Instructions for use KaVoLUX 540 LED U / T 10 Specifications on the electromagnetic compatibility in accordance with EN 60601-1-2 | 10.1 Guidelines and man- ufacturer's declaration - electromagnetic emission 10 Specifications on the electromagnetic compatibility in accordance with EN 60601-1-2 10.1 Guidelines and manufacturer's declaration - electromagnetic emission The operating light KaVoLUX 540 LED is designed for operation in the environ-... - Page 106 Instructions for use KaVoLUX 540 LED U / T 10 Specifications on the electromagnetic compatibility in accordance with EN 60601-1-2 | 10.3 Guidelines and man- ufacturer's statement - Electromagnetic immunity Interference im- IEC 60601 test levels Compliance level Electromagnetic en- munity tests vironment - Guidelines...
- Page 107 Instructions for use KaVoLUX 540 LED U / T 10 Specifications on the electromagnetic compatibility in accordance with EN 60601-1-2 | 10.3 Guidelines and man- ufacturer's statement - Electromagnetic immunity Interference resist- IEC 60601 test Compliance Electromagnetic environment ance levels level - Guidelines tests...
- Page 108 Instructions for use KaVoLUX 540 LED U / T 10 Specifications on the electromagnetic compatibility in accordance with EN 60601-1-2 | 10.4 Recommended pro- tective clearances between portable and mobile HF telecommunication devices and the KaVoLUX 540 LED above, the KaVoLUX 540 LED should be monitored to demonstrate proper func- tion.
Need help?
Do you have a question about the LUX 540 LED U and is the answer not in the manual?
Questions and answers