Table of Contents

Related Manuals for Bomar Practix Automatic Series


Summary of Contents for Bomar Practix Automatic Series
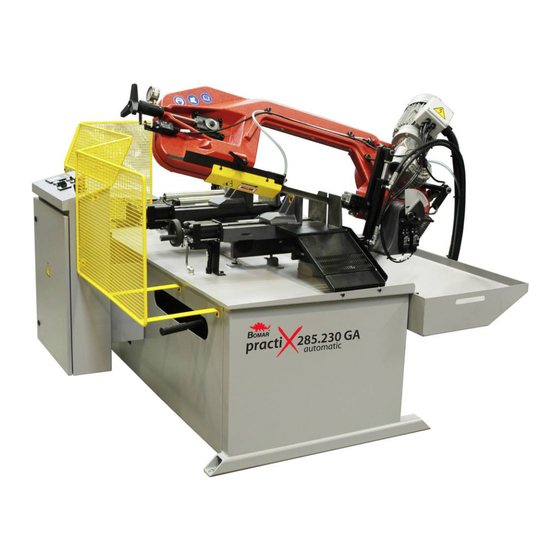
- Page 1 Series Practix Automatic Practix 285.230 GA Operating Instructions for Band Saw Before transporting and using the machine, please read the instructions thoroughly! Seriové číslo / Serien Nummer / Serial Number ___________________...
- Page 2 Czech Republic, EU www: http://www.bomar.cz We are available: Mondays to Fridays – 16 Version: 1.00 / May 2010 rev. 1 BOMAR, spol. s r.o. © – Subject to modifications and amendments. Manual version: 1.00/ May. 2010 Manual rev.:...
- Page 4 Manual version: 1.00/ May. 2010 Manual rev.:...
-
Page 5: Table Of Contents
Content SAFETY NOTES ................ 7 1.1. Band saw using ..............................9 1.2. Protective suit and personal safety......................9 1.3. Safety notes for machine operator ....................... 10 1.4. Safety notes for the servicing and repairs ..................10 1.5. Safety machine accessories ........................11 1.5.1. - Page 6 4.4. Cooling agents and chips disposal ...................... 44 4.4.1. Coolant device inspection ..........................44 4.4.2. Chips disposal ................................ 45 4.5. Greases and oils ..............................45 4.5.1. Gearbox oils ................................45 4.5.2. Lubricant greases ..............................46 4.6. Hydraulic oil level check and Hydraulic oils ..................46 4.6.1.
-
Page 7: Safety Notes
Safety notes... - Page 8 Manual version: 1.00/ May. 2010 Manual rev.:...
-
Page 9: Band Saw Using
The operating instructions must be read by the person, who keeps in touch with the machine before transportation, installation, using, servicing, reparation, stocking or removal! The operating instructions must avoid risks, which are linked to work on the machine. Before transporting and using of the machine, please read the instructions thoroughly! The operating instructions include relevant information. -
Page 10: Safety Notes For Machine Operator
Use only recommended type of the hydraulic oils and oils and lubricants. Do not remove or do not lock the limit switches or safety equipments! Any use of the saw, accessories or machine parts other than that intended by the BOMAR, spol. s r.o. company is not permitted. -
Page 11: Safety Machine Accessories
The guarantee on this product will be afterward lost and BOMAR, spol. s r.o. takes no responsibility for caused damages! Attention! Only a qualified professional can carry out the servicing and repairs of the electric equipment! Take special care during the work with electrical equipment. -
Page 12: Saw Band Stretching And Rupture Inspection
1.5.4. Saw band stretching and rupture inspection This device checks the saw band tension and causes immediate machine stop if the band incidentally ruptures. The device includes a limit switch. Check the switch carefully and periodically – adjust it if necessary. 1.5.5. -
Page 13: Umístění Štítku Stroje / Maschinenschild Position / Position Of Machine Label
1.7. Umístění štítku stroje / Maschinenschild position / Position of machine label Machine label is located on the pedestal in the hydraulic aggregate access area. -
Page 14: Umístění Bezpečnostních Značek / Verteilung Der Sicherheitszeichen / Position Of Safety Symbols
1.8. Umístění bezpečnostních značek / Verteilung der Sicherheitszeichen / Position of safety symbols Manual version: 1.00/ May. 2010 Manual rev.:... -
Page 15: Machine Documentation
Machine documentation... - Page 16 Manual version: 1.00/ May. 2010 Manual rev.:...
-
Page 17: Technická Data / Technische Daten / Technical Data
2.1. Technická data / Technische Daten / Technical data Hmotnost stroje / Maschinengewicht / Machine weight: • 580 kg Hmotnost / Gewicht / Weight Rozměry stroje / Maschinengröße / Machine size • Délka / Länge / Lenght 2250 mm • 1600 mm Šířka / Breite / Width •... -
Page 18: Rozměrové Schéma / Aufstellzeichnung / Installation Diagram
2.2. Rozměrové schéma / Aufstellzeichnung / Installation diagram Manual version: 1.00/ May. 2010 Manual rev.:... -
Page 19: Popis / Beschreibung / Description
2.3. Popis / Beschreibung / Description... -
Page 20: Transportation And Stocking
2.4. Transportation and stocking 2.4.1. Conditions for transportation and stocking Keep recommendations for the manufacturers for transportation and stocking! If the recommendations are not kept, damage can occur to the machine. • Do not use a forklift truck for handling the machine, if you do not have licence for •... -
Page 21: Transportní Schéma / Transportschema / Transport Diagram
2.5. Transportní schéma / Transportschema / Transport diagram... -
Page 22: Activation
2.6. Activation 2.6.1. Machine working conditions Keep the conditions of the manufacturer for machine operating! If recommendations are not kept, damage can occur to the machine. The manufacturer warrants the correct function of the machine for these conditions: • At temperature air from 5°C to 40°C, the temperature average during 24 hours must not exceed over 35°C. -
Page 23: Kotevní Plan / Verankerungsplan / Grounding Plan
2.7. Kotevní plan / Verankerungsplan / Grounding plan... -
Page 24: Electrical Connection
2.8. Electrical connection Only a qualified professional must carry out the servicing and repairs of the electric equipment! Take special care during work with electrical equipment. High voltage shock can have fatal consequences! Always keep notes about work safety! Electrical parameters of the machine: •... -
Page 25: Check Machine Functions
Constant tooth system – the saw band has parallel tooth pitch all over length. This way is suitable for cutting of solid material. BOMAR recommends use variable tooth systém. Variable tooth system – tooth pitch is variable. Variable tooth system is used for profiled materials and bundle cutting. -
Page 26: Saw Band Running-In
K – tooth with positive angle of the teeth. Examples of the tooth system marking: 32 S – number „32“ means 32 teeth on one inch (that means constant tooth system), letter „S“ marks teeth with zero angle of the tooth. 4–6 K –... -
Page 27: Tables For Teeth Selection
2.11.4. Tables for teeth selection SHAPED MATERIAL (D , S = mm) Note: Table shows tooth system selection for cutting one piece of the profile. For cutting of more pieces of the profiles (bundle), you must think of the size of the wall as double size of the wall of one profile (that means, size „S“... - Page 28 Manual version: 1.00/ May. 2010 Manual rev.:...
-
Page 29: Machine Control
Machine control... - Page 30 Manual version: 1.00/ May. 2010 Manual rev.:...
-
Page 31: Machine Start
The master switch of Practix 285.230 GA is located on the left side of the control panel (from view of the controller standing behind the panel). The LCD display shows: Description PX 285.230 A The main info after power up BOMAR s.r.o. -
Page 32: The Control Panel
3.2. The Control panel Manual version: 1.00/ May. 2010 Manual rev.:... - Page 33 Button for starting of the control (safety) circuits The button switches on the control circuits of the control system. Starting of the circuits is signalized by light in the button. Machine mode switch – test mode of the machine – automatic operation mode .
-
Page 34: Selection Of The Machine Operation Mode
3.3. Selection of the machine operation mode The operation mode is selected by the three way switch. Machine operation modes Manual mode Service mode Automatic mode 3.3.1. Service mode Switch the mode switch to position 0 (middle position) and press ENTER – position 15 –... -
Page 35: Manual Mode
3.3.2. Manual mode In manual mode the operator controls all functions of the machine and their order. Machine control is facilitated by help in the first line of LCD display, press (pos. 14) to toggle the help display. Button Function clamp feeding vice clamp main vice vice clamps material... -
Page 36: Automatic Mode
3.3.3. Automatic mode • The cutting process in the automatic mode is divided into several steps, given by different menu on LCD. 1. Mode 2. Machine 3. Set the mode 5. Stop or 4. Cutting selection setting parameters proceed • Set required cutting angle before start of the automatic mode •... - Page 37 • The following menu determines if the material end is cut. If Yes is selected by START, the saw cuts end of material in ˙TRIM cut:START˙ position under the band. < NO > Starts the material cutting, LCD show information message. ˙...
-
Page 38: Working Cycle Interruption
3.4. Working cycle interruption • When TOTAL STOP is pressed, saw band operation is stopped. • Press STOP button (pos. G) to stop the current cycle. Press TOTAL STOP button in emergency. Position of safety button TOTAL STOP and STOP button: 3.5. -
Page 39: Cutting Angle Setting
3.7. Cutting angle setting This machine allows to cut up to 60° angle. The limit positions 0° and 60° are equipped with stops. Setting of the cutting angle according to machine mode: Manual mode Automatic mode Cutting angle 0° to 60° Cutting angle 0°... -
Page 40: Inserting The Material
3.9. Inserting the material • Do not stand under lifted loads! • Never step on the roll conveyor! • Do not hold or manipulate with material during clamping to the vice (using electronic control)! The vice may cause serious injury! 3.9.1. -
Page 41: Machine Service
Machine service... - Page 42 Manual version: 1.00/ May. 2010 Manual rev.:...
-
Page 43: Saw Band Dismantling
4.1. Saw band dismantling Detach the machine from socket. It is guaranteed that the random start is avoided. Dismantle yellow protective cover of the arm. Two plastic-headed screws fasten the cover. Open protective cover on the back side of the saw frame. Turning the stretching screw to the left loose band tension Take the band down from the swing wheels Take the band out of guiding cubes carefully... -
Page 44: Saw Band Inspection
Install the Tenzomat on the saw band and secure it with screws. Stretch the saw band until it is stretched to the recommended value. 4.3.2. Saw band inspection Check the saw band in the guiding cubes and on the wheels Check, if the saw band is right in the guiding cubes.. -
Page 45: Chips Disposal
Use oils with specification DIN 51517 in the gearboxes. Select the viscosity grade ISO VG according to the original oil fill. Attention: When replacing, use oils recommended by BOMAR or oils, which has comparable parameters from the other manufacturers. Do not forget, that mineral and synthetic oils must not be... -
Page 46: Lubricant Greases
Hydraulic oils quantity – see chapter Hydraulic oil level check. Note: When replacing, use oils recommended by BOMAR or oils, which has comparable parameters from the other manufacturers. Do not forget, that mineral and synthetic oils may not be mixed! -
Page 47: Hydraulic Oil Level Check
Manufacturer Type Manufacturer Type Esso Nuto H 46 Texaco Rando HD B 46 HD 5040 Valvoline Ultramax AW 46 Fina Hydran 46 4.6.2. Hydraulic oil level check Pull up the gauge and check the state of the oil. The oil level must be situated between water-glas. - Page 48 Manual version: 1.00/ May. 2010 Manual rev.:...
-
Page 49: Troubleshooting
Troubleshooting... - Page 50 Manual version: 1.00/ May. 2010 Manual rev.:...
-
Page 51: Mechanical Defects
5.1. Mechanical defects Problem Possible causes Repair Slanting cut Wrongly adjusted hard metal guides. Set according to the chapter „Machine service“ Worn hard metal guides. Replace to the chapter „Worn pieces replacement“ Wrongly adjusted cubes of the saw Set according to the chapter „Machine service“ band guiding. - Page 52 Problem Possible causes Repair Worn saw band guide bearings. Check guiding bearings and if you notice some sort of excessive damage, replace them according to chapter„Worn pieces replacement“ Wrongly adjusted guiding cubes of the Set guiding cube according to chapter „Machine saw band.
-
Page 53: Electrical Defects
Problem Possible causes Repair The brush position and the brush cover The brush cover must be posed, in order to the is adjusted wrong – with the brush brush can be turned. cannot be turned. 12. The saw arm Backslash in driving wheel lodgement Change the driving shaft for a long one, new on the shaft. - Page 54 Manual version: 1.00/ May. 2010 Manual rev.:...
-
Page 55: Schémata / Schemas / Schematics
Schémata / Schemas / Schematics... -
Page 56: Elektrické Schema / Elektroschema / Wiring Diagrams - 3×400 V, Tn-C-S
6.1. Elektrické schema / Elektroschema / Wiring diagrams – 3×400 V, TN-C-S Manual version: 1.00/ May. 2010 Manual rev.:... - Page 58 Manual version: 1.00/ May. 2010 Manual rev.:...
- Page 60 Manual version: 1.00/ May. 2010 Manual rev.:...
- Page 62 Manual version: 1.00/ May. 2010 Manual rev.:...
- Page 64 Manual version: 1.00/ May. 2010 Manual rev.:...
- Page 66 Manual version: 1.00/ May. 2010 Manual rev.:...
- Page 68 Manual version: 1.00/ May. 2010 Manual rev.:...
-
Page 69: Elektrické Schema / Elektroschema / Wiring Diagrams - 3×230 V, Tn-C
6.2. Elektrické schema / Elektroschema / Wiring diagrams – 3×230 V, TN-C... - Page 70 Manual version: 1.00/ May. 2010 Manual rev.:...
- Page 72 Manual version: 1.00/ May. 2010 Manual rev.:...
- Page 74 Manual version: 1.00/ May. 2010 Manual rev.:...
- Page 76 Manual version: 1.00/ May. 2010 Manual rev.:...
- Page 78 Manual version: 1.00/ May. 2010 Manual rev.:...
- Page 80 Manual version: 1.00/ May. 2010 Manual rev.:...
-
Page 82: Elektrické Schema / Elektroschema / Wiring Diagrams - 3×400 V, Tn-C
6.3. Elektrické schema / Elektroschema / Wiring diagrams – 3×400 V, TN-C Manual version: 1.00/ May. 2010 Manual rev.:... - Page 84 Manual version: 1.00/ May. 2010 Manual rev.:...
- Page 86 Manual version: 1.00/ May. 2010 Manual rev.:...
- Page 88 Manual version: 1.00/ May. 2010 Manual rev.:...
- Page 90 Manual version: 1.00/ May. 2010 Manual rev.:...
- Page 92 Manual version: 1.00/ May. 2010 Manual rev.:...
- Page 94 Manual version: 1.00/ May. 2010 Manual rev.:...
-
Page 96: Hydraulické Schéma / Hydraulikschema / Hydraulic Diagram
6.4. Hydraulické schéma / Hydraulikschema / Hydraulic diagram Manual version: 1.00/ May. 2010 Manual rev.:... - Page 97 Název položky Poz.. Pos. Bezeichnung Mng. Pos. Item Pcs. speciál B O M A R/870-0707 Nádrž / Behälter / Tank 30 dm 3 MA-AL 80-4 0,55 kW Elektromotor / Elektromotor / Electromotor 400/230V/50Hz 1,51/2,6 A Hydrogenerátor / Hydraulikgenerator / P2-4,8L66017 Hydrogenerator 4,8 c m 3/ot.
- Page 98 Manual version: 1.00/ May. 2010 Manual rev.:...
-
Page 99: Výkresy Sestav Pro Objednání Náhradních Dílů / Zeichnungen Für Bestellung Der Ersatzteile / Drawing Assemblies For Spare Parts Order
Výkresy sestav pro objednání náhradních dílů / Zeichnungen für Bestellung der Ersatzteile / Drawing assemblies for spare parts order • Při objednávání náhradních dílů vždy uvádějte: typ stroje (např. practix 285.230 G manual) , výrobní číslo (např. 125) a rok výroby (např. 1999). •... -
Page 100: Pila / Säge / Saw
7.1. Pila / Säge / Saw Manual version: 1.00/ May. 2010 Manual rev.:... -
Page 101: Kusovník / Stückliste / Piece List - Pila / Säge / Saw
7.2. Kusovník / Stückliste / Piece list – Pila / Säge / Saw... -
Page 102: Skluz / Rutsch / Glide
7.3. Skluz / Rutsch / Glide Manual version: 1.00/ May. 2010 Manual rev.:... -
Page 103: Kusovník / Stückliste / Piece List - Skluz / Rutsch / Glide
7.4. Kusovník / Stückliste / Piece list – Skluz / Rutsch / Glide... -
Page 104: Podstavec / Säge / Saw
7.5. Podstavec / Säge / Saw Manual version: 1.00/ May. 2010 Manual rev.:... -
Page 105: Kusovník / Stückliste / Piece List - Podstavec / Säge / Saw
7.6. Kusovník / Stückliste / Piece list – Podstavec / Säge / Saw... -
Page 106: Konzola / Konsole / Console
7.7. Konzola / Konsole / Console Manual version: 1.00/ May. 2010 Manual rev.:... -
Page 107: Kusovník / Stückliste / Piece List - Konzola / Konsole / Console
7.8. Kusovník / Stückliste / Piece list – Konzola / Konsole / Console... -
Page 108: Válec Svěráku / Schraubstockzylinder / Vice Cylinder
7.9. Válec svěráku / Schraubstockzylinder / Vice cylinder Manual version: 1.00/ May. 2010 Manual rev.:... -
Page 109: Kusovník / Stückliste / Piece List - Válec Svěráku / Schraubstockzylinder / Vice Cyl
7.10. Kusovník / Stückliste / Piece list – Válec svěráku / Schraubstockzylinder / Vice cyl. -
Page 110: Svěrák / Schraubstock / Vice
7.11. Svěrák / Schraubstock / Vice Manual version: 1.00/ May. 2010 Manual rev.:... -
Page 111: Kusovník / Stückliste / Piece List - Svěrák / Schraubstock / Vice
7.12. Kusovník / Stückliste / Piece list – Svěrák / Schraubstock / Vice... -
Page 112: Rameno / Sägerahmen / Saw Arm
7.13. Rameno / Sägerahmen / Saw arm Manual version: 1.00/ May. 2010 Manual rev.:... -
Page 113: Kusovník / Stückliste / Piece List - Rameno / Sägerahmen / Saw Arm
7.14. Kusovník / Stückliste / Piece list – Rameno / Sägerahmen / Saw arm... -
Page 114: Rameno / Sägerahmen / Saw Arm
7.15. Rameno / Sägerahmen / Saw arm Manual version: 1.00/ May. 2010 Manual rev.:... -
Page 115: Kusovník / Stückliste / Piece List - Rameno / Sägerahmen / Saw Arm
7.16. Kusovník / Stückliste / Piece list – Rameno / Sägerahmen / Saw arm... -
Page 116: Napínání / Spannung / Tension
7.17. Napínání / Spannung / Tension Manual version: 1.00/ May. 2010 Manual rev.:... -
Page 117: Kusovník / Stückliste / Piece List - Napínání / Spannung / Tension
7.18. Kusovník / Stückliste / Piece list – Napínání / Spannung / Tension... -
Page 118: Podavač / Vorschub / Feeder
7.19. Podavač / Vorschub / Feeder Manual version: 1.00/ May. 2010 Manual rev.:... -
Page 119: Kusovník / Stückliste / Piece List - Podavač / Vorschub / Feeder
7.20. Kusovník / Stückliste / Piece list – Podavač / Vorschub / Feeder... -
Page 120: Podavač / Vorschub / Feeder
7.21. Podavač / Vorschub / Feeder Manual version: 1.00/ May. 2010 Manual rev.:... -
Page 121: Kusovník / Stückliste / Piece List - Podavač / Vorschub / Feeder 2
7.22. Kusovník / Stückliste / Piece list – Podavač / Vorschub / Feeder 2... -
Page 122: Váleček / Rolle / Roller
7.23. Váleček / Rolle / Roller Manual version: 1.00/ May. 2010 Manual rev.:... -
Page 123: Kusovník / Stückliste / Piece List - Váleček / Rolle / Roller
7.24. Kusovník / Stückliste / Piece list – Váleček / Rolle / Roller... -
Page 124: Váleček / Rolle / Roller 2
7.25. Váleček / Rolle / Roller 2 Manual version: 1.00/ May. 2010 Manual rev.:... -
Page 125: Kusovník / Stückliste / Piece List - Váleček / Rolle / Roller 2
7.26. Kusovník / Stückliste / Piece list – Váleček / Rolle / Roller 2... -
Page 126: Váleček Vertikální / Rolle Vert. / Vert. Roller
7.27. Váleček vertikální / Rolle vert. / Vert. Roller Manual version: 1.00/ May. 2010 Manual rev.:... - Page 127 7.28. Kusovník / Stückliste / Piece list – Váleček vertikální / Rolle vert. / Vert. Roller...
Need help?
Do you have a question about the Practix Automatic Series and is the answer not in the manual?
Questions and answers