
Related Manuals for Fluke PG9000 Series


Summary of Contents for Fluke PG9000 Series
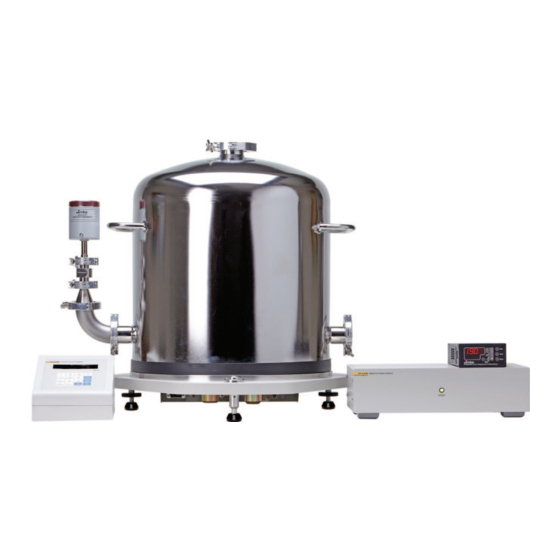
- Page 1 Via Acquanera, 29 22100 Como tel. 031.526.566 (r.a.) fax 031.507.984 info@calpower.it www.calpower.it PG9000 Piston Gauges ™ PG9602 ™ Operation and Maintenance Manual © 2011 Fluke Calibration...
- Page 2 Information in this document is subject to change without notice. No part of this document may be reproduced or transmitted in any form or by any means, electronic or mechanical, for any purpose, without the express written permission of Fluke Calibration, 4765 East Beautiful Lane, Phoenix, Arizona 85044-5318 USA.
-
Page 3: Table Of Contents
Apply Pressure To The Piston-Cylinder Module .................. 28 2.4.7 Check Proper Behavior Of Motorized Piston Rotation ................ 29 2.4.8 Verify Proper Operation Of Piston Behavior Measurements ............... 29 2.4.9 Verify Vacuum Reference ........................29 Page III © 2011 Fluke Calibration... - Page 4 Commands for zero pressure, ending a test ..................79 3.10.12 M] ..............................79 3.10.13 ] and [ ] + [←] ..........................80 3.11 [SETUP] Menu ............................81 3.11.1 <1select> ..............................82 3.11.2 <2view> ..............................83 3.11.3 <3edit> ..............................84 © 2011 Fluke Calibration Page...
- Page 5 Command Descriptions ........................124 4.3.4.1 IEEE Std. 488.2 Common And Status Commands ................124 4.3.4.2 PG9000 Commands ..........................126 Status System ............................. 151 4.4.1 Status Reporting System ........................151 4.4.1.1 Status Byte Register..........................151 4.4.1.2 Standard Event Register ........................153 Page V © 2011 Fluke Calibration...
- Page 6 Pressure ..............................183 Defined Pressure Calculations ......................184 7.2.1 Calculations ............................185 7.2.2 Fluid Heads ............................186 7.2.2.1 Fluid Head Components ........................186 7.2.2.2 Overall Fluid Head Correction ......................187 Glossary .............................. 188 Limited Warranty and Limitation of Liability ..................190 © 2011 Fluke Calibration Page...
-
Page 7: Tables
Table 25. PG9000 Troubleshooting Checklist ..................179 Table 26. Pressure Unit of Measure Conversions ................... 183 Table 27. PG9000 Defined Pressure Calculation Variables ..............184 Table 28. Fluke Calibration Authorized Service Providers ..............191 Page VII © 2011 Fluke Calibration... - Page 8 Figure 25. 10 kPa/kg piston insertion tool ....................168 Figure 26. 50, 100 and 200 kPa/kg gas piston-cylinder modules (exploded view) ......... 172 Figure 27. Gas Operated, Gas Lubricated Piston-Cylinder Module Lubrication Chart......175 VIII © 2011 Fluke Calibration Page...
-
Page 9: About This Manual
PG9602. Note “Note” is used throughout the manual to identify operating and applications advice and additional explanations. [ ] indicates direct function keys (e.g., [RANGE]). < > indicates PG9602 screen displays (e.g., <1yes>) Page IX © 2011 Fluke Calibration... - Page 10 PG9602™ OPERATION AND MAINTENANCE MANUAL Notes © 2011 Fluke Calibration Page...
-
Page 11: Introduction
PG9000 Platform. Operator interaction with PG9000 and its extensive capabilities and peripherals is accomplished through a single display and keypad on the PG Terminal or from a computer via a RS232 or IEEE-488 interface. Page 1 © 2011 Fluke Calibration... -
Page 12: Specifications
DH200 is equivalent to AE SF250C, HIP LF4, etc. Remote Electronics Module ATM port: 10-32 UNF Vacuum Connections (Bell Jar) 3 each KF40, 1 each KF50 (top) CE Conformance All PG9000 models conform to CE requirements and are CE marked. Page 2 © 2011 Fluke Calibration... -
Page 13: Amh Automated Mass Handler (Optional)
• Motorized, intelligent piston drive system based measured rotation rate with operator alert and manual override. • Integrated automated pressure control with standard Fluke Calibration pressure controllers. • Full RS232 and IEEE-488 communications with multi-level commands to set and read all instrument functions. -
Page 14: Ambient And Instrument Condition Measurements
± 0.05 Pa + 0.5 % of reading Measurement Uncertainty PG9000 uses a Fluke Hart Scientific 2626-S temperature and humidity probe specified and factory calibrated to deliver ±0.25 ˚ C uncertainty on temperature and ±3% on relative humidity. PG9000 performance requirements and factory calibration services require only the specifications listed above to meet stated product uncertainties. -
Page 15: Piston-Cylinder Modules
200 mm Mounting system Negative free deformation PC-7100/7600-100 Operation Gas operated, gas lubricated Piston Material Tungsten carbide Cylinder Material Tungsten carbide Nominal Diameter 11 mm Nominal Area 98 mm Mounting System Negative free deformation Page 5 © 2011 Fluke Calibration... -
Page 16: Mass Sets
Sensitivity: The smallest variation in input detectable in output. Reproducibility: The root sum square of the stability of effective area and stability of the AMH-100 mass set for 1 year. Refer to Fluke Calibration Technical Note 0180TN12 © 2011 Fluke Calibration Page... -
Page 17: Front And Rear Panels
Electronics Module. The terminal rear panel assembly is the same for all PG9000 models. Power switch Connector for 25 pin cable to PG Fuse Remote Electronics Module Power receptacle Cooling fan Figure 2. PG Terminal Rear Panel Page 7 © 2011 Fluke Calibration... -
Page 18: Remote Electronics Module (Rem) Rear Panel
PG Driver – to PG Remote Electronics Module AMH Connection AMH Vent Port TEST Pressure Port AMH Drive Pressure Port PRT Connector – to Remote Electronics Module Figure 4. PG9602 Base Rear Panel © 2011 Fluke Calibration Page... -
Page 19: Installation
Humidity Probe from the recalibration transit case and the Platform accessories from the shipping container. Inspect and inventory the accessories (see Section 2.1.2.1). Reinstall the packing inserts into the shipping and storage cases and store in a safe place. Page 9 © 2011 Fluke Calibration... -
Page 20: Piston-Cylinder Assemblies
The PG9000 masses should be removed from their shipping cases and inventoried when setting up the PG9000 system (see Section 2.1.2.2 for mass set content detail). The default manual mass set is the type MS-7002 which has a 4 kg makeup mass. © 2011 Fluke Calibration Page... -
Page 21: Inspecting Contents
Inspect for any missing components or accessories referring to Tables 1-8. Should any items be missing, contact Fluke Calibration or your local Fluke Calibration representative. A parts list of items supplied is provided in the following tables. -
Page 22: Piston-Cylinder Modules
3070203 3070203 3070203 3070203 3070203 Case Accessory Kit 3125242 3122928 3122229 3124345 3124345 3134867 3134867 3134867 3134880 3134880 O-rings 3136458 3136458 3136458 3136458 3136458 Insertion Tool 3071793 3071841 Calibration Report 3152121 3152121 3152121 3152121 3152121 © 2011 Fluke Calibration Page... -
Page 23: Vacuum Reference Hardware (Optional)
500 Pa and close the valve before venting the chamber pressure from vacuum back to atmosphere. Page 13 © 2011 Fluke Calibration... -
Page 24: Amh-100, Automated Mass Handler (Optional)
Reusable Molded Transit Case with Foam Inserts 3068969 3068984 80 kg set 1 ea. 2 ea. 100 kg set 1 ea. 3 ea. Mass Set Storage Tray and Spindle 3147461 and 3148764 Dust Covers 3138017 and 3138127 Calibration Report 3152121 © 2011 Fluke Calibration Page... -
Page 25: Site Requirements
♦ Temperature: 19 to 26 °C, minimize rate of change of temperature. ♦ Relative Humidity: 5 to 95 %RH (non-condensing). ♦ Ambient Pressure: Minimize external influences that will cause barometric instability. Page 15 © 2011 Fluke Calibration... -
Page 26: Table 9. Drive Air Pressure Requirement By Mass Set
(if present). If using a PPC or MPC to generate/control pressure, see its Operation and Maintenance Manual for information on installing it. If a Fluke Calibration interconnections kit is being used to interconnect the components, see its instruction sheet. •... -
Page 27: Setup
If an optional AMH is being used, set it up with its mass set (see Sections 2.3.1.5 and 2.3.1.4). If the PG9000 is to be used with a vacuum reference, set up the optional vacuum reference hardware (see Section 2.3.1.5). Page 17 © 2011 Fluke Calibration... -
Page 28: Setting Up The Platform
(see Section 3.12.3.3). Level the platform using the two leveling feet and the bubble level mounted on the front of the platform. The front foot is stationary and not intended to be part of the leveling adjustment. © 2011 Fluke Calibration Page... -
Page 29: System Pressure Interconnections
This includes always wearing protective gloves when handling the masses to avoid contaminating them with body oils and perspiration. Protective gloves are provided in the accessory kits of PG9000 Platforms. Page 19 © 2011 Fluke Calibration... -
Page 30: Figure 7. Mass Sizes
Fractionary mass discs and pucks are installed vertically in the corresponding slots in the mass loading tray. Use a consistent setup for the sequence number when there are two masses (e.g., always load sequential number 1 in the front). © 2011 Fluke Calibration Page... -
Page 31: Setting Up An Amh Mass Set
PG9000 Platforms. Shown is the MS-AMH-100 mass set for the AMH-100-VAC mass handler. Smaller mass sets may be used with AMH-100-VAC which include fewer main mass discs. Figure 9. AMH Mass Set Page 21 © 2011 Fluke Calibration... -
Page 32: Setting Up An Amh Automated Mass Handler (Optional)
(see Table 4. AHM-100-VAC Parts List). Locate the drive air connection accessories including: • Quick-connector stem (DESO type with red band). • 2 meters pf 1/8 inch O.D., clear PFA tubing. • 1/8 inch Swagelok ® tube connector x 1/4 inch NPT male adaptor. © 2011 Fluke Calibration Page... - Page 33 3/8 in. Swage Tee and Port Connector. The Tee and Port Connector are particularly useful if the vacuum supply is from a Fluke Calibration PPC/MPC Vacuum Kit. Install the Tee on the 3/8 in. PFA tube between the vacuum pump and the PPC or MPC.
-
Page 34: Setting Up Vacuum Reference Hardware (Optional)
Install the vacuum vent kit: The vacuum vent kit includes a manually operated valve, a reducer, clamps and centering rings. Note that a KF40 centering ring with an integral mesh screen is provided to help prevent contaminants from entering the bell jar through the vent valve. © 2011 Fluke Calibration Page... -
Page 35: Installing A Piston-Cylinder Module
It may also be used in reverse order to remove a piston-cylinder. Remove the PG9602 Platform mounting post plug. Unscrew the ORANGE plastic mounting post plug that installed PG9602 mounting post. Rotate counterclockwise to remove. Page 25 © 2011 Fluke Calibration... -
Page 36: Power Up And Verification
Electronics Module, tests, initializes and goes to the main run screen (see Section 3.8). If <….Searching…..> displays for more than 5 seconds, the communications between the PG9000 Remote Electronics Module and the PG Terminal are failing. Check that the PG9000 to PG Terminal cable is properly installed. © 2011 Fluke Calibration Page... -
Page 37: Verify Correct Piston-Cylinder And Mass Set Information
2. INSTALLATION If PG900 fails to reach the main run screen, service may be required. Record the sequence of operations and displays observed and contact a Fluke Calibration Authorized Service Provider (see Table 28). 2.4.2 Verify correct Piston-Cylinder and Mass Set... -
Page 38: Verify Proper Operation Of Ambient Conditions Measurements
The piston-cylinder conversion factor is marked on the top of the piston cap and is in units of kPa per kilogram [kPa/kg]. © 2011 Fluke Calibration Page... -
Page 39: Check Proper Behavior Of Motorized Piston Rotation
Apply a vacuum through another KF40 port on the bell jar, sealing other bell jar openings with caps. Press [SYSTEM] twice to observe the value of vacuum read by the vacuum gauge. Page 29 © 2011 Fluke Calibration... -
Page 40: Amh Initialization / Startup
PG9000 Platform without an actual mass load. If the AMH is laid on its side, then the mass loading tray will need to be held in place by the operator while the initialization routine executes. © 2011 Fluke Calibration Page... -
Page 41: Check Automated Pressure Generation
Caution Before applying pressure to the PG9000 system, be sure that all pressure vessels and connections are rated for the pressure levels that will be applied and that all connections have been properly tightened. Page 31 © 2011 Fluke Calibration... -
Page 42: Setup Verification Step To Take Before Making Pressure Measurements
Remove all masses from the PG9000 Platform (manual mass set only) and cover them. Vent all pneumatic circuits to atmosphere. Turn OFF power using the power switch on the rear of the PG9000 Terminal. © 2011 Fluke Calibration Page... -
Page 43: G E N E R A L O P E R A T I O
Selects the appropriate piston-cylinder to cover the pressure range (see Section 3.12.1.5). Selects the desired pressure unit of measure (see Section 3.10.3). Selects the desired pressure measurement mode (gauge, absolute, differential) (see Section 3.10.4). Page 33 © 2011 Fluke Calibration... -
Page 44: Keypad Layout And Protocol
These keys are also used to scroll through choices. Menu selections can be made by pressing the number of the selection directly or by pressing [←] and [→] to place the cursor on the number of the desired selection and pressing [ENT]. © 2011 Fluke Calibration Page... -
Page 45: Sounds
See the following sections (3.4.1, 3.4.2 and 3.4.3) for details on each of the three Ready/Not Ready indicating characters. Note The criteria used to distinguish between Ready and Not Ready conditions can be customized by the user (see Sections 3.4.1, 3.4.2, 3.4.3). Page 35 © 2011 Fluke Calibration... -
Page 46: Piston Position Ready/Not Ready
Note At mass loads less than 3 kg the low rotation limit is automatically reduced to an operational minimum to maximize free rotation time. © 2011 Fluke Calibration Page... -
Page 47: Vacuum Reference Ready/Not Ready
Midstroke: The piston is at the middle of the float zone. The reference level as marked on the PG9000 mounting post corresponds to the bottom of the piston when it’s at the midstroke position. Page 37 © 2011 Fluke Calibration... -
Page 48: Manual Mass Loading Protocol
When defining a new target pressure, the PG9000 gives mass loading instructions in nominal terms and the operator is expected to load the nominal mass. Meanwhile the micro processor knows the actual true values and uses these to determine the calculated reference pressure. © 2011 Fluke Calibration Page... - Page 49 USE 10 kg mass #1, #2 and #3. • DO NOT USE 10 kg mass #4, #3, #1. • This rule will be followed automatically if masses are installed and used as described in Section 2.3.1.3. Page 39 © 2011 Fluke Calibration...
-
Page 50: Amh Mass Loading
Admitting drive pressure pushes the lifting assembly up. Exhausting the pressure lowers it. The pressure is exhausted outside of the vacuum chamber, to the AMH drive vacuum supply line. © 2011 Fluke Calibration Page... - Page 51 Do not place fingers or anything else beneath the AMH trim mass tray. AMH may lower up to 100 kg (220 lbs) onto anything that is under the trim mass tray. This could cause damage and/or injury. Page 41 © 2011 Fluke Calibration...
-
Page 52: Amh Operation
PG9000 Platform’s COM1 or IEEE-488 interface. Generally, AMH operation is transparent to the operator. The AMH system automatically changes the mass load on the piston as needed when a pressure or mass load setting © 2011 Fluke Calibration Page... -
Page 53: Installing An Amh On The Pg9000 Platform
Installing the AMH over the masses before performing an AMH initialization risks damaging internal AMH components. Figure 16. AMH Installation on PG9000 Platform Page 43 © 2011 Fluke Calibration... - Page 54 Do not plug the AMH drive vacuum port. Doing so may result in damage to the binary mass pins and/or binary masses (see Section 2.3.1.5.2 © 2011 Fluke Calibration Page...
-
Page 55: Removing A Mass Handler From The Pg9000 Platform
Select <1status> to view which AMH masses are loaded. Select <2control>, <1up/down> to raise and lower the mass load without changing the selected masses. Select <2control>, <2discreet> to select specific masses to load and unload. Page 45 © 2011 Fluke Calibration... -
Page 56: Making And Breaking Reference Vacuum With Amh
(see Section 2.3.2.) 3.7.2.7 AMH Indicator LED There is a green indicator LED located on the front of the PG9000 base plate beside the spirit level (see Figure 17). This is the AMH status indicator. © 2011 Fluke Calibration Page... -
Page 57: Amh Error Messages
<AMH not responding> This is a PG9000 generated error as a consequence of a time error #28) out while attempting to communicate with AMH. None Text argument is too long. None Argument out of range. Page 47 © 2011 Fluke Calibration... - Page 58 0.1 kg binary mass pin engage valve (VLV#8) not sensed. 6.4 kg binary mass pin disengage valve (VLV#15) not <AMH valve failure> sensed. <AMH valve failure> 3.2 kg binary mass pin disengage valve (VLV#7) not sensed. © 2011 Fluke Calibration Page...
-
Page 59: Main Run Screen
(see Section 3.12.4.1). calculated pressure as defined by PG9000 with current mass loaded on current piston when all Ready/Not Ready indication characters indicate Ready. <unit>: Current pressure unit of measure (see Section 3.10.3). Page 49 © 2011 Fluke Calibration... -
Page 60: General Function/Menu Flow Chart
Direct function keys are active whenever PG9000 is in a run screen (MAIN, SYSTEM or AMBIENT). Table 11 summarizes the operation of the direct function keys. Section 3.9 provides a flow chart of PG Terminal general operation. See corresponding manual Sections to 3.10.1 to 3.12.9. © 2011 Fluke Calibration Page... -
Page 61: Table 11. Summary Of Pg9000 Direct Function Key Operations
PG9000 system. Backs one step out from the menu tree, Toggles between multiple screens, entry cancels an operation. Pressing ESC of a negative sign. multiple times brings you back to the main run screen. Page 51 © 2011 Fluke Calibration... -
Page 62: [P-C]
Pressing [ENT] while in the P-C function causes PG9000 to select the currently displayed piston-cylinder module as the active piston-cylinder module. Pressing [ESC] while in the P-C function returns to the main run screen without changing piston-cylinder modules. © 2011 Fluke Calibration Page... -
Page 63: Unit]
When the current pressure unit of measure is an altitude unit, atmospheric pressure in the AMBIENT run screen is expressed in kPa if the altitude unit is meters (m) or psi if the altitude unit is feet (ft). Page 53 © 2011 Fluke Calibration... -
Page 64: Customizing Pressure Units Available Under The Unit Function
UNIT display. To delete the current unit from the UNIT screen and show no unit, select <2other>, <6none> for that unit number. © 2011 Fluke Calibration Page... -
Page 65: Mode]
(absolute by vac): Defines absolute pressure by measuring relative to an evacuated bell jar. This mode is required for setting absolute pressures under atmospheric pressure and for lowest uncertainty under about 1 MPa (150 psi). Page 55 © 2011 Fluke Calibration... -
Page 66: Differential Measurement Mode
For differential mode operation, the static pressure is set to the desired value as measured (atmospheric pressure gauge pressure measurements). The RPM offset at the static pressure is determined by applying the static pressure as defined by the PG9000 following: © 2011 Fluke Calibration Page... - Page 67 Kit should be used to provide the DUT high and low test connections and support the RPM offsetting procedure (see Figure 19 and Section 3.10.4.1). A precision Reference Pressure Monitor, such as a Fluke Calibration (DH Instruments) RPM3, should be selected for the AtmP source in SETUP (see Section 3.11, 3.12.5.4).
-
Page 68: Figure 19. Differential Mode Controller Schematic
Valve Static Pressure Exhaust (Internal) Figure 19. Differential Mode Controller Schematic Note Fluke Calibration Technical Note 9940TN02 provides detailed information on differential mode principles and includes a complete uncertainty analysis. Consult Fluke Calibration or visit www.flukecal.com. OPERATION To select differential mode operation and access differential mode functions press [MODE] and select <4dif>. -
Page 69: Table 13. Valve Settings For Setting Differential Mode Static Pressure
STATIC P SELECTION VALVE to SUPPLY. This will connect the pressure setting vacuum source directly to the reference volume and reduce pull down time. Page 59 © 2011 Fluke Calibration... -
Page 70: Table 14. Valve Settings To Apply Pg9000 Pressure To The Rpm For Differential Mode Offsetting
Table 14. Valve Settings to Apply PG9000 Pressure to the RPM for Differential Mode Offsetting VALVE VALVE SETTING Control Selection PG Shutoff Open Test Bypass Open Static P Selection If static pressure is atmospheric pressure VENT or OFF © 2011 Fluke Calibration Page... - Page 71 (see Section 3.10.11). Unless an AMH is used, vacuum under the bell jar must be vented to make mass load changes and reestablished to set a pressure. Page 61 © 2011 Fluke Calibration...
-
Page 72: Table 15. Valve Settings For Operating In Differential Mode
When PG9000 indicates Ready on all Ready/Not Ready indicators, take DUT reading at differential pressure indicated on the top line of the PG9000 display. Slowly put PG SHUTOFF valve in CLOSED position. © 2011 Fluke Calibration Page... -
Page 73: System]
The SYSTEM screens are run screens. This means that other functions can be accessed from the SYSTEM screens and the active SYSTEM screen will be returned to when leaving functions. The MAIN screen and AMBIENT screen are also run screens (see Section 3.9). Page 63 © 2011 Fluke Calibration... -
Page 74: First System Run Screen
To access the second SYSTEM run screen, press [SYSTEM] or [±] from the first SYSTEM run screen. To access the first SYSTEM run screen, press [SYSTEM] from any run screen (see Figure 18). © 2011 Fluke Calibration Page... -
Page 75: Third System Run Screen
SYSTEM run screen. To access the third SYSTEM run screen, press [SYSTEM] or [±] twice from the first SYSTEM run screen, or once from the second SYSTEM run screen. Page 65 © 2011 Fluke Calibration... -
Page 76: Ambient]
The AMBIENT screen is a run screen. This means that other functions can be accessed from the AMBIENT screen and the active AMBIENT screen will be returned to when leaving functions. The MAIN screen and SYSTEM screens are also run screens (see Sections 3.8 and 3.10.5). © 2011 Fluke Calibration Page... -
Page 77: Head]
– the position of a solid piston at mid stroke or reference level (see Figure 20). In this way the DUT height does not need to be determined for each piston-cylinder that is used. Page 67 © 2011 Fluke Calibration... -
Page 78: Figure 20. Pg9000 Platform Reference Level Location
Entering a value of zero turns the HEAD function OFF. Entering a value other than zero turns the HEAD function ON using the height entered. Pressing [ESC] returns to the main run screen with NO change to the current head setting. © 2011 Fluke Calibration Page... -
Page 79: Rotate]
Piston rotation is stopped to avoid loading and unloading masses on the rotating piston and to avoid stopping rotation by friction between the piston and the piston end of stroke stops. Page 69 © 2011 Fluke Calibration... -
Page 80: 2Pre-Decel
[ENT/SET P] is pressed can be turned ON or OFF. If pre-deceleration is ON and AutoRotate is ON, then piston rotation deceleration always initiates immediately when [ENT/SET P] is pressed. © 2011 Fluke Calibration Page... -
Page 81: Gen]
(see Section 3.10.9.1). (e.g. how far above mid float must the piston be before the float process is considered completed) 3. A choice to have the piston raised to the top of the stroke before manipulating mass using an AMH (see Section 3.10.9.2). Page 71 © 2011 Fluke Calibration... - Page 82 Caution To help protect against accidental overpressure, when using automated pressure generation/control, set the upper limit (UL) of the pressure control system using [GEN], <4UL> (see Section 3.10.9.3). © 2011 Fluke Calibration Page...
-
Page 83: 2Target
The tolerance can also be described as the degree of agreement between the pressure control’s pressure measurement and the pressure value set by the PG9000 when the piston is floating. In general, making the Page 73 © 2011 Fluke Calibration... -
Page 84: 6Refloat
To set the mass loading resolution with which PG9000 loads mass in response to pressure or mass commands (see Section 3.10.12). The resolution is commonly set to 0.1 kg. This does not affect the pressure display resolution as it will always be displayed to the highest resolution of digits. © 2011 Fluke Calibration Page... - Page 85 The resolution range is from 0.01 g to 0.1 kg in powers of 10. Note The RES setting has no affect in mass-to-pressure mode. The RES setting only affects the resolution of the mass commands that result from pressure entries in pressure-to-mass mode (see Section 3.10.12). Page 75 © 2011 Fluke Calibration...
-
Page 86: Ent / Set P]
Use system pressure control component to float the PG9000 piston. If the AutoGen function is ON, the automated pressure control component floats the piston automatically when the reference vacuum becomes low enough (see Section 3.10.9). © 2011 Fluke Calibration Page... -
Page 87: Ent / Set P] In Pressure-To-Mass Mode
With PG9000 in absolute by vacuum measurement mode (see Section 3.10.4), the instruction is <Load mass & vac> indicating that the nominal mass value should be loaded and then the bell jar should be installed and vacuum established under the bell jar. Page 77 © 2011 Fluke Calibration... -
Page 88: Ent / Set P] In Mass-To-Pressure Mode
If the mass value entered is valid, the value is processed and operation proceeds to the previous run screen with the new mass value active. © 2011 Fluke Calibration Page... -
Page 89: Commands For Zero Pressure, Ending A Test
In mass-to-pressure operating mode, the operator enters the mass currently loaded and the PG9000 determines the pressure resulting from the current mass load. Mass-to-pressure mode is also useful to determine the true mass resulting from a nominal mass load (see Section 3.6). Page 79 © 2011 Fluke Calibration... -
Page 90: And [ ] + [←]
], then press [←]. The motorized rotation system engages and stays engaged until the piston rotation is stopped. Once the braking function starts the keys may be released and the function will complete unless [ESC] is pressed. © 2011 Fluke Calibration Page... -
Page 91: Setup] Menu
There are 20 SETUP files. File #1 is the factory SETUP file that cannot be edited. It includes the factory default variable choices and normal values. Note SETUP files, USER values and PG9000’s calculation capabilities can be used to calculate defined pressure in specific conditions independent of actual PG9000 operation. Page 81 © 2011 Fluke Calibration... -
Page 92: 1Select
PG9000 in calculating defined pressure. SETUP files should be selected and changed only by qualified personnel. Incorrect SETUP file selection may cause out of tolerance calculations and measurements. © 2011 Fluke Calibration Page... -
Page 93: 2View
<4PCT> to view the piston-cylinder temperature variable source choice and the current value. The value is displayed in degrees Centigrade (°C). <5g> to view the gravity variable source choice and the current value. The value is displayed in meters per second squared (m/s Page 83 © 2011 Fluke Calibration... -
Page 94: 3Edit
The external barometer must be properly set up to communicate with PG9000 (see Section 3.12.5.4 for information on setting up to read an external barometer). Note For differential mode operation (see Section 3.10.4.1) the AtmP selection must be <4COM2>. © 2011 Fluke Calibration Page... - Page 95 Maximum reference vacuum pressure when operating in absolute by vacuum mode. Edit the value, in Pascal (Pa), under which the reference vacuum must be for a vacuum Ready condition to occur (see Section 3.4.3). Page 85 © 2011 Fluke Calibration...
-
Page 96: Special] Menu
View the output and/or adjust PG9000 internal sensors and measurement systems (see Section 3.12.7). <8AMH>: View the status and directly control an AMH (see Section 3.12.8). <9reset>: Access and execute various reset options (see Section 3.12.9). © 2011 Fluke Calibration Page... -
Page 97: 1Pc/Ms
Platform and metrological elements are delivered together, the metrological data information is entered by Fluke Calibration at the factory. If the metrological elements are delivered separately from the platform, or after a recalibration when new data is available, the information must be updated by the user. -
Page 98: Create A Piston-Cylinder Module
PG9000 can store up to 18 piston-cylinder module (PC) files. When <3add> is selected and all the files have already been used, a warning is displayed -- a file must be deleted before a file can be added. © 2011 Fluke Calibration Page... - Page 99 [rpm]. The values (min and max) must be entered in rotations per minute [rpm]. The value automatically defaults to the factory recommended value for the piston-cylinder size and pressurized medium. In most circumstances, the factory default values should be used. Page 89 © 2011 Fluke Calibration...
-
Page 100: Edit A Piston-Cylinder Module
See Section 3.12.1.1, PRINCIPLE. The piston-cylinder module viewing function allows the piston-cylinder module information to be viewed but not altered. To view information on an existing piston-cylinder module, press [SPECIAL] , <1PC/MS> and select <1PC>, <3view>. © 2011 Fluke Calibration Page... -
Page 101: Delete A Piston-Cylinder Module
To create a new mass set that will be available for selection as an active mass set. Use this function when a new mass set has been acquired or a mass set was deleted and must be reentered. Page 91 © 2011 Fluke Calibration... - Page 102 Single tubular, binary mass. 3. 3.2 kg mass: Single tubular, binary mass. 4. 1.6 kg mass: Single tubular, binary mass. 5. 0.8 kg mass: Single tubular, binary mass. 6. 0.4 kg mass: Single tubular, binary mass. © 2011 Fluke Calibration Page...
- Page 103 8000 kg/m ) and press [ENT]. 8000 kg/m3 The display is: Select <1manual> for a manual mass set Mass set type: or <2AMH> for an automated mass 1manual 2AMH handler mass set. Page 93 © 2011 Fluke Calibration...
- Page 104 Press the [←] and [→] keys to move the cursor to access the lines that are NOT visible or directly enter the number of the hidden menu choice if you know it. © 2011 Fluke Calibration Page...
- Page 105 Save MS S/N 4573 The display is: 1no 2yes Select <2yes> to save the all changes made to the mass set and exit. Select <1no> to abandon all changes made to the mass set and exit. Page 95 © 2011 Fluke Calibration...
-
Page 106: Edit A Mass Set
3.12.1.10 Select Mass Set PURPOSE To select a mass set to be active and used by PG9000 in its calculation of the reference pressure. To initialize the optional AMH automated if present. © 2011 Fluke Calibration Page... -
Page 107: Add A Mass Loading Bell
To create a new PG9000 mass loading bell press [SPECIAL] and select <1PC/MS>, <3mass bell>, <3add>. Edit the serial number to the number of Add mass bell: mass bell being added S/N 1 press [ENT]. The display is: Page 97 © 2011 Fluke Calibration... -
Page 108: Edit A Mass Loading Bell
To view information contained in an existing mass loading bell file. OPERATION To view information contained in an existing mass loading bell file press [SPECIAL] and select <1PC/MS>, <3mass bell>, <1view>. The viewing function is identical to the add function (see Section 3.12.1.11). © 2011 Fluke Calibration Page... -
Page 109: Delete A Mass Loading Bell
DUT head. The head height can be adjusted by pressing the [HEAD] key. The head unit of measure and fluid are adjusted by pressing [SPECIAL] and selecting <3head>, <1fluid> and <2unit>. Page 99 © 2011 Fluke Calibration... -
Page 110: 3Head>, <1Fluid
Liquid type: defined liquid is selected, its density must be specified. Making a liquid 1oil 2H20 3user selection returns to the previous run screen with that liquid active for the DUT head function. The display is: © 2011 Fluke Calibration Page... -
Page 111: 3Head>, <2Unit
The PISTON head is automatically turned OFF (has no effect) in gauge or differential measurement mode when the set pressure is zero (system vented or bypassed). When the system is vented or bypassed, the piston position no longer affects the head. Page 101 © 2011 Fluke Calibration... -
Page 112: 4Prefs
This feature is useful to indicate to the operator when the attention should be refocused from the pressure generation device to the piston position indication. Key press sounds can be adjusted in frequency or turned OFF completely. Piston position sounds may be turned ON and OFF. © 2011 Fluke Calibration Page... -
Page 113: 4Prefs>, <3Time
<Save ID?> option. Select <1no> to abandon edits and exit or select <2yes> to save the edited ID. Note The ID can be viewed and edited but it cannot be cleared or reset by any reset functions (see Section 3.12.9). Page 103 © 2011 Fluke Calibration... -
Page 114: 4Prefs>, <5Level
All other security levels have NO effect on remote communications. The security levels are structured to support typical levels of operation. Specifically, the security levels prevent execution of the functions in Table 17 marked by “•”: © 2011 Fluke Calibration Page... -
Page 115: Table 17. Security Levels - Functions Not Executed Per Function/Level
• • • [SPECIAL], <9reset>, <1sets> • • • [SPECIAL], <9reset>, <3com> • • • [SPECIAL], <9reset>, <4cal> • • • [SPECIAL], <9reset>, <5setups> • • • [SPECIAL], <9reset>, <6all> • Remote communications disabled Page 105 © 2011 Fluke Calibration... -
Page 116: 5Remote
The third field, <pppppp>, is for standard password entry. The factory secondary password is available in case the user’s password has been misplaced or forgotten. It can be obtained by contacting a Fluke Calibration Authorized Service Provider. The factory secondary password is different for all PG9000’s and changes each time it is used. -
Page 117: Com1, Com2, Com3 And Com4 (Rs232)
If there is difficulty communicating with PG9000 from a host computer using RS232, the RS232 self test can help establish that the PG9000 COM1 port and the interface cable are good. Page 107 © 2011 Fluke Calibration... -
Page 118: External Barometer (Rpm) Communications (Com2)
To configure PG9000’s COM2 port to communicate with an external barometer, press [SPECIAL] and select <5remote>, <2COM2>, <2baro>. Select <1RPMx> if the external barometer is a Fluke Calibration (DH Instruments) RPM. Select <2user> to set up communications with a barometer other than a DH Instruments RPM. - Page 119 SETUP file that specifies COM2 as the source for AtmP (see Section 3.11) and verify that communications with the external barometer are achieved. Then view current barometer readings in the AMBIENT run screen (see Section 3.10.6) Page 109 © 2011 Fluke Calibration...
-
Page 120: External Vacuum Gauge Communications (Com2)
COM2 must be properly set up. This setup occurs by pressing [SPECIAL] and selecting <5remote>, <2COM2>, <3vac>. Note If a Fluke Calibration (DH Instruments) RPM3 or RPM4 is being used on COM2 for external measurement of barometric pressure, the vacuum gauge may be connected to COM2 of the RPM. In this case, COM2 of the RPM barometer must be configured with the same communication settings as the external vacuum gauge. - Page 121 Pascal [Pa]. If the readings from the external vacuum gauge are NOT Pascal, edit the conversion coefficient value as needed to convert the readings to Pascal. When the conversion coefficient is entered Leading characters to the next setup screen is opened. Strip: 0 display is: Page 111 © 2011 Fluke Calibration...
-
Page 122: 6Gl
9.806650 m/s2 The value displayed is the PG9000 local gravity value. This value can be edited unless it is protected by the current security level. The default value is standard international gravity of 9.806650 m/s © 2011 Fluke Calibration Page... -
Page 123: 7Cal
<2discreet> to specify the masses to be loaded and unloaded (see Section 3.12.8.2). <3loadall> to load all the AMH masses onto the piston (see Section 3.12.8.3). <4unloadall> to unload all the AMH masses from the piston (see Section 3.12.8.4). Page 113 © 2011 Fluke Calibration... -
Page 124: 2Control>, <1Up/Down
AMH proceeds to lower all the masses onto the piston. Warning Do not put fingers or anything else under the AMH trim mass tray. When the mass load is lowered, it can pinch or crush anything under it. © 2011 Fluke Calibration Page... -
Page 125: 2Control>, <4Unloadall
PISTON head correction ON (see Section 3.12.3.4). • Set up file to #1 (see Section 3.11). • Active piston-cylinder module, mass set and mass loading bell to #1 (first in list) (see Sections 3.12.1.5, 3.12.1.10, 3.12.1.15). Page 115 © 2011 Fluke Calibration... -
Page 126: 9Reset>, <2Units
Data Bits Stop Bits <CR>, <LF> Terminating Characters IEEE-488 (GPIB) Address <CR>, <LF> Terminating Characters COM2 User Barometer Inquiry String and Characters see Section 3.12.5.4 COM2 Vacuum Gauge Inquiry String and Characters see Section 3.12.5.5 © 2011 Fluke Calibration Page... -
Page 127: 9Reset>, <4Cal
Performs the functions of the Sets, Units, Cal and Com resets (see Sections 3.12.9.1 to 3.12.9.5). • User security level to low, but does not affect the User Level password (see Section 3.12.4.5). • Local gravity to 9.80665 m/s (see Section 3.12.6) Page 117 © 2011 Fluke Calibration... - Page 128 PG9602™ OPERATION AND MAINTENANCE MANUAL Notes © 2011 Fluke Calibration Page...
-
Page 129: Overview
COM1 RS232 commands must be terminated with at least a single carriage return character, while line feed characters are ignored. All RS232 responses from PG9000 are terminated with a carriage return character and a line feed character (either <CR><LF> or <LF><CR> see Section 3.12.5.1). Page 119 © 1998-2010 Fluke Calibration... -
Page 130: Com2, Com3 And Com4
EOI line. Replies are held in a buffer until the host computer gets them, so it is possible to have old replies in this buffer while expecting new replies from a just issued command. © 2011 Fluke Calibration Page... -
Page 131: Commands
Read or set a mass loading bell’s information CALx(=) Set or read the calibration coefficients for an internal sensor COMx(=) Set or read the COMx port configuration DATE(=) Set or read the current date Page 121 © 2011 Fluke Calibration... - Page 132 Read the piston rotation speed TIME(=) Set or read the current time UCOEF Read the current pressure units conversion coefficient UDD(=) Set or read the user defined external barometer settings UDU(=) Set or read the user defined pressure unit © 2011 Fluke Calibration Page...
-
Page 133: Error Messages
Not available with isolation on ERR #25 Must be READY set ERR #26 COM port failed to initialize ERR #27 Internal device time out error ERR #28 External device time out error ERR #29 File not opened Page 123 © 2011 Fluke Calibration... -
Page 134: Amh Errors
This program message clears the following evens and status registers: Standard Byte Register (STB) Standard Event Status Register (ESR) Error Queue AMH error message Pending OPC operations Example Command: “*CLS” Reply: “OK” (using COM1. No reply if IEEE-488 port) © 2011 Fluke Calibration Page... - Page 135 The identification reply is made up of the manufacturer, the model, the serial number and the software version. Each is separated by a comma. Query Reply The version string. Example Command: “*IDN?” Reply: “FLUKE, PG9602, 1001, Ver3.00a-Lib:nmcm ∗OPC(?) Purpose Sets the operation complete bit when all operations have completed. Syntax “∗OPC” “∗OPC?” Remarks This Command enables PG9000 to set the OPC bit in the Standard Event Status Register when it has completed all pending functions.
-
Page 136: Commands
This includes automated AMH mass loads, auto float and auto rotation operations or any differential mode preparation sequence. Example Typical command: “ABORT” Typical reply: “ABORT” Error None See Also “PS=”, “MS=”, “AROT”, “DIFOFFSET”, “DIFSETUP” © 2011 Fluke Calibration Page... - Page 137 See 9.3.2 Error Messages ERR #1 The setup number x is invalid ERR #2 The source argument is invalid ERR #3 The meas argument is invalid See Also 1.2.1.3, 3.1, 3.10.6, 3.11, “SETUP”, “UDU”, “COM2” Page 127 © 2011 Fluke Calibration...
- Page 138 The sixth field is the first piston-cylinder temperature (PRT1). The seventh field is the second piston-cylinder temperature (PRT2). Example Typical cmd: “AMB” Typical reply: “98,4594 kPaa,18.3 Paa,24%,23.45 dC,22.55 dC,22.53 dC, 22.57 dC Error None See Also 1.2.1.3, 3.1, 3.10.6, 3.11, “SETUP” © 2011 Fluke Calibration Page...
- Page 139 “AMH=3,19” (3 main masses plus 1.9 kg binary mass load, where 19 = 1+2+16) Typical reply: “3, 19” See Also 2.4.10, 3.7.1, “MASS=”, “MASSn” Error See Section 4.3.3 Error Messages ERR #1 Invalid mass load or AMH not active. Page 129 © 2011 Fluke Calibration...
- Page 140 You can then use the “BELL=x” command to select one of the three to use. Example Typical command: “BELL1” Typical reply: “BELL1=101,5058.0 kg/m3,0.500010 kg, 1001, 20060415,20060415” Error See Section 4.3.3 Error Messages ERR #1..7 Invalid or specifies a mass set that is not defined See Also 3.12.1 PRINCIPLE, 3.12.1.13 © 2011 Fluke Calibration Page...
- Page 141 Example Typical command: “DATE=20031025” Typical reply: ” 20031025” Error See Section 4.3.3 Error Messages ERR #1 If invalid date argument See Also 3.12.4.3 Page 131 © 2011 Fluke Calibration...
- Page 142 The Offset field is invalid or missing. The Pressure field is invalid or missing. ERR #2 ERR #35 Offset was “NEW” but the PG is not in the offset determination mode. See Also 3.10.4.1, “DIFLOAD”, “DIFSETUP” © 2011 Fluke Calibration Page...
- Page 143 The *CLS command clears any pending error messages. See Error Message Summary List Section 4.3.3. Example Typical command: “ERR” Typical reply: “Unknown command” (previous invalid command) Typical reply: “OK” (no error) Error None See Also 4.3.3, “AMHERR” Page 133 © 2011 Fluke Calibration...
- Page 144 AMH’s mass set. Example Typical command: “MASS1” Typical reply: “MASS1=101,8000.0 kg/m3,0,0,0,1002, 20060415, 20060415, 0” Error See Section 4.3.3 Error Messages ERR #1..9 Invalid arguments See Also 3.6, 3.12.1.6, 3.12.1 PRINCIPLE, “MASSSETx” © 2011 Fluke Calibration Page...
- Page 145 Typical command: “MASSSET1=10.2,10.201446,1” Mass Set) Typical reply: “10.2,10.201446,1,1” Typical command: “MASSSET=10.2,10.200029,1” Typical reply: “10.2, 10.200029,2,1” Typical command: ”MASSSET=0.1,0.100086,0” Typical reply: “0.1, 0.100086,1,0” Typical command: ”MASSSET=0.2,0.200062,0” Typical reply: “0.2, 0.200062,1,0” Typical command: “MASSSET0” Typical reply: “MASSSET0” Page 135 © 2011 Fluke Calibration...
- Page 146 Typical reply: “AATM” Error ERR #1 Invalid mode specified ERR #23 Vacuum reference disabled on this PG9000 platform ERR #32 Altitude or airspeed unit not allowed with atmospheric reference. See Also 3.10.4, 3.10.3, “UNIT”, “VAC” © 2011 Fluke Calibration Page...
- Page 147 “MRES” command. Example Typical command: “MR” Typical reply: “20.687002 kg, 20.6 Kg, 77.000 g” Error None See Also Page 137 © 2011 Fluke Calibration...
- Page 148 The PG9000 uses two PRTs to independently measure the mounting post temperature (“PRT1” and “PRT2”). Example Typical command: “OHMS” Typical reply: “109.519 ohms, 110.995 ohms” (PG9000) Error None See Also 5.2.1.5 © 2011 Fluke Calibration Page...
- Page 149 If communicating with a PPC via the COM3 port for the purpose of polling the PPC output pressure, the preferred command is PPCPR. Example Cmd sent: “PASSTHRU3=VER” Query reply: “FLUKE PPC4 VER1.01a” (device is a PPC4 on COM3) Error See Section 4.3.3 Error Messages ERR #1 Invalid port ‘x’ ERR#27...
- Page 150 Typical command: “PISTONVAR1” Typical reply: 225, 5.5000 E-6/dC, 4.5000 E-6/dC, 5.3800 E-6/MPa, 0.0000000, 32.4600mm , 0.000 E-6 Error See Section 4.3.3 Error Messages ERR #1..7 x invalid first through seventh argument See Also 3.12.1.1 PISTONx(=) © 2011 Fluke Calibration Page...
- Page 151 Otherwise, a current measurement will be obtained from the PPC for the reply. The reply is in the active pressure unit of measure. Example Typical command: “PPCPR” Typical reply: “10.030210” “10.030210” Error ERR #13 PPC did not respond. See Also 3.10.9, “COM3”, “PPC=” Page 141 © 2011 Fluke Calibration...
- Page 152 “PR” Typical reply: “NR 7.003647 kPa g” (not ready) “R 7.003647 kPa g” (ready) “NRL 7.003647 kPa g” (not ready, busy loading mass) Error None See Also 3.4, 3.10.8, 3.10.9, 3.10.11, “MS=”, “PS=”, “RESUME”, “AMHERR” © 2011 Fluke Calibration Page...
- Page 153 Typical command: “PS=100” Typical reply: “100.0000 kPa g” Error See Section 4.3.3 Error Messages ERR #1 If target results in an invalid mass load See Also 3.10.11, 3.10.12, 3.10.10, 3.10.3, “MS=”, “PR”, “UNIT=”, “RESUME” Page 143 © 2011 Fluke Calibration...
- Page 154 A REMOTE command deactivates the front panel. All front panel controls will be disabled. The REMOTE command can only be canceled by a LOCAL command or by turning off PG9000 power then reapplying it. Example Typical command: “REMOTE” Typical reply: “REMOTE” Error None See Also LOCAL © 2011 Fluke Calibration Page...
- Page 155 “2” Error See Section 4.3.3 Error Messages ERR #1 If setup is invalid ERR #13 Setup requires use of external device which is not responding. See Also 3.11, “AMBHx”, “AMBPx”, “AMBTx”, “READYx”, “VACP”, “PCT” Page 145 © 2011 Fluke Calibration...
- Page 156 Pascal to the displayed pressure units. Pressure in Pascal multiplied by this coefficient yields the pressure in the PG9000 units. Example Typical command: “UCOEF” (current units are “kPa”) Typical reply: “1.000000e-003” Error None See Also 7.1.1, 3.10.3, “UNIT” © 2011 Fluke Calibration Page...
- Page 157 Pressure in Pa = pressure in units/UCOEF Error See Section 4.3.3 Error Messages ERR #1 uuuuu must not exceed 4 characters ERR #2 user defined coefficient cannot be 0 See Also 3.10.3.1, 7.1.1, “UNIT”, “UCOEF” Page 147 © 2011 Fluke Calibration...
- Page 158 Operation and Maintenance Manual, UL Section, for details about its upper limit and “UL” reply. Example Typical command: “UL=1000” Typical reply: “1000.00 kPa g” Error See the controller’s manual for details about its “UL” command. ERR #13 External controller not detected See Also 3.10.9.3 “PGEN” © 2011 Fluke Calibration Page...
- Page 159 See Section 4.3.3 Error Messages ERR #1 The setup number x is invalid ERR #2 The source argument is invalid ERR #3 The meas argument is invalid See Also 3.11, 3.12.5.5, “SETUP”, “COM2”, “UDV” Page 149 © 2011 Fluke Calibration...
- Page 160 Read the version number of the internal software. Syntax “VER” Default Argument Remarks The version of the software installed in the PG9000 FLASH can be read. Example Typical command: “VER” Typical reply: “FLUKE PG9602 Ver3.00” Error None © 2011 Fluke Calibration Page...
-
Page 161: Status System
(“∗ESR?” or “∗ESE n”) Bit5 (32) Bit7 Bit6 Bit5 Bit4 Bit3 Bit2 Bit1 Bit0 OUTPUT Bit4 (16) QUEUE Bit3 (8) ERROR ERROR Bit2 (4) QUEUE Bit1 (2) Bit0 (1) Figure 21. Status Byte Register Page 151 © 2011 Fluke Calibration... - Page 162 IEEE-488 output queue. • ERR: Error Queue not empty (Bit 2) Indicates that at least one command error message is waiting in the PG9000 IEEE-488 error message queue. Use the “SYSTem:ERRor?” query to get this message. © 2011 Fluke Calibration Page...
-
Page 163: Standard Event Register
• RQC: Request Control (Bit 1) This bit is not supported as PG9000 cannot become the active controller in charge. • OPC: Operation Complete (Bit 0) Indicates that PG9000 has completed all requested functions. Page 153 © 2011 Fluke Calibration... - Page 164 PG9602™ OPERATION AND MAINTENANCE MANUAL Notes © 2011 Fluke Calibration Page...
-
Page 165: M A I N T E N A N C E , Ad J U S T M E N T S An D C A L I B R A T I O
This section provides information on maintenance, adjustment and calibration procedures and certain repair procedures. Note Calibration, maintenance and repair services for PG9000 are offered by authorized Fluke Calibration Authorized Service Providers (see Table 28). Caution • PG9000 is a sophisticated measuring instrument with advanced on-board features and functions. -
Page 166: Platform
Adder and/or Multiplier as needed to arrive at acceptable agreement. 5.2.1.2 Barometric Pressure Sensor PURPOSE To view and adjust the output of the on-board barometric sensor. © 2011 Fluke Calibration Page... -
Page 167: Ambient Temperature Sensor
<2cal> to access a screen in which the values of TA and TM can be edited. From here, press [ESC] and select <2ambT>, <1view> to view the ambient temperature sensor reading with the edited calibration coefficients applied. Page 157 © 2011 Fluke Calibration... -
Page 168: Relative Humidity Sensor
PG9000 mounting post and determine the offsets (actual resistances at 0 °C) by calibration. To remove the PRTs from the PG9000 mounting post, follow the instructions provided at the end of this section, Mounting Post PRT Removal. © 2011 Fluke Calibration Page... -
Page 169: Figure 22. Pg9602 Bottom Panel Detail
Remove the two socket head screws (2.5 mm Allen tool), securing the small circular AMH DRIVE connector bulkhead plate to the platform rear panel. PRT1 PRT2 Socket Head Screws Figure 22. PG9602 bottom panel detail. Page 159 © 2011 Fluke Calibration... -
Page 170: Reference Vacuum Sensor (Optional)
From here, press [ESC] and select <6vac>, <1view> to view the vacuum sensor reading with the edited calibration coefficients applied. Note See Section 5.2.1.1 for an explanation of Adders and Multipliers and their use in adjusting internal sensors. © 2011 Fluke Calibration Page... -
Page 171: Piston Position Detection Adjustment
Vent pressure. Select [SPECIAL], <8AMH>, .<2control>, <2discreet> and load all of the binary masses and none of the main masses (see Section 3.12.8.2). The binary mass values with an “*” Page 161 © 2011 Fluke Calibration... -
Page 172: Drive Belt Replacement
PC-7100/7600-xx. These piston-cylinders are interchangeable between the three platforms. Note A piston-cylinder delivered with a PG7102 or PG7601 is compatible with PG9602, however its metrological properties must be recertified for operation to determine uncertainty at higher mass loads. © 2011 Fluke Calibration Page... -
Page 173: Disassembly And Reassembly: 10 And 20 Kpa/Kg
Out of tolerance pressure definitions could result. Numerical references in the procedure below refer to Figure 23. This procedure applies to both the 10 kPa/kg and 20 kPa/kg piston-cylinder modules. Page 163 © 2011 Fluke Calibration... - Page 174 (1). The cap retaining screw will not fully disengage from the piston cap due to the adjustment mass (3). Gently remove the cap and screw from the assembly. Step 4 © 2011 Fluke Calibration Page...
- Page 175 Caution Do not touch the polished surfaces of the piston or the cylinder at any time. Step 5 Reinstall the piston cap (2) directly onto the piston head (5). Step 6 Page 165 © 2011 Fluke Calibration...
- Page 176 The piston enters the end of the cylinder that is marked with the serial number. Installing the cylinder with the wrong orientation may lead to out of tolerance measurements. © 2011 Fluke Calibration Page...
-
Page 177: Figure 23. 10 Kpa/Kg Piston-Cylinder Module (Expanded View)
5. MAINTENANCE, ADJUSTMENTS AND CALIBRATION Figure 23. 10 kPa/kg piston-cylinder module Figure 24. Gas piston-cylinder module (expanded view) sleeve nut tool Page 167 © 2011 Fluke Calibration... -
Page 178: Piston Insertion Tool (10 Kpa/Kg Only)
Use a slow steam of dry gas to blow off any unseen lint or dust. After using the tool, rewrap it in plastic wrap to keep it clean and store in its plastic container. © 2011 Fluke Calibration Page... -
Page 179: Disassembly And Reassembly: 50, 100 And 200 Kpa/Kg
The 10 and 20 kPa/kg piston-cylinders disassembly and reassembly process is the same for both models. The 50, 100, and 200 kPa/kg piston-cylinders share a common disassembly process. Page 169 © 2011 Fluke Calibration... - Page 180 (1). The cap retaining screw will not fully disengage from the piston cap due to the adjustment mass (3). Gently remove the cap and screw from the assembly. Step 3 © 2011 Fluke Calibration Page...
- Page 181 (7) where it mates with the main module housing (4). This must be applied before the sleeve is inserted into the housing. The end of the cylinder marked with the serial number must enter the main module housing first. Page 171 © 2011 Fluke Calibration...
-
Page 182: Cleaning Piston-Cylinders
Body oils and acids can permanently etch the surfaces. • undertake piston-cylinder module disassembly without familiarizing yourself with Section 5.3.1 of this manual. Incorrect disassembly may damage or destroy the piston-cylinder element. © 2011 Fluke Calibration Page... -
Page 183: Water / Detergent Cleaning Method
With experience, the difference in feel between a piston-cylinder that is truly clean, and one that is even mildly contaminated, becomes obvious. Reassemble the piston-cylinder module. Page 173 © 2011 Fluke Calibration... -
Page 184: Lubricating Piston-Cylinder Modules
Pistons and cylinders Pistons and cylinders should be kept perfectly free from vacuum grease and any other contaminant. Vacuum grease or other contaminants on the piston or cylinder will prevent the piston-cylinder from operating correctly. © 2011 Fluke Calibration Page... -
Page 185: Recalibration
Then, based on their observed stability, a longer calibration interval can usually be assigned. Though other organizations may be able to perform these calibrations, it is recommended that a Fluke Calibration Service be used, if possible. The recalibration process may find values for piston-cylinder effective area, pressure deformation coefficient and mass values that are different from the previous values. -
Page 186: Mass Sets
PG9000 power. • The Fluke Calibration flash software loading utility and PG9000 embedded software are available for download from the Service and Support section of Fluke Calibration’s worldwide web site at www.flukecal.com. -
Page 187: Terminal
Disconnect the cover to base ribbon cables at the connectors on the base printed circuit board. Be aware that the connectors are locking connectors. To reassemble, proceed in reverse order. 5.6.3 AMH Removal To remove the AMH-100-VAC from the PG9000 Platform, see Section 3.7.2.2. Page 177 © 2011 Fluke Calibration... - Page 188 PG9602™ OPERATION AND MAINTENANCE MANUAL Notes © 2011 Fluke Calibration Page...
-
Page 189: T R O U B L E S H O O T I N
<FATAL FAULT>. conflict. conditions leading up to the event, including the numbers displayed when enter is pressed and report the information to a Fluke Calibration Authorized Service Provider. Display <TOUT>, <TIME-OUT> or PG9000 is having a communications Check setup and communications with... - Page 190 The resolution of mass loading The mass loading resolution setting is set Use [RES] to set mass loading resolution as instructions doesn’t seem correct. incorrectly. desired. 3.10.10 The recommended default setting is 0.1 kg. © 2011 Fluke Calibration Page...
- Page 191 Connect the PRTS cable between the REM Terminal. cannot get a signal from the mounting post and the PG9600 base. Make or break the PRTs. cable connection only with power turned OFF to the PG Terminal. Page 181 © 2011 Fluke Calibration...
- Page 192 PG9602™ OPERATION AND MAINTENANCE MANUAL Notes © 2011 Fluke Calibration Page...
-
Page 193: A P P E N D I
@ 0°C inch of mercury 2.953 E-04 kilogram force per centimeter square 1.019716 E-05 Torr Torr (mmHg @ 0°C) 7.50063 E-03 mTor milli Torr (micron Hg @ 0°C) 7.50063 user User User defined coefficient Page 183 © 1998-2010 Fluke Calibration... -
Page 194: Defined Pressure Calculations
Calculated from standard air density corrected for actual atmospheric pressure, ambient temperature and relative humidity (atm p, humidity and temp source are specified by SETUP file) (3.11). ρ Mass density kg/m Mass set file (3.12.1.8). © 2011 Fluke Calibration Page... -
Page 195: Calculations
πΓ π θ − θ α α λ ⋅ ⋅ − θ • Differential pressure (differential mode): θ πΓ π ∆ − − offset θ ⋅ − ⋅ θ − α α λ θ Page 185 © 2011 Fluke Calibration... -
Page 196: Fluid Heads
(value as specified in the active SETUP file, see Section 3.11). , barometer height [m] = Height of the internal or external barometer above the PG9000 reference level. Value is negative if below reference level. © 2011 Fluke Calibration Page... -
Page 197: Overall Fluid Head Correction
Differential mode: Head correction is the same as for absolute mode with vacuum reference. Head correction for the height of the RPM is unnecessary through the use of the RPM offset. ρ ρ − Page 187 © 2011 Fluke Calibration... -
Page 198: Glossary
See also Pressure Entry Mode. Medium, pressurized The pressurized fluid. Multiplier A value by which internal sensor readings are multiplied to change their slope (pressure multiplier, temperature multiplier, humidity multiplier, vacuum multiplier) for calibration adjustment. © 2011 Fluke Calibration Page... - Page 199 The actual mass loaded on the piston using the measured value of each mass. See also Nominal Mass. User Level Level of security that can be set to limit access to certain PG9000 functions. Commonly used to protect against accidental or unauthorized editing of the metrological data. Page 189 © 2011 Fluke Calibration...
-
Page 200: Limited Warranty And Limitation Of Liability
Fluke warrants that software will operate substantially in accordance with its functional specifications for 90 days and that it has been properly recorded on non-defective media. Fluke does not warrant that software will be error free or operate without interruption. -
Page 201: Table 28. Fluke Calibration Authorized Service Providers
7. APPENDIX Table 28. Fluke Calibration Authorized Service Providers TELEPHONE, FAX NORMAL SUPPORT REGION COMPANY AND EMAIL Fluke Calibration US Tel: 1-877-355-3225 North America Customer Service service@flukecal.com (Regional) Fluke Do Brazil Tel: (11) 3759-7600 South America (Brazil) Fax: (11) 3759-7630 info@fluke.com.br... - Page 202 PG9602™ OPERATION AND MAINTENANCE MANUAL Notes Via Acquanera, 29 22100 Como tel. 031.526.566 (r.a.) fax 031.507.984 info@calpower.it www.calpower.it © 2011 Fluke Calibration Page...
Need help?
Do you have a question about the PG9000 Series and is the answer not in the manual?
Questions and answers