Table of Contents
Advertisement
Disassembly &
Assembly
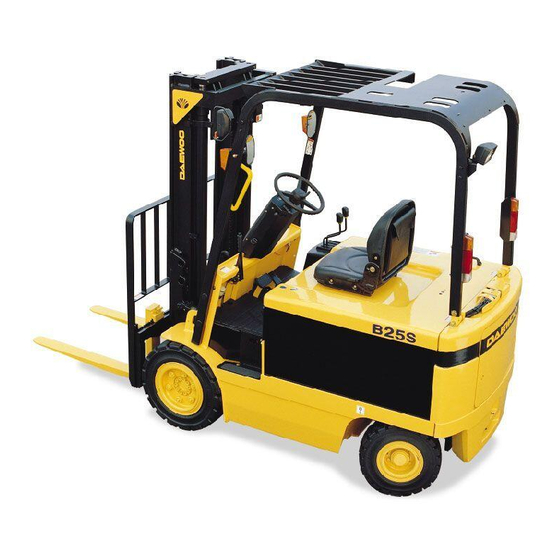
L L i i f f t t T T r r u u c c k k s s V V e e h h i i c c l l e e S S y y s s t t e e m m s s
B B 2 2 0 0 S S - - 2 2 , ,
B B C C 2 2 0 0 S S - - 2 2 , ,
B B 2 2 5 5 S S - - 2 2 , ,
B B C C 2 2 5 5 S S - - 2 2 , ,
B B 3 3 0 0 S S - - 2 2
B B C C 3 3 0 0 S S - - 2 2
SB2028E02
A u g . 1 9 9 9
Advertisement
Table of Contents

Related Manuals for Daewoo B20S-2


Summary of Contents for Daewoo B20S-2
- Page 1 SB2028E02 A u g . 1 9 9 9 Disassembly & Assembly L L i i f f t t T T r r u u c c k k s s V V e e h h i i c c l l e e S S y y s s t t e e m m s s B B 2 2 0 0 S S - - 2 2 , , B B 2 2 5 5 S S - - 2 2 , , B B 3 3 0 0 S S - - 2 2...
-
Page 2: Important Safety Information
If a tool, procedure, work method or operating technique not specifically recommended by DAEWOO is used, you must satisfy yourself that it is safe for you and others. You should also ensure that the product will not be damaged or made unsafe by the operation, lubrication, maintenance or repair procedures you choose. - Page 4 Index Accelerator Control Switch ........61 Backrest..............7 Carriage..............7 Control Panel............66 Counterweight ............67 Drive Motor.............63 Forks.................7 Hydranlic Control Valves ........42 Hydraulic Control Valve Switch Group .....5 Hydraulic Pump Motor..........5 Mast................13 Master Cylinder ............60 Parking Brake............61 Primary Lift Cylinder ..........32 Secondary Lift Cylinders ........29 Standard Lift Cylinders ...........26 Steer Axle ...............59 Steering Column.............56...
-
Page 6: Disassembly And Assembly
Disassembly And Assembly 5. Install the switches, sensor and board assembly on the bracket if they were removed. Install the switch group on the control valve. Hydraulic Control Valve 6. Put cams (8) in position on the spools. Install the screws, lockwashers and nuts. - Page 7 NOTE: The following steps are for installation of the hydraulic pump motor. 5. Install the two plates and blocks on the pump motor if they were removed. Put the pump motor in position in the lift truck with tooling (A) and a hoist. 6.
- Page 8 Forks Backrest Remove & Install Forks Remove & Install Backrest Start By: a. Remove forks. IDCD001P IDCD003P 1. Fasten a hoist to the backrest. Remove bolts(2) that fasten the backrest to the carriage. 2. Remove backrest (1). Backrest(1) weighs 40kg (90lb).
- Page 9 NOTE: For purposes of reassembly, identify and mark all hydraulic lines and connectors before removing or disconnecting. IDCD004P IDCD006P 3. Remove four bolts(8) from the chain guard/hose support assembly(6). Set the hoses aside, clear of the primary cylinder and cross head. IDCD005P 1.
- Page 10 IDCD008P Typical Example 5. Use tool(A) to remove retainer ring(11) from the cross head shaft. IDCD010P 6. Remove cross head(12) from the shaft. 8. Raise the inner mast to pull out carriage as shown. 9. Remove carriage from bottom of inner mast(15). Carriage(14) weighs 116kg(255 lb).
- Page 11 IDCD005P IDCD008P 12. Install cross head(12) and retaining ring(11). 15. Connect two hydraulic line(4) in their original positions. End By: a. Install backrest. b. Install forks. Disassemble Carriage Start By: IDCD009P a. Remove carriage. 13. Put the chains in position over cross head(12). Install nuts(9) onto the chain anchors.
- Page 12 VIEW A-A IDCD012P 2. Remove four lower roller bearings(3) and the shims from the carriage. VIEW B-B VIEW C-C IDCS125S Carriage Adjustment IDCD013P (3) Upper bearings. (4) Shims. (5) Bolt. (6) Screw. (7) Middle bearings. (8) Lower bearings. (A) Zero clearance. (B) 6.0 to 9.0 mm.
- Page 13 IDCD014P IDCD009P 2. Find narrowest point by ruler on the inner mast in 6. Shim stop bolt (11) as required to obtain a 6 to 9 the area where the bearings make contact. mm (.24 to .35 in) lap with top carriage stop on the inner upright.
- Page 14 Mast Remove & Install Mast Start By: a. remove forks b. drain the hydraulic oil to tank IDCD019P 3. Disconnect two hydraulic lines(4). WARNING Tilt cylinders(7) can drop when pin(6) is removed. To avoid component damage or personal injury, support tilt cylinder(7) while removing pin(6). IDCD017P 4.
- Page 15 Disassemble Mast WARNING Start By: Loose the tension of straps to be connected with hoist when mast assembly(2) is tilted forward. a. Remove primary lift cylinder. If straps are too tight, mast assembly(2) could be got off when bolts(8) are removed. b.
- Page 16 IDCD023P IDCD025P 2. Remove hose sheave (3). 5. Remove top cylinder retainer bolt(6) from each side of the mast. 3. Remove chain nut(4) from the top of the mast(each side). IDCD026P IDCD024P 6. Remove cylinder retainer brackets(8) from each cylinder. 4.
- Page 17 IDCD027P IDCD030P 7. Fasten a nylon strap and hoist to secondary 10. Check the condition of the seals and bearings(12) cylinder(9) as shown. Remove secondary located in each of the mast mounting bores. cylinders(9). Each cylinder weighs 50 kg(110 lb). Replace the seals and bearings(12) with new if worn or damaged.
- Page 18 IDCD033P IDCD035P 13. Fasten nylon straps and a hoist to the intermediate 16. Remove rollers(18) and the shims from the mast channel(15). Remove mast channel(15). stationary mast channel. The intermediate mast channel weighs 168kg (370 lb). 17. Remove nylon pads(19) and the shims. IDCD034P 14.
- Page 19 Assemble Mast NOTE: The standard, Full Free Lift and Full Free Triple Lift mast load bearings are all adjusted the same way. The mast shown in the following illustrations is the Full Free Triple Lift mast. 1. Make sure all parts are clean and free of dirt and foreign material.
- Page 20 NOTICE When the correct amount of shim has been installed behind rollers (1) there will be contact (zero clearance) between the rollers and the inner mast at most narrow point of mast (refer to step 4) IDCD037P IDCS123S Mast Adjustment Lower Bearings (A) Zero clearance.
- Page 21 IDCD039P 8. In case of standard and full free mast, inner lower bearings can be easily extruded by pulling down the inner mast from the bottom of staionary mast. If intermediate mast is stuck and do not move rolling up and down, there might be excessive shim.
- Page 22 C. Upper Pad Adjustment IDCD039P 11. In case of standard and full free mast, stationary upper bearings can be easily extruded by pulling down the inner mast from the bottom of staionary mast. If intermediate mast is stuck and do not move rolling up and down, there might be excessive shim.
- Page 23 D. Lower Bearing Adjustment of Inner Mast IDCD040P 14. Find narrowest point by ruler on the intermediate mast in the area where the inner lower bearings make contact full length of intermediate mast excluding minimum channel lap 475 mm (18.7 in). IDCS123S Mast Adjustment Lower Bearings (A) Zero clearance.
- Page 24 E. Upper Bearing Adjustment of intermediate Mast Follow same procedure with above B. F. Upper Pad Adjustment of Intermediate Mast Follow same procedure with above C. IDCD041P IDCS123S Mast Adjustment Lower Bearings (A) Zero clearance. (B) Minimum clearance. (C) Zero clearance. 17.
- Page 25 IDCD043P IDCD025P 19. If the bearings were removed from the tilt 22. Install top retainer bolts (14) for the secondary cylinder pin bores, install new ones. cylinders. 15° 13° IDCD027P 20. Fasten a hoist and nylon strap to secondary IDCD322S cylinder (12).
- Page 26 IDCD023P IDCD045P 25. Connect chains (16) at the chain bracket of 28. Install primary lift cylinder. Assemble primary lift stationary mast upper. cylinder retainer bolt(20). 26. Install sheave (18) of lift hose. IDCD044P 27. Install the lift hose support bracket(19) and hoses.
- Page 27 Standard Lift Cylinders Disassemble Standard Lift Cylinders Start By: a. Remove standard lift cylinders. IDCD007P 31. Install carriage chains to primary lift cylinder. IDCD399P 1. Put standard lift cylinder (1) in position on vise (A). IDCD005P 32. Install hydraulic hose (22) of side shifter to side shifter cylinder (23).
- Page 28 ICD407P IDCD410P 3. Remove bearing (3) with wrench (C). 6. Remove O-ring seal (6) and back-up ring (7) from the bearing. IDCD408P IDCD411P 4. Remove rod (4) from the cylinder body. 7. Remove wiper seal (8) and seal (9) from the bearing.
- Page 29 Assemble Standard Lift Cylinders IDCD409P 4. Install split rings (5) on the cylinder rod. IDCD411P 1. Install seal (2) in the bearing. 2. Install wiper seal (1). Install the seal with the lip toward the outside. IDCD408P 5. Install cylinder rod (6) in the cylinder body. IDCD410P NOTE : Install back-up ring (4) with the curved side contacting the O-ring seal.
- Page 30 Secondary Lift Cylinders Disassemble Secondary Lift Cylinders Tools Needed Hydraulic Cylinder Repair Stand Wrench Assembly IDCD406P 7. Tighten setscrew (8) with wrench (B) to a torque of 6 L 1 NIm (53 L 9 lbIin). Start By: a. Remove standard lift cylinders. End By: a.
- Page 31 IDCD208P IDCD204P 3. Remove rod (4) from the cylinder body. 7. Remove slyd ring (11), wear ring (12) and O-ring (13) from the bearing. IDCD206P IDCD209P 4. Remove stop ring (4) from the cylinder rod. 8. Remove wiper seal (14) and retaining ring (15) 5.
- Page 32 Assemble Secondary Lift Cylinders IDCD206P 5. Install stop rings (10) on the cylinder rod. IDCD209P 6. Install wear ring (11), U-packing (12) and backup ring (13). 1. Install U-packing (1) in the bearing. 2. Install wiper seal (2) and retaining ring (3). Install the seal with the lip toward the outside.
-
Page 33: Primary Lift Cylinder
Primary Lift Cylinder Remove & Install Primary Lift Cylinder Start By: a. Remove carriage. IDCD060S WARNING 4. Pull the cylinder out far enough to disconnect elbow (3). Remove primary lift cylinder (4). Weight To prevent personal injury, move the control is 27 kg (60 lb). - Page 34 Disassemble Primary Lift Cylinders Tools Needed Hydraulic Cylinder Repair Stand Wrench Assembly Start By: IDCD211P a. Remove primary lift cylinder. 4. Remove wear ring (4), U-packing (5) and backup ring (6). IDCD210P IDCD212P 1. Remove flow protector valve (1) from the cylinder body.
- Page 35 IDCD213P IDCD214P 7. Remove wiper seal (12) and retaining ring (13) 3. Install O-ring seal (4) and two slyd-rings(5). and U-packing (14) from the bearing. Assemble Primary Lift Cylinders Tools Needed Hydraulic Cylinder Repair Stand Wrench Assembly IDCD212P 4. Install check valve (6), retaining ring (7) and spacer (8).
-
Page 36: Tilt Cylinders
IDCD215P IDCD061P WARNING 6. Install cylinder rod (12) in the cylinder body. 7. Install bearing (13) on the cylinder body. Use tool To prevent personal injury, move the control (A) to tighten bearing. levers backward and forward to release any pres- sure in hydraulic system. - Page 37 Disassemble & Assemble Tilt 4. Remove piston and seal assembly (4) from the cylinder rod. Cylinders 5. Remove head assembly (5). Tools Needed Spanner Wrench Start By: a. Remove tilt cylinder. IDCD423P 6. Remove spacer (6) from the cylinder rod. 7.
- Page 38 IDCD253P IDCD426P 9. Remove seal (11) from the spacer. 12. Install seal (14) in the head. Position the lip of the seal toward the inside of the head. 13. Install seal (15). 14. Install seal (16) in the cylinder head. Position the lip of seal (16) toward the outside of the cylinder head.
- Page 39 IDCD458P IDCD422P 16. Install seal (11) in the spacer. 20. Install head assembly (5) on the cylinder rod. 21. Install piston assembly (4) onto the cylinder rod. 22. Install nut (3). Tighten nut (3) to a torque of 270 L L 30 N•m (200 L L 22 lb•ft). IDCD423P 17.
-
Page 40: Steering Cylinder
Steering Cylinder Disassemble Steering Cylinder Tools Needed Pliers NOTE : Steering cylinder has two rods positioned between the cylinder end caps. These rods are IDCD266S attached to the cylinder end caps with nuts at each end. Remove the nuts and rods (A) before removing 4. - Page 41 Assemble Steering Cylinder Tools Needed Pliers IDCD268S 6. Remove and inspect O-ring seal (6). IDCD271S 1. Assemble each end cap as follows ; a. Install O-ring seal (2). b. Install wear ring (1). c. Install u-cup seal (3). IDCD269S 7. Remove seal (7) from the piston. IDCD272S 2.
- Page 42 IDCD273S IDCD275S 3. Install O-ring seal (5) on the cylinder rod. 7. Install cylinder tube (9) on the rod assembly. 4. Install piston (6) on the cylinder rod. IDCD276S IDCD274S NOTE : Install the nuts and rods (A) on steering cylinder after installing the cylinder end caps.
-
Page 43: Hydraulic Control Valves
Hydraulic Control Valves Disassemble Hydraulic Control Valves Remove & Install Hydraulic Start By : Control Valves a. Remove hydraulic control valve. WARNING Hydraulic oil under pressure can remain in the hydraulic system after the engine and pump have been stopped. Personal injury can result if the pressure is not released before any work is done to the hydraulic system. - Page 44 IDCD222P IDCD219P 3. Remove side shift spool (7) from the valve body. 6. Remove lift and tilt valve spool assemblies (11) from the valve body. 4. Remove seal (8) and spring (9) from the valve spool. 7. Remove seals (12) from the valve spools. 8.
- Page 45 Assemble Hydraulic Control Valves IDCD224P 11. Remove relief plugs (17), springs (18) and pop- pets (19). IDCD224P 1. Make sure all valve parts are clean and free of dirt. 2. Install poppets (1), springs (2), and relief plugs (3). IDCD223P 3.
- Page 46 IDCD222P IDCD226P 5. Install springs (7) and seals (8) on the valve 10. Install retainer (14), dust cover (15) and bolt (16) spools. to each section. 6. Install lift and tilt spool assemblies (9) to the valve body. IDCD216P IDCD221P 11.
-
Page 47: Steering Unit
Steering Unit Disassemble Steering Unit Cleanliness is extremely important when repairing a steering unit. Work in a clean area. Before discon- necting lines, clean port area of unit thoroughly. Use a wire brush to remove foreign material and debris from around exterior joints of the unit. End Cap Althouh not all drawings show the unit in a vise, we Cap Screw... - Page 48 Control End Drive Drive Seal IDCD282S IDCD281S 8. Remove drive. 11 Remove housing from vise. Place housing on a clean soft cloth to protect surface finish. Use a 9. Remove spacer plate. thin bladed screwdriver to pry retaining ring from housing.
- Page 49 Quad Ring Seal Seal Dust Gland Seal Bushing IDCD286S IDCD284S 13. Remove quad ring seal from seal gland bushing. 16. Remove spool and sleeve assembly from 14 hole end of housing. 14. Use a thin bladed screwdriver to pry dust seal from seal gland bushing.
- Page 50 Seal 9,3mm [.36in.] ID Check Check Ball Set Screw Ball Check Seat 7.7mm Ball [.30 in.] ID Retainer IDCD287S IDCD288S 18. Push spool partially from control end of sleeve, 21. Remove set screw from housing. then remove 4 centering springs from spool carefully by hand.
- Page 51 Assemble Steering Unit Control End Check all mating surfaces. Replace any parts that Set Screw 9,3 mm have scratches or burrs that could cause leakage. [.36 in.] ID Clean all metal parts in clean solvent. Blow dry with air. Do not wipe dry with cloth or paper towel because lint or other matter can get into the Check Ball Seat hydraulic system and cause damage.
- Page 52 Spring Slot Control Sleeve Spring Slot Control Identification Spool Marks IDCD291S IDCD290S 6. Assemble spool and sleeve carefully so that the 7. Bring spring slots of both parts in line and stand spring slots line up at the same end. Rotate spool parts on end of bench.
- Page 53 Needle Thrust Bearing Bearing Race (2) Seal IDCD292S IDCD293S 11. Position the spool and sleeve assembly so that the splined end of the spool enters the 14 hole end of housing first. 12. Place housing on clean lint free cloth. Install 47,5 ATTENTION: Be extremely careful that the parts do mm [1.86 in.] ID seal in housing.
- Page 54 Retaining Ring Seal Gland Bushing (with seals) IDCD294S IDCD296S 16. Install seal gland bushing over the spool end with 18. Clamp housing in vise. Clamp lightly on edges of a twisting motion. Tap the bushing in place with a mounting area. Do not over tighten jaws. rubber hammer.
- Page 55 Seal Groove this Side of Gerotor (Meter) Star Valley Port Face Drive Pin Parallel with Port Drive Face (Marked) IDCD298S 21. Rotate spool and sleeve assembly until pin is parrallel with port face. Install drive, make sure Port Face you engage drive with pin, To assure proper IDCD300S alignment, mark drive as shown.
- Page 56 24. Install drive spacer (s) when used, in meter. 25. Install 73.5 mm [2.89 in.] ID seal in gerotor (meter) or end cap, see notes. Seal Drive Spacer(s) 26. Install end cap on gerotor, align holes. IDCD301P IDCD302P Actual Spacer Displacement /r(in Length mm[in.]...
-
Page 57: Steering Wheel
Steering Wheel Steering Column Remove And Install Steering Wheel Remove Steering Column Start By: a. remove steering wheel. IDCD309S 1. Remove cap (1) from the steering wheel. 1. Remove bolts (1) and front cover (2). 2. Remove nut (3) and cup (2) from the steering 2. - Page 58 4. Disconnect the four steering gear hoses. Disconnect wires (8) from the ignition switch. 5. Disconnect all kinds of connector (9). 6. Remove bolts, clamp (10) and directional switch (11) from the steering column. Disconnect hose (13) from the steering gear. 8.
- Page 59 IDCD317S IDCD312S 2. Put steering column (15) in position in the support 6. Put the cover and instrument group assembly in assembly. Connect steering gear (16) to column position over the steering column. Connect two (15), and install four bolts (14) that hold the steer- wiring harness connectors (7).
-
Page 60: Steer Axle
Steer Axle Remove Steer Axle Tools Needed Jack Stand WARNING IDCD320S Be sure the pressure in the hydraulic system is released before any lines or hoses are disconnected. 6. Remove bolts (2) and mounting caps (3) from the steer axle. IDCD318S IDCD321S 1. -
Page 61: Master Cylinder
IDCD321S IDCD324S 1. Put steer axle (4) in position with a floor jack. 5. Connect hoses (1) to the steering lines. Master Cylinder Remove And Install Master Cylinder IDCD323S NOTE: Install bolts (2) with approximately two bolt threads into the mounting bosses. 2. -
Page 62: Parking Brake
6. Connect brake line (4) and hose (1) to the master Parking Brake cylinder. Fill the brake reservoir with brake fluid. See the Operation And Maintenance Manual. Remove And Install Parking Brake 7. Bleed the brake system, and if necessary, adjust the pedal free travel. - Page 63 9. With the parking brake lever assembly in the “OFF” position and cable assembly shoulder (10) seated against strap assembly (12), as shown in BRAKE OFF, adjust nuts (1) until spring (3) over travel (X) is 70.0 L 0.5mm (2.76 L .02 in). 10.
-
Page 64: Drive Motor
NOTE: The following steps are for assembly of the Drive Motor parking brake. 3. Put the strap assembly in position on bracket Remove And Install Drive Motor assembly (8). Install bracket assembly (3). 4. Install spring (6), bolt (7) and the wire. Install ring Tools Needed (2), spring (1) and retaining nut (5). - Page 65 The following steps are for installation of the drive motor. 7. Put O-ring seal (14) on the drive motor, and put clean SAE 10W oil on it. Install gear (13), the lock- washer, washer and nut (12). Tighten the nut with tool (B) to a torque of 100 L 15 NIm (75 L 11 lbIft), and the lock the nut in position.
- Page 66 Transaxle 1. Remove the battery and the plate under the bat- tery. Disconnect the four cables and wires (if equipped) from the drive motor. Disconnect the parking brake cable assembly and the two wires Remove And Install Transaxle from the parking brake switch (see Parking Brake in this module).
-
Page 67: Control Panel
Control Panel Remove And Install Control Panel Typical Example 3. Disconnect wiring harness connector (5). IDCD378S Disconnect seven cables (6) and two wires (7) from the contactors at the bottom of the control Typical Example panel. 4. Loosen the two lower corner mounting bolts for WARNING the control panel. - Page 68 Counterweight 4. Remove three bolts (1) and the counterweight. NOTE: The following steps are for installation of the counterweight. Remove And Install Counterweight 5. Put the counterweight in position on the lift truck Tools Needed and install three bolts (1). Link Bracket 6.
Need help?
Do you have a question about the B20S-2 and is the answer not in the manual?
Questions and answers