
Related Manuals for ASL INTERCOM MPS Series


Summary of Contents for ASL INTERCOM MPS Series
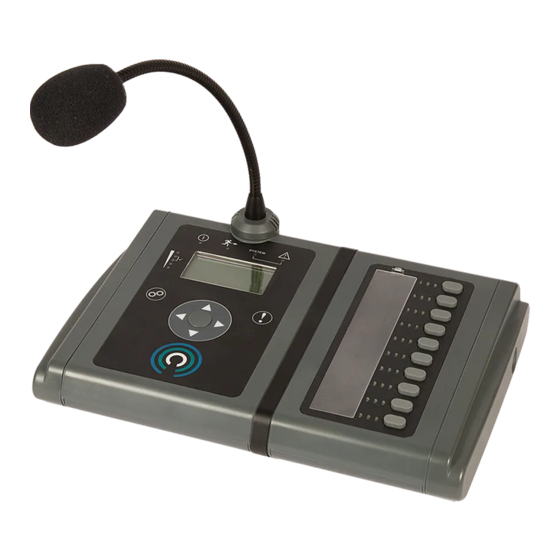
- Page 1 MPS-Series Modular Paging Microphones Software V1.5.13 MPS01 MPS10 MPS20 Configuration Guide ASL Document Ref.: U-0664-0265.doc Issue: 03 complete, approved - Date: 22/06/12 Part Number: M0664_TBD...
- Page 2 MPS-Series – Configuration Guide The MPS microphone must not be installed in an area that is subject to a corrosive atmosphere, excessive moisture or may allow water or other liquids to come into contact with the unit or its external connections. Objects filled with liquids such as vases should not be placed upon it. Additional User Documentation: MPS-Series Installation Guide (ASL Document Ref: U-0664-0174) MPS-Series (ASL Paging Protocol) Quick Operation Guide (ASL Document Ref: U-0664-0264)
-
Page 3: Table Of Contents
MPS-Series – Configuration Guide Contents Introduction ..............................5 MPS Microphone Firmware Update......................6 Firmware Update via Ethernet Port .................... 6 Firmware Update via USB Port ....................9 MPS Microphone Configuration ....................... 11 Microphone Button Capability....................12 3.1.1 Router Connection – ASL Paging Protocol ..............12 3.1.2 IP Connection –... - Page 4 MPS-Series – Configuration Guide 4.6.8.2 DVA Play Mode ...................... 36 4.6.8.3 Busy Indication Mode ..................... 36 VIPA Device Configuration ........................37 Configuring a MPS Microphone with IP Connection ..............38 Configuring the Background Music ..................45 Configuring the Listen-in Function.................... 51 5.3.1 PMC Stream for Listen-in Using the PMC Broadcaster Method ........
-
Page 5: Introduction
MPS-Series – Configuration Guide Introduction This Configuration Guide provides instructions on how: • To update the MPS microphone firmware • To modify the MPS microphone configuration file • To download a configuration file to the MPS microphone • To configure a VIPA device which is hosting a MPS microphone Abbreviations Application Solutions (Safety and Security) Limited BackGround Music... -
Page 6: Mps Microphone Firmware Update
MPS-Series – Configuration Guide MPS Microphone Firmware Update There are a number of programs which run on the MPS microphone. These instructions describe how to update the main MPS firmware application which runs on its main board. Firmware Update via Ethernet Port You Will Need: 1) The new firmware binary file (e.g. - Page 7 MPS-Series – Configuration Guide If you wish, previous command lines may be commented out by placing a colon (:) at the beginning of the line as shown below. Copy the IP and MAC addresses of the microphone to be updated into the “download_ethernet.cmd” script file as shown below.
- Page 8 MPS-Series – Configuration Guide To Change the Binding Order of the Network Interfaces on a Windows Machine: Select “Run” from the “Start” menu. Type “ncpa.cpl”, and then click “OK”. The “Network Connections” window will be displayed. All available network connections are listed; see example below for Windows XP.
-
Page 9: Firmware Update Via Usb Port
MPS-Series – Configuration Guide Firmware Update via USB Port You Will Need: 1) The new firmware binary file (e.g. ASL-DESK-MIC_V1_5_6.bin) 2) The USB Updater (dfuprog.exe), script file (download_usb.cmd) and the drives for the microphone’s USB device To Update The Main Board Application Using the USB Updater: Disconnect the power supply to the microphone. - Page 10 MPS-Series – Configuration Guide Connect the microphone to the host PC via a USB serial cable. In Windows Explorer, double-click the "download_usb.cmd" file to run the script. The command prompt will display the download progress. The download should start instantly. Once completed, you will be prompted to press any key. Example: Firmware download progress ASL Microphone USB Device Firmware Upgrade Utility <Version: 1.1.0002.7611>.
-
Page 11: Mps Microphone Configuration
MPS-Series – Configuration Guide MPS Microphone Configuration The MPS microphone’s configuration file is in XML format. The configuration file is downloaded into the MPS microphone using the microphone Configuration Tool. IMPORTANT: 1) The microphone IP settings and audio levels are configurable from the microphone’s LCD display menu. Refer to the Quick Operation Guide for details. -
Page 12: Microphone Button Capability
MPS-Series – Configuration Guide Microphone Button Capability 3.1.1 Router Connection – ASL Paging Protocol Table 1 Microphone button capability for connection to an ASL Audio Router MPS Microphone Software Version 1.5.13 Microphone Buttons Functions Configuration MPS01 1-30 MPS GUI • Router configuration and None MPS XML configuration... -
Page 13: Ip Connection - Asl Paging Protocol
MPS-Series – Configuration Guide 3.1.2 IP Connection – ASL Paging Protocol Table 2 Microphone button capability for connection to an IP network MPS Microphone Software Version 1.5.13 Microphone Buttons Functions Configuration • MPS01 1-30 MPS GUI VIPA device configuration None and MPS XML configuration •... -
Page 14: Configuration File
MPS-Series – Configuration Guide Configuration File Figure 1 below shows an example of a configuration file for a MPS microphone. The configuration attributes and attribute values are described in Table 3 (page 15). Figure 1 Configuration file example <System jpcid="ASL"> <!-- ################################################################# -->... - Page 15 MPS-Series – Configuration Guide Table 3 Configuration file attributes MPS Microphone Software Version 1.5.13 Attributes Description Attribute Values globals config-version version Configuration version As required. mcast-address ipaddr Mulitcast address “239.1.0.1” (Do not change!) LCD Display: IP SETTINGS>CTL IP ADDRESS NOTE: The microphone will not operate in fallback mode (LOCAL CONTROL) if this address is modified.
- Page 16 MPS-Series – Configuration Guide MPS Microphone Software Version 1.5.13 Attributes Description Attribute Values ip-gain-dmic Microphone input gain “0” (minimum level – 0%) to “120” (maximum level – 100%) Default: “30” (25%) LCD display: AUDIO LEVELS>MICROPHONE ip-gain-emic Headset boom input gain “30”...
- Page 17 MPS-Series – Configuration Guide MPS Microphone Software Version 1.5.13 Attributes Description Attribute Values live-port Communication port used for As configured on the host VIPA device (VIPA live announcements device configuration: Microphone> Audio Group); see Section 5.1 (page 38). LCD Display: IP SETTINGS>PMC LIVE PORT bgm-addr Multicast address used for As configured on the host VIPA device (System...
- Page 18 MPS-Series – Configuration Guide MPS Microphone Software Version 1.5.13 Attributes Description Attribute Values type Button type Available button types (as required): For Router connection: • “zone-select”: zone select button for live announcements or message routing For IP connection: • “zone-select”: zone select button for live announcements •...
-
Page 19: Downloading A Mps Microphone Configuration
MPS-Series – Configuration Guide Downloading a MPS Microphone Configuration You Will Need: 1) The microphone Configuration Tool (asl-config.exe) and all required dlls (QtCore4.dll, QtGui4.dll, QtNetwork4.dll and QtXml4.dll) The host PC must be in the same subnet as the microphone. 2) The microphone configuration file The configuration file must be named “config.xml”... - Page 20 MPS-Series – Configuration Guide The microphone will prompt for reboot – Follow the instructions displayed on the microphone’s LCD display. If the microphone does not prompt for reboot, the configuration download has failed. a) Double-check the microphone and host PC’s IP addresses. b) Check the network connections.
- Page 21 MPS-Series – Configuration Guide To Verify the Actual Configuration Against the Configuration File: Run the microphone Configuration Tool as described above. Press the “Record Network Config” button. The results are displayed in the command prompt window screen and logged into the “ASL-Network- Config-Log.txt”...
-
Page 22: Router Configuration
MPS-Series – Configuration Guide Router Configuration IMPORTANT: MPS’s Router 2 Microphone Port should be used for connection to the Router (any available microphone input). The MPS software at the time of publication (V1.5.13) does not support the listen-in function. NOTES: 1) The following details are correct for the current Router software versions at the time of publication: •... -
Page 23: Configuring The Microphone Control Parameters
MPS-Series – Configuration Guide Configuring the Microphone Control Parameters 4.3.1 Microphone Protocol Menu: Configuration or Config System Router Inputs Mic/Line <I/P #nn – input name> Paging Microphone Ctrl Ctrl-1 Protocol ASL Serial Protocol This parameter is not available on the DAU and ACU at the time of publication. Possible values: ‘Paging mic protocol’... -
Page 24: Microphone Class
MPS-Series – Configuration Guide Note that when the microphone is connected to a Control Node (VAR8-ACU), the Control Node uses the priority to arbitrate the use of the network channels, and then each Slave Node in the network uses its own priority configuration for local arbitration. -
Page 25: Busy And Select Leds Mode (Var8-Acu And Acu Only)
MPS-Series – Configuration Guide This name is for reference only in the Router settings and may be modified as required. It can be any alphanumeric string of up to 12 characters. Modify the microphone name as required. 4.3.7 Busy and Select LEDs Mode (VAR8-ACU and ACU only) VAR8-ACU Menu: Config System Router Inputs Mic/Line <I/P #nn –... -
Page 26: Microphone Output Relative Gain
MPS-Series – Configuration Guide If this surveillance is enabled, then in the absence of a surveillance tone, an Input Audio fault will be raised and logged. This would indicate that the microphone audio connection is broken, or is a poor connection. Note that on VAR4/12/20 the microphone input gain affects the surveillance tone. -
Page 27: Microphone Equalisation
MPS-Series – Configuration Guide Ensure that the Night Time Volume Control is inactive, by setting it to ‘Off’: Menu: Configuration or Config System Router Noise Off Ensure that all Volume Controls are set to maximum volume, i.e., control at position ‘11’. Make broadcasts from the fist microphone and confirm that they are free of acoustic feedback. - Page 28 MPS-Series – Configuration Guide The Fade Up time is the time the signal takes to fade up when: • Turned on (routed); • Override removed. The diagram in Figure 5 illustrates the sequence of events during the enabling and disabling of a single audio source (e.g.
-
Page 29: Microphone Pre-Announcement Chime
MPS-Series – Configuration Guide 4.4.6 Microphone Pre-Announcement Chime Menu: Configuration or Config System Router Inputs Mic/Line <I/P #nn – input name> Paging Microphone Audio Chime Possible chime level: –40dB to 0dB (1dB steps) Possible chime types: ‘Off’: none ‘Chime-1’: single note chime ‘Chime-2’: two-notes chime ‘Chime-3’:... -
Page 30: Configuring The Microphone Buttons
MPS-Series – Configuration Guide • Tolerant The ANS system is tolerant to this input, and the ANS compensation continues to be calculated, while the input is being broadcast, i.e., the input is considered as part of the ambient noise. This setting is used for audio sources such as background music. -
Page 31: Ptt Restore Mode
MPS-Series – Configuration Guide 4.5.1.3 PTT Restore Mode Menu: Configuration or Config System Router Inputs Mic/Line <I/P #n – name> Paging Microphone> Buttons PTT Restore Disabled or Restore Enabled Possible values: ‘Restore Disabled’ or ‘Restore Enabled’ System default configuration: ‘Restore Disabled’ Configure the PTT Restore mode as required. -
Page 32: Dva Routing Button (Var4/Var12/Var20 Only)
MPS-Series – Configuration Guide Configure a button for ‘MIC Routing’, and then select the output or group of outputs to which audio (microphone) is to be routed when the Zone Select button is pressed. Consult the system design documentation for which outputs are used for which audio zones. Note that to simplify this process the Router may have had the output names changed to zone names. -
Page 33: Play Dva Button (Dau, Var8, Acu And Var8-Acu Only)
MPS-Series – Configuration Guide 4.6.4 Play DVA Button (DAU, VAR8, ACU and VAR8-ACU only) Menu: Config System Router Inputs Mic/Line <I/P #n – name> Paging Microphone> Buttons Zoning <Button # nn> Play DVA The button function is ‘play DVA to selected outputs’. When the button is pressed a route is made connecting a DVA audio source from the Slave Unit or the Audio Control Unit (ACU) to outputs which have been pre- selected using buttons configured for zone selection. -
Page 34: Single Dva Route Button (Acu And Var8-Acu Only)
MPS-Series – Configuration Guide 4.6.5 Single DVA Route Button (ACU and VAR8-ACU only) Menu: Config System Router Inputs Mic/Line <I/P #n – name> Paging Microphone> Buttons Zoning <Button # nn> Single DVA Route The ‘Single DVA Route’ button function enables a route to be made that connects one audio input to any combination of outputs. -
Page 35: Cancel All Dvas Button (Dau, Var8, Acu And Var8-Acu Only)
MPS-Series – Configuration Guide 4.6.6 Cancel All DVAs Button (DAU, VAR8, ACU and VAR8-ACU only) Menu: Config System Router Inputs Mic/Line <I/P #n – name> Paging Microphone> Buttons Zoning <Button # nn> Cancel-All-DVAs The button function is ‘stop all DVAs’. Pressing the button stops DVAs playing to any zone. The announcement will stop playing immediately, or play until its end depending on how the DVA is configured. -
Page 36: Dva Play Mode
MPS-Series – Configuration Guide Menu: Config System Router Inputs Mic/Line <I/P #n – name> Paging Microphone> Buttons Zoning <Button # nn> DVA Routing or Play DVA or Single DVA route Control Latching ResetButton • ‘Play Once’ mode Pressing a ‘DVA Routing’, ‘Play DVA’ or ‘Single DVA’ button plays the DVA associated with the route once only. -
Page 37: Vipa Device Configuration
MPS-Series – Configuration Guide VIPA Device Configuration This section describes how to configure a VIPA device to host a MPS microphone over an IP network using the VIPA Config Tool (VCT). It also describes how to configure a VIPA device to support the MPS microphone functionalities such as background music, listen-in and fallback mode. -
Page 38: Configuring A Mps Microphone With Ip Connection
MPS-Series – Configuration Guide Configuring a MPS Microphone with IP Connection Figure 7 MPS microphone configuration – IP connection (example using iPAM400) VIPA Device hosting the MPS microphone Microphone node: • Audio Group: <Live audio PMC address>:<Live audio PMC port>:1 •... - Page 39 MPS-Series – Configuration Guide To Configure a MPS Microphone with IP Connection to a VIPA Device: Ensure the VIPA device which is hosting the MPS microphone has been configured with correct IP address. Add a standard Microphone node to the VIPA device. Configure the microphone IP connection as follows;...
- Page 40 MPS-Series – Configuration Guide Configure other microphone parameters as required. • Priority (Optional Settings): As required. Refer to the System Design documentation to find out the microphone priority. • Permissions (Optional Settings): − ANS enabled: Determines whether an Ambient Noise Sensor (ANS) will affect the broadcast.
- Page 41 MPS-Series – Configuration Guide Add a Button node to the microphone for each of the microphone buttons used in your system. Figure 8 Microphone button configuration (example with Page button) VIPA Device hosting the MPS microphone MPS microphone node Button node: •...
- Page 42 MPS-Series – Configuration Guide − Listen-in: Pressing the button activates the listen-in function from the zone defined in the Zones property (Optional Settings). Note that the Listen-in button type on the VIPA device is for reference only. This equates to type “listen-in” in the microphone XML configuration. The listen-in function must be configured in the microphone’s XML configuration file;...
- Page 43 MPS-Series – Configuration Guide Figure 9 MPS fault reporting – IP connection: Virtual audio input (example using iPAM400) VIPA Device hosting the MPS microphone Audio Device (Inputs 1 and 2) node: • First Input: Input 1 used for general audio input •...
- Page 44 MPS-Series – Configuration Guide Figure 10 MPS fault reporting – IP connection: Fault tree (example using iPAM400) VIPA Device hosting the MPS microphone Faults of a MPS microphone connected over IP are reported to the last analogue audio input. In this example, MPS faults are reported to Input Port 6. A communication failure is present.
-
Page 45: Configuring The Background Music
MPS-Series – Configuration Guide Configuring the Background Music NOTE: Although described as “Background Music” this function can route any audio connected to the MPS microphone audio input (3.5 mm jack) to a configured zone or group of zones. A single microphone button toggles the route on and off. - Page 46 MPS-Series – Configuration Guide To Configure the Background Music: Add a Linutop node in the System configuration; see Figure 11 (page 45). • Hostname: as required • IP address: DHCP • Run announce-d: No • Other parameters: system default settings NOTE: The Linutop is used to make the BGM PMC stream generated by the MPS microphone known to all VIPA devices in the system.
- Page 47 MPS-Series – Configuration Guide Figure 12 Background music configuration – VIPA device (example using iPAM400) VIPA Device node hosting the MPS microphone BGM PMC Stream node: • Stream: “1” • Audio Group: audio group assigned to the Linutop’s PMC Output node Configure the required MPS microphone buttons for type “bgm”;...
- Page 48 MPS-Series – Configuration Guide If the VIPA device which is hosting the MPS microphone is a VIPET (or a Linutop), then follow the steps below. Add a BGM PMC Stream node to the VIPET which is hosting the MPS microphone; see Figure 13 (page 48).
- Page 49 MPS-Series – Configuration Guide If the background music audio is to be fed into the Router, then configure the audio output that is connected to the Router as a PMC listener which will listen to the PCM stream from the Linutop; see Figure 14 (page 49). Refer to the System Design documentation to find out the audio output used for background music.
- Page 50 MPS-Series – Configuration Guide Configure a BGM Input for the ASL Router node; see Figure 15 (page 50). Refer to the System Design documentation to find out the Router audio input connected to VIPET audio output providing the background music feed. Figure 15 VIPET Background music configuration –...
-
Page 51: Configuring The Listen-In Function
MPS-Series – Configuration Guide Configuring the Listen-in Function There are a number of options for IP based listen-in functionality. The MPS software at the time of publication (V1.5.13) does not support the standard ASL IP listen-in function. However, it does support a listen-in GUI which operates by selecting one of a number of permanently streamed listen-in sources, one per zone. - Page 52 MPS-Series – Configuration Guide Figure 16 Listen-in implementation methods for MPS microphone (example using iPAM400 units) iPAM400-01 IP01 OP01 MX100 AUDIO DEVICE Built-in Sound (Inputs 1 & 2, Outputs 1 & 3) IP02 OP02 MX100 OP03 MX100 AUDIO DEVICE Built-in Sound (Inputs 3 &...
-
Page 53: Pmc Stream For Listen-In Using The Pmc Broadcaster Method
MPS-Series – Configuration Guide 5.3.1 PMC Stream for Listen-in Using the PMC Broadcaster Method Figure 17 Listen-in configuration – PMC broadcaster method (example using iPAM400) VIPA Device hosting the PMC stream used for listen-in Audio Device node: Parameters: system default settings Audio Input node: •... - Page 54 MPS-Series – Configuration Guide To Configure the PMC Stream for Listen-in (PMC Broadcaster): Ensure the VIPA device used to provide the listen-in audio stream has been configured with correct IP address and all required Audio Devices, including audio inputs and outputs. Example: The iPAM400 in Figure 17 (page 53) has two Audio Device nodes.
-
Page 55: Pmc Stream For Listen-In Using The Pass Through And Pmc Broadcaster Method
MPS-Series – Configuration Guide 5.3.2 PMC Stream for Listen-in Using the Pass Through and PMC Broadcaster Method Figure 18 Listen-in configuration – Pass Through and PMC broadcaster method (example using iPAM400) Audio Device node: Parameters: system default settings Audio Input node: •... - Page 56 MPS-Series – Configuration Guide To Configure the PMC Stream for Listen-in (Pass Through and PMC Broadcaster): Ensure the VIPA device used to provide the listen-in audio stream has been configured with correct IP address and all required Audio Devices, including audio inputs and outputs. Example: The iPAM400 in Figure 18 (page 55) has two Audio Device nodes.
- Page 57 MPS-Series – Configuration Guide Add a second Pass Through node to the Audio Device node. This Pass Through node provides the listen-in PMC stream for the MPS microphone. • From: The audio group assigned to the Audio Input. Example: From = “ipam02-ip” •...
-
Page 58: Fallback Configuration
MPS-Series – Configuration Guide Fallback Configuration The MPS microphone will operate in fallback mode (LOCAL CONTROL) when the microphone fails to communicate with its host VIPA device over the IP network or when it is configured to operate as stand- alone unit in an IP network. - Page 59 MPS-Series – Configuration Guide To Configure the Fallback Operation: Ensure the VIPA devices have been configured with correct IP address. Add a Process node to each of the VIPA devices that will be addressed by the MPS microphone when it is operating in fallback node. •...
Need help?
Do you have a question about the MPS Series and is the answer not in the manual?
Questions and answers