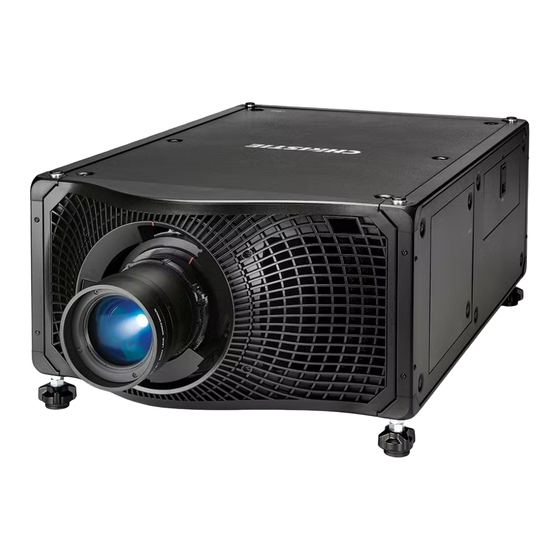
Christie Mirage 304K User Manual

Christie Mirage 304K User Manual

Hide thumbs Also See for Mirage 304K:
Table of Contents

Advertisement

Quick Links

User Guide
020-101778-12
Mirage 304K (Bm.1)

Advertisement

Table of Contents
loading

Summary of Contents for Christie Mirage 304K

  • Page 1 User Guide 020-101778-12 Mirage 304K (Bm.1)
  • Page 2 The warranty does not apply to any product where the serial number has been removed or obliterated. The warranty also does not apply to any product sold by a reseller to an end user outside of the country where the reseller is located unless (i) Christie has an office in the country where the end user is located or (ii) the required international warranty fee has been paid.
  • Page 3: Table Of Contents

    Ultra short throw lens control limitations........26 Mirage 304K (Bm.1) User Guide 020-101778-12 Rev. 1 (04-2020) Copyright © 2020 Christie Digital Systems USA, Inc. All rights reserved.
  • Page 4 Enabling or disabling the high frame rate (HFR)....... .38 Mirage 304K (Bm.1) User Guide 020-101778-12 Rev. 1 (04-2020) Copyright © 2020 Christie Digital Systems USA, Inc. All rights reserved.
  • Page 5 Upgrading the Mirage 304K software........
  • Page 6 Running the Mirage 304K interrogator........
  • Page 7 Dual-input 3D for Mirage projectors........74 Mirage 304K (Bm.1) User Guide 020-101778-12 Rev. 1 (04-2020) Copyright © 2020 Christie Digital Systems USA, Inc. All rights reserved.
  • Page 8: Introduction

    Introduction This manual is intended for Christie qualified installers and trained operators of Christie Mirage 304K projection systems. For complete Mirage 304K product documentation and technical support, go to www.christiedigital.com. Safety and warning guidelines Read all safety and warning guidelines before installing or operating the projector.
  • Page 9: Light Intensity Hazard Distance

    B—Hazard distance. Operators must control access to the beam within the hazard distance or install the product preventing potential exposure of the spectators' eyes from being in the hazard distance. Mirage 304K (Bm.1) User Guide 020-101778-12 Rev. 1 (04-2020) Copyright © 2020 Christie Digital Systems USA, Inc. All rights reserved.
  • Page 10: Product Labels

    Learn about the labels that may be used on the product. Labels on your product may be yellow or black and white. General hazards Hazard warnings also apply to accessories once they are installed in a Christie product that is connected to power. Fire and Shock Hazard To prevent fire or shock hazards, do not expose this product to rain or moisture.
  • Page 11 Explosive material hazard. To avoid personal injury, disconnect all power sources before performing maintenance or service, and wear Christie-approved protective clothing. Bright light hazard. To avoid personal injury, never look directly at the light source.
  • Page 12: Projector Overview

    4K images at 60 frames per second. Contact your dealer Record the information about your projector and keep this information with your records to assist with the servicing of your projector. If you encounter a problem with your Christie projector, contact your dealer. Purchase record...
  • Page 13: Key Features

    LCD display to provide information at-a-glance How the projector works The Mirage 304K accepts a variety of input signals for projection on front or rear projection screens, typical in commercial or other large screen applications. High-brightness light is generated by mercury vapor lamps, then modulated by three Digital Micromirror Device (DMD) panels responding to incoming data streams of digitized red, green and blue color information.
  • Page 14: Product Documentation

    Introduction Product documentation For installation, setup, and user information, see the product documentation available on the Christie Digital Systems USA Inc. website. Read all instructions before using or servicing this product. Mirage 304K 1. Access the documentation from the Christie website: •...
  • Page 15: Power Connection

    Provides to the user interface air filter. Display panel Displays the projector menus and status. Keypad interface Controls the projector. Mirage 304K (Bm.1) User Guide 020-101778-12 Rev. 1 (04-2020) Copyright © 2020 Christie Digital Systems USA, Inc. All rights reserved.
  • Page 16: Ir Remote Keypad

    One of the two IR sensors on the projector detect the signal and relay the commands for internal processing. The remote also offers a connector for wired connections to the projector. Mirage 304K (Bm.1) User Guide 020-101778-12 Rev. 1 (04-2020) Copyright © 2020 Christie Digital Systems USA, Inc. All rights reserved.
  • Page 17 Turns off the light source and puts the projector in standby. Selects an active or inactive input on any slot. Not supported. Mirage 304K (Bm.1) User Guide 020-101778-12 Rev. 1 (04-2020) Copyright © 2020 Christie Digital Systems USA, Inc. All rights reserved.
  • Page 18 Shows or hides the on-screen display menus. Turns the remote backlight on. Male 3-pin XLR connector for wired option. Lock/unlock the keypad. Battery door. Mirage 304K (Bm.1) User Guide 020-101778-12 Rev. 1 (04-2020) Copyright © 2020 Christie Digital Systems USA, Inc. All rights reserved.
  • Page 19: Display Panel Components

    Controls Projector Information Provides information about the projector such as the projector name, serial number, software version, and projector ID. Mirage 304K (Bm.1) User Guide 020-101778-12 Rev. 1 (04-2020) Copyright © 2020 Christie Digital Systems USA, Inc. All rights reserved.
  • Page 20: Turning On The Projector

    Solid Error in Projector is in standby. An error exists that standby prevents the projector from starting up. Mirage 304K (Bm.1) User Guide 020-101778-12 Rev. 1 (04-2020) Copyright © 2020 Christie Digital Systems USA, Inc. All rights reserved.
  • Page 21: Projector Led Shutter Indicators

    2. To turn off power to the projector, disconnect from AC power. Mirage 304K (Bm.1) User Guide 020-101778-12 Rev. 1 (04-2020) Copyright © 2020 Christie Digital Systems USA, Inc. All rights reserved.
  • Page 22: Adjusting The Image

    Adjusting the image Adjust the projector image. Christie recommends warming the lens before completing these procedures as focus may change as the lens warms. Selecting screen image orientation Specify the orientation to use for the image. The projector supports front projection, rear projection, front projection inverted, or rear projection inverted.
  • Page 23: Resetting The Lens To Home Position

    1. Select MENU > Configuration > Lens Settings > Zoom Lens Calibration. Issuing the (LCB+ZOOM 1) serial command also manually calibrates the lens. Mirage 304K (Bm.1) User Guide 020-101778-12 Rev. 1 (04-2020) Copyright © 2020 Christie Digital Systems USA, Inc. All rights reserved.
  • Page 24: Determining What Lens Warnings Are Displayed

    • Hide Detection Warnings—Hides lens detection warnings. Christie recommends selecting this option when using a third-party lens. 3. Select Enter. Mirage 304K (Bm.1) User Guide 020-101778-12 Rev. 1 (04-2020) Copyright © 2020 Christie Digital Systems USA, Inc. All rights reserved.
  • Page 25: Lens Control Limitations

    The projector has keep-out areas for the lens position, illustrated below. When adjusting the lens offset, these regions are unavailable to prevent interference and potentially damage of internal components. Mirage 304K (Bm.1) User Guide 020-101778-12 Rev. 1 (04-2020) Copyright © 2020 Christie Digital Systems USA, Inc. All rights reserved.
  • Page 26: Ultra Short Throw Lens Control Limitations

    The reduced keep-out area is implemented and the lens offset is set to zero. 4. To use a non-ultra short throw lens, clear the checkbox to disable this option. Mirage 304K (Bm.1) User Guide 020-101778-12 Rev. 1 (04-2020) Copyright © 2020 Christie Digital Systems USA, Inc. All rights reserved.
  • Page 27: Adjusting Primary Colors

    5. To view a specific color while adjusting, select Show Color Pattern. 6. Select the appropriate color and select Enter. Mirage 304K (Bm.1) User Guide 020-101778-12 Rev. 1 (04-2020) Copyright © 2020 Christie Digital Systems USA, Inc. All rights reserved.
  • Page 28: Adjusting Color By Saturation

    Signal color correction Adjust the video signal color as required. For best results, Christie recommends setting all color and gamma settings to Auto Detect. Adjusting the color space Determine how the color components are decoded for accurate color in the display.
  • Page 29: Adjusting Color Values Based On Gamma Function

    3. Use the right and left arrows to adjust how the image displays in conditions with ambient light. 4. To confirm your selection, select Enter. Mirage 304K (Bm.1) User Guide 020-101778-12 Rev. 1 (04-2020) Copyright © 2020 Christie Digital Systems USA, Inc. All rights reserved.
  • Page 30: Setting The Frame Delay

    Combine several projected images into one single, seamless image with edge blending. Adding edge blends to the projector Use Christie or to create edge blends and upload them to Mirage 304K. 1. Create an edge blend file using the Christie or application.
  • Page 31: Enabling Basic Edge Blending

    Adjusting the image Christie Twist Premium, Twist Pro, and offer advanced warping options. Refer to the Christie website (www.christiedigital.com) for product information and documentation. 2. Upload the edge blend file to the projector. 3. On one projector, select MENU > Configuration > Edge Blending.
  • Page 32: Correcting The Shape Of A Keystoned Image

    4. To make the keystone adjustments, use the arrow keys to change both the vertical and horizontal values. 5. Select Apply Changes. Mirage 304K (Bm.1) User Guide 020-101778-12 Rev. 1 (04-2020) Copyright © 2020 Christie Digital Systems USA, Inc. All rights reserved.
  • Page 33 1. Select MENU > Configuration > Geometry Correction. 2. Select Reset Keystone Correction. 3. At the confirmation prompt, select Reset. Mirage 304K (Bm.1) User Guide 020-101778-12 Rev. 1 (04-2020) Copyright © 2020 Christie Digital Systems USA, Inc. All rights reserved.
  • Page 34: Cropping Pixels From The Display Edges

    5. To remove all cropping from the display edges, select Reset Blanking. 6. At the confirmation prompt, select Reset. The blanking values are returned to 0. Mirage 304K (Bm.1) User Guide 020-101778-12 Rev. 1 (04-2020) Copyright © 2020 Christie Digital Systems USA, Inc. All rights reserved.
  • Page 35: Configuring System Settings

    1. Select MENU > System Settings > Splash Screen Settings > Background Color. 2. Select a splash screen background color: Mirage 304K (Bm.1) User Guide 020-101778-12 Rev. 1 (04-2020) Copyright © 2020 Christie Digital Systems USA, Inc. All rights reserved.
  • Page 36: Determining The On-Screen Display Position

    1. From the home page of the web interface, select MENU > Admin > Remote Password. 2. Click the Current Password and type your current password. 3. Click New Password and type your new password. Mirage 304K (Bm.1) User Guide 020-101778-12 Rev. 1 (04-2020) Copyright © 2020 Christie Digital Systems USA, Inc. All rights reserved.
  • Page 37: Accessing The Generated User Account Password

    1. Select MENU > System Settings > Power Settings. 2. Select Keep Electronics On In Standby. 3. To enable electronics remaining on in standby mode, select Enter. Mirage 304K (Bm.1) User Guide 020-101778-12 Rev. 1 (04-2020) Copyright © 2020 Christie Digital Systems USA, Inc. All rights reserved.
  • Page 38: Enabling Direct Pass-Through Of Hdmi, 3G, And Displayport Input Signals

    2. To disable the secondary receivers, select Enter. Informing the source of signal preferences Configure Mirage 304K to automatically inform the video source of the preferred signal formats. 1. From the display panel, select MENU > Configuration > Input Settings > Advanced EDID Extensions.
  • Page 39: Adjusting Lamp Power

    2. Enter the service password. The password is only required for the display panel and not the web user interface. Mirage 304K (Bm.1) User Guide 020-101778-12 Rev. 1 (04-2020) Copyright © 2020 Christie Digital Systems USA, Inc. All rights reserved.
  • Page 40: Implementing Stealth Mode

    2. To disable the LEDs and heartbeat feature, select Enter. 3. To enable the LEDs and heartbeat feature, select Stealth Mode again. Mirage 304K (Bm.1) User Guide 020-101778-12 Rev. 1 (04-2020) Copyright © 2020 Christie Digital Systems USA, Inc. All rights reserved.
  • Page 41: Configuring Communications

    3. To determine the remote access for the Ethernet port, select Remote Access Level (Ethernet). 4. Select the appropriate remote access level: • No Access • Login Required • Free Access Mirage 304K (Bm.1) User Guide 020-101778-12 Rev. 1 (04-2020) Copyright © 2020 Christie Digital Systems USA, Inc. All rights reserved.
  • Page 42: Communicating With Mirage 304K Through Art-Net

    There are 512 channels per universe. Mirage 304K specifies 24 channels. Mirage 304K has multiple methods of being controlled in addition to Art-Net. If a setting is changed through another interface, the DMX controller can re-assert control by changing the value on the appropriate DMX channel.
  • Page 43 Lens Vertical Position 0 = Full lower position • Locked by the Lens Shift (Coarse) (0%) Enable channel. Mirage 304K (Bm.1) User Guide 020-101778-12 Rev. 1 (04-2020) Copyright © 2020 Christie Digital Systems USA, Inc. All rights reserved.
  • Page 44: Index List For The Input Channel

    Not all options listed in the table are available on all products. Available options depend on the projector model and the cards installed on the projector. The QSFP+ options require the Enable Christie Link option to be set.
  • Page 45 Four-Port [2-1][2-2][2-3][2-4] QSFP+ [0-1] Four-Port [3-1][3-2][3-3][3-4] QSFP+ [0-2] Four-Port [4-1][4-2][4-3][4-4] QSFP+ [1-1] Four-Port [1-1][1-2][2-1][2-2] QSFP+ [1-2] Four-Port [3-1][3-2][4-1][4-2] QSFP+ [2-1] Mirage 304K (Bm.1) User Guide 020-101778-12 Rev. 1 (04-2020) Copyright © 2020 Christie Digital Systems USA, Inc. All rights reserved.
  • Page 46: Working With Macros

    QSFP+ [2-2] Working with macros Automate tasks in Mirage 304K with macros so the same tasks can be done on a regular basis. If the date and/or time is changed on the projector, a macro may be unexpectedly executed. Adding a Scheduled Event macro Create a Scheduled Event macro to automate a repetitive task.
  • Page 47: Adding A Gpio Event Macro

    An input pin can only have a maximum of two events, one for each transition type. 7. In the Serial Command field, enter the serial command(s) you want to run. For available serial commands and their syntax, refer to the Mirage 304K Serial Commands Guide (P/N: 020-101776-XX).
  • Page 48: Editing A Macro

    This feature is only available on the web interface. Mirage 304K (Bm.1) User Guide 020-101778-12 Rev. 1 (04-2020) Copyright © 2020 Christie Digital Systems USA, Inc. All rights reserved.
  • Page 49: Gpio Connector

    GPIO 3 damage Pin 8 GPIO 5 Pin 9 GPIO 7 All GPIO pins are weakly pulled up to 3.3V. Mirage 304K (Bm.1) User Guide 020-101778-12 Rev. 1 (04-2020) Copyright © 2020 Christie Digital Systems USA, Inc. All rights reserved.
  • Page 50: Setting Up Projector Profiles

    2. Select an existing profile. 3. Select Restore Profile. 4. From the Restore dialog, select the settings you want to restore. 5. Select Restore. Mirage 304K (Bm.1) User Guide 020-101778-12 Rev. 1 (04-2020) Copyright © 2020 Christie Digital Systems USA, Inc. All rights reserved.
  • Page 51: Renaming A Projector Profile

    1. Select MENU > Admin > Projector Profiles. 2. Select the profile you want to delete. 3. Select Delete Profile. 4. At the confirmation prompt, select Delete. Mirage 304K (Bm.1) User Guide 020-101778-12 Rev. 1 (04-2020) Copyright © 2020 Christie Digital Systems USA, Inc. All rights reserved.
  • Page 52: Backing Up, Restoring, And Upgrading Projector Files

    5. Select an upgrade file and select Enter. 6. To automatically restart Mirage 304K, select Restart Now. If you decide restart Mirage 304K at a later date (Restart Later), you cannot perform another upgrade until the Mirage 304K is restarted.
  • Page 53: Exporting Backup Settings To An External Device

    10. Repeat steps 3 to 9 for each additional projector. Exporting backup settings to an external device Save the Mirage 304K settings to a USB flash drive (projector) or file (web interface). 1. If using the display panel to export settings, insert a USB flash drive (properly formatted as FAT) into the USB port on Mirage 304K.
  • Page 54: Restoring Projector Default Settings

    Backing up, restoring, and upgrading projector files Restoring projector default settings Restore the Mirage 304K settings back to the default values. Network configurations and calibration values are not reset. 1. From the display panel, select MENU > Admin > Backup & Restore.
  • Page 55: Diagnostic Tools

    Follow these procedures to help with diagnosing issues with Mirage 304K. Viewing Mirage 304K information View the licenses for the software added to Mirage 304K and the licenses of the software used to operate Mirage 304K. The information is read-only.
  • Page 56: Test Patterns

    8. To change the level of the ramp test pattern, select Test Pattern Ramp Level and adjust the slider to the value you want. 9. To confirm your selection, select Enter. Mirage 304K (Bm.1) User Guide 020-101778-12 Rev. 1 (04-2020) Copyright © 2020 Christie Digital Systems USA, Inc. All rights reserved.
  • Page 57: Modifying Grid Test Pattern Characteristics

    Viewing Mirage 304K status Alarms contain information about the values of the items operating in normal range, warnings, and errors that can be reported by the status system of Mirage 304K. 1. From the display panel, select Status. You can also view the statuses from MENU > STATUS.
  • Page 58: Monitoring Projector And Lamps With Christie Tap

    The near field communication (NFC) mobile app, called Christie TAP, enables Android devices to communicate with the projector, regardless if the projector is powered on or not. 1. From the Google Play Store, download the Christie TAP mobile app to your compatible Android device.
  • Page 59: Configuring Traps

    Diagnostic tools Configuring traps A trap is a condition that SNMP monitors on Mirage 304K. 1. Select MENU > Communications > SNMP > Trap Configuration. 2. Select the trap you want to enable and select Enter. The available traps are: •...
  • Page 60: Mirage 304K Specifications

    = 0.300 +/- 0.050 Gamma Nominal 2.2 ± 5% Control signal compatibility Ethernet port Interface 10Base-T/100Base-TX Connector Female RJ-45 Mirage 304K (Bm.1) User Guide 020-101778-12 Rev. 1 (04-2020) Copyright © 2020 Christie Digital Systems USA, Inc. All rights reserved.
  • Page 61: Shipped Input Cards

    1 x TDPIC 144-006107-02 1 x 3GIC 144-006107-03 1 x HBMIC 4 blank faceplates Mirage 304K 144-001023-01 4 x TDPIC 144-001023-02 Mirage 304K (Bm.1) User Guide 020-101778-12 Rev. 1 (04-2020) Copyright © 2020 Christie Digital Systems USA, Inc. All rights reserved.
  • Page 62: Optional Input Cards

    Red DMD Green FPGA Blue FPGA Option card 0 Option card 1 Option card 2 Option card 3 Option card 4 Mirage 304K (Bm.1) User Guide 020-101778-12 Rev. 1 (04-2020) Copyright © 2020 Christie Digital Systems USA, Inc. All rights reserved.
  • Page 63: Warning Thresholds For Fans

    Lamp fan B1 Lamp fan A1 Radiator fan A Radiator fan B Radiator fan C Radiator fan D HIP blower A Mirage 304K (Bm.1) User Guide 020-101778-12 Rev. 1 (04-2020) Copyright © 2020 Christie Digital Systems USA, Inc. All rights reserved.
  • Page 64: Warning Threshold For Liquid Cooling Module

    Learn the warning thresholds (in RPMs) for the liquid cooling components. Location Warning Liquid cooling pump 180 RPM Power requirements Learn the power requirements for Mirage 304K projector. Parameter Requirement Rated voltage Input 1 200 - 240 VAC Input 2 100 - 130 VAC;...
  • Page 65: Physical Specifications

    1.31-1.63:1 HB zoom 144-104106-XX 1.13-1.66:1 HB zoom 144-129103-XX 1.45-2.17:1 HB zoom 144-130105-XX 1.63-2.17:1 HB zoom 144-105107-XX 1.95-3.26:1 HB zoom 144-131106-XX Mirage 304K (Bm.1) User Guide 020-101778-12 Rev. 1 (04-2020) Copyright © 2020 Christie Digital Systems USA, Inc. All rights reserved.
  • Page 66: Regulatory

    IEC 60950-1 IEC/EN 60950-1 – Information Technology Equipment – Safety – Part 1: General Requirements • IEC 62471-1 – Photobiological Safety of Lamps and Lamp Systems Mirage 304K (Bm.1) User Guide 020-101778-12 Rev. 1 (04-2020) Copyright © 2020 Christie Digital Systems USA, Inc. All rights reserved.
  • Page 67: Near Field Communication Reader

    Near field communication reader Warning! If not avoided, the following could result in death or serious injury. • Changes or modifications not expressly approved by Christie Digital Systems USA Inc. could void the user's authority to operate the equipment. •...
  • Page 68: Environment

    3000 meters (10,000 feet) maximum at 10 to 25°C (50 to 77°F) ambient Non-operating environment Temperature -40 to 70°C (-40 to 158°F) Mirage 304K (Bm.1) User Guide 020-101778-12 Rev. 1 (04-2020) Copyright © 2020 Christie Digital Systems USA, Inc. All rights reserved.
  • Page 69: Signal Connectivity Specifications

    The list of formats listed below are not exhaustive and other formats may be supported. For more information, contact Christie Technical Support. For a list of supported Christie Link video formats, see the Christie Link User Manual (P/N: 020-102234-XX). HBMIC video formats for Mirage projectors Identify the video formats for the HBMIC card.
  • Page 70 4:2:2 10bpc — 4096x2160 4096 2160 24, 25, 30 RGB/4:4:4 10/12bpc — 4096x2160 4096 2160 50, 60 4:2:2 10bpc — Mirage 304K (Bm.1) User Guide 020-101778-12 Rev. 1 (04-2020) Copyright © 2020 Christie Digital Systems USA, Inc. All rights reserved.
  • Page 71: Qdpic Video Formats

    8/10bpc Cannot use both TDPIC inputs at once; requires two separate TDPICs 3840x2160 1920 1080 50, 60 RGB/4:4:4 8/10bpc — Mirage 304K (Bm.1) User Guide 020-101778-12 Rev. 1 (04-2020) Copyright © 2020 Christie Digital Systems USA, Inc. All rights reserved.
  • Page 72: Ddic Video Formats For Mirage Projectors

    HD 1280x720 — 1280 24, 25, 30, 50, 60, RGB/4:4:4/4:2:2 8/10/12bpc — 1920x1080i — 1920 1080 50, 60 RGB/4:4:4/4:2:2 8/10/12bpc — Mirage 304K (Bm.1) User Guide 020-101778-12 Rev. 1 (04-2020) Copyright © 2020 Christie Digital Systems USA, Inc. All rights reserved.
  • Page 73: Hdbase-T Video Formats For Mirage Projectors

    — 1920x1080i — 1920 1080 50, 60 4:2:2 10bpc — 1920x1080 — 1920 1080 24, 25, 30 4:2:2 10bpc — Mirage 304K (Bm.1) User Guide 020-101778-12 Rev. 1 (04-2020) Copyright © 2020 Christie Digital Systems USA, Inc. All rights reserved.
  • Page 74: Dual-Input 3D For Mirage Projectors

    24, 25, 30, 60 4:2:2 10bpc 1920x1080 1920 1080 24, 25, 30 4:2:2 10bpc 2048x1080 2048 1080 24, 25, 30 4:2:2 10bpc Mirage 304K (Bm.1) User Guide 020-101778-12 Rev. 1 (04-2020) Copyright © 2020 Christie Digital Systems USA, Inc. All rights reserved.
  • Page 75 4K 3840x2160 3840 2160 24, 25, 30 RGB/4:4:4 8/10bpc Cannot use both TDPIC inputs at once; requires two separate TDPICs Mirage 304K (Bm.1) User Guide 020-101778-12 Rev. 1 (04-2020) Copyright © 2020 Christie Digital Systems USA, Inc. All rights reserved.
  • Page 76 RGB/4:4:4/4:2:2 8/10/12bpc 3840x2160 1920 1080 24, 25, 30, 60 RGB/4:4:4/4:2:2 8/10/12bpc 4096x2160 2048 1080 24, 25, 30, 60 RGB/4:4:4/4:2:2 8/10/12bpc Mirage 304K (Bm.1) User Guide 020-101778-12 Rev. 1 (04-2020) Copyright © 2020 Christie Digital Systems USA, Inc. All rights reserved.
  • Page 77 10bpc Level-A recommended 4096x2160 1920 1080 24, 25, 30 RGB/4:4:4 10/12bpc Level-A recommended 4096x2160 2048 1080 4:2:2 10bpc Level-A recommended Mirage 304K (Bm.1) User Guide 020-101778-12 Rev. 1 (04-2020) Copyright © 2020 Christie Digital Systems USA, Inc. All rights reserved.
  • Page 78 Corporate offi ces Worldwide offi ces Christie Digital Systems USA, Inc. Africa United Kingdom Columbia Korea (Seoul) ph: 714 236 8610 ph: +27 (0)11 510 0094 ph: +44 (0) 118 977 8000 ph: +57 (318) 447 3179 ph: +82 2 702 1601 Christie Digital Systems Canada Inc.

This manual is also suitable for:

Boxer 2k seriesBoxer 2k20Boxer 2k25Boxer 2k30

Table of Contents