Christie Mirage 304K Installation And Setup Manual
Bm.1
Hide thumbs
Also See for Mirage 304K:
- User manual (79 pages) ,
- Service manual (113 pages) ,
- Installation and setup manual (52 pages)
Table of Contents
Advertisement
Quick Links
Advertisement
Table of Contents

Related Manuals for Christie Mirage 304K


Summary of Contents for Christie Mirage 304K
- Page 1 Installation and Setup Guide 020-102013-12 Mirage 304K (Bm.1)
- Page 2 Christie's control such as maintenance of the product in proper working conditions. Performance specifications are based on information available at the time of printing. Christie makes no warranty of any kind with regard to this material, including, but not limited to, implied warranties of fitness for a particular purpose.
-
Page 3: Table Of Contents
Adjusting offset..........27 Mirage 304K (Bm.1) Installation and Setup Guide 020-102013-12 Rev. 1 (09-2022) Copyright © 2022 Christie Digital Systems USA, Inc. All rights reserved. If printed, please recycle this document after use. - Page 4 Running Auto Setup to optimize display settings......34 Configuring Mirage 304K to work with Christie Link......34 Disposing of the product packaging.
- Page 5 Dual-input 3D........... . . 64 Mirage 304K (Bm.1) Installation and Setup Guide 020-102013-12 Rev. 1 (09-2022) Copyright © 2022 Christie Digital Systems USA, Inc. All rights reserved. If printed, please recycle this document after use.
-
Page 6: Introduction
This projector is intended for use in a non-cinema environment. This projector must be operated in an environment that meets the operating range specification. Use only the attachments and/or accessories recommended by Christie. Use of others may result in the risk of fire, shock, or personal injury. - Page 7 Be aware that some medications are known to increase sensitivity to UV radiation. Mirage 304K (Bm.1) Installation and Setup Guide 020-102013-12 Rev. 1 (09-2022) Copyright © 2022 Christie Digital Systems USA, Inc. All rights reserved. If printed, please recycle this document after use.
-
Page 8: Installation Safety And Warning Guidelines
ELECTRICAL and BURN HAZARD! Use caution when accessing internal components. • Only Christie qualified technicians are authorized to use the tools provided in the toolbox. Light intensity hazard distance This projector has been classified as Risk Group 3 as per the IEC62471 standard due to possible hazardous optical and thermal radiation being emitted. - Page 9 E—Represents the top view of the projector. • F—Represents the side view of the projector. The following table lists the hazard distance for the Christie projector lens with the zoom adjusted to its most hazardous position. Projection lens Part number Hazard distance 0.38:1...
-
Page 10: Product Labels
Learn about the labels that may be used on the product. Labels on your product may be yellow or black and white. General hazards Hazard warnings also apply to accessories once they are installed in a Christie product that is connected to power. Fire and Shock Hazard To prevent fire or shock hazards, do not expose this product to rain or moisture. - Page 11 Indicates the presence of a protective earth ground. Indicates the presence of an earth ground. Mirage 304K (Bm.1) Installation and Setup Guide 020-102013-12 Rev. 1 (09-2022) Copyright © 2022 Christie Digital Systems USA, Inc. All rights reserved. If printed, please recycle this document after use.
-
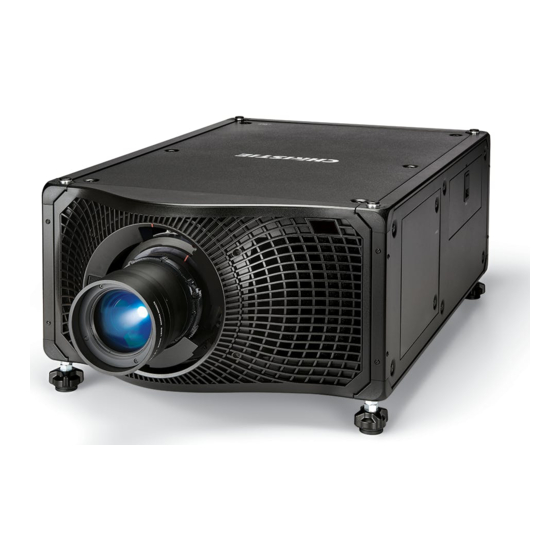
Page 12: Projector Overview
4K images at 60 frames per second. Contact your dealer Record the information about your projector and keep this information with your records to assist with the servicing of your projector. If you encounter a problem with your Christie projector, contact your dealer. Purchase record... -
Page 13: How The Projector Works
LCD display to provide information at-a-glance How the projector works The Mirage 304K accepts a variety of input signals for projection on front or rear projection screens, typical in commercial or other large screen applications. High-brightness light is generated by mercury vapor lamps, then modulated by three Digital Micromirror Device (DMD) panels responding to incoming data streams of digitized red, green and blue color information. -
Page 14: Related Documentation
Mirage 304K Serial Commands Guide (P/N: 020-101776-XX) • Mirage 304K Status System Guide (P/N: 020-101783-XX) Mirage 304K (Bm.1) Installation and Setup Guide 020-102013-12 Rev. 1 (09-2022) Copyright © 2022 Christie Digital Systems USA, Inc. All rights reserved. If printed, please recycle this document after use. -
Page 15: Installation And Setup
Input 2. Mirage 304K (Bm.1) Installation and Setup Guide 020-102013-12 Rev. 1 (09-2022) Copyright © 2022 Christie Digital Systems USA, Inc. All rights reserved. If printed, please recycle this document after use. -
Page 16: Projector Components
A variety of lenses can be used with the projector. Available lenses are listed in accessories. Mirage 304K (Bm.1) Installation and Setup Guide 020-102013-12 Rev. 1 (09-2022) Copyright © 2022 Christie Digital Systems USA, Inc. All rights reserved. If printed, please recycle this document after use. -
Page 17: Ir/Wired Remote Keypad
The remote also offers a connector for wired connections to the projector. Mirage 304K (Bm.1) Installation and Setup Guide 020-102013-12 Rev. 1 (09-2022) Copyright © 2022 Christie Digital Systems USA, Inc. All rights reserved. If printed, please recycle this document after use. - Page 18 Selects an active or inactive input on any slot. Not supported. Mirage 304K (Bm.1) Installation and Setup Guide 020-102013-12 Rev. 1 (09-2022) Copyright © 2022 Christie Digital Systems USA, Inc. All rights reserved. If printed, please recycle this document after use.
- Page 19 Male 3-pin XLR connector for wired option. Lock/unlock the keypad. Battery door. Mirage 304K (Bm.1) Installation and Setup Guide 020-102013-12 Rev. 1 (09-2022) Copyright © 2022 Christie Digital Systems USA, Inc. All rights reserved. If printed, please recycle this document after use.
-
Page 20: Display Panel Components
Provides information about the projector such as the projector name, serial number, software version, and projector ID. Mirage 304K (Bm.1) Installation and Setup Guide 020-102013-12 Rev. 1 (09-2022) Copyright © 2022 Christie Digital Systems USA, Inc. All rights reserved. If printed, please recycle this document after use. -
Page 21: Positioning The Projector
1. To adjust the vertical position of the projector, extend or retract the adjustable feet on the bottom of the projector using the adjustable knobs on the feet. Christie recommends adjusting the feet from the side or rear of the projector and not the front to avoid exposure to the output light. -
Page 22: Connecting To Ac Power
The second click indicates the lens is fully locked in position. The top center label should face up and be aligned to the lens guide on the front cover. Connecting to AC power The Mirage 304K projectors can operate in full or limited power modes, depending on the available or required AC power source. Power mode... -
Page 23: Turning On The Projector
Light source is off. Video electronics are off. Projector status is OK. Mirage 304K (Bm.1) Installation and Setup Guide 020-102013-12 Rev. 1 (09-2022) Copyright © 2022 Christie Digital Systems USA, Inc. All rights reserved. If printed, please recycle this document after use. -
Page 24: Projector Led Shutter Indicators
Shutter open The shutter is open. Mirage 304K (Bm.1) Installation and Setup Guide 020-102013-12 Rev. 1 (09-2022) Copyright © 2022 Christie Digital Systems USA, Inc. All rights reserved. If printed, please recycle this document after use. -
Page 25: Lamp States
2. To turn off power to the projector, disconnect from AC power. Mirage 304K (Bm.1) Installation and Setup Guide 020-102013-12 Rev. 1 (09-2022) Copyright © 2022 Christie Digital Systems USA, Inc. All rights reserved. If printed, please recycle this document after use. -
Page 26: Calibrating The Lens Motor
Packaging tape is required to ensure safe shipment of the projection lens to restrain the zoom ring from rotating during shipping. Mirage 304K (Bm.1) Installation and Setup Guide 020-102013-12 Rev. 1 (09-2022) Copyright © 2022 Christie Digital Systems USA, Inc. All rights reserved. If printed, please recycle this document after use. -
Page 27: Aligning The Image
5. To exit to the home page, select Back. Mirage 304K (Bm.1) Installation and Setup Guide 020-102013-12 Rev. 1 (09-2022) Copyright © 2022 Christie Digital Systems USA, Inc. All rights reserved. If printed, please recycle this document after use. -
Page 28: Adjusting Boresight
The Boresight test pattern assists with adjusting the boresight for the three focus points. Mirage 304K (Bm.1) Installation and Setup Guide 020-102013-12 Rev. 1 (09-2022) Copyright © 2022 Christie Digital Systems USA, Inc. All rights reserved. If printed, please recycle this document after use. - Page 29 Repeat for the other two stabilization screws. Continue to adjust the locking screws until they are tight. 11. Open the shutter. Mirage 304K (Bm.1) Installation and Setup Guide 020-102013-12 Rev. 1 (09-2022) Copyright © 2022 Christie Digital Systems USA, Inc. All rights reserved. If printed, please recycle this document after use.
-
Page 30: Adjusting The Fold Mirror
7. To continue to refine the fold mirror adjustment, repeat the horizontal and vertical adjustments. Mirage 304K (Bm.1) Installation and Setup Guide 020-102013-12 Rev. 1 (09-2022) Copyright © 2022 Christie Digital Systems USA, Inc. All rights reserved. If printed, please recycle this document after use. -
Page 31: Optimizing The Integrator Zoom And Focus
4. Adjust the magnification using the Zoom paddle. Make sure you do not see any corners. Mirage 304K (Bm.1) Installation and Setup Guide 020-102013-12 Rev. 1 (09-2022) Copyright © 2022 Christie Digital Systems USA, Inc. All rights reserved. If printed, please recycle this document after use. - Page 32 6. To continue to refine the zoom and focus, repeat steps 4 and 5. 7. When complete, lock the Zoom and Focus paddles. Mirage 304K (Bm.1) Installation and Setup Guide 020-102013-12 Rev. 1 (09-2022) Copyright © 2022 Christie Digital Systems USA, Inc. All rights reserved. If printed, please recycle this document after use.
-
Page 33: Adjusting Dmd Convergence
4. Use the Convergence test pattern to assist with adjusting the horizontal and vertical lines. Vertical convergence and rotation is done by adjusting two knobs. Christie recommends rotating a single knob a maximum of a quarter rotation before adjusting the second knob a quarter rotation. -
Page 34: Aligning The Image With Lens Zoom And Focus
The system optimizes the active signal and displays a progress message on screen. Configuring Mirage 304K to work with Christie Link Configure Mirage 304K to work with Christie Link, which provides a fully integrated fiber solution for long range video transport. 1. Turn on Mirage 304K. -
Page 35: Disposing Of The Product Packaging
On the Input selection page, select the appropriate input marked Christie Link. More than one input source may be listed as Christie Link, depending on how many signals are being sent from Christie Link. For example, 0-1, 0-2, and so on, where 0 is the slot number. -
Page 36: Connecting Devices And Establishing Communication
The IMXB has a variety of ports that can be used for control, 3D sync, upgrading, retrieving interrogators, and connecting audio. Mirage 304K (Bm.1) Installation and Setup Guide 020-102013-12 Rev. 1 (09-2022) Copyright © 2022 Christie Digital Systems USA, Inc. All rights reserved. If printed, please recycle this document after use. -
Page 37: Connecting A Video Source Using 3G Input Card
Physically connects a remote control to the projector. 3D Sync In/3D Sync Out Supported for 3D-enabled projectors. Ethernet Connects to the web user interface and can send Christie serial commands. RS232 Sends Christie serial commands using a standard RS232 serial cable. -
Page 38: Connecting A Video Source Using Dvi
4K input image. Mirage 304K (Bm.1) Installation and Setup Guide 020-102013-12 Rev. 1 (09-2022) Copyright © 2022 Christie Digital Systems USA, Inc. All rights reserved. If printed, please recycle this document after use. -
Page 39: Connecting A Video Source Using Hdmi
May be used for Dual-Input 3D configurations. One THIC card Mirage 304K (Bm.1) Installation and Setup Guide 020-102013-12 Rev. 1 (09-2022) Copyright © 2022 Christie Digital Systems USA, Inc. All rights reserved. If printed, please recycle this document after use. -
Page 40: Connecting A Video Source Using Hbmic
May be used for SDI inputs. 1 HBMIC card Connecting a video source using TSIC The Terra SDVoE (TSIC) input card accepts digital video data from a Christie Terra Transmitter. Part number: 144-132107-XX The port configuration listed below is supported. -
Page 41: Connecting A Video Source Using Hdbaset
4. To return to the Input screen, select the left arrow. Mirage 304K (Bm.1) Installation and Setup Guide 020-102013-12 Rev. 1 (09-2022) Copyright © 2022 Christie Digital Systems USA, Inc. All rights reserved. If printed, please recycle this document after use. -
Page 42: Selecting A Video Source
Connecting to a computer or server Communicate with a remote computer, server, or an existing network using a RJ-45 cable. The RS232 port located on the IMXB faceplate uses the Christie proprietary protocol and is intended for Christie accessories or automation controllers only. -
Page 43: Setting Up The Ethernet
Ethernet is set up to obtain an IP address automatically if a DHCP server is on the network, modify IP settings, or manually enter an address. Christie recommends using the Ethernet port on the IMXB as the HDBaseT port is limited to 100 Mb/s. You cannot change the IP settings using the web interface. -
Page 44: Setup For Mirage Projectors
(dual-input 3D) Mirage 304K (Bm.1) Installation and Setup Guide 020-102013-12 Rev. 1 (09-2022) Copyright © 2022 Christie Digital Systems USA, Inc. All rights reserved. If printed, please recycle this document after use. -
Page 45: Active Stereo 3D Configuration
Use the following diagram to understand a typical hardware configuration for passive stereo 3D systems. Mirage 304K (Bm.1) Installation and Setup Guide 020-102013-12 Rev. 1 (09-2022) Copyright © 2022 Christie Digital Systems USA, Inc. All rights reserved. If printed, please recycle this document after use. -
Page 46: 3D System Timing
2. Select the appropriate 3D mode: • Off—Disable the 3D operation. Mirage 304K (Bm.1) Installation and Setup Guide 020-102013-12 Rev. 1 (09-2022) Copyright © 2022 Christie Digital Systems USA, Inc. All rights reserved. If printed, please recycle this document after use. -
Page 47: Confirming The Emitter Setup
Direct input 3D or for frame doubled content. Mirage 304K (Bm.1) Installation and Setup Guide 020-102013-12 Rev. 1 (09-2022) Copyright © 2022 Christie Digital Systems USA, Inc. All rights reserved. If printed, please recycle this document after use. - Page 48 IR Emitter for active glasses or a polarization device for passive glasses. Mirage 304K (Bm.1) Installation and Setup Guide 020-102013-12 Rev. 1 (09-2022) Copyright © 2022 Christie Digital Systems USA, Inc. All rights reserved. If printed, please recycle this document after use.
-
Page 49: Mirage 304K Specifications
Control signal compatibility Ethernet port Interface 10Base-T/100Base-TX Connector Female RJ-45 Mirage 304K (Bm.1) Installation and Setup Guide 020-102013-12 Rev. 1 (09-2022) Copyright © 2022 Christie Digital Systems USA, Inc. All rights reserved. If printed, please recycle this document after use. -
Page 50: Shipped Input Cards
4 blank faceplates Mirage 304K 144-001023-01 4 x TDPIC 144-001023-02 Mirage 304K (Bm.1) Installation and Setup Guide 020-102013-12 Rev. 1 (09-2022) Copyright © 2022 Christie Digital Systems USA, Inc. All rights reserved. If printed, please recycle this document after use. -
Page 51: Optional Input Cards
Image processor warp- blue Formatter-Red Red DMD Formatter-Green Formatter-Blue Option card 0 Mirage 304K (Bm.1) Installation and Setup Guide 020-102013-12 Rev. 1 (09-2022) Copyright © 2022 Christie Digital Systems USA, Inc. All rights reserved. If printed, please recycle this document after use. -
Page 52: Warning Thresholds For Fans
Lamp fan A2 Lamp fan B1 Lamp fan A1 Radiator fan A Mirage 304K (Bm.1) Installation and Setup Guide 020-102013-12 Rev. 1 (09-2022) Copyright © 2022 Christie Digital Systems USA, Inc. All rights reserved. If printed, please recycle this document after use. -
Page 53: Warning Threshold For Liquid Cooling Module
Learn the warning thresholds (in RPMs) for the liquid cooling components. Location Warning Liquid cooling pump 180 RPM Power requirements Learn the power requirements for Mirage 304K projector. Parameter Requirement Rated voltage Input 1 200 - 240 VAC Input 2 100 - 130 VAC;... -
Page 54: Physical Specifications
0.72:1 HB fixed 144-110103-XX 0.9:1 fixed 144-111014-XX 1.13-1.31:1 HB zoom (Discontinued) 144-103105-XX Mirage 304K (Bm.1) Installation and Setup Guide 020-102013-12 Rev. 1 (09-2022) Copyright © 2022 Christie Digital Systems USA, Inc. All rights reserved. If printed, please recycle this document after use. -
Page 55: Regulatory
ANSI/UL 60950-1 – Information Technology Equipment – Safety – Part 1: General Requirements • CAN/CSA C22.2 No. 60950-1 • EN 60950-1 Mirage 304K (Bm.1) Installation and Setup Guide 020-102013-12 Rev. 1 (09-2022) Copyright © 2022 Christie Digital Systems USA, Inc. All rights reserved. If printed, please recycle this document after use. -
Page 56: Near Field Communication Reader
Near field communication reader Warning! If not avoided, the following could result in death or serious injury. • Changes or modifications not expressly approved by Christie Digital Systems USA Inc. could void the user's authority to operate the equipment. •... -
Page 57: Environment
3000 meters (10,000 feet) maximum at 10 to 25°C (50 to 77°F) ambient Non-operating environment Temperature -40 to 70°C (-40 to 158°F) Mirage 304K (Bm.1) Installation and Setup Guide 020-102013-12 Rev. 1 (09-2022) Copyright © 2022 Christie Digital Systems USA, Inc. All rights reserved. If printed, please recycle this document after use. -
Page 58: Signal Connectivity Specifications
The list of formats listed below are not exhaustive and other formats may be supported. For more information, contact Christie Technical Support. For a list of supported Christie Link video formats, see the Christie Link User Manual (P/N: 020-102234-XX). HBMIC video formats Identify the video formats for the HBMIC card. - Page 59 10/12bpc — 4096x2160 4096 2160 50, 60 4:2:2 10bpc — Mirage 304K (Bm.1) Installation and Setup Guide 020-102013-12 Rev. 1 (09-2022) Copyright © 2022 Christie Digital Systems USA, Inc. All rights reserved. If printed, please recycle this document after use.
-
Page 60: Tsic Video Formats For Mirage Projectors
3840x2160 1920 2160 RGB/4:4:4 8/10bpc 4096x2160 2048 2160 RGB/4:4:4 8/10bpc Mirage 304K (Bm.1) Installation and Setup Guide 020-102013-12 Rev. 1 (09-2022) Copyright © 2022 Christie Digital Systems USA, Inc. All rights reserved. If printed, please recycle this document after use. -
Page 61: Tdpic Video Formats
Notes HD 1280x720 — 1280 RGB/4:4:4 8bpc Dual-link (120 Hz) Mirage 304K (Bm.1) Installation and Setup Guide 020-102013-12 Rev. 1 (09-2022) Copyright © 2022 Christie Digital Systems USA, Inc. All rights reserved. If printed, please recycle this document after use. -
Page 62: Thic Video Formats
1280x720 1280 24, 25, 30, 50, 60, RGB/4:4:4/4:2:2 8/10/12bpc — Mirage 304K (Bm.1) Installation and Setup Guide 020-102013-12 Rev. 1 (09-2022) Copyright © 2022 Christie Digital Systems USA, Inc. All rights reserved. If printed, please recycle this document after use. -
Page 63: 3Gic Video Formats
3840x2160 2048 1080 50, 60 4:2:2 10bpc Level-A recommended Mirage 304K (Bm.1) Installation and Setup Guide 020-102013-12 Rev. 1 (09-2022) Copyright © 2022 Christie Digital Systems USA, Inc. All rights reserved. If printed, please recycle this document after use. -
Page 64: Dual-Input 3D
24, 25, 30 RGB/4:4:4 10/12bpc 4096x2160 4096 2160 4:2:2 10bpc Mirage 304K (Bm.1) Installation and Setup Guide 020-102013-12 Rev. 1 (09-2022) Copyright © 2022 Christie Digital Systems USA, Inc. All rights reserved. If printed, please recycle this document after use. - Page 65 1080 RGB/4:4:4 8/10bpc — 4096x2160 2048 1080 RGB/4:4:4 8/10bpc — Mirage 304K (Bm.1) Installation and Setup Guide 020-102013-12 Rev. 1 (09-2022) Copyright © 2022 Christie Digital Systems USA, Inc. All rights reserved. If printed, please recycle this document after use.
- Page 66 10/12bpc Level-A recommended 2048x1080 2048 1080 4:2:2 10bpc Level-A recommended Mirage 304K (Bm.1) Installation and Setup Guide 020-102013-12 Rev. 1 (09-2022) Copyright © 2022 Christie Digital Systems USA, Inc. All rights reserved. If printed, please recycle this document after use.
- Page 67 10/12bpc Level-A recommended 4096x2160 2048 1080 4:2:2 10bpc Level-A recommended Mirage 304K (Bm.1) Installation and Setup Guide 020-102013-12 Rev. 1 (09-2022) Copyright © 2022 Christie Digital Systems USA, Inc. All rights reserved. If printed, please recycle this document after use.
Need help?
Do you have a question about the Mirage 304K and is the answer not in the manual?
Questions and answers