Riello Condexa PRO Series Installation, Technical And Maintenance Manual
Hide thumbs
Also See for Condexa PRO Series:
- Installation, operation and service manual (112 pages) ,
- Installation, technical and maintenance manual (84 pages) ,
- Manual (24 pages)

Related Manuals for Riello Condexa PRO Series


Summary of Contents for Riello Condexa PRO Series
- Page 1 Condexa PRO EN INSTALLATION, TECHNICAL ASSISTANCE SERVICE AND SYSTEM MANAGEMENT MANUAL...
- Page 2 Condexa PRO 100 20115226 Please accept our thanks and our congratulations on your choice of product. Condexa PRO 115 20115228 Riello S.p.A. Condexa PRO 135 20115229 ACCESSORIES CONFORMITY For a complete list of accessories and details of their compatibil- ity, refer to the Catalogue.
-
Page 3: Table Of Contents
CONTENTS 1 GENERAL INFORMATION . . . . . . . . . . . . . . . . . . . . . . . . . . . . 4 3.1.2 Date and time setting . -
Page 4: General Information
GENERAL INFORMATION GENERAL INFORMATION Regularly check that the condensate drain is free from ob- struction. General Safety Information We recommend cleaning inside the exchanger once a year, extracting jet and burner and removing any installation de- bris by suction. This operation should be done by personnel After removing the packaging, check the condition and from the Technical Assistance Service only. -
Page 5: Description Of The Appliance
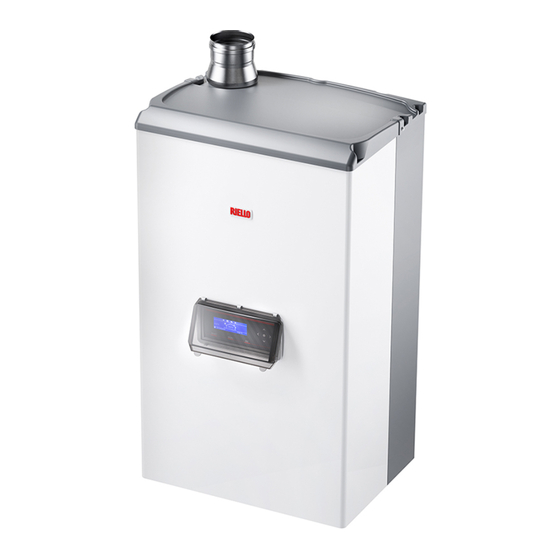
GENERAL INFORMATION Description of the appliance Safety devices Condexa PRO it is a condensing, pre-mixed thermal module All appliance functions are electronically controlled by a dual consisting in a modulating thermal element. processor technology board approved for safety functions. It is available in various models, ranging from 34,9kW to 131kW. Any malfunction results in the appliance being shut down and Optimal combustion management supports high yields (over the automatic closure of the gas valve. -
Page 6: Identification
II2H3+ SK: G20=20mbar (ES=18mbar) G30=28-30mbar G31=37mbar II2H3+ BE : G20/25=20/25 mbar I2E(S) RIELLO S.p.A. BE : G30/G31=28-30/37mbar G31=28-30/37mbar 0085 / 18 Via Ing.Pilade Riello, 7 MT-CY-IS: G30=30mbar 37046 Legnago (VR) I3B/P 0085CP0214 ITALY FR: G20/25= 20/25mbar G30/G31=28-30/37mbar II2E+3+ PL-RU: G20=20 mbar G30= 37 mbar (RU=37mbar) -
Page 7: System Layout
GENERAL INFORMATION System layout Condexa PRO 35 P - 50 P Flue gas analysis outlet Flue gas exhaust connection Gas valve Flue gases pressure switch Combustion chamber Electrical panel Minimum Pressure Switch set at 0,7 bar Exhaust flue probe 10 Condensate drain siphon Drain cock 12 Main switch 13 Central heating return... - Page 8 GENERAL INFORMATION Condexa PRO 57 P - 70 P Flue gas analysis outlet Flue gas exhaust connection Gas valve Combustion chamber Electrical panel Smoke-exhaust flue non-return valve Drain cock Minimum Pressure Switch set at 0,7 bar 10 Pump Main switch 12 Central heating return 13 Gas supply 14 Central heating flow...
- Page 9 GENERAL INFORMATION Condexa PRO 90 - 100 - 115 - 135 Flue gas analysis outlet Flue gas exhaust connection Combustion chamber Electrical panel Smoke-exhaust flue non-return valve Drain cock Minimum Pressure Switch set at 0,7 bar Main switch 10 Central heating return Gas supply 12 Central heating flow 13 Condensate drain connection...
-
Page 10: Technical Specifications
GENERAL INFORMATION Technical specifications Condexa PRO Description U.M. 35 P 50 P 57 P 70 P Condensing boiler heating system Appliance type B23; B53; B53P; C13*; C33*; C53*; C63* IT-GB-GR-IE-PT-SI: G20=20mbar G30/G31=28-30/37mbar; II2H3+ SK: G20=20mbar G30=28-30mbar G31=37mbar; II2H3+ ES: G20=18mbar G30=28-30mbar G31=37mbar; II2H3+ BE: G20/25=20/25mbar;... - Page 11 GENERAL INFORMATION Condexa PRO Description U.M. 35 P 50 P 57 P 70 P (referred Emissions (**) 42,0 43,9 34,2 36,4 38,1 38,7 39,3 46,1 to HCV) 9 - 9 Emissions at max./min. heat input, 63/2,3 73/2,3 79/6,5 90/6,5 81/7,5 91,5/7,5 89/4,6 91,5/5,6 Maximum rated heat input (LCV) 34,9 Minimum rated heat input (LCV)
-
Page 12: Pumps
GENERAL INFORMATION Pumps Thermal modules Condexa PRO 90, Condexa PRO 100, Condexa PRO 115 and Condexa PRO 135 are not equipped with a circulator, The thermal modulesCondexa PRO 35 P , Condexa PRO 50 P , Con- which must be inside or outside the appliance (see accessories). dexa PRO 57 P and Condexa PRO 70 P are fitted with a circulator. -
Page 13: Water Circuit
GENERAL INFORMATION Water circuit 1.10 Positioning the temperature sensors Probes placed on the related sockets of the thermal module 6 7 8 (Condexa PRO 35 P - Condexa PRO 50 P): Exhaust flue probe Safety thermostat CH flow temperature sensor Return probe Heat exchanger Circulator (only for models Condexa PRO 35 P - Con-... -
Page 14: Control Panel
GENERAL INFORMATION 1.11 Control panel CONTROL PANEL AND SYMBOLS 255x80 point backlit display (106,4x39,0mm) RESET key: restores normal operations after a safety shut-down MENU key: switches on the main menu ESC key: in menu navigation, it enables you to exit a menu item and go back to the previous one 5 ÷... -
Page 15: Installation
The instruction manual is an integral part of the appliance; therefore, it should be read and stored carefully. Keep the documentation envelope in a safe place. Any re- placement documents must be ordered from Riello S.p.A. who reserve the right to charge for the cost of the replace- ment. -
Page 16: Installation Premises
INSTALLATION Installation premises The minimum surface of ventilation openings is 3,000 cm gas fuel heating systems. The thermal module Condexa PRO can be installed in rooms that are permanently ventilated and equipped with suitably sized Installation in older systems and systems ventilation openings in line with Technical Standards and Regu- lations applicable to the installation site. -
Page 17: Moving And Removing The Packing
INSTALLATION Moving and removing the packing Do not remove the cardboard packaging until your reach the installation location. Before handling the appliance and removing the packaging, wear PPE and use tools suitable for the appliance's size and weight. This step must be carried out by several individuals equipped with suitable means with respect to the appliance's size. - Page 18 INSTALLATION After installing the thermal module: Locate the envelope containing the product documentation and − remove the locking screw. stick the Energy Efficiency Label (if any) contained in the enve- − pull the front panel outwards and then to the top to de- lope onto the panel.
-
Page 19: Water Connections
INSTALLATION Water connections The dimensions and position of thermal module's hydraulic connections are shown in the table below. Front view Bottom view Condexa PRO DESCRIPTION 35 P 50 P 57 P 70 P 143,5 143,5 143,5 143,5 143,5 143,5 143,5 143,5 63,5 63,5... -
Page 20: Typical Water System Schematics
INSTALLATION 2.8 Typical water system schematics Layout 1: circuit with thermal module directly linked to heating system (check that the pump's discharge head is sufficient to ensure adequate circulation) CONDEXA PRO 10 9 Layout 2: circuit with thermal module directly linked to heating system and DHW tank. (check that the pump's discharge head is sufficient to ensure adequate circulation) CONDEXA PRO 1 9 10 1... - Page 21 INSTALLATION Layout 3: circuit with thermal module connected to a heating system via a separator CONDEXA PRO 10 9 Layout 4: circuit with thermal module linked to DHW tank and heating system via a separator CONDEXA PRO 1 9 10 1 10 9 Isolating valve 10 Pressure reducer...
- Page 22 INSTALLATION Layout 5: circuit with thermal module linked to heating system and DHW. tank via a separator CONDEXA PRO 1 9 10 1 10 9 Isolating valve 10 Pressure reducer Outdoor sensor Non-return valve Storage cylinder High temperature DHW circulation pump 12 Automatic bleed valve system flow Expansion tank...
-
Page 23: Gas Connections
INSTALLATION Gas connections 2.10 Discharge of combustion products The gas connection must be made respecting the installation The appliance is supplied as standard in B-type configuration regulations in force, and sized to ensure the correct gas delivery (B23-B23P-B53P), i.e. pre-fitted to suction air directly into the to the burner. - Page 24 INSTALLATION Check that pipes are suitably far (min. 500 mm) from flam- mable or heat-sensitive construction elements. Make sure that condensation is not built up along the duct. For this purpose, provide a sloping duct of at least 3 degrees towards the appliance in case there is an a horizontal sec- tion.
- Page 25 INSTALLATION "C" TYPE INSTALLATION The table with available residual discharge heads is shown be- Double pipes Ø 80-125 mm low. Maximum Pressure drop Discharge head Description Model length 45° bend 90° bend Ø 80-125 mm Condexa PRO 35 P Condexa PRO 35 P 15 m Condexa PRO 50 P Condexa PRO 50 P...
-
Page 26: Preparation For The Condensate Drain
INSTALLATION 2.10.1 Preparation for the condensate drain The condensate drain must be suitably siphoned. Fill the siphon with drain in order to prevent the release of com- The evacuation of the condensate produced by the appliance bustion products when the appliance is first switched on. Condexa PRO during its normal operationmust be carried out through a siphoned condensate collector, placed under the It is recommended that condensate from the thermal mod-... -
Page 27: System Filling And Emptying
INSTALLATION 2.12 System filling and emptying Do not use excessively softened water. Excessive water sof- tening (total hardness < 5° f) results in corrosion due to con- The thermal module Condexa PRO must be provided with a tact with metal elements (pipes or thermal module com- charging system to be connected to the appliance's return line. -
Page 28: Emptying
INSTALLATION 2.12.2 Emptying − Unscrew the vent valve's release cap − Open the shut-off cocks in order to slowly fill the system − Use the pressure gauge to check that the pressure is rising Before starting to empty the appliance and the storage cylinder: and the water is exiting through the vent valves −... -
Page 29: Wiring Diagram
INSTALLATION 2.13 Wiring diagram J6-3 J6-10 J6-12 J6-5 J7-3 J7-2 J7-2 J7-4 J12-4 J12-1 J7-6 J7-7 J7-8 J12-2 J12-5 J21-1 / J6-1 J21-5 / J6-2 J21-4 / J6-8 J21-6 J21-3 10 11 12 13 14 15 16 17 18 0-10V Modbus BUS 1 BUS 2... - Page 30 INSTALLATION J2-1 J2-4 J1-4 J1-5 J1-1 J4-2 J4-3 J4-6 J4-5 J4-4 J4-1 J5-2 J5-1 J3-1 J3-7 J3-2 J3-3 J3-8 J3-5 J3-10 J3-4 J2-3 J3-9 J3-6 101 102 103 104 105 106 107 108 109 110 111 112 113 114 115 PC (*) (ACS) PC (PS)
-
Page 31: Electrical Connections
INSTALLATION 2.14 Electrical connections To switch it off (during the heating stage) use a room/heat demand thermostat. The On-Off key can only be actioned The thermal module Condexa PRO is manufactured fully wired whist the appliance is in stand-by or emergency mode. and only needs to be connected to the mains, the room/heat demand thermostat and any other system components. - Page 32 INSTALLATION Loosen the fixing screws (2) and remove the protection (3) For connection, see the following figure: ~ 230 V 101 102 103 104 105 106 107 108 109 110 111 112 113 114 115 Circuit breaker Relay / Switch (230V AC) Refer to the device type for the supply tension.
- Page 33 INSTALLATION Electrical wiring referred to layout 2 at page "20". Electrical wiring referred to layout 4 at page "21". 10 11 12 13 14 15 16 17 10 11 12 13 14 15 16 17 101 102 103 104 105 106 101 102 103 104 105 106 0-10V Modbus...
-
Page 34: Electronic Control
INSTALLATION 2.15 Electronic control The electronic control operator interface menu is a multi-level one. Navigation between the various levels is shown in the figures below. Level 0 displays the Home Screen (Home). Level 1 displays the Main Menu screen. The subsequent levels are activated depending on available sub-menus. -
Page 35: Menu Structure
INSTALLATION 2.15.1 Menu structure... - Page 36 INSTALLATION...
- Page 37 INSTALLATION...
- Page 38 INSTALLATION...
- Page 39 INSTALLATION...
-
Page 40: Ionisation
INSTALLATION Level 1 Level 2 Level 3 Level 4 Level 5 Menu Clock Program Holiday Settings Mode System Holiday Setpoint " " " " " " " " " " " " " " Begin Date " " End Date "... -
Page 41: Parameters' List
INSTALLATION 2.15.2 Parameters' list Parameters are listed base on the reference menu. Reference Menu Access type Parameters Menu End user Cascaded module configuration menu Installer Cascaded boiler configuration menu Manufacturer Appliance configuration menu Nr. dis- Par. Default Access Menu played Description Range Category... - Page 42 INSTALLATION Nr. dis- Par. Default Access Menu played Description Range Category setting type Display Min. Power Sets the heating's % min. power. 1…30 Heating CH/DHW Defines the proportional parameter for modulation CH PID P 0…1275 Heating during heating operation. Defines the modulation integral term during heat- CH PID I 0…1275 Heating...
- Page 43 INSTALLATION Nr. dis- Par. Default Access Menu played Description Range Category setting type Display Defines the primary circuit's restart hysteresis in Tank modes 1 and 2 of domestic hot water (valid both for 0…20 °C Supp cascade and stand-alone applications). Hyst Dn Defines the primary circuit's shut-off hysteresis in Tank...
-
Page 44: Status
INSTALLATION Nr. dis- Par. Default Access Menu played Description Range Category setting type Display 0 Disabled 1 Prog Drain switch 2 Defined by The value of this parameter is defined by Par. 97. General Input 3. Gas pressure Par. 97 switch 0 Disabled 1 Prog... - Page 45 INSTALLATION Nr. dis- Par. Default Access Menu played Description Range Category setting type Display Bitron, Huba: Flow Huba Defines the type of flow sensor used. DN8, DN10, DN15, General sensor DN25 DN15, DN20, DN25 Mod. Defines the delta T set for the operation of the 5…40 °C General...
- Page 46 INSTALLATION Nr. dis- Par. Default Access Menu played Description Range Category setting type Display Delay Defines the stand-by time in seconds to switch off Quick 5…255 Sec. Cascade the last cascade module on in Quick Stop mode. Stop Next Defines by how many degrees the temperature Hyst.
- Page 47 INSTALLATION Nr. dis- Par. Default Access Menu played Description Range Category setting type Display Defines the speed (in °C/100 ms) with which the set-point of individual modules is decreased in the PID Slew event the primary circuit's set-point is exceeded (if 0…25.5 Cascade Rate Dn...
-
Page 48: Commissioning And Maintenance
COMMISSIONING AND MAINTENANCE 3 COMMISSIONING AND MAINTENANCE Confirm with the ● key and select "Date and Time " with the ▲ / ▼ keys Initial startup General Settings “ ” Language − Switch the system's master switch to the ON position and “... -
Page 49: Password Access
COMMISSIONING AND MAINTENANCE Enter one digit at a time using the ▲ / ▼ keys to increase/de- Display Settings crease the numeric value. When you have set the right value, “ ” confirm by pressing the ● key. Year 4Digits “... - Page 50 COMMISSIONING AND MAINTENANCE The parameters regulating such temperature are: Par. Delivery Temp. Description (°C) Tset max (°C) Par. 24 Sets the desired flow temperature with heating mode. Active for the heating mode Par. 1 = 0 o 3 Limits the minimum value that can be assigned to the Par.
- Page 51 COMMISSIONING AND MAINTENANCE Mode 2 Par. Description (Working on climatic mode with attenuation controlled by a room/heat demand thermostat, variable set point according to Sets the desired flow temperature with heating mode. the outdoor temperature) Active for the heating mode Par. 1 = 0 o 3 Limits the minimum value that can be assigned to the In this case the thermal module operates with a set-point de- set-point in heating mode (does not apply to heating...
-
Page 52: Setting The Domestic Hot Water Parameters
COMMISSIONING AND MAINTENANCE 3.1.5 Setting the domestic hot water parameters − Press the ● key to confirm. The parameter 35 defines the various operation modes of the Domestic Hot Water (DHW) thermal module for DHW production “ ” DHW Setpoint 45.0 °C “... -
Page 53: Scheduled Programme
COMMISSIONING AND MAINTENANCE 3.1.6 Scheduled programme Priority setting The parameter 42 sets the priorities between the DHW and CH The Scheduled Programme is designed to program the opera- circuit. tion of the various circuits managed by the thermal module, (CH, Four modes are envisaged: DHW and additional mixed zones). - Page 54 COMMISSIONING AND MAINTENANCE Heating programming DHW setting Group Group “ ” “ ” Program Comfort Period Program Comfort Period “ ” “ ” Comfort Setpoint 28.0 °C Out of interval setpoint “ ” “ ” “ ” “ ” ECO Setpoint 20.0 °C “...
-
Page 55: Tempera
COMMISSIONING AND MAINTENANCE Holiday setting Seasonal setting Enables the user to change parameters for the Seasonal Pro- gramme. Holiday Settings The seasonal programme is used to define a period of inactivity “ ” Mode Group for the heating system. This menu includes the following ele- “... -
Page 56: Thermal Module Information
COMMISSIONING AND MAINTENANCE 3.1.7 Thermal module information Boiler History “ ” In order to display key information on the screen, press the Successful Ignitions °C menu key and select "Information" with the ▲ / ▼ keys. “ ” “ ” Failed Ignitions °C “... -
Page 57: Checks During And After Initial Start-Up
COMMISSIONING AND MAINTENANCE Checks during and after initial start-up When the appliance it started, it must be checked by stopping and then restarting the thermal module in the following way: − Set the operating mode of the thermal module in heating to 0 (Par. -
Page 58: Error List
COMMISSIONING AND MAINTENANCE Error List 3.3.2 Temporary Errors Error Description When a display has a technical fault, a numeric error code ap- pears that will enable the maintenance operator to identify the WD_ERROR_RAM Internal software error possible cause. WD_ERROR_ROM Internal software error There are 3 categories of errors: WD_ERROR_STACK Internal software error... -
Page 59: Transformation From One Gas Type To Another
COMMISSIONING AND MAINTENANCE Transformation from one gas type to another Versions Condexa PRO 35 P - Condexa PRO 70 P − unscrew the three screws (1) and the swivel nut (2) of the The thermal module Condexa PRO is supplied for operation with gas pipe in order to remove the valve from the fan G20 (natural gas). -
Page 60: Tempera
COMMISSIONING AND MAINTENANCE − Press the ▼ key, select "Config. Confirmed" and press the For all models ● key − Fulfil the operations, place back the front panel and lock − With the ▲ / ▼ keys change the value to "Yes" and press the locking screws. -
Page 61: Adjustments
COMMISSIONING AND MAINTENANCE Adjustments − the appliance will operate at maximum power. − unscrew the cap (1) and insert the combustion analyser The thermal module Condexa PRO is supplied for operation with sensor G20 (methane gas), as indicated by the type plate, and has al- −... -
Page 62: Temporary Or Short-Term Shut-Down
COMMISSIONING AND MAINTENANCE − Select with keys ▲ / ▼ "Mode" and confirm with key ●. Versions Condexa PRO 90 - Condexa PRO 135 Select “System” mode and confirm. Holiday Settings “ ” Mode System “ ” “ ” Holiday Setpoint Comfort “... -
Page 63: Maintenance
COMMISSIONING AND MAINTENANCE Maintenance 3.8.1 "Service reminder" function It is mandatory to perform maintenance and cleaning of the de- The thermal module is fitted with a function that reminds the vice at least once a year. user of the need to carry out planned maintenance on the ap- pliance after a number of hours defined in the maintenance plan. -
Page 64: Cleaning And Removing Internal Components
COMMISSIONING AND MAINTENANCE Cleaning and removing internal components Loosen the fixing screws (2) and remove the protection (3) Before any cleaning operation, disconnect the electric power supply by switching the main system switch to "off”. OUTSIDE Clean the casing, the control panel, the painted parts and plastic parts with cloths moistened with soap and water. - Page 65 COMMISSIONING AND MAINTENANCE Removing the fan and the burner models Condexa PRO 35 P - Disassembling of the fan and burners models Condexa PRO 57 Condexa PRO 50 P P - Condexa PRO 70 P − Remove the locking screws and the panel's front side −...
- Page 66 COMMISSIONING AND MAINTENANCE Disassembling of the fan and burners models Condexa PRO 90 Removing the top closing for cleaning the heat exchangers - Condexa PRO 100 - Condexa PRO 115 - Condexa PRO 135 models Condexa PRO 35 P - Condexa PRO 50 P −...
- Page 67 COMMISSIONING AND MAINTENANCE disassembling of the flange for cleaning up the heatexchanger Disassembling the flange for cleaning the exchanger models models Condexa PRO 57 P - Condexa PRO 70 P Condexa PRO 90 - Condexa PRO 100 - Condexa PRO 115 - Con- −...
-
Page 68: Troubleshooting
COMMISSIONING AND MAINTENANCE 3.10 Troubleshooting FAULT CAUSE SOLUTION − Check the seal of the gaskets and the There is a smell of gas Gas supply circuit closure of the pressure tapping points − Check the gasket seals Odour of unburnt gas Flue gas circuit −... -
Page 69: Managing Additional Zone
MANAGING ADDITIONAL ZONE 4 MANAGING ADDITIONAL ZONE The electronic control of the thermal module will automatically check which zones are connected to the bus. Controlling zone with additional zone The menu items of the zone in the electronic control of the ther- mal module will be available when one or more zone manage- accessory ment devices are detected. -
Page 70: Setting Parameters Of The Additional Zone
MANAGING ADDITIONAL ZONE Setting parameters of the additional zone Controls interface 255x80 point backlit display (106,4x39,0mm) RESET key: restores normal operations after a safety shut-down MENU key: switches on the main menu ESC key: in menu navigation, it enables you to exit a menu item and go back to the previous 5 ÷... -
Page 71: Menu Structure
MANAGING ADDITIONAL ZONE 4.3.1 Menu structure Level 0 Level 1 Level 2 Level 3 Level 4 Level 5 Level 6 Level 7 Home / Menu Information External Zone Status External Zone 1 - 16 Zone Setpoint ” ” “ ” “... -
Page 72: Setting Zone's Climatic Curve Parameters (Accessible Only With Installer Password)
MANAGING ADDITIONAL ZONE 4.4 Setting zone's climatic curve parameters Programming the zone (accessible only with installer password) By default the schedule timer is disabled. Menu → “Settings” → “Zone Clim. Curve” In fact, to start a request from the zone just close the contact of the zone request. -
Page 73: Scheduling The Time Bands
MANAGING ADDITIONAL ZONE 4.6 Scheduling the time bands The programmable periods for each zone are 7 and they can be selected by changing the number that appears beside “pro- gramming period”. By going to: Menu → “Schedule timer” → “Zones CH Program ” The “Comfort Setpoint”... -
Page 74: Information On The Operation Of The Zone
MANAGING ADDITIONAL ZONE Information on the operation of the zone The information displayed is the following: Error code Description By going to: Indicates the error code of the board (255 = no Menu → “Information” → “Zone Status” error) Indicates whether there is a request (namely, if External Zone Status Input Heat the contact for the heat request is open (NO, no... -
Page 75: System Manager
SYSTEM MANAGER SYSTEM MANAGER 5 SYSTEM MANAGER − Switch the system's master switch to the ON position and the thermal module's master switch to (I). Putting into service The appliance must be maintained and adjusted at least once a year by Technical Assistance Service or by profession- ally qualified staff in compliance with all applicable Nation- al and Local provisions. -
Page 76: Temporary Or Short-Term Shut-Down
SYSTEM MANAGER SYSTEM MANAGER Temporary or short-term shut-down − Close the fuel and water valves for the heating and do- mestic hot water system. In the event of temporary or short-term shut-down (e.g. due to holidays), proceed as follows: − Press the MENU key and select with keys ▲ / ▼ "Time schedule", confirm with key ●. -
Page 77: Useful Information
SYSTEM MANAGER SYSTEM MANAGER 5.6 Useful information Seller: ................Installer: ................Mr.: .................. Mr.: .................. Address: ................Address: ................Tel.: .................. Tel.: .................. Technical Assistance Service: ..........Mr.: .................. Address: ................Tel.: .................. Date Work done Fuel oil supplier: ............... Mr.: .................. -
Page 78: Modbus Connection
SYSTEM MANAGER MODBUS CONNECTION 6 MODBUS CONNECTION Registers Depending on the type of Modbus device used to connect to The thermal mode is equipped with a Modbus connection the thermal module, the registers' addressing may start from (based on the RS485 communication standard) that supports 0x0000 or 0x0001. - Page 79 SYSTEM MANAGER MODBUS CONNECTION Status parameters Dependent information Access Access Register Automatic Value Register Automatic Value Description Description number conversion range number conversion range See "State" Dependent 01 State table See "State" State See "Sta- table Status tus" table See "Error" Error code See "Error"...
-
Page 80: Error Code
SYSTEM MANAGER MODBUS CONNECTION Parameters registers Access Register Automatic Value Description Access Register Automatic Value number conversion range Description Note number conversion range Dependent 09 Heating See "State" mode 0..x State table (Par. 1) See "Error" Error code tables mode 0..x (Par. -
Page 81: Heating Pump
SYSTEM MANAGER MODBUS CONNECTION STATE table Register Automatic Value Access Description Note Name Description number conversion range Minimum RESET_0 Initialisation of reset variables value RESET_1 Reset that can be Depends STANDBY_0 Standby assigned on °C/°F PRE_PURGE Initialisation of pre-purging variables to the units heating... -
Page 82: Recycling And Disposal
SYSTEM MANAGER RECYCLING AND DISPOSAL 7 RECYCLING AND DISPOSAL The appliance is manufactured using various materials, such as metal, plastics, and electric and electronic components. At the end of the life cycle, safely remove the components and dispose of them in a responsible manner, in compliance with the installation country's applicable environmental legislation. - Page 83 SYSTEM MANAGER RECYCLING AND DISPOSAL...
- Page 84 RIELLO S.p.A. Via Ing. Pilade Riello, 7 37045 - Legnago (VR) www.riello.com The manufacturer strives to continuously improve all products. Appearance, dimensions, technical specifications, standard equipment and accessories are therefore liable to modification without notice.
Need help?
Do you have a question about the Condexa PRO Series and is the answer not in the manual?
Questions and answers