Table of Contents
Advertisement
Advertisement
Table of Contents

Related Manuals for Ross NK Routing Systems RCP-QE


Summary of Contents for Ross NK Routing Systems RCP-QE
- Page 1 RCP-QE User Guide Version 02...
- Page 2 Ross has become well known for the Ross Video Code of Ethics. It guides our interactions and empowers our employees. I hope you enjoy reading it below. If anything at all with your Ross experience does not live up to your expectations be sure to reach out to us at solutions@rossvideo.com.
- Page 3 Ross Video. While every precaution has been taken in the preparation of this document, Ross Video assumes no responsibility for errors or omissions. Neither is any liability assumed for damages resulting from the use of the information contained herein.
- Page 4 Notice Changes or modifications to this equipment not expressly approved by Ross Video Ltd. could void the user’s authority to operate this equipment.
- Page 5 Ross. Warranty repairs will be conducted at Ross, with all shipping FOB Ross dock. If repairs are conducted at the customer site, reasonable out-of-pocket charges will apply. At the discretion of Ross, and on a temporary loan basis, plug in circuit boards or other replacement parts may be supplied free of charge while defective items undergo repair.
- Page 6 To avoid the potential release of those substances into the environment and to diminish the need for the extraction of natural resources, Ross Video encourages you to use the appropriate take-back systems. These systems will reuse or recycle most of the materials from your end-of-life equipment in an environmentally friendly and health conscious manner.
-
Page 7: Table Of Contents
Contents Introduction Overview of this User Guide ..........................1-1 RCP-QE Overview Features ..................................2-1 Typical System Equipment ............................2-1 System Overview ..............................2-2 How the RCP-QE and Routing Switchers Communicate..................2-3 Installation Unpacking the Equipment............................3-1 General ...................................3-1 Installing the RCP-QE ............................3-1 Accessing the RCP-QE in DashBoard ........................3-3 Checking the Firmware Version ..........................3-5 Upgrading the Firmware Version ..........................3-5 Setting Up the RCP-QE... - Page 8 Using Category Index Mode ..........................5-4 Locking the RCP-QE ............................5-5 Protecting a Destination ............................5-5 Clearing Protects Held by an RCP-QE ......................... 5-6 Toggling Between Two Sources ........................... 5-6 Using a Menu ................................ 5-7 De-Assigning a Machine Control Port ........................5-7 De-Assigning Resources ............................
-
Page 9: Introduction
Overview of this User Guide This guide is for installers and operators of the Ross Video RCP-QE. It provides instructions on how to connect the RCP-QE to your routing switcher system, how to set up a configuration file for the RCP-QE using DashBoard, and how to operate the RCP-QE. - Page 10 1–2 • Introduction RCP-QE User Guide (02)
-
Page 11: Rcp-Qe Overview
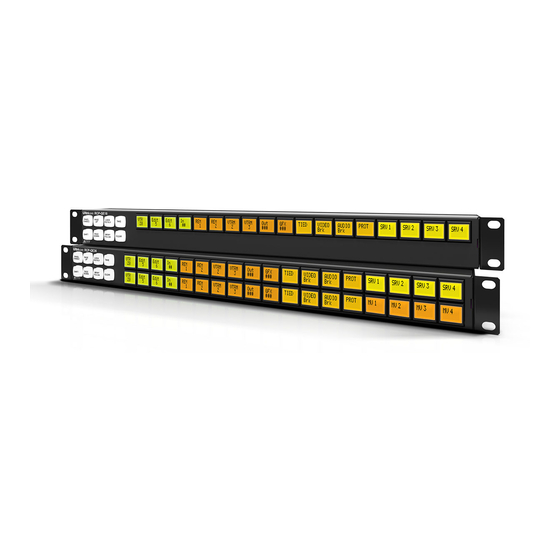
RCP-QE Overview Features The RCP-QE Remote Control Panel provides the following features: • 17 programmable buttons (functions, backlighting level, color, and custom text) • operation in XY mode • up to 32 router levels may be controlled • virtual routing and resource management •... -
Page 12: System Overview
System Overview A routing switcher system may use distributed control across the internet, a LAN, or a VPN. The routing switcher system shown in Figure 2.1 has been simplified. Internet/LAN/VPN Ethernet switch Ethernet Ethernet Computer running DashBoard RCP-QE Remote Control Panel RCP-QE 5 V, 2 A power supply... -
Page 13: How The Rcp-Qe And Routing Switchers Communicate
How the RCP-QE and Routing Switchers Communicate Switching The RCP-QE sends a switch request message through the NK-NET (or NK-IPS) to the routing switcher. The routing switcher recognizes the request, sets the crosspoint, and then sends a response through the NK-NET (or NK-IPS) to the RCP-QE. - Page 14 2–4 • RCP-QE Overview RCP-QE User Guide (v02)
-
Page 15: Installation
If anything is missing or damaged, contact your Ross Video office immediately to obtain the correct warranty service procedures. This ensures prompt assistance, minimal turnaround time, and avoids any freight issues. - Page 16 Installing the Routing Switcher System The RCP-QE uses a TCP network for connection. It connects to the T-BUS routing devices using either the NK-NET or the NK-IPS. The NK-NET receives phantom power from the T-BUS devices to which it is connected. If the device providing power loses power, the NK-NET loses power as well.
-
Page 17: Accessing The Rcp-Qe In Dashboard
Accessing the RCP-QE in DashBoard Before you can set up and send a configuration file to the RCP-QE, you must access it in DashBoard. In order to access the RCP-QE in DashBoard, the RCP-QE needs to be detected and the IP address for the LAN configured for use within a network using Walkabout. - Page 18 2. Locate the RCP-QE you want to add to DashBoard and configure the following information if necessary: • Name – double click inside the cell to enter a name for the RCP-QE. The default is RCP-QE. • Address – double click inside the cell to enter an IP address for the RCP-QE. The default is 192.168.20.130.
-
Page 19: Checking The Firmware Version
Checking the Firmware Version Firmware may be updated easily using DashBoard. To check for the latest firmware versions, contact Ross Video Technical Support. To check the firmware version of a device using DashBoard: 1. Open DashBoard. 2. In the Basic Tree View, double-click the Connection icon ( ) within the device tree (RCP-QE 2 in the icon is a name used for example purposes). - Page 20 3–6 • Installation RCP-QE User Guide (v02)
-
Page 21: Setting Up The Rcp-Qe
Setting Up the RCP-QE The RCP-QE panel can be set up using DashBoard. You must have an NK-NET, NK-IPS, or Ultricore Central Controller connected to the T-BUS system to connect to NK Series devices. The parameters for a device can be saved to a configuration file. For More Information on... -
Page 22: Rcp-Qe Connection Editor
RCP-QE Connection Editor The RCP-QE Connection Editor enables users to configure the device details, such as the name and group, the network settings, and the server connections. Opening the RCP-QE Connection Editor To open the RCP-QE Connection Editor: 1. In DashBoard, expand the tree view for the RCP-QE in the Basic Tree View. Figure 4.2 Basic Tree View in DashBoard 2. -
Page 23: Rcp-Qe Connection Editor Field Descriptions
RCP-QE Connection Editor Field Descriptions General Serial Num (read-only) – the serial number is set in the factory before shipping and is unique to each device. This parameter is not user configurable. Version (read-only) – the software/firmware version. Device Details Serial Num (read-only) –... -
Page 24: Rcp-Qe Panel Configuration Editor
Toolbar Buttons Refresh – click this button to revert to the configuration previously sent to the RCP-QE. The RCP-QE Connection Editor will display the last settings that were sent to the RCP-QE via the Send Configuration button. Send Firmware – click this button to open a file browser to select a software/firmware file to send to the RCP-QE. Send Configuration –... -
Page 25: Rcp-Qe Panel Configuration Editor Field Descriptions
The Panel Configuration editor opens. Figure 4.5 The RCP-QE Panel Configuration editor tab in DashBoard RCP-QE Panel Configuration Editor Field Descriptions General Serial Num (read-only) – the serial number is set in the factory before shipping and is unique to each device. This parameter is not user configurable. - Page 26 Simulated RCP-QE Panel Inputs/Outputs – source/destination buttons. Click a button to open the Button menu to assign a function to the button. Hide Panel – click this button to hide the simulated RCP-QE panel. Button – click the arrow buttons to select a button from the panel or use the list to select a specific button. Menu –...
- Page 27 Protect Mode – select a radio button to assign a protect mode to the panel: • Block Other Panels – the protected destination and level(s) cannot be switched to another source by other remote control panels. The protected destination and level(s) can be switched to another source on the current remote control panel. •...
- Page 28 Output/Input Assigns Number of outputs/inputs (increments of 8) – enter or select a number of outputs/inputs. The number must be changed in increments of eight. Update – click this button to update the output/input assigns. Copy to Input/Output Assigns – click this button to transfer the number of outputs/inputs to the other assigns tab. The labels are imported as well.
-
Page 29: Changing Device Details
Set – click to set the level mask(s). Salvo Names Tab Only applicable when the routing system includes an Ultrix router or Ultricore Central Controller. Salvo # (read-only) – the list order number of the salvo. Name (read-only) – the name of the salvo as defined in connected Ultrix router or Ultricore Central Controller. Enabled –... -
Page 30: Default Configuration
Default Configuration Every panel leaves the factory with a default configuration. This default configuration is viewed by opening the editor tab for the device in DashBoard. Loading Default Configuration Best practice is to save the default configuration to an *.cbd file after opening the Connection Editor and Panel Configuration editor in DashBoard for the first time. -
Page 31: Assigning Physical Connections For Control By An Rcp-Qe
Button Assignments By default, the 17 buttons on the RCP-QE are assigned the following functions: • buttons 1 to 6: destinations (outputs 1 to 6, respectively) • buttons 7 to 13: sources (inputs 1 to 7, respectively) • button 14: Level 1 •... -
Page 32: Setting Up Breakaways
3. Click to highlight the text in the Label column corresponding to the output/input to which the item of destination/source equipment is connected. 4. Enter the name of the item of destination/source equipment. 5. Press Enter. The name of the item of destination/source equipment appears on the corresponding button on the simulated RCP-QE in DashBoard. -
Page 33: Setting Up Menus
8. Clear the remaining level masks from unused breakaways in the Breakaways table. 9. In the Configuration section, use the Breakaway Warning Mode list to select the breakaway with which you want to compare the status of the router levels in the current breakaway. 10. -
Page 34: Setting Up Button Display Options On The Rcp-Qe
To set up a menu: 1. Open the RCP-QE Panel Configuration editor (see “Opening the RCP-QE Panel Configuration Editor” on page 4–4). 2. Select the Menu Details tab. 3. In the Number of menus box, enter or select the number of menus to match the requirements of your routing switcher system. -
Page 35: Assigning Functions To Buttons On The Rcp-Qe
You can select any of the available colors to represent default and selected states. You can also choose whether or not the default or selected state uses inverse. – Default (not selected), not inverted – Selected, inverted – Default (not selected), inverted –... - Page 36 The RCP-QE can be programmed with 250 menu pages. Each menu can hold a different set of button functions. Table 4.3 lists the functions you can assign across any menu. Table 4.3 Functions that can be assigned to buttons on the RCP-QE Function Description Destination...
- Page 37 Table 4.3 Functions that can be assigned to buttons on the RCP-QE (Continued) Function Description Breakaway A predefined group of router levels assigned to a button. You select a breakaway as part of making a switch. For more information see, “Setting Up Breakaways” on page 4–12 and “Assigning a Breakaway Button”...
- Page 38 Assigning a Destination or Source Button Destination and source buttons map the physical connections on the routing switcher to the RCP-QE. You can provide labels for these physical connections using the Input Assigns and Output Assigns tabs in the Panel Configuration editor for the RCP-QE (see “Assigning Physical Connections for Control by an RCP-QE”...
- Page 39 8. Send the current configuration file to the device (see “Sending a Configuration File to a Device” on page 4–33). For More Information on... • assigning a menu navigation button, refer to “Assigning Menu Navigation to a Button” on page 4–25. Assigning a Function Button A function button enables you to assign a specific task to a button on the panel.
- Page 40 The simulated RCP-QE in DashBoard shows the selected level on the button. For example, Level 2. 6. Send the current configuration file to the device (see “Sending a Configuration File to a Device” on page 4–33). Assigning a Breakaway Button When you make a switch, you need to select the level(s) that you are switching using a breakaway.
- Page 41 Assigning a Macro Button If you want to perform several tasks with the press of a single button, assign a macro button to the RCP-QE and then record a macro using this button. For information on recording a macro, see “Recording a Macro Using the Panel”...
- Page 42 4. Do one of the following: • To add an extra button sequence, press the required buttons to add to the macro in the correct sequence until your task is completed. • To add an existing macro, press the button for the macro you want to add. Each button acknowledges that it has been pressed by flashing briefly.
- Page 43 Assigning a Name to a Macro Using DashBoard Macros can be assigned custom names in DashBoard using the Macro Names tab. To assign a name to a macro using DashBoard: 1. In DashBoard, select the Macro Names tab. 2. In the Name column, perform the following: a.
- Page 44 Assigning a Take Button If you want to pre-load a switch sequence but delay the switch, assign a take button on the menu. If a take button is assigned, then all switches on that menu are activated by pressing the TAKE button instead of the source/crosspoint/macro button.
- Page 45 To assign a panel lock button: 1. Open the RCP-QE Panel Configuration editor (see “Opening the RCP-QE Panel Configuration Editor” on page 4–4). 2. On the simulated RCP-QE, select the button that you want to use for the panel lock. The Button configuration box opens.
-
Page 46: Assigning A Salvo To A Button
• Previous Menu — goes to the previously used menu if one is held in the buffer. • Up Menu — goes up a menu as defined on the Menu Details tab. • Down Menu — goes down a menu as defined on the Menu Details. •... -
Page 47: Assigning A Category Index Mode Button
The Button configuration box opens. 3. In the Button list, select Salvo 4. Use the Value list to select one of the Salvo names. 5. Send the current configuration file to the device as outlined in the section “Sending a Configuration File to a Device”... -
Page 48: Setting Up Machine Control
3. In the Configuration section, select the Panel Locked check box. 4. Send the current configuration file to the device (see “Sending a Configuration File to a Device” on page 4–33). The RCP-QE is locked. If a panel lock button is assigned, it can be pressed to unlock the RCP-QE. If a protect button is assigned, it can be held to unlock the RCP-QE. -
Page 49: Linking Remote Control Panels
For More Information on... • resource management, refer to “Setting Up Virtual Routing and Resource Management” on page 4–30. To assign a de-assign button: 1. Open the RCP-QE Panel Configuration editor (see “Opening the RCP-QE Panel Configuration Editor” on page 4–4). 2. -
Page 50: Setting Up Virtual Routing And Resource Management
3. Select the Configuration tab. 4. In the Panel Link Address field of the Panel Link area, enter the individual address (between 1 and 254) that you want this particular remote control panel to use. By default, the panel link address of a remote control panel is set to zero (0). -
Page 51: Setting The Retry Time For A Switch Failure
6. Send the current configuration file to the device (see “Sending a Configuration File to a Device” on page 4–33). Setting the Retry Time for a Switch Failure When you make a switch, a switch request is sent from the RCP-QE to the NK-NET (or NK-IPS) and forwarded to the NK routing switcher. -
Page 52: Loading Factory Defaults Using Dashboard
Loading Factory Defaults Using DashBoard If you need to return the RCP-QE to a known configuration, you can use DashBoard to load the factory defaults. To load the factory defaults: 1. Open the RCP-QE Panel Configuration editor for the RCP-QE (see “Opening the RCP-QE Panel Configuration Editor”... -
Page 53: Sending A Configuration File To A Device
Opening a Saved Configuration To open a saved configuration: 1. In the File Navigator pane, navigate to the saved configuration file that you want to open. 2. Double-click on the icon for the file. Sending a Configuration File to a Device When you have made changes to the configuration of a device, the changes are not activated in the device until the changes to the configuration are sent to the device. - Page 54 5. In the Select Devices list, select the device to which you want to send the current configuration. 6. Click Send. 7. In the Basic Tree View pane, right-click on the device and select Reload. The device is reloaded with the new configuration. 4–34 •...
-
Page 55: Operating The Rcp-Qe
Operating the RCP-QE LCD Buttons The LCD buttons reflect any one of the following, depending on their current use: • current status • label • current display mode • special indicators The text on the button changes as required. The color and inverse settings change depending upon the status of the button and how these display options have been set up. - Page 56 One level may be assigned to a button. You can assign multiple level buttons to an RCP-QE. You can select multiple level buttons prior to a switch. If you change the level pattern in DashBoard, a breakaway button must be pressed on the panel for the new level assignment to take effect.
-
Page 57: Making A Switch
Making a Switch A switch can be made with or without a take button assigned to the menu. If there is no take button assigned, a switch is made when the source/crosspoint/macro button is pressed. If a take button is assigned to the menu, the switch is made when the take button is pressed. -
Page 58: Using A Macro
Using a Macro You can use macros on the RCP-QE. To use a macro: 1. Create a macro (see “Assigning a Macro Button” on page 4–21). 2. Press the macro button. 3. If a TAKE button is assigned to the menu, press TAKE. Using a Salvo ... -
Page 59: Locking The Rcp-Qe
3. If assigned within the category structure, numerical extension for like label prefixes presents a numerical keypad for selection. 4. Pressing the Left most button with the back arrow, or the category name before the current category traverses back up the tree one step. Locking the RCP-QE You can lock the RCP-QE if a panel lock or protect button has been assigned to the RCP-QE. -
Page 60: Clearing Protects Held By An Rcp-Qe
To remove the protection from a destination: 1. Press the button for the protected destination. 2. Press PROT Loc. The status of the key changes to PROT Off and the protection indicator is removed from the destination key. Clearing Protects Held by an RCP-QE A protect that is held by an RCP-QE prevents the crosspoint being changed by another user. -
Page 61: Using A Menu
7. Do one of the following: • If you are in slow chop, press CHOP twice to stop toggling between the two sources. • If you are in fast chop, press CHOP once to stop toggling between the two sources. The status of the button returns to CHOP. -
Page 62: Resetting Devices
Resetting Devices If you want to return to a known operating state and configuration, you can: • send the default configuration to the RCP-QE (see “Sending a Configuration File to a Device” on page 4–33) • reset the device • reload the factory defaults If the RCP-QE fails to accept any configuration files that are sent to it, then you should reset the device. - Page 63 transfer status, request and response information between them. Effectively, the remote control panels combine to form one big remote control panel. Up to 255 remote control panels may be linked together. For example, if you want to operate a 34-key remote control panel with the inputs and outputs of a 32 × 32 routing switcher, you may link two RCP-QE panels together.
- Page 64 Menus Menus and menu navigation buttons are only effective on the remote control panel to which they are assigned. Macros Macros may be recorded or added across linked remote control panels. 5–10 • Operating the RCP-QE RCP-QE User Guide (v02)
-
Page 65: Troubleshooting
Troubleshooting Table 6.1 Troubleshooting Problem Cause Action I am stuck on a menu A return loop was not set Use DashBoard to return to the Home menu (see “Returning to the with no way back. up when the menu was Home Menu”... - Page 66 6–2 • Troubleshooting RCP-QE User Guide (v02)
-
Page 67: Rcp-Qe Hexadecimal To Router Level Conversion
RCP-QE Hexadecimal to Router Level Conversion The router level is represented by eight hexadecimal characters. For each hexadecimal character, read the corresponding binary representation across the table. For each ‘1’ that appears in the binary representation, drop down to the Level row to read the actual router level included in the mask. - Page 68 7–2 • RCP-QE Hexadecimal to Router Level Conversion RCP-QE User Guide (v02)
Need help?
Do you have a question about the NK Routing Systems RCP-QE and is the answer not in the manual?
Questions and answers