Grandhall Freedom 450 Operating And Assembly Instructions Manual
Portable gas barbecues
Hide thumbs
Also See for Freedom 450:
- Assembly instructions manual (12 pages) ,
- Operating instructions manual (25 pages)
Advertisement
Quick Links
Portable Gas
Barbecues
Operating and assembly instructions
FOR YOUR SAFETY.
IF YOU SMELL GAS:
1. Shut off gas to the
appliance, if possible.
2. Extinguish any open flame.
3. Open hood.
4. If odour continues,
immediately call your gas
supplier or fire department.
FOR YOUR SAFETY.
1. Do not store or use
petrol or other flammable
vapours and liquids in the
vicinity of this or any other
appliance.
2. A gas cylinder not
connected for use must not
be stored in the vicinity of
this or any other appliance.
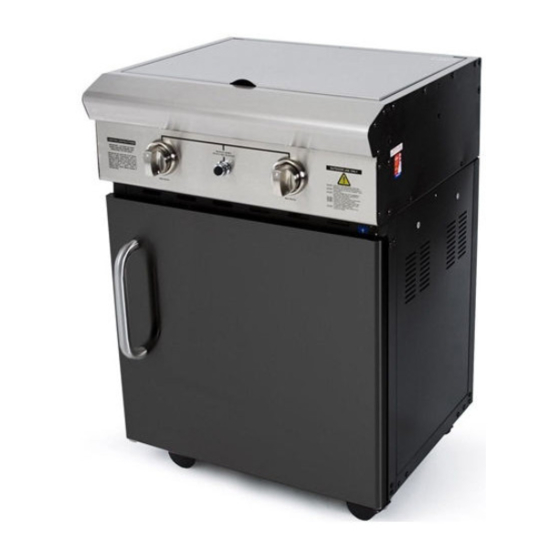
These instructions are
a guide to assembling
and using the Freedom 450
Outdoor Range Barbecue.
Please read carefully, and
retain for future reference.
Only to be used outdoors. Illustration may
vary from barbecue contained in carton.
Advertisement

Related Manuals for Grandhall Freedom 450


Summary of Contents for Grandhall Freedom 450
- Page 1 Operating and assembly instructions These instructions are FOR YOUR SAFETY. FOR YOUR SAFETY. a guide to assembling and using the Freedom 450 IF YOU SMELL GAS: 1. Do not store or use Outdoor Range Barbecue. petrol or other flammable 1. Shut off gas to the vapours and liquids in the appliance, if possible.
- Page 2 G E N E R A L I N F O R M A T TABLE OF CONTENTS GAS INSTALLATION CODES This appliance is certified to AS 4557 by the Australian Gas Association. General Information and must be used in accordance with the installation requirements of your Safety local gas supply authority, and the appropriate installation standard Outdoor Areas...
- Page 3 Turn burner control(s) to ‘OFF’, then turn on gas at source. READ CAREFULLY BEFORE Apply the soap solution to all visible and accessible gas connections ASSEMBLING AND OPERATING including the gas cylinder. Bubbles will appear in the soap solution YOUR OUTDOOR RANGE BARBECUE. if connections are not properly sealed.
- Page 4 ALWAYS CHECK FOR GAS LEAKS EACH TIME YOU USE YOUR OUTDOOR RANGE BARBECUE You should follow this procedure after any of the following: • Not having used the appliance for an extended period of time, • Initial assembly of appliance, •...
- Page 5 THIS APPLIANCE SHALL ONLY BE USED IN AN ABOVE GROUND OPEN AIR SITUATION WITH NATURAL VENTILATION, WITHOUT STAGNANT AREAS, WHERE GAS LEAKAGE AND PRODUCTS OF COMBUSTION ARE RAPIDLY DISPERSED BY WIND AND NATURAL CONVECTION. ANY ENCLOSURE IN WHICH THE APPLIANCE IS USED SHALL COMPLY WITH ONE OF THE FOLLOWING: •...
-
Page 6: Table Of Contents
GENERAL ASSEMBLY TIPS Flatten cardboard packaging and use this as a protective While it is possible for one person to assemble the Outdoor work surface to assemble upon. Range Barbecue, we recommend asking for the assistance of another person when manoeuvring some of the larger and heavier Some protective coating may need to be removed from pieces. - Page 7 INSTALL CASTORS • Place the trolley bottom shelf on the cardboard work surface with the bottom side of shelf facing up. Install the four (4) castors onto the castor seats as shown. Phillips-head screw " x " Qty. 16 INSTALL TROLLEY LEGS WITH SIDE PANELS •...
-
Page 8: Trolley - Rear Panel
INSTALL TROLLEY REAR PANEL Phillips-head screw " x " Qty. 4 INSTALL TROLLEY BRACKET • Install the trolley bracket in the up position (part is labelled ‘UP’ to ensure proper assembly) between front trolley legs as shown. Phillips-head screw " x 2" Qty. -
Page 9: Door Handle
INSTALL DOOR • Install the door handle to door. • Install the bottom door hinge bracket to right trolley leg. • Insert door bottom post into bottom door hinge bracket. • Hold the door and install the top door hinge bracket to right trolley leg. Door handles Phillips-head screw "... - Page 10 I N S P E C T I O N If no spark is seen, the spark gap needs to be INSTALL IGNITER BATTERIES adjusted as follows: • Using an adjustable spanner, loosen the inside nut until the • Unscrew igniter cap from control panel. gas collector box can be turned upward.
-
Page 11: Grease Receptacle
A S S E M B L Y – G E N E R A L INSTALL GREASE RECEPTACLE NOW YOUR OUTDOOR RANGE APPLIANCE TUBE AND GREASE TUBE IS READY TO USE • Install grease receptacle under the trolley separation panel Before first use and at the beginning of each season: from the front of appliance. - Page 12 A S S E M B L Y – G E N E R A L INSTALL SIDE SHELVES ATTACHING TO OTHER FREEDOM MODULES NOTE: Shelves are not included, but are included NOTE: modules may be attached to both right and with the barbecue modules, and can be purchased left sides of any other modules.
- Page 13 A S S E M B L Y – G E N E R A L CONFIGURATION SUGGESTIONS Freedom 450 Freedom 321C / 326C Freedom 440...
- Page 14 A S S E M B L Y – G E N E R A L CONNECTING TO, AND DISCONNECTING FINAL ASSEMBLY STEP FROM GAS SOURCE When you have finished assembling your Outdoor Range Barbecue Familiarise yourself with the general information and safety be sure that all screws are tightened for safe operation of your guidelines located at the front of this booklet.
- Page 15 A S S E M B L Y – G E N E R A L Ensure hatch in trolley top panel is closed to secure gas CONNECTING TO GAS SOURCE hose. Refer page 9. Screw the wing bolt and special nut to trolley bottom shelf or Place the gas cylinder on the ground in front of the appliance.
- Page 16 LOUVRES ON BARBECUE MUST • FAILURE TO REPLACE A FAULTY REMAIN UNOBSTRUCTED TO ALLOW HOSE, SECURE GAS SUPPLY FOR COMBUSTION AIR. CONNECTIONS OR TO OPEN THE ACCESS MUST BE PROVIDED TO HOOD BEFORE SHUT-OFF VALVE. PROCEEDING TO THE LIGHTING PROCEDURES COULD RESULT IN A FIRE OR EXPLOSION THAT COULD CAUSE SERIOUS BODILY INJURY, DEATH, OR PROPERTY DAMAGE.
- Page 17 LIGHTING PROCEDURES COOKING TEMPERATURES ‘HI’ setting – Use this setting only for warm up, for searing steaks • THE LID MUST BE IN THE OPEN and chops, and for burning food residue from the grill plates after POSITION FOR LIGHTING. the cooking is over.
- Page 18 IF THIS APPLIANCE FAILS TO LIGHT SHOULD A FLASHBACK FIRE OCCUR IN OR AROUND BURNER TUBES, FOLLOW THE INSTRUCTIONS BELOW. Turn gas off at source and turn burner control knobs to FAILURE TO COMPLY WITH THESE ‘OFF’. Wait at least five (5) minutes for gas to clear, then INSTRUCTIONS COULD RESULT IN: retry.
- Page 19 DO NOT USE OVEN CLEANER TO CLEAN CLEANING THE GREASE TRAY RECEPTACLE THE OUTDOOR RANGE. SOME PROPRIETORY BARBECUE To reduce the chance of fire, the grease receptacle should be CLEANERS MAY AFFECT / DAMAGE visually inspected before each appliance use. Remove any SOME OF THE SURFACE COATINGS grease and wash grease receptacle with a mild soap and warm...
- Page 20 • BEWARE OF SPIDERS. STORAGE BURNER TUBES SHOULD BE INSPECTED AND CLEANED We recommend that you minimise the exposure of the Outdoor PERIODICALLY. Range to the elements. • SPIDERS AND SMALL INSECTS CAN High moisture content in the air (rain, mist, salt spray etc.) OCCASIONALLY SPIN WEBS OR MAKE can affect metal components and lead to material breakdown.
- Page 21 METHOD 3: Use an air hose to force air through each burner tube. CLEANING BURNER TUBES The forced air should pass debris or obstructions through burner AND BURNER PORTS and out the ports. To reduce risk of FLASHBACK FIRE you must clean the burner Regardless of which burner cleaning procedure you use, we tubes as follows at least once a month in summer and autumn or recommend you also complete the following steps to help prolong...
- Page 22 P A R T S L I S T This diagram is provided to assist you identify parts if replacement is necessary. Contact the place of purchase or manufacture to enquire about parts, availability and/or service. Items included in Outdoor Range Barbecue specification may differ from parts list, depending on region or specific dealer specification.
-
Page 23: Hot Plate
Description Part # P00146096A Hot plate P05702030H Hot plate handle P00203022H Pot support P00814004D Pot burner frame P0071322FC Pot burner P02002057A Pot burner cap P02013050G Electrode – pot burner P02606007A Gas collector with electrode – hot plate burner P02613002A Wire set P02615100A Control panel –... - Page 24 PRIVACY POLICY Focus Lifestyle Products Pty Ltd may collect personal information about a consumer of its products in the course of receiving or responding to a warranty claim. Such information is only collected to enable the resolution of the warranty claim to the consumer’s satisfaction, and is not disclosed to other organisations except service agents or sometimes the applicable retailer.
Need help?
Do you have a question about the Freedom 450 and is the answer not in the manual?
Questions and answers