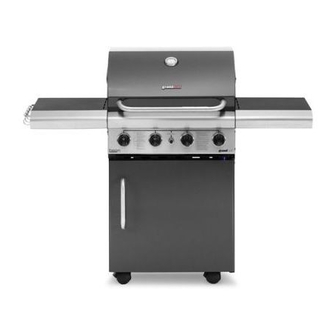
Grandhall Freedom 321C Operating And Assembly Instructions Manual
Portable gas barbecues
Hide thumbs
Also See for Freedom 321C:
- Assembly instructions manual (12 pages) ,
- Operating instructions manual (25 pages)
Advertisement
Quick Links
Portable Gas
Barbecues
Operating and assembly instructions
FOR YOUR SAFETY.
IF YOU SMELL GAS:
1. Shut off gas to the
appliance, if possible.
2. Extinguish any open flame.
3. Open hood.
4. If odour continues,
immediately call your gas
supplier or fire department.
FOR YOUR SAFETY.
1. Do not store or use
petrol or other flammable
vapours and liquids in the
vicinity of this or any other
appliance.
2. A gas cylinder not
connected for use must not
be stored in the vicinity of
this or any other appliance.
These instructions are a
guide to assembling and
using the Freedom 321C
and Freedom 326C barbecue.
Please read carefully, and
retain for future reference.
Only to be used outdoors. Illustration may
vary from barbecue contained in carton.
Advertisement

Subscribe to Our Youtube Channel
Related Manuals for Grandhall Freedom 321C


Summary of Contents for Grandhall Freedom 321C
- Page 1 Operating and assembly instructions These instructions are a FOR YOUR SAFETY. FOR YOUR SAFETY. guide to assembling and using the Freedom 321C IF YOU SMELL GAS: 1. Do not store or use and Freedom 326C barbecue. petrol or other flammable 1.
- Page 2 OVERALL DIMENSIONS Height – All models: hood closed 1215 mm, hood open 1590 mm SPECIFICATIONS Width – Freedom 321C: 1462 mm Freedom 326C: 1690 mm Appliance specifications can be found on the data label attached to the side panel of the barbecue body.
- Page 3 GAS CYLINDER USE AND SAFETY READ CAREFULLY BEFORE ASSEMBLING AND OPERATING This is a low pressure barbecue and must only be used with the hose and YOUR BARBECUE. regulator supplied. Your barbecue is designed for use with a 9 kg gas cylinder. Ensure gas cylinder conforms to Australian Standard AS2469 and is less than 10 years old, or re-certified if older than 10 years.
- Page 4 ALWAYS CHECK FOR GAS LEAKS EACH TIME YOU USE YOUR BARBECUE. You should follow this procedure after any of the following: • Not having used the barbecue for an extended period of time, • Initial assembly of barbecue, • Any disconnection and reconnection of hose assembly, •...
- Page 5 THIS APPLIANCE SHALL ONLY BE USED IN AN ABOVE GROUND OPEN AIR SITUATION WITH NATURAL VENTILATION, WITHOUT STAGNANT AREAS, WHERE GAS LEAKAGE AND PRODUCTS OF COMBUSTION ARE RAPIDLY DISPERSED BY WIND AND NATURAL CONVECTION. ANY ENCLOSURE IN WHICH THE APPLIANCE IS USED SHALL COMPLY WITH ONE OF THE FOLLOWING: •...
- Page 6 LEAK TESTED – DO NOT DISCONNECT. CONTENTS LIST CHECK BARBECUE FOR ANY DAMAGE Description Freedom 321C Freedom 326C Before attempting to assemble your barbecue, check that all the necessary parts have been included using the contents list. Trolley bottom shelf Inspect barbecue and trolley parts as you proceed.
-
Page 7: Door
NOTE: Assembly steps are common for both models, except where indicated. INSTALL CASTORS • Place the trolley bottom shelf on the cardboard work surface with the bottom side of shelf facing up. Install the four (4) castors onto the castor seats as shown. Phillips flat-head screw "... - Page 8 INSTALL TROLLEY REAR PANEL • Install the trolley rear panel between rear trolley legs as shown. Phillips flat-head screw " x " Qty: 4 INSTALL TROLLEY BRACKET • Install the trolley bracket in the up position (part is labelled ‘UP’ to ensure proper assembly) between front trolley legs as shown.
-
Page 9: Door Handle 1
INSTALL DOORS – Freedom 321C model • Install the door handle to door. • Install the bottom door hinge bracket to right trolley leg. • Insert door bottom post into bottom door hinge bracket. • Hold the door and install the top door hinge bracket to right trolley leg. - Page 10 INSTALL BARBECUE HEAD • Remove cooking components from barbecue head. With an assistant, lift and position barbecue head on the trolley. • Tighten securely using screws. • Attach the lighting stick to the left body panel. Lighting Stick Lighting stick to barbecue body Phillips-head screw M4 x 8 mm Qty: 1 Barbecue head to trolley...
- Page 11 INSTALL SIDE SHELF • Remove screws from the tool holder. Slide the four (4) tool hooks onto the tool holder with the hooks facing the left side shelf. Attach tool holder to side shelf using these screws. • Align the two (2) holes on front and rear body panels and three (3) holes on left body panel with the threaded holes on left side shelf.
- Page 12 ASSEMBLE AND INSTALL GREASE DRAINING TRAY • Remove plastic shipping bands attaching regulator to burner. • Place the heat shield into grease draining tray making sure to fit the heat shield tabs into the slots in the base of the tray. •...
- Page 13 A S S E M B L Y – G E N E R A L If no spark is seen, the spark gap needs to be INSTALL IGNITER BATTERIES adjusted as follows: • Using an adjustable spanner, loosen the inside nut until the •...
-
Page 14: Grill Plate 2
Place the secondary cooking / warming rack into the slots EVEN GO OUT. on barbecue body side panels. NOTE: It is possible to use a maximum of two hot plates. Freedom 321C Secondary cooking / warming rack Grill plate Flame tamer... -
Page 15: General Information
A S S E M B L Y – G E N E R A L CONNECTING TO, AND DISCONNECTING FINAL ASSEMBLY STEP FROM GAS SOURCE When you have finished assembling your barbecue be sure that Familiarise yourself with the general information and safety guide- all screws are tightened for safe operation of your barbecue. - Page 16 A S S E M B L Y – G E N E R A L Secure the gas hose to the trolley bracket front with hook CONNECTING TO GAS SOURCE supplied. Note: Not applicable to Premium 326 Screw the wing bolt and special nut to trolley bottom shelf or and 326X models.
- Page 17 LOUVRES ON BARBECUE MUST • FAILURE TO REPLACE A FAULTY REMAIN UNOBSTRUCTED TO ALLOW HOSE, SECURE GAS SUPPLY FOR COMBUSTION AIR. CONNECTIONS OR TO OPEN THE ACCESS MUST BE PROVIDED TO HOOD BEFORE SHUT-OFF VALVE. PROCEEDING TO THE LIGHTING PROCEDURES COULD RESULT IN A FIRE OR EXPLOSION THAT COULD CAUSE SERIOUS BODILY INJURY, DEATH, OR PROPERTY DAMAGE...
- Page 18 MAIN BURNER BACK BURNER Before each use, check all hoses for cracks, nicks, cuts, Lid must be open before lighting. For easy ignition, push the burner burns or abrasions. If a hose is damaged in any way, do not control in fully. Slowly rotate the burner control anti-clockwise use your barbecue before replacing the hose with an through 90 degrees (approx.
- Page 19 COOKING WITH THE HOOD DOWN COOKING WITH THE HOOD OPEN NOTE: Freedom 326C model shown as example. Cooking with the hood in the closed position helps to cook food more quickly than in conventional barbecues with a simple lid. The hood (when closed) helps to retain the heat more evenly and conserves energy.
- Page 20 • The easiest foods to balance are those of uniform shape ROTISSERIE and texture. To test if the food is balanced correctly when secured, place the ends of the rotisserie skewer loosely NOTE: The following information is relevant in the palm of your hands. Give the spit a quarter turn and whether rotisserie cooking with a back burner or if there is no tendency to roll and it is stable give it a another using the indirect method –...
- Page 21 IF THE BARBECUE FAILS TO LIGHT • SHOULD A FLASHBACK FIRE OCCUR IN OR AROUND THE BURNER TUBES, FOLLOW THE INSTRUCTIONS BELOW. Turn gas off at source and turn burner control knobs to FAILURE TO COMPLY WITH THESE ‘OFF’. Wait at least five (5) minutes for gas to clear, then INSTRUCTIONS COULD RESULT IN A retry.
- Page 22 DO NOT USE OVEN CLEANER TO CLEAN CLEANING THE FLAME TAMERS THE BARBECUE. SOME PROPRIETORY BARBECUE Periodically you should wash the flame tamer in a soap and warm CLEANERS MAY AFFECT / DAMAGE water solution. Use a vegetable brush to remove stubborn burnt-on SOME OF THE SURFACE COATINGS cooking residue.
- Page 23 • BEWARE OF SPIDERS. STORAGE BURNER TUBES SHOULD BE INSPECTED AND CLEANED We recommend that you minimise the barbecue’s exposure to PERIODICALLY. the elements. High moisture content in the air (rain, mist, salt spray etc.) can affect metal components and lead to material •...
- Page 24 METHOD 3: Use an air hose to force air through each burner tube. CLEANING THE BURNER TUBES The forced air should pass debris or obstructions through the AND BURNER PORTS burner and out the ports. To reduce the chance of FLASHBACK FIRE you must clean the Regardless of which burner cleaning procedure you use, we burner tubes as follows at least once a month in summer and fall recommend you also complete the following steps to help prolong...
- Page 25 THIS PAGE HAS BEEN LEFT INTENTIONALLY BLANK...
- Page 26 P A R T S L I S T Freedom 321C model This diagram is provided to assist you identify parts if replacement is necessary. Contact your place of purchase or the manufacturer to enquire about parts, availability and or service.
- Page 27 List applicable to Freedom 321C model Description Part Hood assembly P00119114D Protective pad P05518001I Temperature gauge P00601011B Hood badge P00407006S Hood handle P00205055B Cooking rack – fixed P01505008E Grill plate P01602004E Hot plate P01702002E Flame tamer P01705009E Body panel – left P00720261A Body panel –...
- Page 28 P A R T S L I S T Freedom 326C model This diagram is provided to assist you identify parts if replacement is necessary. Contact your place of purchase or the manufacturer to enquire about parts, availability and or service. Items included in your barbecue specification may differ from the parts list, depending on region or specific dealer specification.
- Page 29 List applicable to Freedom 326C model Ref Description Part Ref Description Part Hood assembly P00119134D Side shelf decoration panel – left P07503005A Protective pad P05518001I Side shelf – right P01103020C Temperature gauge P00601011B Side shelf decoration panel – right P07502015A Hood badge P00407006S Tool holder...
- Page 32 PRIVACY POLICY Focus Lifestyle Products Pty Ltd may collect personal information about a consumer of its products in the course of receiving or responding to a warranty claim. Such information is only collected to enable the resolution of the warranty claim to the consumer’s satisfaction, and is not disclosed to other organisations except service agents or sometimes the applicable retailer.
Need help?
Do you have a question about the Freedom 321C and is the answer not in the manual?
Questions and answers