SMART Podium ID422w Installation And User Manual
Interactive pen display
Hide thumbs
Also See for Podium ID422w:
- Installation and user manual (66 pages) ,
- Quick start manual (2 pages)

Related Manuals for SMART Podium ID422w


Summary of Contents for SMART Podium ID422w
- Page 1 Installation and User’s Guide SMART Podium ID422w Interactive Pen Display DTU-2231...
- Page 2 Trademark Notice The SMART logo and smarttech are trademarks or registered trademarks of SMART Technologies ULC in the U.S. and/or other countries. All other third-party product and company names may be trademarks of their respective owners.
-
Page 3: Important Information
Important Information Please read this manual carefully before setting up and using your SMART Podium ID422w interactive pen display. WARNING If the screen is damaged, don’t touch any liquid that leaks from it. This liquid is an irritant. If the liquid makes contact with your skin, eyes or mouth, immediately rinse the area with running water for at least 15 minutes. - Page 4 Where use is prohibited, turn off the interactive pen display to prevent the possibility of it interfering with or causing other electronic devices to malfunction. SMART doesn’t accept any liability for direct or consequential damages.
-
Page 5: Other Precautions
CAUTION If you transport the interactive pen display over a distance, we strongly urge you to completely repackage it using the original carton. We designed this packaging with optimal shock and vibration protection. If the original carton is no longer available, pack all components with as much padding as reasonably possible to protect the components from excessive vibration or shock. - Page 6 Disconnect the interactive pen display if you won’t use it for an extended period. • If the interactive pen display requires replacement parts, use parts that are specified by SMART Technologies. • Don’t expose the interactive pen display to rain or moisture.
-
Page 7: Table Of Contents
The Pen Tool, Function and Display Control Buttons........2 Connection Panel ................... 2 Power......................2 Power Saving ................... 3 Installing the SMART Interactive Pen Display............5 System Requirements ..................6 Determining the Best Location for the Interactive Pen Display....... 7 Setting Up Your Work Area ..............7 Changing the Angle of the Interactive Pen Display ........ - Page 8 CON T EN TS Orienting the Screen..................21 Securing the Interactive Pen Display............21 Removing the Interactive Pen Display’s Stand..........22 Other Integrations ..................23 Using the Interactive Pen Display ............... 25 Touching the Interactive Screen ..............26 Using the Pen ....................26 Pen Components ...................
- Page 9 vi i | – Display Troubleshooting................. 38 General Display Problems..............38 VGA Display Problems................40 Windows-Specific Problems..............41 Mac-Specific Problems................42 Control and Writing Problems ..............43 Regulatory Compliance ..................45 Waste Electrical and Electronic Equipment Regulations ......45 Restriction of Certain Hazardous Substances (RoHS) Directives ....46 Customer Support ....................
- Page 10 vi ii | – 99-00724-00 REV C0...
-
Page 11: The Interactive Screen
... -
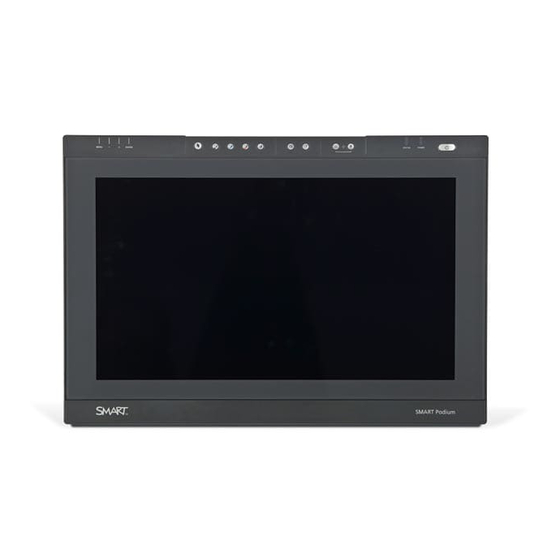
Page 12: Overview
Use the pen tool buttons to control the function of the pen tool. You can select from different digital ink colors and an eraser button. Use the function buttons to perform a right-click and to access specific SMART Board tools, such as SMART Notebook software. -
Page 13: Power Saving
CH A P T E R 1 – OV E R V IE W Power Saving The SMART Podium ID422w conforms to VESA and ENERGY STAR® power saving guidelines. When you use the SMART Podium ID422w with a Display Power Management Signaling (DPMS) compliant computer or video card, the display automatically complies with the folowing power saving parameters. - Page 14 CH A P T E R 1 – OV ERV IEW 99-00724-00 REV C0...
-
Page 15: Installing The Smart Interactive Pen Display
– integrate a monitor or a projector (page 12) – attach the pen (page 12) – install SMART Notebook software (page 14) – match your computer’s and interactive screen’s resolutions (page 15) – adjust the screen settings (page 16) –... -
Page 16: System Requirements
Although you can quickly connect the SMART Podium ID422w to either a VGA or DVI video card, connecting to a DVI video card generally results in optimum performance. -
Page 17: Determining The Best Location For The Interactive Pen Display
SMART Notebook software and open SMART Board tools. You should also keep your computer within 19 1/2' (6.0 m) of the unit. This distance protects against signal degradation that occurs with a longer USB cable. -
Page 18: Changing The Angle Of The Interactive Pen Display
CAUTION Never connect or disconnect the video or power cables while your computer or SMART Podium ID422w are powered on – this can damage the display or video card. 2. If your computer has only one video connector, unplug your previous monitor or add a second video card. -
Page 19: Stage 2: Cable Installation
ADC to DVI adapter, connect the other end of the SMART Podium ID422w cable to the DVI IN connector on the pen display unit, and then connect the ADC adapter end to the ADC connector on your video card. - Page 20 (VGA) mode, see also Adjusting pitch and phase (VGA only) on page 27. 5. After the LCD monitor portion of the SMART Podium ID422w is working to your satisfaction, move on to Step 2: Pen tablet installation to install the pen tablet portion of the SMART Podium ID422w.
-
Page 21: Integrating A Monitor Or A Projector
CH A P T E R 2 – I NS T A L L I N G T H E S M A R T IN T ERA CT IV E PE N DIS PLA Y NOTES • SMART produces each SMART Podium ID422w LCD panel under very stringent quality standards. We cannot guarantee an absolutely perfect TFT display, and some panels may exhibit a certain number of pixels that show an incorrect color. -
Page 22: Attaching The Pen
SMART Podium ID422w Carefully pull the cord until the loop is snug. 2. Thread the other loop through the installation fitting. Then slip the pen and the rest of the tether through the loop. - Page 23 13 | CH A P T E R 2 – I NS T A L L I N G T H E S M A R T IN T ERA CT IV E PE N DIS PLA Y NOTE You can attach the installation fitting to any of the four available holes on the back of the interactive pen display.
-
Page 24: Installing Smart Notebook Software
When you install SMART Notebook software, select the option to start the SMART Board tools automatically when you start your computer. You’ll know the tools are open if you can see the SMART Board icon in the system tray or the Dock. -
Page 25: Matching The Resolution
15 | CH A P T E R 2 – I NS T A L L I N G T H E S M A R T IN T ERA CT IV E PE N DIS PLA Y Matching the Resolution Before the image output of the computer can display properly on the interactive screen, you must set the computer’s resolution to the screen’s native resolution. -
Page 26: Adjusting The Screen
• CUSTOM enables you to independently adjust the RED, GREEN, and BLUE display colors. Note: Any manual changes you make to the color settings will invalidate the SMART Podium ID422w color profile. 99-00724-00 REV C0... - Page 27 17 | CH A P T E R 2 – I NS T A L L I N G T H E S M A R T IN T ERA CT IV E PE N DIS PLA Y OSD Menu Functions Menu options include: •...
-
Page 28: Adjusting The Display
Adjusting the Display Factory Presets, Auto-sync and User Settings Factory presets For optimal display quality, set your video card to the SMART Podium ID422w’s native resolution of 1920 x 1080 pixels (full HD). Auto-sync The SMART Podium ID422w automatically synchronizes to the incoming signal. -
Page 29: On Screen Display (Osd) Settings
This is applicable to all display modes. If you make changes to the display appearance and cannot return to the original settings, use the RESET option to return the SMART Podium ID422w to its original factory defaults. - Page 30 When you adjust the pitch and phase in VGA mode, some computers and video cards may not allow the auto-sync function to fully work when the SMART Podium ID422w is first connected. If some portion of text appears blurred, use the AUTO ADJUST option to automatically synchronize to the incoming signal.
-
Page 31: Orienting The Screen
To orient the screen 1. (Windows operating systems) Press the SMART Board icon in the system tray, and thenpress Orient. (Mac computers) Press and hold the SMART Board icon in the Dock, and then press Open Orient. 2. Follow the on-screen instructions. -
Page 32: Removing The Interactive Pen Display's Stand
22 | CH A P T E R 2 – I NS T A L L I N G T H E S M A R T IN T ERA CT IV E PE N DIS PLA Y Removing the Interactive Pen Display’s Stand If you want, you can remove the interactive pen display from its stand. -
Page 33: Other Integrations
For example, you can integrate your interactive pen display with a projector and a SMART Board interactive whiteboard. NOTE If you want to use a video cable longer than 50' (15 m), you must boost the video signal with a video distribution amplifier. - Page 34 24 | CH A P T E R 2 – I NS T A L L I N G T H E S M A R T IN T ERA CT IV E PE N DIS PLA Y 99-00724-00 REV C0...
-
Page 35: Using The Interactive Pen Display
– the tethered pen and pen tool buttons function like the SMART pen tray tools on the interactive whiteboard 99-00724-00 REV C0... -
Page 36: Touching The Interactive Screen
The pen is cordless, battery-free, and senses the amount of pressure you apply to the tip. Hold the pen like you would a normal pen or pencil. As you work with the SMART Podium ID422w, you can rest your hand lightly on the display screen, just as if it were a drawing board or sheet of paper. -
Page 37: Basic Pen Operation
IMPORTANT Use only the pen that came with your SMART Podium ID422w pen display. Other pens may not function properly. Also, the SMART Podium ID422w pen tip is specifically designed for use with the SMART Podium ID422w pen display – the tips on other pens could damage the protective coating on the pen display screen. -
Page 38: Double-Clicking
28 | CH A P T E R 3 – U S I N G T H E I NT E R A C T I V E P EN D I S P L A Y • For Windows XP, from the TOOLS pull-down menu choose FOLDER OPTIONS.. - Page 39 SMART Notebook software online Help. Writing on the Screen and When the SMART Board tools are running on a connected computer, you can use the Saving Your Notes interactive pen display’s Digital Ink pen tool buttons to create notes over any computer application.
-
Page 40: Using The Eraser
SMART Notebook software online Help. If your interactive pen display is connected to a Mac computer, you can capture the entire screen. For more information, see the SMART Notebook software online Help. Using the Eraser When you press the Eraser button, you can use the tethered pen to erase your notes from the screen. -
Page 41: Using The Function Buttons
SMART Notebook software – an application that helps you organize, save and share your notes. • SMART Keyboard – a virtual keyboard that floats over your active application and lets you enter typed text at the cursor location. NOTE You can reconfigure the Keyboard button. For details on customizing this button, see the SMART Notebook software online Help. - Page 42 32 | CH A P T E R 3 – U S I N G T H E I NT E R A C T I V E P EN D I S P L A Y 99-00724-00 REV C0...
-
Page 43: Maintaining The Interactive Pen Display
Maintaining the Interactive Pen Display This chapter tells you how to keep the SMART Podium clean and replace the pen tip when it wears down. Cleaning the Screen You should clean the interactive screen once a week because dirt and dust can stick to the screen. -
Page 44: Cleaning The Pen
34 | CH A P T E R 4 – M AIN T AIN IN G T HE IN T ERA CT IV E PE N D IS PLA Y Cleaning the Pen To clean the pen, use a soft cloth with a mild detergent. The tethered pen is a sealed unit that contains electronics but no batteries. -
Page 45: Troubleshooting
Chapter 5 Troubleshooting This chapter offers suggestions for troubleshooting your interactive pen display. SMART designed this pen display tablet to work reliably, but if you are having trouble, we recommend you do the following: • If the device driver failed to load properly, first perform the recommended action in any error message that may appear on your screen. - Page 46 If the power indicator is off, make sure that: • the interactive pen display’s power cable is connected properly. • the interactive pen display is turned on. If the power indicator still doesn’t illuminate, contact SMART Technical Support (page 47). 99-00724-00 REV C0...
-
Page 47: Checking The Interactive Pen Display's Status
37 | CH A P T E R 5 – T R O U B L E S H O O T I N G Checking the Interactive Pen Display’s Status The Status indicator shows whether the pen is interacting with the display. Status Indicator STATUS POWER... -
Page 48: Image Problems
Image Problems Display Troubleshooting If you encounter problems with the SMART Podium ID422w display, refer to the following tables; your problem may be described here and you can try the solution offered. For additional information about color issues, see the documentation that came with your operating system or applications. - Page 49 • The input signal frequency is on your display screen. incorrectly set or not compatible with the SMART Podium ID422w. Set the refresh rate (vertical frequency) between 50 and 75 Hz. If your video card driver supports adjustment of the...
-
Page 50: Vga Display Problems
Color quality is inaccurate. • Open the OSD menu and select the RESET option. • • Be sure the SMART Podium ID422w color profile has been installed and is selected as the profile for use with your operating system and applications. -
Page 51: Windows-Specific Problems
• Set the display resolution of your video card to 1920 x 1080. Text or other portions of the screen appear blurred • Turn off the SMART Podium ID422w, then turn it back on. • Open the OSD menu and select the AUTO ADJUST option. If necessary, manually adjust the brightness, pitch, and phase settings. -
Page 52: Mac-Specific Problems
42 | CH A P T E R 5 – T R O U B L E S H O O T I N G Mac-Specific Problems Symptom Solution At startup, a dialog box appears telling • The pen display tablet was not you that either the driver failed to load or detected at startup. -
Page 53: Control And Writing Problems
If the pointer doesn’t accurately follow the movement of the pen, orient the interactive pen display. Before you can write on the screen in digital ink, SMART Board tools must be running the attached computer. You’ll know that the SMART Board tools are running if you can see the SMART Board icon in the system tray or the Dock. - Page 54 44 | CH A P T E R 5 – T R O U B L E S H O O T I N G 99-00724-00 REV C0...
-
Page 55: Regulatory Compliance
WEEE recycling agency for recycling and disposal advice. Your SMART product required the extraction and use of natural resources for its production. It may contain hazardous substances. By disposing of electrical and electronic equipment appropriately, you lower the impact of these substances upon health and the environment and reduce the pressure on natural resources. -
Page 56: Restriction Of Certain Hazardous Substances (Rohs) Directives
Restriction of Certain Hazardous Substances (RoHS) Directives SMART Technologies supports global efforts to ensure that electronic equipment is manufactured, sold and disposed of in a safe and environmentally friendly manner. This product meets the requirements of the European Union's Restriction of Certain... -
Page 57: Customer Support
Technical Support If you experience difficulty with your SMART product, please contact your local reseller before contacting SMART Technical Support. Your local reseller can resolve most issues without delay. NOTE To locate your local reseller, visit www2.smarttech.com/st/en-US/Where+to+Buy. -
Page 58: General Inquiries
Warranty Product warranty is governed by the terms and conditions of SMART’s “Limited Equipment Warranty” that shipped with the SMART product at the time of purchase. Registration To help us serve you, register online at www.smarttech.com/registration. 99-00724-00 REV C0... -
Page 59: Index
47 registration, 48 Erasing your Notes, 30 Replacing the Pen Tip, 34 RoHS directives, 46 Function Buttons, 31 SMART Technical Support, 47 Status Indicator, 37 Storing the Tethered Pen, 31 general inquiries, 48 support, 47–48 inquiries, 48 Technical Support, 47... - Page 60 50 | IN DE X user’s guides, 47 warranty, 48 Using the Eraser, 30 WEEE regulations, 45 Using the Function Buttons, 31 Using the Pen Tool Buttons, 28 99-00724-00 REV C0...
- Page 62 Contact SMART Technologies Toll Free 1.866.518.6791 (U.S./Canada) or +1.403.228.5940 99-00724-00 REV C0...
- Page 63 FCC ID: HV4DTU2231 FCC Compliance and Advisory Statement This device complies with Part 15 of the FCC rules. Operation is subject to the following two conditions:(1) this device may not cause harmful interference, and (2) this device must accept any interference received, including interference that may cause undesired operation. This equipment has been tested and found to comply with the limits for a Class B digital device, according to Part 15 of the FCC rules.
Need help?
Do you have a question about the Podium ID422w and is the answer not in the manual?
Questions and answers