
Related Manuals for Visual Productions CUECORE2


Summary of Contents for Visual Productions CUECORE2
- Page 1 C U ECOR E2 MA N UAL © V I S U A L P R O D U C T I O N S B V W W W . V I S U A L P R O D U C T I O N S . N L...
- Page 2 Revision History Revision Date Author(s) Description 05.12.2016 Initial version. 17.10.2017 Added: Rackmount accessory, MSC API, GPI wiring examples & password protection feature. Improved quick- start system diagrams. Replaced Vi- sualTouch info by Kiosc. Updated timecode functionality. 07.06.2018 Updated vManager chapter to reflect app-store distribution.
-
Page 3: Table Of Contents
Contents 1 Introduction 2 Protocols 3 Quickstart 4 Setting up 5 Network 6 Operating Modes 7 Tracks 8 Playbacks 9 Show Control 10 Protocol Conversion 11 Monitors 12 Settings 13 vManager 14 Kiosc Appendices A Trigger Types B Task Types C Templates D API... - Page 4 2018 Visual Productions BV. All rights reserved. No parts of this work may be reproduced in any form or by any means - graphic, electronic, or mechanical, including photocopying, recording, taping, or infor- mation storage and retrieval systems - without the written permission of the publisher.
- Page 5 Declaration of Conformity We, manufacturer Visual Productions BV, herby declare under sole responsibility, that the following device: CueCore2 Is in conformity with the following EC Directives, including all amendments: EMC Directive 2004/108/EG And the following harmonized standards have been applied:...
-
Page 6: Introduction
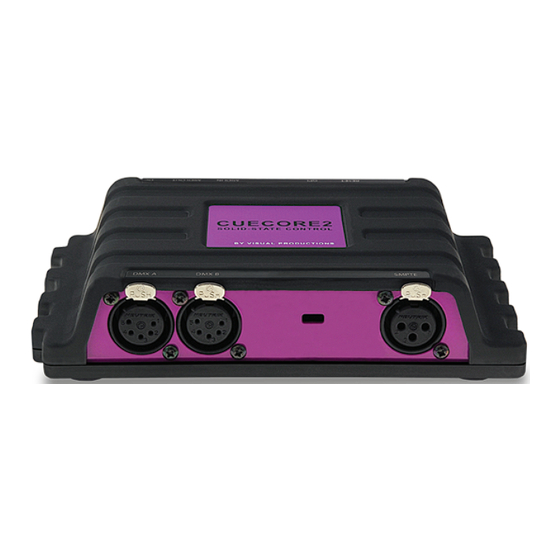
)permanent installations. The engineering team at Visual Productions is proud to present to you the latest development in solid-state lighting control. Figure 1.1: CueCore2 At the time of writing this manual the CueCore2’s firmware was at version 1.26. Design Goals... - Page 7 1.1.2 Multi-zone Replay Unit One of the principle functions of the CueCore2 is to playback DMX shows. We took a lot of consideration into making this feature as powerful as possible with the given hardware platform. The playback mechanism we developed can control six different zones.
- Page 8 CueCore1 . This overview might prove to be helpful to CueCore1 users considering choosing the model for their new designs. Please note that there is no battery fitted inside the CueCore2. The Real-Time clock has a backup charge through means of a super-capacitor.
- Page 9 Info card Saving data to memory This manual will describe how to configure the CueCore2 and program tracks, playbacks, action, etc. The unit’s web-interface is used for editing these kinds of elements. When changes are made, these changes are directly stored in the...
- Page 10 For this reason the CueCore2 will copy any changes in the RAM memory to its onboard flash memory. Flash memory retains its data even when not powered. The CueCore2 will load all its data back from the flash memory upon startup.
-
Page 11: Protocols
Chapter 2 Protocols The CueCore2 is fitted with several communication ports and supports various protocols. This chapter describes these protocols and to which extent they are implemented in the CueCore2 DMX-512 DMX-512 is the standard communication protocol for stage lighting. Its official name is E1.11-2008 USITT DMX512-A. - Page 12 KiNet is a proprietary protocol of Philips Color Kinetics to control their LED fixtures and power supplies. It is a lightweight Ethernet-based protocol that carries DMX-style data. Within the CueCore2 it can only be used to output data. The Transmission Control Protocol (TCP) is a core protocol of the Internet Protocol Suite.
- Page 13 Show Controllers. It does not incorporate error checking, therefor it is faster than TCP but less reliable. There are two ways how to have the CueCore2 respond to incoming UDP messages. The API (see page 101) makes typical CueCore2 functions available through UDP.
- Page 14 There is also a large collection of MIDI con- trol surfaces available; user-interface consoles with knobs, (motorised-)faders, rotary-encoders, etc. The CueCore2 is fitted with a MIDI input and MIDI output port. It supports receiving and sending MIDI messages like NoteOn, NoteOff, ControlChange and ProgramChange.
- Page 15 2.11 Network Time Protocol (NTP) is a networking protocol for clock synchronisa- tion between computer systems over networks. The real-time clock (RTC) in the CueCore2 can be synchronised to an ex- ternal time server using the NTP protocol. 2.12 DHCP The Dynamic Host Configuration Protocol (DHCP) is a standardised network...
- Page 16 The CueCore2 is a DHCP client.
-
Page 17: Quickstart
Chapter 3 Quickstart This chapter provides step by step tutorials on how to program your CueCore2 for some typical tasks: Playback lighting scenes based on the scheduler Choose between different lighting scenes via incoming UDP messages Record a show from an external DMX console... - Page 18 Once the installation is complete, run the vManager to discover the IP address of the CueCore2. 3. Open the web-interface Choose the CueCore2 from the device list and click on the Browse button to open the web-interface. 4. Create the scene Use the browser to go to the CueCore2’s ’Track’...
- Page 19 5. Create a cue Go to the Playback page and select Playback 1. Press the Add button to create a new cue. Once the Cue is added it will automatically refer to Track 1. 6. Start playback Press Go+ on the transport area to start the Playback. The playback now indicated the green ’play’...
- Page 20 30 for alternative setups. 2. Create the first scene Use the browser to go to the CueCore2’s ’Track’ page. Select a track from the table and press the ’Open Console’ button. Create a scene by using the command-line syntax.
- Page 21 3. Create the second scene Press the ’right arrow’ button to switch to the next track. Again make a scene by using some command-line syntax; e.g. 1 THRU 4 @ 10 ENTER 4. Program the playback Go to the ’Playback’ page, select the first of the six playback and insert two cues by pressing the ’add’...
- Page 22 5. Create an action list Go to the ’Show control’ page. Select ’UDP’ from the ’Sources’ table. Copy UDP to the ’Action list’ table by using the ’Add ’ button. Select the new UDP action list and insert two actions by pressing the ’ Add’...
- Page 23 6. Create actions Select the first action and press ’Edit’ to open the dialog. Change the trigger value to ”tulip”. Add one task by using the ’Add’ button. Choose ’Playback’ from the list of task types. Select the newly added task and set the ’feature’...
- Page 24 7. Test with netcat and monitor On your computer, use a simple command-line tool like netcat to send a UDP string to the CueCore2. On Mac OSX netcat is started with the command nc -u 192.168.1.10 7000 (replace 192.168.1.10 with IP address of your CueCore2).
- Page 25 1. Connect the external console Connect the DMX output of the DMX console to Port A of the CueCore2. Connect the fixtures to Port B. 2. Configure port settings Go to the Settings page and set DMX Port A to In. Set Port B to Universe A, it will now transmit DMX channels 1-512.
- Page 26 3. Throughput the DMX The DMX received by the CueCore2 will not automatically be output to the fixtures, however, it is desirable to see the console’s output on the actual fixtures. To achieve throughput of the DMX, go to the Show Control page.
- Page 27 4. Configure the recording Go to the Track page. Select the first track and press the Erase button. Wait until the erase process is completed. Set Mode to Manual. Set Source to DMX and set Sample rate to 40 FPS. 5.
-
Page 28: Setting Up
Distrelec (order code 300060) Rackmount There is an adapter available for mounting the CueCore2 into a 19” rack . The rackmount adapter is 1 HE and is sold separately. It fits two units, however, it is supplied with one position closed by a blind panel, see figure 4.2. - Page 29 Figure 4.3: Kensington lock Power The CueCore2 requires a DC power supply between 9 and 24 Volt with a min- imum of 500mA. The 2,1 mm DC connector is center-positive. The CueCore2 is also Power-over-Ethernet (PoE) enabled. It requires PoE Class I.
-
Page 30: Network
The CueCore2 is a network capable device. A network connection between between a computer and the unit is required to configure and program the CueCore2, however, once the device is programmed then it is not necessary anymore for the CueCore2 to be connected to an Ethernet network. - Page 31 IP Address The CueCore2 supports both static IP addresses and automatic IP addresses. By default, the CueCore2 is set DHCP in which it will be automatically as- signed an IP address by the DHCP server in the network. The ’DHCP server’...
- Page 32 The default IP address is 192.168.1.10 with the subnet mask set to 255.255.255.0. Web-interface The CueCore2 features an inbuilt web-server. This web-interface can be accessed via a standard browser. It is recommended to use any of the following browsers: Microsoft Edge...
- Page 33 5.2.3 Master IP When the unit is not in Stand Alone mode, then this field displays the IP number of system that is mastering the CueCore2. Refer to chapter 6 for more information on operating modes. Access via Internet The CueCore2 can be accessed through the Internet. There are two ways to achieve this: Port Forwarding and VPN.
-
Page 34: Operating Modes
Chapter 6 Operating Modes A CueCore2 can operate in three modes, each mode resulting in a different behaviour of the device. Stand-alone Slave CueluxPro By default the CueCore2 operates in the Stand-alone mode. Figure 6.1: Status bar The status bar at the bottom of the web-interface (figure 6.1) indicates the current operating mode. - Page 35 Master/Slave in the Settings page. CueluxPro Mode CueluxPro (see figure 6.4) is a software-based lighting console that is bundled with the CueCore2. The purpose of the CueCore2 in this mode is to be an...
- Page 36 CueCore2 is suspended. Figure 6.5 illustrates a typical CueluxPro/CueCore2 system. Figure 6.4: CueluxPro The CueCore2 enters the CueluxPro mode as soon as it is patched to one or more universes within the CueluxPro software. This mode is exited by un-patching the CueCore2 or closing down the CueluxPro software.
- Page 37 Timeline editor CueluxPro can also be used for generating the lighting content that can be uploaded to the CueCore2. After uploading, the CueCore2 can continue to be used stand-alone. For information on how to use CueluxPro please refer to the CueluxPro manual on the Visual Productions website. This manual provides instructions for connecting to CueluxPro and uploading content to the CueCore2.
-
Page 38: Tracks
’Tracks’. Go to the Settings page to choose the amount of slots the memory chip is divided into. The CueCore2 offers a choice of 1, 2, 4, 8, 16, 32, 64 or 128 tracks. More tracks will result in a smaller memory size per track. - Page 39 Figure 7.1: Tracks Track Properties The Track listing (See figure 7.1) displays the following track properties: Label The name of the track; this field can be changed by double-clicking. Size The number of bytes used by the data inside the track. The maximum size is indicated at the top of this column.
- Page 40 putted live. The ’Track Preview’ is a useful option to briefly test the content stored in a track without having to configure a playback for it. Please note that any active playback will be released when the Track Preview is enabled. Figure 7.2: Console page Inside the Console page the DMX values of the track can be changed by us- ing the Command-line interface.
- Page 41 This is done by selecting it in the table and then pressing the ’Erase’ button. In case a non-erased track will be directly recorded then the CueCore2 will automatically first erase the track, however, this gives less control over the timing of the start of the recording, especially in the Manual mode.
- Page 42 CueluxPro instead of recording from an external source, as CueluxPro automatically takes care of making its content seamless. 7.4.2 Sources The CueCore2 is capable of recording DMX data from an external source by using three different protocols: Art-Net sACN Please consider that the operation of these protocols depend on their properties the Settings page.
- Page 43 7.4.4 XLR Adapter The DMX ports on the CueCore2 are mainly used for outputting DMX and therefor are fitted with female XLR connectors. When using the ports as an input it is likely that the XLR needs to ’gender change’ into a male connector.
- Page 44 3. Press the ’Capture’ button. The recording of this lighting scene is now saved in the Intensity Map. The capture buttons remain disabled while the CueCore2 is not receiving the ac- tual signal from the corresponding protocol. The ’Clear Intensity Map’ button is...
- Page 45 only enabled when there is an intensity map present; a disabled ’Clear Intensity Map’ button is an indication that there is no map stored in the memory.
-
Page 46: Playbacks
Chapter 8 Playbacks A playback is capable of activating the lighting content stored in the tracks. Tracks are merely storage for lighting scenes and effects; the playbacks actually plays them. The playbacks are located in the Playback page in the web-interface, see figure 8.1. - Page 47 Figure 8.2: Playback structure for a different zone. Figure 8.3 shows an example of controlling multiple zones in a hypothetical restaurant. Figure 8.3: Playbacks controlling zones in a restaurant Precedence All active Playbacks produce DMX values. These values will be merged to- gether and sent to the DMX output.
- Page 48 HTP is the most common choice in precedence. With HTP the output of all playbacks is compared to each other; for each DMX channel the level is set to the highest value found in that particular channel amongst all playbacks. The table below shows an example of HTP merging.
- Page 49 Current/Total of Cues. Indicates which cue is currently active and indicates the total number of cues in the Playback. The intensity and rate properties are not stored in the CueCore2’s internal flash memory. It is expected that these properties can change often during the operation of the CueCore2 and could consequently wear out the flash memory.
- Page 50 be played and if it should be cross-faded from the previous cue. Figure 8.5: Cues Each cue provides the following properties:...
- Page 51 Track A reference to the track that will be played in this step. Fade The cue will fade from the current levels to its programmed levels. The time it takes to cross-fade is specified by ’Fade’. When the fade is set to 0 then there will be no cross-fade; the values will change instantly.
- Page 52 Intensity The master intensity works like a theatrical ’grand master’; it dims the output of all playbacks taking their individual intensity setting into account. Rate The master rate will control the play speed of all playbacks; with taking their individual rate settings into account. Fade The master fade time overrides the fade time of all cues.
-
Page 53: Show Control
Chapter 9 Show Control The CueCore2 can interact with the outside world; it can receive messages and values through various protocols and it can send out many protocols. It is pos- sible to automate the CueCore2 by having it respond automatically to incoming signals. - Page 54 Figure 9.2: Show Control structure The CueCore2 is capable of listening to various protocols. These available pro- tocols are listed in Sources, however, the CueCore2 can only actively listen to 8 protocols at once. The active protocols are listed in ’Action Lists’. Each action list can contain actions.
- Page 55 Task Types). The Variable task will set a value of which an enabled action-list type with Variable as Source will use as a trigger. The CueCore2 will keep the values of the 8 variables even after shut down so long as the RTC battery is not empty.
- Page 56 DMX channel if the action is placed inside a ’DMX Input’ list and it means a single Art-Net channel if the action resides in an Art-Net action-list. A trigger is determined by the trigger-type, trigger-value and trigger-flank fields. Although these fields are not applicable for all action-lists and are therefor sometimes omitted in the web GUI.
- Page 57 Variables Variables are part of the show control system in the CueCore2. There are eight variables and each can hold a value in the range of [0,255]. These values can be manipulated by tasks and can be used for advanced action programming.
-
Page 58: Protocol Conversion
(such as GPI, MIDI,UDP, OSC, etc.) and some other protocols are mainly used for recording (such as DMX input, Art-Net and sACN) the CueCore2 is capable of converting one protocol into another. This chapter provides an insight on which conversions are possible and how to set them up. - Page 59 conveying control messages. Setting up a conversion is done in the Show Control page. First add the in- coming protocol from the ’Sources’ table into the ’Action list’ table. Then add an action to this new action-list. Inside this action the trigger-flank field (if visible) should be set to Change;...
- Page 60 DMX Universe you wish to convert; e.g. when converting two DMX ports to Art-Net it requires two action to programmed. The trigger-type in the actions should be set to ’Universe’ to make the CueCore2 process the 512 channels as a whole rather then process individual channels. Each action should contain a DMX-task with the ’feature’...
- Page 61 Figure 10.3: DMX merging data flow The HTP precedence is the default choice where all channels are compared and the highest levels are used for the merged output. Amongst all the playbacks set to LTP only one of them is included in the HTP merge; the LTP playback that has been activated latest.
- Page 62 Figure 10.5: Converting Art-Net to DMX step 1 Figure 10.6: Converting Art-Net to DMX step 2 Figure 10.7: Converting Art-Net to DMX step 3...
-
Page 63: Monitors
Chapter 11 Monitors This page allows the user to inspect the incoming and outgoing data, both DMX-type data (See figure 11.1) as well as control messages (See figure 11.2). Monitoring incoming and outgoing data can help the user troubleshoot during programming. - Page 64 Figure 11.2: OSC Monitor page...
-
Page 65: Settings
Chapter 12 Settings The CueCore2’s settings are organised into sections, see the Settings page figure 12.1. This chapter will discuss each section. Figure 12.1: Settings page... - Page 66 IP back to the default factory settings. 12.2 The IP fields are for setting up the IP address and subnet mask of the CueCore2. The Router field is only required when Port Forwarding is used. You can also enable or disable the DHCP feature (For more information see chapter 5 at page 30).
- Page 67 The Time Server field allows a NTP server to specified. At start up, the CueCore2 will fetch the time and date from this server. Additionally, an ac- tion can be used to fetch the time. The DST and the Coordinated Universal Time (UTC) are taken into account when obtaining the time for the NTP server.
- Page 68 For example, Visual Productions’ HQ is based in the city of Haarlem, the Netherlands. During the winter the UTC equals +1 and in the summer during day light saving time it is set to +2. So, the settings for the Visual Productions’ HQ are shown in Figure 12.6.
- Page 69 Figure 12.6: Location settings 12.6 External equipment sending OSC messages to the CueCore2 need to be aware of the number specified in the ’Port’ field. This is the port the CueCore2 listens to for incoming messages. Figure 12.7: OSC Settings The CueCore2 will send its outgoing OSC messages to the IP addresses speci- fied in the ’Out IP’...
- Page 70 Defines the listening ports for TCP and UDP messages. External system in- tending to send TCP or UDP message to the CueCore2 should need to know the unit’s IP address and this port number. By default both ports are set to 7000.
- Page 71 12.11 Art-Net The Art-Net feature in the CueCore2 supports 2 universes out or 2 universes in. These universes can be mapped to any of the 256 available universes in the Art-Net protocol. The universe is entered in the ’subnet.universe’ format, i.e.
- Page 72 Figure 12.13: sACN settings The CueCore2 supports 2 incoming sACN universes and 2 outgoing uni- verses. Each universe field should hold a number in the range of [1,63999]. Outgoing sACN transmission can be disabled by entering ’off’ into the sACN output fields.
- Page 73 An advantage of Timespans over normal scheduler actions is that Timespans are power-cycle safe. When the CueCore2 is without power during the moment of a normal scheduler trigger then it will miss that trigger. Timespans, however, will still receive the trigger once the power is restored after the moment has occurred.
-
Page 74: Vmanager
Backup and restore the device’s internal data and settings Perform firmware updates Set the real-time clock of the CueCore2 (The computer’s date and time will be used) Identify a specific device (in a multi device set-up) by blinking its LED Revert to factory defaults Figure 13.1: vManager... - Page 75 The following section explain the buttons in the vManager, as seen in figure 13.1. 13.1 Backup Backups of all the programming data inside the device can be made. This backup file (an XML) is saved on the computer’s hard-disk and can be easily transferred via e-mail or USB stick.
- Page 76 13.6 RTC Calibration The CueCore2 features an internal real-time clock (RTC) that is used for gen- erating scheduler triggers (date, time, sunrise, etc). In case that the clock is drifting, i.e. slowly falling behind or getting ahead of the real time, then it can be calibrated again using the vManager.
- Page 77 13.7 Reboot The Reboot button allows you to remotely restart the device. This is useful for testing the unit’s behaviour after a power-cycle. 13.8 Installing vManager The vManager app is available on a wide range of operating systems, both mobile and desktop. The softwares is distributed through app-stores to take advantage of receiv- ing future software updates automatically.
- Page 78 Ubuntu 18.04 LTS is recommended. The software is only available for the amd64 architecture.
-
Page 79: Kiosc
Chapter 14 Kiosc Kiosc is an app for creating custom user-interface. This app (see figure 14.1) is available on many operating systems: (iOS, Android, Windows, macOS & Ubuntu Linux). It can remote control lighting controllers from Visual Produc- tions such as CueluxPro, CueCore, IoCore and the B-Station. Figure 14.1: Kiosc Please read the Kiosc manual, available from http://www.visualproductions.nl/downloads, for more details. -
Page 80: Appendices
Appendices... -
Page 81: A Trigger Types
Appendix A Trigger Types The following tables list the different types of triggers that can be used in the CueCore2. The different types are accompanied with values and flanks. - Page 82 Trigger Type Trigger Value Flank Description Channel Port number Change Port state changes Channel Port number Down Port is closed Channel Port number Port is opened Channel 0-19% Port number Change Analog level enters or leaves the range Channel 0-19% Port number Down Analog level enters the range...
- Page 83 MIDI Trigger Type Trigger Value Flank Description Message MIDI address Change Receive a message that matches the address Message MIDI address Down Receive a message that matches the address and the value non-zero Message MIDI address Receive a message that matches the address and the value is zero Receiving Receive any message...
- Page 84 Playback Trigger Type Trigger Value Flank Description Active Playback Index Change Playback starts or stops Active Playback Index Released Playback stops Active Playback Index Start Playback starts Release Playback Index Change Playback starts or finishes releasing Release Playback Index Released Playback finished releasing Release Playback Index...
- Page 85 Trigger Type Trigger Value Flank Description Message String Receive a message that matches the trigger-value Receiving Receive any message The user can define his own string as the trigger value of a message. Please note that this string has a maximum length of 31 characters. Trigger Type Trigger Value Flank...
- Page 86 sACN Trigger Type Trigger Value Flank Description Channel DMX Address Change Channel changes Channel DMX Address Non-zero Channel becomes non-zero Channel DMX Address Zero Channel becomes zero UniverseA A DMX level change in the first universe UniverseB A DMX level change in the second universe Receiving Change Start receiving or loose sACN signal...
- Page 87 The Randomizer made a value that matches A.15 System Trigger Type Trigger Value Flank Description Startup The CueCore2 has been power up Network Connection Change Network connection established or lost Network Connection Stop Network connection lost Network Connection Start Network connection established...
- Page 88 A.16 Variable Trigger Type Trigger Value Flank Description Channel Variable Index The specified variable changes Variable 1 Number [0,255] Change Variable 1 becomes equal or not equal to the specified number Variable 1 Number [0,255] Equal Variable 1 = number Variable 1 Number [0,255] Unequal...
- Page 89 A.17 Timer Trigger Type Trigger Value Flank Description Timer Index Change The timer starts or stops Timer Index Stop The timer stops Timer Index Start The timer starts A.18 Actionlist Trigger Type Trigger Value Flank Description Actionlist Index Change The actionlist enable checkbox changes Actionlist Index Down The actionlist is enabled...
-
Page 90: B Task Types
Appendix B Task Types Tasks allow you to automate the functionality in the CueCore2. All this func- tionality is categorized in task-types. This appendix provides a listing of the various task-types. The tables present an overview of all available features and functions per task-type. - Page 91 Feature Function Parameter 1 Parameter 2 Intensity Playback Index percentage [0%,100%] Intensity Control Playback Index Set Rate Playback Index percentage [-100%,100%] Set Rate Control Playback Index Transport Pause Playback Index Transport Release Playback Index Transport Playback Index Transport Playback Index Transport Jump Playback Index...
- Page 92 Feature Function Parameter 1 Parameter 2 Program Stop Program Record Track Index Program Erase Track Index Intensity Map Clear Intensity Map Capture DMX Intensity Map Capture Art-Net Intensity Map Capture sACN Send an UDP message via the network. Specify the recipient in Parameter 2. For example ”192.168.1.11:7000”.
- Page 93 Feature Function Parameter 1 Parameter 2 Send Float floating point number Send Float Control Send Unsigned positive number Send Unsigned Control Send Bool true or false Send Bool Control Send String String of characters Send String Control Colour RGB colour Colour Control Please note that string in parameter 1 has a maximum length of 31 charac-...
- Page 94 Feature Function Parameter 1 Parameter 2 Universe Control HTP Universe # Universe Control LTP Universe # Universe Control Priority Universe # Universe Clear Universe # Set Channel DMX Channel DMX Value Set Channel Toggle DMX Channel Set Channel Control DMX Channel Set Channel Inverted Control DMX Channel...
- Page 95 Feature Function Parameter 1 Parameter 2 Send Start MIDI Channel Send Stop MIDI Channel Send Restart MIDI Channel Send Pause MIDI Channel Send Record MIDI Channel Send Deferred Play MIDI Channel Send Record Exit MIDI Channel Send Record Pause MIDI Channel Send Eject MIDI Channel...
- Page 96 Feature Function Parameter 1 Parameter 2 Set Value Variable # Number in the range of [0,255] Set Value Toggle Variable # Number in the range of [0,255] Set Value Control Variable # Set Value Inverted Control Variable # Set Value Decrement Variable # Set Value...
- Page 97 B.14 Action-list Manipulate an action-list. Feature Function Parameter 1 Parameter 2 Enable Action-list On or Off Enable Toggle Action-list Enable Control Action-list Enable Inverted Control Action-list B.15 Randomiser Trigger the Randomizer to generate a new random number. Feature Function Parameter 1 Parameter 2 Refresh Minimum value...
-
Page 98: C Templates
Appendix C Templates This appendix discusses the templates provided in the Show Control page. Template Description Receiving DMX Receiving DMX on all ports. DMX properties in the Settings page have to be configured accordingly. Receiving Art-Net Receiving DMX on all universes. Art-Net properties in the Settings page have to be configured accordingly. -
Page 99: D Api
Notwithstanding these API’s, it is possible to create your own OSC, TCP and UDP implementation in the Show Control page. The API is originally designed for external equipment to control the CueCore2, however, the is also capable to send information back. This feedback mechanism is discussed at the end of this chapter, on page 105. - Page 100 The following table uses track #1 as an example. The number ’1’ can be replaced by any number in the range of [1,128]. Parameter Description /core/tr/select integer Select a track /core/tr/erase Erase the selected track /core/tr/record Start recording the selected track /core/tr/stop Stop recording /core/tr/1/erase...
- Page 101 Typically either TCP or UDP is supported by various media devices like video projectors and show controllers. The functionality within the CueCore2 can controlled by using the following ASCII strings (human readable text) messages: The following table uses playback #1 as an example. The number ’1’ can...
- Page 102 String Description core-pb-1-go+ Jump to the next cue in playback #1 core-pb-1-go- Jump to the previous cue in playback #1 core-pb-1-jump= integer Jump to a specific cue in playback #1 core-pb-1-release Release the playback core-pb-1-intensity= float Set the playback’s intensity core-pb-1-rate= float Set the playback’s intensity core-pb-release...
- Page 103 HTTP (Hyper Text Transfer Protocol) is the standard protocol to access web pages. It can also be used to control the CueCore2, using the URLs listed below. The following table uses playback #1 as an example. The number ’01’ can...
- Page 104 Example Blink LED /ajax/blink http://192.168.1.10/ajax/blink You can send your HTTP GET requests to port 80. The CueCore2 can also be remote controlled via MIDI Show Control. The fol- lowing commands are available. Command Description Parameters Jump to a cue of a playback.
- Page 105 Set the timecode source to internal Feedback The CueCore2 is able to send feedback to external equipment using its API, so called ’clients’. The CueCore2 keeps a memory of the last four OSC clients and last four UDP clients. The clients will automatically receive updates on several playback related state changes.
- Page 106 A power-cycle will clear the internal client lists. Consider programming custom action in the show control when additional feedback functionality is required.
- Page 107 Index CueCore1, 6, 8 Go+, 51 CueCore2, 8 Go-, 51 CueluxPro Mode, 35 GPI, 13, 72–78 19 rack, 28 Greenwich Mean Time, 68 Action, 53 Halt, 51 Action list, 54 Home page, 34 Art-Net, 12, 71 HTP, 47, 60 Auto-sensing, 31...
- Page 108 Password, 66 Track Preview, 40 Playback, 46 Trigger, 54 PoE, 29 UDP, 13, 70 Polarity, 29 Uptime, 32 Port, 70 UTC, 67 Port Forwarding, 33, 66 Potentiometer, 14 Variables, 57 Power, 29 VPN, 33 Precedence, 47 Priority, 47, 60 XLR, 43 Protocol Conversion, 58 QuadCore, 8 Rackmount, 28...
Need help?
Do you have a question about the CUECORE2 and is the answer not in the manual?
Questions and answers