Download Print this page

Advertisement

Green Drop Instrument
Instructions

Advertisement

loading

Summary of Contents for palintest Green Drop Kit

  • Page 1 Green Drop Instrument Instructions...
  • Page 2: Table Of Contents

    Contents 1. GENERAL INFORMATION 2. KIT CONTENTS 3. TEST PROCEDURES 4. INSTRUMENT OPERATION PALINTEST 7500 PHOTOMETER PALINTEST 800 MULTIPARAMETER METER PALINTEST MICRO 600 DISSOLVED OXYGEN METER 5 REORDERING CODES...
  • Page 3: General Information

    This booklet describes the best way to use Palintest products, and provides instructions for the range of water tests that can be performed using this instrument.
  • Page 4: Kit Contents

    2. KIT CONTENTS This kit contains:  Palintest 7500 Photometer  Palintest 800 Multiparameter meter  Palintest Micro 600 Dissolved Oxygen meter  100ml sample container  10ml plastic syringe  Test tube brush  Crush Rods  Zero Oxygen Calibration Solution ...
  • Page 5: Test Procedures

    3. TEST PROCEDURES Blanks and Samples Palintest photometers use a BLANK tube to set the instrument to blank and a SAMPLE tube to take the reading. A BLANK tube is a test tube filled with untreated water sample. A SAMPLE tube is a test tube...
  • Page 6: Instrument Operation

    4. INSTRUMENT OPERATION 4.1. Palintest 7500 Photometer This set of instructions is a quick guide to using your photometer. For more details on the full range of functions that are available on your 7500 Photometer, please contact sales@palintest.com. 4.1.1 General Photometer Operation The photometer is controlled by a simple intuitive menu system.
  • Page 7 4.1.2 Operating Modes The photometer has two distinct operating modes - the PHOTOMETER mode and the SYSTEM mode. The PHOTOMETER mode is the normal operating mode for taking photometer readings. This mode is engaged automatically when the instrument is turned on by pressing the key.
  • Page 8 Instructions Each test is identified by a separate program number or named key. Program numbers are shown in Palintest photometer methods instructions. For some tests, a choice of different programs is offered in order to give the option of the result in...
  • Page 9 This option may be used in conjunction with the Palintest Dilution Tube which enables dilutions of x2, x3, x4, x5 and x10 to be made; or with Palintest syringes which enable higher dilutions factors. Higher dilution factors may be entered subject to the limitation of the number of digits available on the result display for each test.
  • Page 10 4.1.6 Getting the Best Results Success in obtaining accurate and consistent test results will depend on the care with which test procedures are carried out. Always follow the test instructions carefully and observe the stated standing periods and temperature conditions where applicable.
  • Page 11 become stained or scratched in use should be replaced. Taking Test Readings Press key. The instrument displays the ‘Choose a Test’ menu box, with the last test program used highlighted as the active line. The cursor will flash on the [OK] symbol of the ‘options menu' at the bottom of the screen.
  • Page 12 3 If the sample number option is pre-selected (see system menu for options), then the following display will appear, for example :- Sample Number 1024 Enter or confirm the sample number (up to 10 digits), then press [OK]. If the dilution factor option is pre-selected (see system menu for options), then the following display will appear:- Dilution Factor...
  • Page 13 Place a BLANK TUBE in the test chamber, then press [OK]. The instrument will be set automatically, and after a few seconds the following display will appear:- Phot 007 Chlorine-Free / 5 Insert Sample Blank - Choose a Test - Time Place SAMPLE TUBE in the test chamber, then press [OK].
  • Page 14 The ‘options menu' offers the choice to :- ‘Choose a Test’ - return to the menu of test programs and select another test ‘Read’ - read further sample tubes of the currently selected test ‘Blank’ - re-blank the instrument ‘Follow-On’ - carry out a continuation test if available.
  • Page 15 readings (where appropriate). The result will be displayed as follows, for example :- During the display period, similar options are available as at the end of a normal test program. Select ‘Return’ from the ‘options menu' to take the program back to the start of the first stage of a multiple test procedure to enable further samples to be tested for the same parameters.
  • Page 16 Note that the log stores the result in the primary form. 4.1.6 Reading in Transmittance and Absorbance When taking readings in Transmittance (%T) or   Absorbance mode, use the keys to step through the wavelengths until the required wavelength is reached. 4.1.7 Care and Maintenance The photometer is designed to give long and trouble-free operation.
  • Page 17 certificate with the correct %T value on the certificate, i.e. the wavelength is the same on both the photometer screen and the certificate). For example, Standard B is characterised at 450 and 500nm. Therefore when measuring the standard using the photometer, ensure the result on screen relevant compared to the certificate value.
  • Page 18 4.1.8 Cleaning the Optics Any build-up of dirt or deposits may interrupt light transmission and affect readings. To clean the optics, undo the two screws to remove the optics base plate. Gently clean the internal surfaces of the optics with a soft, non-abrasive cloth.
  • Page 19 4.1.10 Guarantee Palintest photometers are guaranteed for a period of two years from the date of purchase, excluding accidental damage or damage caused by unauthorised repair or misuse. The guarantee specifically excludes damage caused by water or by ingress of chemical solutions. Should repair be...
  • Page 20: Palintest 800

    4.2. Palintest 800 Multiparameter Meter This set of instructions is a quick guide to using your multiparameter meter, capable of measuring pH, conductivity/TDS and temperature. For more details on the full range of functions that are available on this instrument, please contact...
  • Page 21 4.2.1 General Information The LCD has a primary and secondary display: The primary display shows the measured pH or conductivity. The secondary display shows the measured temperature. The display also shows error messages, keypad functions and program functions. 1. SETup mode indicator 8.
  • Page 22 Function ON/OFF Powers on and shuts off the meter. When you switch on the meter, the meter starts up in the mode that you last switched off from. For example, if you shut the meter off in conductivity measurement mode, the meter will be in conductivity measurement mode when you switch the meter HOLD Freezes the measured reading.
  • Page 23 blinks while in manual ranging function. In Calibration mode: During conductivity and TDS calibration, press to scroll through calibration values. In SETUP mode: Press to scroll through the setup subgroup programs. SETUP Takes you into the SETUP mode. This mode lets you customize meter preference and defaults, view calibration, electrode offset data, adjust for temperature coefficient and normalization temperature.
  • Page 24 Probe Information Your meter includes two probes:  pH electrode with BNC connector.  conductivity/temperature probe with a notched 6-pin connector The temperature sensing element built into the conductivity probe will also compensate for pH readings as long as both probes are in your solution at the same time.
  • Page 25 To Connect the Conductivity/Temperature Probe: 1 Line up the notch and 6 pins on the probe connector with the holes in the connector located on the top of the meter. Push down and screw the metal sleeve to lock the probe connector into place.
  • Page 26 Preparing the Meter for Calibration Before starting calibration, make sure you are in the correct measurement mode. pH Calibration NOTE: We recommend that you perform at least 2- point calibration using standard buffers that bracket (one above and one below) the expected sample range.
  • Page 27 4.2.2 To Calibrate pH:- 1 If necessary, press the MODE key to select pH mode. The pH indicator appears in the upper right hand corner of the display. 2 Rinse the probe thoroughly with deionised water. Do not wipe the probe;...
  • Page 28 indicate the pH standard buffer solution. 5 Wait for the measured pH value to stabilize. 6 Press ENTER to confirm calibration. The meter is now calibrated to the current buffer. The lower display scrolls through the remaining buffer options. If you are performing multi-point calibration, go to Step 7.
  • Page 29 If the selected buffer value is not within  1.0 pH from the measured pH value: the electrode and buffer icon blink and the ERR annunciator appears in the lower left corner Err Message and Electrode Icon of the display. will appear if Incorrect Buffer are Used 4.2.3 To Calibrate conductivity:-...
  • Page 30 2 Rinse the probe thoroughly with deionised water, and then rinse with a small amount of calibration standard. 3 Dip the probe into the calibration standard. Immerse the probe tip beyond the upper steel band. Stir the probe gently to create a homogeneous sample.
  • Page 31 Note Ensure conductivity probes are fully submerged when taking measurements or calibrating. To exit from Conductivity calibration mode without confirming calibration, DO NOT press the ENTER key in Step 7. Press CAL/MEAS instead. This will retain the meter’s old calibration data in the measuring range of the calibration.
  • Page 32 1 Rinse the pH electrode with deionised water before use to remove any impurities adhering to the probe body. If the pH electrode has dehydrated, soak it for 30 minutes in Palintest electrode storage solution solution (PT 105/4). 2 Press ON to switch on meter.
  • Page 33 3 Press the MODE key to select pH measurement mode. The MEAS annunciator appears on the top center of the LCD. 4 Dip the probe into the sample. Since the conductivity cell contains the temperature sensor, make sure it is also immersed in your solution.
  • Page 34 MEAS annunciator appears on the top center of the LCD. 4 Dip the probe into the sample - When dipping the probe into the sample, take care to ensure that the liquid level is above its upper steel band. Stir the probe gently in the sample to create a homogenous sample.
  • Page 35 sample. covers the probe sensors. g) External noise pickup or Move or switch off interfering induction caused by nearby motor. electric motor. h) Broken probe. Replace probe. “OR” on upper a) Probe is shorted. Test probe. Make sure probe display is fully connected to meter.
  • Page 36 4.2.6 Guarantee Palintest electrochemical meters are guaranteed for a period of one year from the date of purchase, probes are guaranteed for six months, excluding accidental damage or damage caused by unauthorised repair or misuse. The guarantee specifically excludes damage caused by water or by ingress of chemical solutions.
  • Page 37 4.3 Palintest Micro 600 Dissolved Oxygen (DO) Meter This set of instructions is a quick guide to using your DO meter. For more details on the full range of functions that are available on this instrument, please contact sales@palintest.com. 4.3.1 General Information The meters have six keys on its splash-proof keypad;...
  • Page 38 Powers on and shuts off the meter. ON / OFF Takes you directly into measurement mode when meter is switched on.  Enters into calibration mode % saturation and Temperature.  To abort calibration or setup mode without confirming any set value. HOLD: Freezes reading.
  • Page 39 Inserting New Batteries The battery compartment is found at the back of instrument. To open the battery compartment, push in the direction of arrow and lift up the cover. Note the polarity of battery before inserting into position. After replacement, place cover back and press down until it locks tight.
  • Page 40 Connecting the Electrode and Temperature Sensor Connecting electrode: Rotate the locking ring clockwise until it locks. Removing electrode: Rotate the connector counterclockwise and slide the connector off the socket. Insert the mini phono jack of temperature sensor into the meter as shown. CAUTION: Do not pull on the electrode cord to avoid internal wire breakages.
  • Page 41 4.3.2 Preparing the Meter for Calibration Before starting calibration the meter must be in the correct mode. The temperature and % Saturation calibration must be done first before performing the mg/L (ppm) calibration. In % Saturation, the meter is able to perform either a one point calibration or a two point calibration.
  • Page 42 Calibrating to 100% Saturation will also calibrate mg/L corresponding to 100% Saturation. Calibrate 100% Saturation: Rinse the probe with DI water or rinse solution and let it dry. Do not touch the membrane. Press MODE to select % Saturation mode. Hold the probe in the air with the sensor downwards.
  • Page 43 4.3.3 Measurement Mode selection (mg/L or ppm) You can select to measure in mg/L or ppm:- Enter SETUP menu by pressing ON and MODE simultaneously, holding both keys for 2 seconds. Then release the ON key before releasing the MODE key. ‘StUP’ indicator will appear followed by ‘COF.1’.
  • Page 44 Taking Measurements Rinse the probe with DI water or rinse solution. Press MODE to select % Saturation, Concentration (mg/L), (ppm) or Temperature (T). Dip the probe into the sample. Stir the solution gently to homogenise the sample. Take the measurements once the meter reading has stabilised.
  • Page 45 4.3.4 Pressure/Salinity Compensated Measurements For more accuracy it is recommended to set the barometric pressure and salinity values, the meter will automatically compensate for the entered values. Set the barometric pressure before performing a calibration. The barometric differences caused by the weather have slight influences on the readings, for very accurate readings it is recommended to reset this value every time you take a...
  • Page 46 Setting Pressure Enter the SETUP menu as described in 4.3.3. Press ▲ or ▼ until you view ‘DPr.7’. Press HOLD/ENTER, display will show either ‘A.HG’ for mm Hg or ‘A.PA’ for kilo Pascal. Press ▲ or ▼ to select. Press ‘HOLD/ENTER’ to confirm. Press ▲...
  • Page 47 4.3.5 Setting Salinity Turn on the meter and select mg/L or ppm measurement mode. Repeat steps 1 to 2 from Section 4.3.3 Press HOLD/ENTER until you view ‘b.SAL’. Press HOLD/ENTER. Press ▲ or ▼ to set the salinity value (in ppt).
  • Page 48 4.3.6 Troubleshooting The DO in the sample is consumed by the cathode, it is essential that a new sample must flow past the membrane of the probe to prevent the occurrence of false readings. The probe uses very little oxygen for its measurement.
  • Page 49 Replacement of the pre-membraned cap is required when you cannot calibrate the probe, or if the membrane is damaged. Typical membrane damages are punctures or wrinkles caused during measurements or cleaning:- Unscrew counter clockwise the cap from the probe sensing tip. Wash the probe under running water.
  • Page 50 Problem Possible cause Solution Check that Batteries batteries are in not in place place and making No display good contact Batteries when ‘ON’ not in correct Re-insert polarity (+ and – batteries with position) is pressed correct polarity Weak Replace batteries.
  • Page 51 External sensor noise pickup or Move or induction caused switch off by nearby interfering motor electric motor Replace Broken probe. probe. Dirty / oily Clean electrode electrode Slow Allow time Response Temperat for temperature to ure is changing. stabilise. Cancel HOLD HOLD mode mode in...
  • Page 52 Error Possible Corrective Indicates Message Cause Action Check the value of calibration Calibration solution. If is performed zero when factory calibration calibrated ‘Err 1’ in % % Saturation is done, absolute Saturation Calibration make sure value is out Mode error the limit of of calibration 10% is not...
  • Page 53 nt is below Check that 2.00 mg/L or the correct temperatur e and salinity setting has been set prior calibration. Check the probe’s temperatur ATC probe ‘UR’ / ‘OR’ e input is removed with blinking phono jack ATC probe or broken ‘A’...
  • Page 54 the ATC connection Concentratio feature to the n Mode activated. meter. Ensure probe is not broken punctured. Battery icon Battery Replace Low battery lights up power is low batteries...
  • Page 55 5. Reorder codes and Accessories Part Code Description Free/Total Chlorine AP 031 Reagents (250 pack) Iron MR Reagents (250 AP 292 pack) Alkalinity Reagents (250 AP 188 pack) Sulphide Reagents (250 AP 168 pack) Nitrate Reagents (250 AP 163 pack) Nitrite Reagents (250 AP 109 pack)
  • Page 56 Solution PT 148/3 Replacement DO probe DO membrane PT 148/2 maintenance set Replacement PT 146/1 Conductivity/TDS probe PT 146/2 Replacement pH probe PT 105/4 Electrode Care pack For any other accessories, please contact sales@palintest.com V1 – 08/14 ZI INST 8100...

This manual is also suitable for:
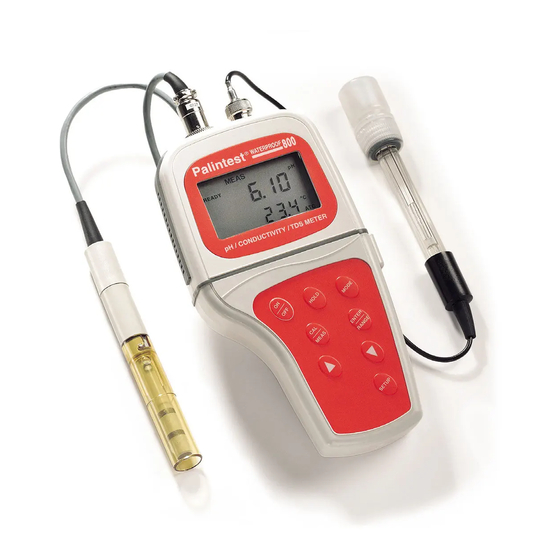
7500800Micro 600