Table of Contents
Advertisement
Palintest
INSTRUMENTS
_______________________________________________________________________________________
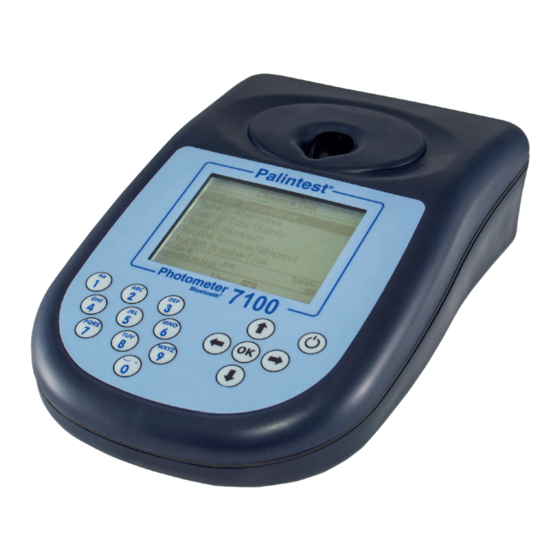
PHOTOMETER 7100
Your Palintest direct-reading photometer is designed to give long and
trouble-free operation. To ensure you get the best out of this photometer,
please read these instructions carefully and follow the procedures
recommended.
The photometer is suitable for use in both the plant room and the laboratory,
or for portable use at the waterside. It is sturdy and robust but should always
be regarded as a scientific instrument. Treat it in the same way that you
would a watch or a camera. It is designed to resist moisture and spills but
careless use will almost certainly result in damage or reduce the life of the
instrument.
Here are 10 hints on keeping the photometer clean, free from contamination
and in good working order :-
1 Prepare your workplace before use. Make sure that you have enough
space to work with the photometer and with the reagent systems.
2 Do not pour out samples or prepare the tests directly over the instrument.
Remember to cap the tube before reading in the instrument.
3 Always cap the test tubes after preparing the blank and test sample.
4 Wipe test tubes on a clean tissue to remove drips or condensation before
placing in the photometer.
5 Do not leave tubes standing in the photometer test chamber. Remove
the tubes immediately after each test.
6 Immediately wipe up any drips or spillages onto the instrument or into the
test chamber with a clean tissue.
7 Keep the instrument clean. Clean the test chamber regularly using a
moistened tissue or cotton bud.
8 Keep the instrument away from all chemicals and cleaning materials. Do
not place the instrument on top of chemical drums or barrels.
9 Keep the instrument in a clean, dry place when it is not in use. Keep it on
a clean, dry bench away from chemicals, place it in a storage cupboard
or keep it in a carrying case.
10 Keep the carrying case (where supplied) in a clean, dry condition. Make
sure that any solutions which have spilled or drained into the carrying case
are dried up before the case is closed up and the instrument is put away.
®
INST.7100.C
Version 3-01/09
1
Advertisement
Table of Contents

Related Manuals for palintest Photometer 7100


Summary of Contents for palintest Photometer 7100
- Page 1 Version 3-01/09 INSTRUMENTS _______________________________________________________________________________________ PHOTOMETER 7100 Your Palintest direct-reading photometer is designed to give long and trouble-free operation. To ensure you get the best out of this photometer, please read these instructions carefully and follow the procedures recommended. The photometer is suitable for use in both the plant room and the laboratory, or for portable use at the waterside.
-
Page 2: Table Of Contents
INDEX OPERATING PRINCIPLE ................. 3 Power Supply ....................4 Replacing the Batteries ..................4 GENERAL PHOTOMETER OPERATION ............5 Operating Modes ................... 5 SYSTEM MODE....................6 Back Light ...................... 6 Language Options..................6 Units ....................... 6 Battery Level ....................6 TAKING PHOTOMETER READINGS .............. -
Page 3: Operating Principle
With coloured samples, light is absorbed and that which passes through the sample is proportionately reduced. In Palintest test procedures, the direct-reading photometer is used to measure the colour which is produced when chemical reagents are reacted with the water sample. -
Page 4: Power Supply
Power Supply The photometer is designed to operate on alkaline batteries. The photometer features a battery indicator – see ‘System Mode’ functions. A minimum voltage of 3.0V is needed to operate the photometer. In addition to the above feature, a battery-warning message will appear automatically on the display when the battery voltage becomes low. -
Page 5: General Photometer Operation
GENERAL PHOTOMETER OPERATION The photometer is controlled by a simple intuitive menu system. The highlight indicates the active line or section of the screen. keys move the highlight through the menu choices. The and keys allow selection of options. The flashing cursor in the ‘options menu’... -
Page 6: System Mode
SYSTEM MODE When the instrument is first used, the SYSTEM mode should be used to set the preferred operating options: • Use the keys to scroll through the features. • Use the and keys to select the options. • Press [OK] to accept the selections and return to PHOTOMETER mode. Back Light The graphic display features a backlight to enhance the display contrast. -
Page 7: Taking Photometer Readings
TAKING PHOTOMETER READINGS The photometer is very simple to use. Screen prompts guide the user towards the test result. The following sections describe how to get the best out of the system. Program Numbers and Test Instructions Each test is identified by a separate program number or named key. Program numbers are shown in test instruction sheets supplied with the instrument or reagent systems. -
Page 8: Getting The Best Results
Getting the Best Results Success in obtaining accurate and consistent test results will depend on the care with which test procedures are carried out. Always follow the test instructions carefully and observe the stated standing periods and temperature conditions where applicable. Wipe test tubes free from condensation before placing in the photometer. -
Page 9: Continuation Tests (Certain Tests Only)
5 The instrument will take the reading and display the result as follows, for example :- Phot 007 Chlorine-Free / 5 1.00 mg/l Cl Choose a Test Read Blank Follow-On The following symbols indicate the result is out of test range :- >... -
Page 10: Favourite Tests List
Note that some continuation test procedures involve a standing period. The photometer may switch off automatically during this time. To avoid the instrument switching off, use the timer function to time any standing period. The timer will over-ride the auto switch off function. Favourite Tests List The four most recently used tests are listed at the top of the 'Choose a Test' screen for convenience. -
Page 11: Care And Maintenance
SERVICE REQUIREMENT The servicing of photometer instruments is essential to ensure optimum performance. To arrange a service of the instrument, contact Palintest Technical Services Department or the distributor who supplied the instrument. The Palintest standard photometer service includes cleaning of the optical assembly,... -
Page 12: Error Messages
Error 9 indicates not enough light – follow ‘Cleaning the Optics’ routine. GUARANTEE Palintest photometers are guaranteed for a period of two years from the date of purchase, excluding accidental damage or damage caused by unauthorised repair or misuse. The guarantee specifically excludes damage caused by water or by ingress of chemical solutions.
Need help?
Do you have a question about the Photometer 7100 and is the answer not in the manual?
Questions and answers
How do I access the data log on this kit to review previous readings?
To access the data log on the Palintest Photometer 7100 (same as for the 7500), connect the instrument to a computer, then drag the LOG.txt file to the local desktop. Open the file using any program that supports CSV format.
This answer is automatically generated
Can i use lovibond COD Vario 0-15000 mg/l vials with palintest photometer 7100?