Table of Contents
Advertisement
Advertisement
Table of Contents

Related Manuals for palintest Pooltest 4


Summary of Contents for palintest Pooltest 4
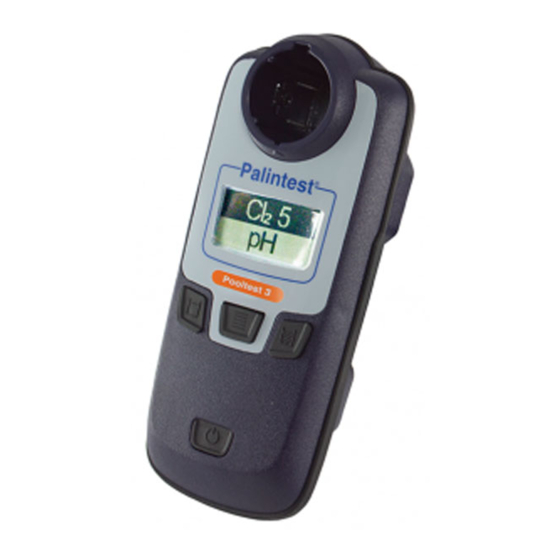
- Page 1 Pooltest 3 Pooltest Pooltest 4 Pooltest 6 User Manual ZIINST49...
- Page 2 At Palintest we deliver: Swimmer safety Safeguard pool users through effective disinfection and water balance control Pool integrity Regular pool testing helps maintain your pool and protects the pool infrastructure Water balance Maintain optimum water balance to avoid corrosion or scaling...
-
Page 3: Table Of Contents
Contents Getting Started Instrument Layout and Buttons How to Select and Perform a Test Error Messages Cleaning the Optics Check Standards Accessing the Memory Procedures for Testing How to Get Accurate Results Blanking Sample Dilution Table of Tests Test Instructions Chlorine Cyanuric Acid Total Alkalinity... -
Page 4: Getting Started
Getting Started Thank you for choosing a Palintest Pooltest Photometer. Please take time to read this manual and only use this instrument for its intended purposes. This instrument is waterproof to IP67. However, for optimum performance please ensure it is clean and dry before use. - Page 5 Serial Number 0 1 2 3 4 5 6 7 8 9 0 Made in UK www.palintest.com Battery Cover: Please take care not to damage gasket when replacing the 2 x AA batteries...
-
Page 6: How To Select And Perform A Test
How to Select and Perform a Test This is the basic procedure for all tests. For specific test details see Test Instructions. Select a test by pressing the Menu key. Scroll through the list until the desired test is highlighted. Pooltest Place a test tube containing pool or spa... - Page 7 Press the blank key. Pooltest Blanking enables the instrument to set the correct zero value. This ensures the final result will be accurate, even when testing water that is cloudy or coloured. The screen will show that the instrument is Pooltest measuring the blank.
- Page 8 Prepare a 10mL sample by adding reagents according to the Test Instructions. Place this sample tube in the cell holder. Press the “read sample” key The screen will show that Pooltest “reading” is in progress. mg/L When complete a result will appear on screen.
-
Page 9: Error Messages
(following page). If error messages E1 to E6 appear during testing, try cleaning the optics (see Cleaning the Optics on the following page) or contact your local Palintest Branch or Distributor. -
Page 10: Cleaning The Optics
Do not use solvents. Instrument failure due to contamination is not covered by warranty. Check Standards Sets of Check Standards for Pooltest Instruments are available from Palintest. These verify that the instrument is correctly calibrated and performing correctly. -
Page 11: Accessing The Memory
Accessing the Memory Press and hold the “Menu” button. The most recent test result will be displayed. mg/L Further presses of the Menu button will show previous test results. Pooltest The instrument always stores the last ten results, numbered in reverse order with ‘1’... -
Page 12: Procedures For Testing
How to Get Accurate Results Rinse all equipment thoroughly with the water that is being tested. When filling tubes to the 10 mL line ensure the level is as shown Use Palintest Photometer tablets. Rapid dissolving and Comparator tablets are not suitable. - Page 13 During sample testing or blanking, remove any attached bubbles by capping the tube and rotating as shown. Ensure tubes are dry on the outside before placing them in the instrument. Ensure that the Pooltest Instrument is clean and dry. Place tubes in the pooltest instrument with white diamond aligned to the mark on the instrument.
-
Page 14: Blanking
Important: pH and Alkalinity tests are not suitable for dilution. A dilution tube is available from Palintest to simplify this. Example for a x2 dilution: Fill with sample to x2 line and top up to 100 mL with deionised water. -
Page 15: Table Of Tests
Table of Tests Depending upon model, any of the following tests may be present in the menu. Test Menu Range Parameter Abbreviation Chlorine ● ● ● (Free and 0 - 5 mg/L Total) Chlorine ● ● ● (Free and 0 - 10 mg/L Total) pH (Phenol ●... -
Page 16: Test Instructions
Test Instructions Free and Total Chlorine - Cl 5 and Cl Colourless to Pink Colour Change: 0 – 5 mg/L use DPD 1 and DPD 3 Tablet Two Ranges: 0 – 10 mg/L use DPD XF and DPD XT Tablet Rinse tube with sample leaving a few drops. -
Page 17: Chlorine
Fill with further sample to the 10 mL line. Stir. Cap the tube. Take the Photometer Reading. mg/L Result = Free Chlorine Pooltest... - Page 18 Keep tube and contents to measure Total Chlorine. If no shock treatment has been used, continue to step 12. Add one Oxystop Tablet. Crush and Stir. Replace cap and wait. 1 minute...
- Page 19 Add one DPD 3 or DPD XT Tablet. Crush and stir. Replace cap and wait. 2 minutes Take the Photometer Reading. mg/L Result = Total Chlorine Pooltest NB: Combined Chlorine = Total Chlorine – Free Chlorine...
- Page 20 pH (Phenol Red) Yellow to Red Colour Change: Range: 6.5 – 8.4 Fill tube with sample precisely to 10 mL. Add one Phenol Red tablet. Crush and stir.
- Page 21 Replace cap. Take the Photometer reading. Pooltest...
-
Page 22: Cyanuric Acid
Cyanuric Acid - CYA Clear to Cloudy Colour Change: Range: 0 – 200 mg/L CYA Fill tube with sample to the 10 mL line. Add one Cyanuric Acid tablet. DO NOT CRUSH. Wait 2 minutes (to let tablet disintegrate). - Page 23 Crush any remaining tablet and mix. Replace cap. mg/L Take the Photometer reading. Pooltest...
-
Page 24: Total Alkalinity
Total Alkalinity - T-Alk Yellow to Green to Blue Colour Change: 0 – 500 mg/L CaCO Range: Fill tube with sample to the 10 mL line. Add one Alkaphot™ tablet. Crush thoroughly and mix. Ensure all particles have completely dissolved. - Page 25 Replace cap and wait. 1 minute Mix again (if the colour is not uniform). mg/L CaCO Take the Photometer reading. Pooltest...
-
Page 26: Calcium Hardness
Calcium Hardness - Calc & Calc NaCl Violet to Orange Colour Change: Range: 0 – 500 mg/L CaCO Fill tube with sample to the 10 mL line. Add one Calcicol No 1 tablet, crush and mix. Add one Calcicol No 2 tablet, crush and mix. - Page 27 Replace cap. Wait. 2 minutes mg/L CaCO Take the Photometer reading. Pooltest...
-
Page 28: Bromine
Bromine - Br Colour Change: Colourless to Pink 0 – 10.0 mg/L Br Range: Rinse tube with sample leaving a few drops. Add one DPD 1 Tablet. Crush tablet to form a paste. - Page 29 Fill with further sample to the 10 mL line. Stir. Cap the tube. Take the Photometer Reading. mg/L Result = mg/L Total Bromine Pooltest...
-
Page 30: Water Balance
Water Balance The results from a Pooltest 6 can used to determine the Palintest Water Balance. To calculate this on other models, Tablet Count tests for Alkalinity and/or Calcium Hardness will be needed and are available from Palintest. Procedure 1. Carry out tests for Calcium Hardness and Alkalinity. -
Page 31: Interpreting The Result
Interpreting the Result Water Balance Index Recommendations Condition Highly Corrosive Below 9.6 Increase pH to 7.5 - 7.8. Increase Calcium Hardness to at least 50 mg/l. Increase Total Alkalinity to 100 Corrosive 9.6 - 10.5 mg/l or higher as necessary. Retest Water Balance. -
Page 32: Technical Specifications
Technical Specification Instrument Dual wavelength, direct-reading colorimeter Optics Palintest dual LED light source optical system with narrow band wavelength filters and photodetectors Wavelengths Automatic wavelength selection of 530 nm or 575 nm Wavelength Tolerance ± 2 nm Filter Bandwidth 10 nm... - Page 34 www.palintest.com...
Need help?
Do you have a question about the Pooltest 4 and is the answer not in the manual?
Questions and answers