Table of Contents
Advertisement
Quick Links
Advertisement
Table of Contents

Subscribe to Our Youtube Channel
Related Manuals for palintest Micro 600


Summary of Contents for palintest Micro 600
- Page 1 Micro 600 pH Meter ZI INST 1200...
- Page 2 This manual is written to cover as many anticipated applications of the Micro 600 pH meter as possible. If there are doubts in the use of this meter, please contact us. Our contact details are on the last page of this manual.
-
Page 3: Table Of Contents
Contents Chapter Page Introduction Getting Started Description of Keypad Functions Description of LCD Annunciators Inserting & removing the rubber armour/stand Inserting New Batteries Connecting Electrodes and Temperature Sensor Powering the Meter On Calibration pH Calibration pH Calibration Procedure Resetting Used Calibrated Values Millivolt (mV) Calibration Temperature Calibration With Temperature Probe (Automatic Temperature Compensation) -
Page 4: Introduction
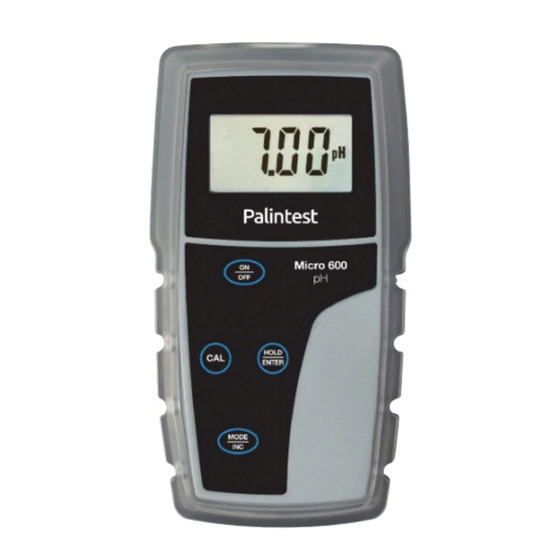
Introduction 1.0 Introduction Thank you for selecting our Micro 600 pH portable meter. This microprocessor- based handheld instrument is both economical and easy to use. The Micro 600 pH measures pH, mV (ORP) and temperature (ºC). Each meter includes 4 x alkaline “AAA” batteries, a rubber armour/stand, pH7 buffer, pH4 buffer, Electrode Storage Solution, Deionised water, pH Electrode, Temperature Probe and instruction manual. -
Page 5: Getting Started
Getting Started 2.1 Description of Keypad Functions The Micro 600 pH has four keys, on its splash-proof keypad as shown here: ON/OFF Powers the meter on and off. Upon power on, the meter automatically begins in the measurement mode that was last used. -
Page 6: Inserting & Removing The Rubber Armour/Stand
Getting Started 2.3 Inserting & removing the rubber armour/stand Before removing the meter from the rubber armour, disconnect any electrodes. Push out from the bottom edges of meter until it is completely out of boot. To insert meter into the armour, slide in from the top of meter before pushing the bottom edges of meter into position. -
Page 7: Connecting Electrodes And Temperature Sensor
Getting Started 2.5 Connecting Electrodes and Temperature Sensor Align the BNC connector slots with the posts 2.5mm Phono plug for temperature measurement of meter’s socket and rotate connector clockwise until it locks - do not force. To connector of remove, rotate the connector in counter- pH, ORP, or clockwise direction until it unlocks, and slide Ion Selective... -
Page 8: Calibration
Calibration 3.1 pH Calibration The Micro 600 pH meter is capable of up to three-point calibration with standard pH buffer values at pH 4.01, 7.00 and 10.01 to ensure accuracy across the entire range of the meter. It also allows offset adjustment in mV and Temperature modes. -
Page 9: Resetting Used Calibrated Values
Calibration 3 Pour pH buffer calibration standard solution into a clean, dry container and dip your pH electrode and temperature probe in the solution. Swirl gently or stir and wait for reading to stabilise (approx. 30 seconds depending on your electrode condition). 4 When the pH reading has stabilised, the pH annunciator will stop blinking. -
Page 10: Millivolt (Mv) Calibration
Calibration 1 Power off the meter. Press and hold CAL then press ON/OFF. If successful, “rST” will blink on the display. Release both keys. 2 Press HOLD/ENTER to enter the reset menu. 3 Press MODE to toggle between No Reset (nO), Calibration Reset (CAL), or Factory Reset (FCt). -
Page 11: Temperature Calibration
Calibration 2 Press CAL to begin mV calibration mode. “CA” (calibrate) will display briefly. The un-adjusted mV value will blink. 3 Use MODE/INC to adjust the reading to the desired value. The maximum adjustment is ± 50 mV. 4 When the reading has stabilised, the mV annunciator will stop blinking. Press HOLD/ENTER to confirm the value. -
Page 12: Without Temperature Probe (Manual Temperature Compensation)
Calibration 2 Press CAL to begin temperature calibration mode. “CA” (calibrate) will display briefly. The un-adjusted °C value will blink. 3 Compare the measured value of the temperature probe with the reference thermometer. Use MODE/INC to adjust the reading to the desired value. The maximum adjustment is ±... - Page 13 Calibration 1 Turn on the meter and select °C mode by pressing MODE if necessary. Disconnect the temperature probe. 2 Press CAL to begin temperature calibration mode. “CA” (calibrate) will display briefly. The factory default temperature 25.0°C value will blink. 3 Use MODE/INC to adjust the reading to the desired value.
-
Page 14: Measurement
Measurement Taking Measurements 1 Before measurement, rinse the pH/ORP electrode and temperature probe with clean water. 2 Power on the meter. Press MODE key to select your desired mode of operation (pH, mV, Ion, or Temperature). 3 Dip both probes gently into an aqueous test sample, swirl or stir gently and allow the reading to stabilise. -
Page 15: Electrode Care And Maintenance
For best results, always keep the pH electrode bulb wet. Store the pH bulb with electrode storage solution. Electrode storage solution is available as part of the Palintest Electrode Care Pack (see Accessories Section). If electrode storage solution is not available, use tap water or buffer solution. -
Page 16: Troubleshooting
Troubleshooting Troubleshooting Problem Cause Solution No display Batteries absent or installed incorrectly Insert batteries using correct polarity “LO” Low battery Replace batteries “---” on Ion 6+ requires calibration Perform either 2 or 3 point ion calibration display a) Hydrate/soak pH electrode a) Dry electrode Unstable b) Clean electrode... -
Page 17: Specifications
Specifications Specifications Calibration Points 2 or 3 consecutive points; (0.1, 1.0, 10.0, 100.0, 1000) pH Range 0.00 to 14.00 pH Resolution 0.01 pH Accuracy ± 0.01 pH Slope Range 80 to 120% Buffer 4.01, 7.00, 10.01 Temperature Range 0.0 to 100.0ºC Resolution 0.1ºC Accuracy... -
Page 18: Replacements And Accessories
Electrode Care Pack (incl Electrode Storage Solution) PT 105/4 Replacement pH Electrode PT 110/1B Replacement Temperature Probe PT 140/4 Replacement ORP Electrode PT 110/3B ORP Calibration Solution 255mV (500ml) PT 1252 Deionised Water Wash Solution, 500ml PT 1250 Micro 600 pH Complete Kit PT 1200... -
Page 19: Warranty And Certification
Warranty and Certification Warranty The Palintest Micro 600 pH Meter is guaranteed for a period of three years from date of purchase - its associated pH electrode is guaranteed for a period of six months from date of purchase. This guarantee excludes accidental damage, or damage caused by unauthorised repair or misuse. - Page 20 For more information on Palintest products, contact your nearest Palintest office or visit our website Palintest Ltd Palintest China Palintest House, Kingsway, Team Valley, Room 1711, Fanli Mansion, Gateshead, NE11 0NS 22 Chaowai Street, Chaoyang District, Tel: +44 (0)191 491 0808...
Need help?
Do you have a question about the Micro 600 and is the answer not in the manual?
Questions and answers