
Related Manuals for Teledyne XTRX500


Summary of Contents for Teledyne XTRX500
- Page 1 XTRX500 AMPLE REPARATION XTRACTOR UIDE 46-208-208-Rev. B—8 July 2020...
- Page 2 About Teledyne Hanson Teledyne Hanson, a division of Teledyne Instruments, Inc., is a global technology company specializing analytical test instruments for the pharmaceutical industry. Founded by the innovator modern dissolution test technology, Teledyne Hanson helps ensure the world’s pharmaceuticals are...
- Page 3 Sales and Support Congratulations on your purchase of the Teledyne Hanson XTRX500 Sample Preparation Extractor. While we are certain you will enjoy this new product, we also understand from time to time you may have a question or technical issue requiring our assistance.
- Page 4 Description of Change 28 Feb 2019 Original issue. 8 July 2020 Changed name to XTRX500 Sample Preparation Extractor. To confirm that you have received the latest version of this user guide, contact Teledyne Hanson Technical Support. 46-208-208 Rev. B—XTRX500 User Guide RH-1...
-
Page 5: Table Of Contents
Table of Contents Table of Contents Introduction ……………………………………. A-1 Regulatory and Safety ……………………….. B-1 Installation ……………………………………… C-1 Operation ………………………………………. D-1 Sample Preparation …………………….…. Maintenance ………………………………….. F-1 Troubleshooting ………………………..…….. G-1 Specifications ………………………..…….….. H-1 General Warranty ………………………….….. I-1 46-208-208 Rev. B—XTRX500 User Guide TOC-1... -
Page 6: Introduction
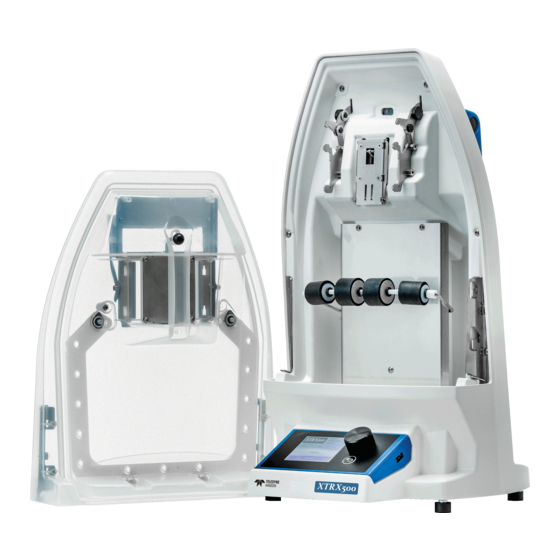
Teledyne Hanson Authorized Engineers, where the engineer is qualified to complete XTRX500 installation and service. Cassette: The removable front part of the XTRX500 into which the extraction pouches are loaded. Consumable pack: A consumable pack consists of either 100 x 100 mL extraction pouches or 100 x 500 mL extraction pouches. - Page 7 A. Introduction Sample Preparation Extractor Overview Sample preparation extractor (XTRX500) system description. 46-208-208 Rev. B—XTRX500 User Guide...
- Page 8 A. Introduction Fluid lifter tool, back Fluid lifter tool, front 100 mL extractor pouch 500 mL extractor pouch 46-208-208 Rev. B—XTRX500 User Guide...
- Page 9 An apparatus and consumable for rapid extraction of solid and semi-solid dosage forms. NOTE: The XTRX500 is designed to be a tool that will allow the analyst to extract and dissolve solid and semi-solid dosage forms. The actual extraction success is highly dependent on the analyst’s ability to develop a method within the constraints of...
- Page 10 In addition, the drain container should be of sufficient volume to contain any fluid that may need to be collected and be used at all times when the XTRX500 is being operated. In the event of a solvent spill the user should clear this up in line with the Standard Operating Procedure following Good Laboratory Practice (GLP).
- Page 11 A. Introduction Drain tube Hose attached Always unplug the unit from the mains power before any maintenance, cleaning or servicing that requires operations with the cassette removed, or if a leak occurs. 46-208-208 Rev. B—XTRX500 User Guide...
- Page 12 A. Introduction Recommendations for Using This Manual Teledyne Hanson recommends the following steps for making best use of this user guide: Review the introduction section for an overview of the instrument. Carefully review and follow all safety instructions. Unpack, inspect, and install the instrument according to instructions in the installation section.
-
Page 13: Regulatory And Safety
B. Regulatory and Safety Regulatory Compliance Teledyne Hanson hereby certifies that this product, including hardware and firmware, was designed, evaluated, validated, inspected, tested approved specified quality requirements of THR in conformance with current USP, EP, JP, and other international standards (India & Korea). - Page 14 B. Regulatory and Safety The following safety symbols are used throughout this manual. Symbol Definition General warning of potential damage or danger from a variety of sources. Caution, risk of electrical shock (high voltage) 46-208-208 Rev. B—XTRX500 User Guide...
- Page 15 The XTRX500 is thus intended to be a tool for use by laboratory scientists to release their time from the existing process, but not to replace their involvement or their responsibility. As such,...
- Page 16 It is recommended that the XTRX500 external power supply (power brick) is placed away from any area where organic vapor can collect in levels that could cause a potential explosion.
- Page 17 The instrument must be switched off at the mains before unplugging the power cord. The XTRX500 should be unplugged from the mains prior to cleaning or maintenance of the instrument. Regular electrical testing should be carried out on the instrument.
- Page 18 Teledyne Hanson approved consumables. Extraction pouches are single-use consumables and must not be used more than once. It is considered to be best practice to store the XTRX500 with the cassette in place. The case work should be inspected periodically to ensure that no damage has been sustained. In the event of any damage contact a Teledyne Hanson representative before continuing to use the XTRX500.
- Page 19 B. Regulatory and Safety Labelling The following warning labels are used on the XTRX500. Position Label Symbols On the main body of the Caution moving XTRX500, parts. below the barcode reader Keep hands clear. 46-208-208 Rev. B—XTRX500 User Guide...
-
Page 20: Installation
XTRX500 Installation Review all safety instructions before proceeding with installation of the XTRX500. The XTRX500 must be installed and properly set up before the operating instructions can be used. Position of the XTRX500 instrument The XTRX500 must be placed such that the operator has ready access to the power inlet in case they need to disconnect the instrument. - Page 21 A drain tube is provided in the unlikely event of pouch failure. This is connected to the back of the XTRX500 and the receiving container should be of sufficient volume and not too full to accommodate any solvent from a burst pouch.
-
Page 22: Operation
XTRX500 Using the XTRX500 NOTE: The operating instructions are intended for infrequent users of the XTRX500 or new users that are experienced in using automated systems to perform existing analytical methods. NOTE: The XTRX500 must be installed and set up properly... - Page 23 Failure to ensure this will result in the inability to mount the cassette on the XTRX500. Jaws of extraction pouch. Ensure they are firmly clipped together.
- Page 24 D. Operation Cassette removed from the XTRX500 showing extraction pouch mounting bracket in the up and down position. Extraction pouch mounting bracket in the up position. Extraction pouch mounting bracket in the down position 46-208-208 Rev. B—XTRX500 User Guide...
- Page 25 D. Operation Cassette removed from the XTRX500 showing detail of the extraction pouch mounting plate and the open bracket for loading samples into the extraction pouch. Extraction pouch mounting plate Open bracket for loading samples into the extraction pouch 46-208-208 Rev. B—XTRX500 User Guide...
- Page 26 D. Operation Step 1 – Load the extraction pouch into the XTRX500, as shown in the pictures below. First, remove the cassette from the XTRX500 as shown. The action required to remove this is to pull the cassette up and away from the XTRX500.
- Page 27 D. Operation With the cassette removed from the XTRX500 and ensure both the extraction pouch mounting bracket and sample loading bracket are open. Sample loading bracket Extraction pouch mounting plate Extraction pouch mounting bracket 46-208-208 Rev. B—XTRX500 User Guide...
- Page 28 The extraction pouch should load with a distinctive ‘click’. Lower lugs of extraction pouch Extraction pouch clicked in place mounted first on mounting plate 46-208-208 Rev. B—XTRX500 User Guide...
- Page 29 Smooth the extraction pouch into place in the cassette then raise the extraction pouch mounting bracket. Top tab of the extraction pouch Smooth the extraction pouch into slipped over the sample loading place in the cassette bracket 46-208-208 Rev. B—XTRX500 User Guide...
- Page 30 D. Operation Step 3 (continued) Smooth the extraction pouch into Raise the extraction pouch place in the cassette mounting bracket 46-208-208 Rev. B—XTRX500 User Guide...
- Page 31 D. Operation NOTE: It is essential to ensure the extraction pouch is correctly placed in the XTRX500 cassette and that the cassette is loaded correctly onto the XTRX500 as shown. Incorrect orientation may lead to malfunction and damage to the XTRX500. Note that this is the same for both types of extraction pouch.
- Page 32 Step 5 – The top of the extraction pouch is closed. It is very important that the sample stays in the top of that extraction pouch and does not go into the jaws. Correct location of sample Incorrect location of sample 46-208-208 Rev. B—XTRX500 User Guide D-11...
- Page 33 D. Operation Step 6 – The cassette is then loaded onto the XTRX500, when located correctly the barcode reader will illuminate and read the barcode on the extraction pouch. NOTE: Do not force the cassette into place, excessive force can damage the instrument and/or extraction pouch and is not necessary if the cassette is aligned correctly with the XTRX500.
- Page 34 D. Operation Step 7 – Once the extraction is complete the cassette is removed from the XTRX500 as shown. The action required to remove this is to pull the cassette up and away from the XTRX500. The solvent lifter tool (a.k.a. pouch compression tool) is fitted to the inside of the cassette with the soft face against the extraction pouch.
- Page 35 (provided). Note that not more than 2000 mL should be put on the pouch stand at one time using the small ring only. 46-208-208 Rev. B—XTRX500 User Guide D-14...
- Page 36 Step 9 – Once the solution is at the correct level at the top of the extraction pouch an aliquot is removed using a syringe. Solution at correct level at top Remove an aliquot of solution with of extraction pouch a syringe 46-208-208 Rev. B—XTRX500 User Guide D-15...
- Page 37 Step 10 – The extraction pouch can be removed from the cassette. This is done by raising the extraction pouch release lever, unhooking the extraction pouch from the sample loading bracket and lowering the extraction pouch mounting bracket. Extraction pouch release lever 46-208-208 Rev. B—XTRX500 User Guide D-16...
- Page 38 NOTE: The solution can be kept for further analysis or disposed of in a safe manner as described by the user’s SOP. The extraction pouch can be disposed of via incineration. 46-208-208 Rev. B—XTRX500 User Guide D-17...
-
Page 39: Sample Preparation
E. Sample Preparation Running Immediate Mode and creating and running new methods Rotary encoder and select button Back button 46-208-208 Rev. B—XTRX500 User Guide... - Page 40 The barcode reader automatically detects which size extraction pouch is loaded. Step 2 Crusher: The XTRX500 can be used with the crusher ON or OFF. These options are selected with the rotary encoder switch/dial. 46-208-208 Rev. B—XTRX500 User Guide...
- Page 41 500 mL Extraction Pouch is 100 mL. NOTE 2: If too much solvent is used for the 100 mL extraction pouch then an error screen is shown when Run is selected. 46-208-208 Rev. B—XTRX500 User Guide...
- Page 42 0 s. The time is changed and set by using the rotary encoder dial/switch. Step 6 Run: Selecting this will run the XTRX500 with the conditions set. The Running screen shows the crusher ON/OFF, mixer ON/OFF, Run time and time remaining.
- Page 43 Resume or Cancel. When the run is either stopped or comes to completion the XTRX500 mixer bar returns to the home position. A run can be stopped and resumed as many times as required up to the maximum run time allowed.
-
Page 44: Step 7
If Finished is selected, then the XTRX500 returns to the home/start up screen. If New Event is selected the XTRX500 returns to the Immediate Mode screen. The Immediate Mode can be re-run up to a maximum of 30 times, this can be useful for dissolution method development. - Page 45 E. Sample Preparation Methods Menu Creating and running methods. Step 1 From XTRX500 home/start up screen select “Methods”. Step 2 From Methods Menu screen select +Add method. 46-208-208 Rev. B—XTRX500 User Guide...
- Page 46 E. Sample Preparation Step 3 From the Edit Method menu, the XTRX500 automatically names a new method as NEW METHOD X (X being the next number in numerical order compared to existing methods). Select NEW METHOD X. Step 4 From Edit Name screen use the alphanumeric display to select a method name.
- Page 47 NOTE 2: If too much solvent is used for the 100 mL extraction pouch then another error screen is shown when Run is selected. The maximum amount of solvent that can be used in this extraction pouch is 100 mL. 46-208-208 Rev. B—XTRX500 User Guide...
-
Page 48: Time: The Total Mixer/Crusher Time Is Selected From 5 S To 1 H 0
E. Sample Preparation It is possible for the XTRX500 to perform a dry crush on the sample. To do this from the Methods Menu Select: +Add Method Edit Method Initial Solvent 0 mL Crusher On ... - Page 49 Step 6 - 10. A Pause event allows the addition of another or further solvent as required. The XTRX500 programming will not allow the maximum amount of solvent added to exceed the capacity of the extraction pouch used.
- Page 50 A maximum of 30 events can be used in one method. Once the required number of events have been added to a method, depressing the back button twice takes the XTRX500 to the Edit Method menu. The new method can be saved in the Edit Method menu.
- Page 51 E. Sample Preparation View: Allows the user to view the selected method. The XTRX500 displays the method name, extraction pouch size, Total Solvent and Total time along with details of the events used. Run: Allows the user to run the method selected. The Running screen shows the crusher and mixer ON/OFF, the run time, and the time remaining.
- Page 52 E. Sample Preparation If an extraction pouch that has already been used in a run is reinserted into the XTRX500 for another, different, run an error message is displayed. If this error message is shown the extraction pouch cannot be used for the run selected and a new extraction pouch must be used.
- Page 53 In the Method Action menu selecting Delete allows the user to delete the selected method. Once the method is deleted the XTRX500 returns to the Methods Menu. If Cancel is selected from the Delete Method menu the XTRX500 returns to the Method Action screen.
- Page 54 Instructions for updating the firmware will be supplied by Hanson at the time of the update. If the memory stick is left plugged into the XTRX500 for 5 minutes with no action taken, then the instrument reverts back to the home screen.
- Page 55 Stored methods can be locked so that they are not copied or inadvertently deleted or edited. From the main/home screen select Options. From the Options Menu select Methods. In the Method Options menu select Lock Methods. 46-208-208 Rev. B—XTRX500 User Guide E-17...
- Page 56 The main switch/dial is then used to input a six-digit code for the password. When OK is selected the Confirm Password screen is displayed. When the password is confirmed, select OK. This gives the Password set successfully screen. 46-208-208 Rev. B—XTRX500 User Guide E-18...
- Page 57 If Cancel is selected in the Set Password menu then the Password not changed screen is displayed. To remove the password, in the Set Password menu enter 000000 as the password to disable the password function. 46-208-208 Rev. B—XTRX500 User Guide E-19...
- Page 58 E. Sample Preparation The Method Edit Password Disabled screen is then displayed. Once the password is set this needs to be re-entered when methods are copied, edited or deleted. 46-208-208 Rev. B—XTRX500 User Guide E-20...
- Page 59 E. Sample Preparation About Selecting About in the options menu displays the About XTRX500 screen. 46-208-208 Rev. B—XTRX500 User Guide E-21...
- Page 60 E. Sample Preparation History Selecting History in the options menu displays the History screen. Unlock Selecting Unlock in the options menu enables manual unlocking of the cassette in the event of a jam. 46-208-208 Rev. B—XTRX500 User Guide E-22...
-
Page 61: Maintenance
F. Maintenance Maintenance The XTRX500 should only be used with Hanson supplied extraction pouches. The sample preparation extractor has been designed to be compatible with standard HPLC polar solvent ranges and weak acids and base solutions/buffers. For specific advice contact a Teledyne Hanson representative. -
Page 62: Troubleshooting
Troubleshooting The sample preparation extractor may represent one of several components in the laboratory process of the analysis. The following guide is limited to the XTRX500 only. Below are a set of commonly encountered error messages, their possible cause and recommended action. - Page 63 46-208-208 Rev. B—XTRX500 User Guide...
-
Page 64: Specifications
Power supply output: 24 VDC, 6.25 A, 150 W max User Modes Walk up quick run mode: No method required Method Mode: Select existing method Edit Mode: Create, edit, remove methods Display Color (RGB) 320 x 240 46-208-208 Rev. B—XTRX500 User Guide... - Page 65 46-201-222 XTRX500 Sample Preparation Extractor with 1000x 500 mL Pouches 46-201-223 XTRX500 Sample Preparation Extractor with 500x 500 mL and 500x 100 mL Pouches Each extractor includes a startup kit containing 1 pouch stand kit, 1 manual sampling cannula, 24 single-use syringes (20 mL), and 1 cassette. Purchase of one or more spare cassettes is recommended for higher throughput.
-
Page 66: General Warranty
Teledyne Hanson will give reasonable assistance to buyer in obtaining from the respective manufacturer whatever adjustment is available under the manufacturer’s own warranty. Teledyne Hanson shall be released from any and all obligations under any warranty, either expressed or implied, if the product covered is repaired or modified by other than its own personnel, or without written authorization from Teledyne Hanson. - Page 67 Teledyne Hanson 9810 Variel Avenue Chatsworth, CA 91311, USA Phone: +1 818.882.7266 www.teledynehanson.com Copyright © 2020 Teledyne Hanson, a division of Teledyne Instruments, Inc. Document 46-208-208 Rev. B...
Need help?
Do you have a question about the XTRX500 and is the answer not in the manual?
Questions and answers