
Related Manuals for Spectra Logic Spectra 2K Library


Summary of Contents for Spectra Logic Spectra 2K Library
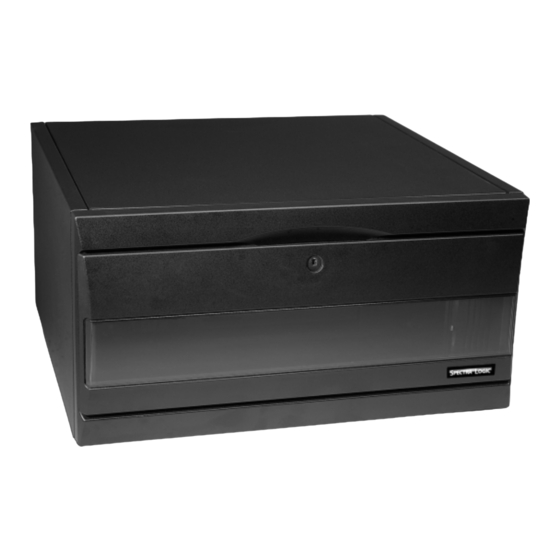
- Page 1 P.N. 90870091 Revision D Copyright © 2003 Spectra Logic Corporation. All Rights Reserved.
-
Page 2: Notices
In no event shall Spectra Logic be liable for any loss of profits, loss of business, loss of use of data, interruption of business, or for indirect, special, incidental, or consequential damages of any kind, even if Spectra Logic has been advised of the possibility of such damages arising from any defect or error. - Page 3 Š All title and copyrights in and to Spectra Logic upgrade support firmware (the “Support Firmware”) are owned by Spectra Logic or its suppliers. The Support Firmware is copyrighted and is protected by copyright and international treaty provisions. Support Firmware may be a trade secret. In addition, Support Firmware may be protected by one or more Spectra Logic Patents.
-
Page 4: Warnings And Cautions
Notices Warnings and Cautions AC Power Warning: Risk of electrical shock. To remove AC power from the library, unplug the power cord from the power inlet. There are no user-serviceable parts within the library. High Voltage Warning: The library contains high-voltage components that can cause injury or death. -
Page 5: Table Of Contents
Contacting Spectra Logic ........ - Page 6 Contents Chapter 4. Overview About the Library ..........27 Initial Configuration .
- Page 7 Spectra Logic Repair Policies ........
-
Page 8: Chapter 1. Introduction
15 or 30 cartridges and with one or two tape drives. About This Guide This guide describes the installation and operation of the Spectra 2K library, including troubleshooting information. The information in this manual specifically covers Spectra 2K libraries with Gigabit Ethernet or Fibre Channel interfaces using iSCSI, NDMP or Serverless Backup. -
Page 9: Contacting Spectra Logic
Fax: (303) 939-8844 Boulder CO 80301 Web site: http://www.spectralogic.com Support: Phone: (800) 227-4637 or (303) 449-0160 Spectra Logic Europe Limited Phone: +44 (0) 870 112 2150 Hampden House Fax: +44 (0) 870 112 2175 Monument Business Park Web site: http://www.spectralogic.com... -
Page 10: Chapter 2. Installing The Library
2 Installing the Library •Unpacking the Library •Powering On the Library •Inserting Media •Installing the Data Cartridge Magazines Unpacking the Library Save the original packing material. Failure to transport the library in its original packaging risks voiding the library’s warranty. To unpack the library, first note how the library is packed into its box (Figure 2-1), then complete the steps that follow. - Page 11 • One small screwdriver for configuring settings on the back of the library • The Spectra 2K Library User Guide for iSCSI, NDMP, and Serverless Backup (this guide) • The Spectra 2K Library Release Notes or iSCSI, NDMP, and Serverless Backup •...
- Page 12 Chapter 2. Installing the Library 6. Remove the plastic piece and the foam piece that protect the robotic picker (Figure 2-1). Caution: Take care when removing these pieces not to damage the door sensor cable (the white cable that runs along the right side of the library).
-
Page 13: Powering On The Library
Chapter 2. Installing the Library Powering On the Library Caution: Make sure all internal packaging is removed. Power on the library and take note of the library’s initialization routine: 1. The robotic picker moves along the length of the library, checking the DCMs and tape drive(s) for data cartridges. - Page 14 Chapter 2. Installing the Library 3. Look inside the DCM for the numbers at the back (1-15), and make sure that you position the DCM with the 1 at the top. Also, match the holes on the side of the DCM to the corresponding pegs inside the library (Figure 2-2).
- Page 15 Chapter 2. Installing the Library To Install the Second DCM: 1. Remove the DCM from its protective packaging. 2. Connect power to the library and turn it on. You will see the picker move and then stop to rest at the bottom of the library. You will then see the rotation of the DCM, so that the first DCM installed now faces the back of the library.
-
Page 16: Chapter 3. Using The Spectra 2K Library
3 Using the Spectra 2K Library •Getting to Know Your Library •Attaching Bar Code Labels •Using AIT Data Cartridges •Getting Information from the Picker’s LED •Getting Information from the Drive LEDs •Using the 30-Cartridge Library... -
Page 17: Getting To Know Your Library
Chapter 3. Using the Spectra 2K Library Getting to Know Your Library Front Panel Components The front panel components of the Spectra 2K library include: •The door, which provides access to the data cartridge magazine, tape drives and robotic tape picker. - Page 18 Chapter 3. Using the Spectra 2K Library Internal Components The internal components accessible through the front door include: •Data cartridge magazine (DCM) •AIT tape drive(s) •Robotic tape picker Note: To prevent the door from accidentally opening and to make sure that the library operates without interruption, shut the door and keep it locked.
- Page 19 Chapter 3. Using the Spectra 2K Library Rear Panel Components The rear panel components of the library are used to install, configure, and repair the library; they include: •Power entry module (includes fuse, power switch, and power cable connector) •Serial diagnostic port •Library internal SCSI ID switch (Library)
-
Page 20: About Ait Bar Code Labels
Spectra 2K library accepts only bar code labels with a checksum character. Attaching Bar Code Labels Bar code labels allow the Spectra 2K library to track data cartridges within the library. To attach a bar code label to an AIT data cartridge: 1. -
Page 21: Using Ait Data Cartridges
Chapter 3. Using the Spectra 2K Library Using AIT Data Cartridges AIT is the only tape to incorporate the unique Memory-In-Cassette (MIC) feature. The MIC feature reduces file access time and expedites the operation of the drive. Top of the DCM... - Page 22 Chapter 3. Using the Spectra 2K Library Write-Protecting and Recording The write-protect tab on the AIT cartridge prevents accidental data erasure. To use the write-protect tab on the AIT data cartridge: •Move the tab on the edge of the data cartridge to the SAFE position. With the tab in this position, the tape cannot be written to and data on the tape is safe from accidental deletion.
-
Page 23: Getting Information From The Picker's Led
•Follow the tape storage suggestions described in Caring for Data Cartridges on page 67. •Before using cartridges in the Spectra 2K library, store the cartridges for 24 hours in the same room as the library; this prevents problems (such as tape seizure) caused by cold tapes. -
Page 24: Getting Information From The Drive Leds
Chapter 3. Using the Spectra 2K Library Getting Information from the Drive LEDs The AIT tape drive has three LEDs, located on the front of the drive (Figure 3-6): •Busy: indicates drive read and write activity •Tape: indicates tape load and unload activity and error rate information •Status: indicates the status of the tape drive, including whether the tape inside is... -
Page 25: Using The 30-Cartridge Library
Chapter 3. Using the Spectra 2K Library The following table summarizes the information carried by the blinking methods of the different drive LEDs: LED Type Type of Blink Busy Tape Status Not Busy Unloaded Device Active Loaded Write protected Fast Blink... - Page 26 Chapter 3. Using the Spectra 2K Library 3. Close the door of the library and the process repeats itself. Figure 3-7 The 30-cartridge magazine carousel.
-
Page 27: Chapter 4. Overview
The Spectra Logic Library architecture uses a networked storage operating system that uses an innovative approach to sharing tape backup resources among hosts. The architecture enables the Spectra 2K library to be connected to a storage network using one of several protocols, including Internet SCSI (iSCSI), Network Data Management Protocol (NDMP) over Ethernet, and Serverless Backup over Fibre Channel. - Page 28 Chapter 4. Overview devices. The Spectra 2K library supports Version 2 and Version 3 of NDMP (see www.ndmp.org for more information about NDMP protocol versions). Serverless Backup Serverless Backup is sometimes referred to as Third Party Copy or Extended Copy (X-copy).
-
Page 29: Initial Configuration
Chapter 4. Overview use by a backup application utilizing the SCSI Reserve and Release commands. When a device has been locked, no other host can gain access to the drive until it is unlocked. In any case, if multiple hosts will be accessing the library, some access management scheme must be implemented to prevent stored data written by one host from being overwritten by another. -
Page 30: Chapter 5. Using The Http Interface
5 Using the HTTP Interface •Connecting to the HTTP Interface •Status •Configuration •Maintenance: •Security Connecting to the HTTP Interface Note: The Ethernet port is assigned a default hostname of SL<serial number>-0, where <serial number> is the serial number of the library (located on the rear panel of the library). This hostname may be changed to avoid duplicate hostnames. - Page 31 Chapter 5. Using the HTTP Interface 3. The following page will open: Figure 5-1 The Login screen. 4. Enter the default User of SU and select Enter; do not enter any password. If this is the first time using your library, the default super user setting is username SU with no password.
-
Page 32: Status
Chapter 5. Using the HTTP Interface Status The General Status screen will be the first screen to display after you have logged in. Figure 5-2 The General Status Screen. Use the tabs on the left to navigate sections; use the large icons to navigate screens within that section. - Page 33 Chapter 5. Using the HTTP Interface Fibre Port Identifies the World Wide Number (WWN) and the link state for libraries with a Fibre Channel interface. Click on Fibre Port to configure. For more information on configuring the fibre interface, go to Fibre Channel on page 36. Ethernet Port Identifies the Hostname, the IP address and the port speed for libraries with an Ethernet interface.
-
Page 34: Configuration
Chapter 5. Using the HTTP Interface Configuration Options The Options screen offers choices for enabling and configuring the library’s available options. Figure 5-3 The Options screen. Options Enablement This section identifies the hardware ID that you will need to be able to receive an option key. - Page 35 Chapter 5. Using the HTTP Interface Caution: Do not enter or save invalid activation keys. This could disable existing options. Options Configuration This section lists the available licensed options and options not yet licensed. You can select which licensed option you would like enabled here. Once you have made your selection, select Change.
- Page 36 Chapter 5. Using the HTTP Interface Fibre Channel Figure 5-4 Fibre Port Setup screen. The Fibre Port Setup screen allows you to configure the connection type for your Fibre Channel interface. The WWN is identified here. Once you make any changes to the configuration, select Change.
- Page 37 Chapter 5. Using the HTTP Interface Ethernet Figure 5-5 Ethernet Port Setup screen. The Ethernet Port Setup screen allows you to configure the Hostname, IP Address, IP Subnet Mask, and Gateway for your Ethernet interface. You can also enable DHCP and WINS in this screen.
- Page 38 Chapter 5. Using the HTTP Interface Change: Select Change to save parameters. Protocols The Protocols screen will display the protocol page for whichever type of licensed protocol you have enabled (iSCSI, NDMP, or Serverless Backup). iSCSI Figure 5-6 The Protocols screen for iSCSI. The following parameters should be configured to match the capabilities of the iSCSI initiators that are connecting to the tape and library devices.
- Page 39 Chapter 5. Using the HTTP Interface Header and Data Digest Select None if you do not wish to have a header or data digest. Cyclic Redundancy Check 32 (CRC-32) is a technique for detecting data transmission errors. Note: Enabling CRC will have an impact on performance. Protocol User Name: Set a User Name for iSCSI (see CHAP).
- Page 40 Chapter 5. Using the HTTP Interface NDMP Figure 5-7 The NDMP Access Control screen. Configure the NDMP port, and add a username and password. You can also select to allow plain text passwords. Select Change to save the information. The NDMP Device Names are also listed.
- Page 41 Chapter 5. Using the HTTP Interface Note: The library will not be in SCSI-3 mode entirely; only the read element status return will be in SCSI-3 mode. When the box is left unchecked, the library will return device identifiers using the SCSI-2 standard.
-
Page 42: Maintenance
Chapter 5. Using the HTTP Interface Maintenance Drive Info Controller Info Selecting any of these icons will give you detailed information about that specific device. Use these icons to assist in troubleshooting your device. To view the information, select the appropriate icon for the device type, select the specific device from the drop-down menu, and then select GO. -
Page 43: Security
Chapter 5. Using the HTTP Interface Security Users Figure 5-10 The Security Users screen. Note: If this is the first time using your library, the default super user setting is username SU with no password. Add User Select a Name, Password, and Security level, and then select Add User. Edit User Select a current user to be edited and then select Change. -
Page 44: Logout
Chapter 5. Using the HTTP Interface Note: You cannot delete the last user with super user permissions. Logout To log out, simply select the Logout link located in the upper right-hand corner of the HTTP interface. -
Page 45: Chapter 6. Using The Serial Port Interface
6 Using the Serial Port Interface •Serial Port Connection •Fibre Channel Configuration •Configuring Serverless Backup •Ethernet Configuration •iSCSI •Password Configuration •Enabling Options •Connecting the Library to the Network •Jumbo Frames •NDMP Setup Serial Port Connection 1. Connect a serial cable to the library (the diagnostic port located by the serial number tag) with a serial port terminal emulation application (like HyperTerminal) running on a host computer. - Page 46 Chapter 6. Using the Serial Port Interface 2. The serial port settings should be set as follows: Figure 6-1 Serial port settings. 3. After making sure the serial port settings are correct, select OK. 4. Select Enter; the Configuration Menu is displayed (Figure 6-2): Figure 6-2 The Configuration Menu.
- Page 47 Chapter 6. Using the Serial Port Interface [2] Fibre configuration: Select to configure Fibre Serverless Backup. [3] Ethernet configuration: Select to configure the Ethernet settings. [4] TAOS ITP: Not available. [5] TAOS NDMP: Select to configure the NDMP settings. [6] TAOS iSCSI: Select to set configure the iSCSI settings. [7] Enable Device options: Not available in library.
- Page 48 Chapter 6. Using the Serial Port Interface How to Proceed If you would like to configure your Fibre Channel ports or Serverless Backup, go to Fibre Channel Configuration on page 49. If you would like to configure your Ethernet ports, iSCSI, or NDMP, go to Ethernet Configuration on page 52.
-
Page 49: Fibre Channel Configuration
Chapter 6. Using the Serial Port Interface Fibre Channel Configuration The Fibre Configuration Menu (Figure 6-3) allows you to configure the Fibre Channel port. 1. To launch the Fibre Configuration Menu, select 2 from the Configuration Menu. Figure 6-3 The Fibre Configuration Menu. To configure the Fibre Channel port, use the following options: [1] Loop ID Type: Toggles between hard and soft loop ID. - Page 50 After configuring your library for your Fibre Channel network, you can set up Serverless Backup for your library by using the following procedure. 1. Obtain the activation key code for Serverless Backup from Spectra Logic. 2. From the main Configuration Menu, select 8 to access the Option Enablement Menu for your library (Figure 6-4).
- Page 51 Chapter 6. Using the Serial Port Interface 8. Tap y to confirm rebooting the system (Figure 6-6). Figure 6-6 Select b to reboot, then select y to confirm. After a reboot, Serverless Backup is ready for use.
-
Page 52: Ethernet Configuration
(The Ethernet port is assigned a default hostname of SL-xxxxxx. Where xxxxxx is the serial number of the Spectra 2K library—located on the rear panel of the library. This hostname may be changed to avoid duplicate hostnames.) - Page 53 Chapter 6. Using the Serial Port Interface [4] IP subnet mask: IP network mask (standard IP parameter). This field is not available while in DHCP mode. [5] IP gateway: Gateway address (standard IP parameter). This field is not available while in DHCP mode.
-
Page 54: Iscsi
Chapter 6. Using the Serial Port Interface iSCSI 1. To launch the iSCSI Configuration Menu, select 6 from the Configuration Menu (Figure 6-8). Figure 6-8 The Configuration Menu. 2. Configure iSCSI using the iSCSI Configuration Menu (Figure 6-9). Figure 6-9 The iSCSI Configuration Menu. The iSCSI Configuration Menu gives you the following options: [1] Authentication: Choose an authentication method: CHAP, SRP or None. - Page 55 Chapter 6. Using the Serial Port Interface [4] iSCSI Port: The default iSCSI port number is 3260. This is the IANA assigned port for iSCSI and should not be modified under normal conditions. [5] Enable iSNS: Choose to enable or disable iSNS. When iSNS is enabled it is necessary to specify the IP address of the iSNS server.
-
Page 56: Password Configuration
Chapter 6. Using the Serial Port Interface Password Configuration As shipped, the serial port configuration menu is not password protected. To prevent unauthorized changing of library configuration settings, you can enable a password. 1. Select 1 from the Configuration Menu. 2. -
Page 57: Enabling Options
1. To launch the Options Enablement Menu, select 8 from the main menu. 2. Contact Spectra Logic with the identifier of the device, as shown in Figure 6-11, to obtain an activation code that will enable options for this device. - Page 58 Chapter 6. Using the Serial Port Interface Caution: Do not enter or save invalid activation keys. This could disable existing options. Backup Options [2-5]: Typing in the option number will toggle the option between the enabled state and the disabled state. CoD Option [6]: Indicates storage capacity in the library.
-
Page 59: Connecting The Library To The Network
Chapter 6. Using the Serial Port Interface Connecting the Library to the Network Once Ethernet parameters have been set, you are ready to attach the library to your network. If you are using NDMP, read the rest of this chapter in sequence. Jumbo Frames The use of Jumbo Frames on the Gigabit Ethernet network can enhance performance. -
Page 60: Ndmp Setup
(Figure 6-12). Figure 6-12 The Options Enablement Menu. •If NDMP Network Backup is not licensed, obtain and enter the activation key from Spectra Logic. •If NDMP is not enabled, tap 2 to toggle enabled/disabled. Configuring NDMP 1. Select 5 from the Configuration menu to access the NDMP Configuration Menu (Figure 6-13). - Page 61 Chapter 6. Using the Serial Port Interface [1] Cleartext passwords Select 1 to either enable or disable cleartext passwords. [2] NDMP Port Select 2 to set the NDMP port. 2. Press Esc to return to the Configuration Menu. There will be an asterisk (*) next to the menu option, indicating that an unsaved change has been made.
-
Page 62: Ndmp Backup Application Notes
Chapter 6. Using the Serial Port Interface NDMP Backup Application Notes Most NDMP backup applications work in a three-way configuration. A host computer runs the backup application, one or more filers contain the data to be backed up, and a tape server contains the tape library and device resource. All three of these components must be present and must be able to communicate with each other over the network. - Page 63 Chapter 6. Using the Serial Port Interface Host Server Setup There is some minor setup that must be performed on the host server, where the NDMP backup application will be running. Since this is a three-way backup configuration, all participants must be able to communicate with each other over the network.
-
Page 64: Chapter 7. Maintenance, Troubleshooting, And Repairs
Accessories on page 73. Tape Drive Head Cleaning Recommendations Spectra Logic makes the following recommendations for tape drive cleaning: •Although AIT drives feature a built-in cleaning function to prevent and recover from head contamination, Spectra Logic does recommend cleaning the drive heads periodically, particularly in environments that have a high amount of airborne particulates and are not in a temperature and humidity controlled environment. - Page 65 Chapter 7. Maintenance, Troubleshooting, and Repairs Spectra Logic preliminarily recommends cleaning the drives with approved Sony cleaning media after every 100 hours of use. However, since customer environments do vary widely, 100 hours may be too often for some environments, and not enough for others.
-
Page 66: Maintaining The Library
Chapter 7. Maintenance, Troubleshooting, and Repairs Manual Drive Head Cleaning Operation To clean your AIT tape drives, follow these steps: Note: Use only Sony SDX-TCL cleaning cartridges. 1. Power on the library. 2. Open and close the library door. Before the picker completes its calibration routine, it pauses in front of the DCM and the LED shines green. - Page 67 •Tape cartridges must be kept in a clean, dust-free environment. Store tape cartridges in a sealed container (the individual tape case or the Spectra Logic 15-slot cartridge packs with the dust cover installed) when they are not loaded in the library. The Spectra Logic PackRack™...
- Page 68 Chapter 7. Maintenance, Troubleshooting, and Repairs Caring for the Library For a lifetime of reliable performance from the Spectra 2K library, disconnect the power to the library and perform an annual inspection of the internal components including: •Use compressed air to clean out the slots in the data cartridge magazines.
- Page 69 Chapter 7. Maintenance, Troubleshooting, and Repairs Replacing the Fuses The fuses used in the library are 1/4 x 1 1/4 (3AG) or 5x20 mm, 250-volt, 2A slow fuses. For purchasing information, see Purchasing Additional Library Accessories on page 73. To check or replace the fuses, follow these steps: 1.
-
Page 70: Updating Library Robotics Firmware
SMTP. Both procedures are listed in the sections which follow here. Updating Firmware via Code Tape Note: To complete this procedure, you must have a Spectra Logic firmware upgrade tape available from Spectra Logic Technical Support. To load the library firmware: 1. - Page 71 Chapter 7. Maintenance, Troubleshooting, and Repairs Note: You may close the library door while moving the library, if necessary. However, you must re-open the door before the upgrade. The library door must remain open during the entire upgrade procedure. 8. Locate the configuration switches on the rear of the library. 9.
-
Page 72: Troubleshooting The Library
Chapter 7. Maintenance, Troubleshooting, and Repairs Troubleshooting the Library The following procedures solve many common problems: •Troubleshooting Library Initialization •Troubleshooting the Robotic Tape Picker •Troubleshooting the Bar Code Scanner Troubleshooting Library Initialization To troubleshoot problems with library initialization: 1. Check that the power cable is securely inserted in the library and the wall outlet. 2. -
Page 73: Purchasing Additional Library Accessories
000000 to 000179, are available directly from Spectra Logic. Note: For media information, please visit our Web site at: http://www.spectralogic.com/media. To order approved Spectra Logic accessories, call (800) 833-1132 or (303) 449-6400 and ask for a sales representative. Use the correct part number when ordering: Accessory Part Number... -
Page 74: Purchasing Bar Code Labels
Bar codes for custom sequences can be purchased through distribution. The part number for AIT bar code labels is #1699-26 EDP. See the Enabled Spectra 2K Release Notes for iSCSI, NDMP, and Serverless Backup or contact Spectra Logic for a list of firms that can supply custom bar code sequences. -
Page 75: Shipping Information
Spectra Logic offers a standard three-year return-to-factory warranty on all libraries. As of January 13, 2003, Spectra Logic is also offering a free upgrade to QuickSwap when users register their libraries on the Spectra Logic Web site within 60 days of the date on which the library was shipped to them. - Page 76 Limited Warranty Spectra Logic warrants the tape library to be in good working order for a period of three full years from the date of shipment from Spectra Logic or an authorized Spectra Logic dealer. Should this product fail to be in good working order at any time during...
- Page 77 In no event will Spectra Logic be liable to you for any damages, including any lost profits, lost savings, or other...
- Page 78 Out-of-Warranty Turnaround Time The non-warranty turnaround time is two weeks from receipt of the unit. An expedited turnaround time of 48 hours is available for an additional fee. Spectra Logic reserves the right to either repair or replace the unit.
-
Page 79: Contacting Spectra Logic
Chapter 7. Maintenance, Troubleshooting, and Repairs Contacting Spectra Logic Information Web Site http://www.spectralogic.com Technical Assistance Technical Support Phone United States: (800) 227-4637 or (303) 449-0160 Europe: +44 (0) 870 112 2185 Technical Support E-Mail support@spectralogic.com Knowledge Base http://www.spectralogic.com/support/kbase/index.cfm Supplies and Accessories Sales... -
Page 80: Appendix A. Specifications
•Sony AIT Tape Specifications •Sony AIT Tape Drive Specifications •Power Requirements •Operating Environment Limits Library Storage Capacity As shown in the table below, the Spectra 2K library data storage capacity depends on the cartridge model and data compression: AIT-1 AIT-1 AIT-2... -
Page 81: Sony Ait Tape Specifications
Appendix A. Specifications Sony AIT Tape Specifications Sony is the only manufacturer of AIT tape cartridges. The table below lists the native and compressed capacities of the AIT tape cartridges. Tape Type Manufacturer Length Capacity AIT-1 Sony 170 meters 25.0 GB native SDX-25C 65.0 GB compressed AIT-1... -
Page 82: Sony Ait Tape Drive Specifications
AIT-3: 80 MB/sec Synchronous maximum The upper limit applies to the drives themselves. The temperature limits for the Spectra 2K library are given in Operating Environment Limits on page 84. Be sure there is adequate air flow around the library at all times. -
Page 83: Power Requirements
220-Volt AC Power Cord for Use in North America The criteria for a U.S. and Canadian 220-volt AC power cord for the Spectra 2K library are as follows: •Power cord must have a molded NEMA 6-15P attachment plug on one end. -
Page 84: Operating Environment Limits
Appendix A. Specifications 220-Volt AC Power Cord for International Use The criteria for an international 220-volt AC power cord are as follows: •Power cord must have an attachment plug of the proper type, rating, and safety approval for the intended country. •Power cord must have an IEC type CEE-22 female connector on one end to connect the library. -
Page 85: Appendix B. Regulatory Notices
•EU Declaration of Conformity •Japan •Taiwan Safety Agency Standards The following lists the safety standards obeyed by the Spectra 2K library and its components (including the drives): •UL 1950: 3rd Edition, Information Technology Equipment Including Electrical Business Equipment •CSA-C22.2 No. 950-M95, Safety of Information Technology Equipment Including Electrical Business Equipment •EN60950/IEC950: Safety of Information Technology Equipment Including Electrical... -
Page 86: Eu Declaration Of Conformity
Boulder, Colorado 80301 declare under sole responsibility that Spectra Logic’s Spectra 2K Library to which this declaration relates, meets the essential health and safety requirements and is in conformity with the EU Directives listed below using the relevant section of... -
Page 87: Japan
Appendix B. Regulatory Notices The Spectra 2K Library complies with all safety relevant provisions referring to: •Protection against electrical hazards. •Protection against hazards such as: • Mechanical Hazards • Fire Hazards • Noise • Vibration The CE marking has been affixed on the device according to article 10 of the EU Directive 89/336/EEC and 73/23/EEC. -
Page 88: Index
74 AIT data cartridges 21 iSCSI 27 bar code reader library 27 troubleshooting 73 NDMP 27 Serverless backup 28 Spectra 2K library 8 this guide 8 TreeFrog architecture 8 cartridges AC power 83 ordering 74 accessories specifications 81... - Page 89 Index contact information enable options Spectra Logic 79 NDMP 57 Serverless Backup 57 contents this guide 8 enclosed flush-mount rack mount rail kit 74 conventions used 9 Ethernet configuration 37 DHCP environment 29 serial port configuration 52 static IP address 29...
- Page 90 Index horizontal library labels front door conversion kit 74 bar code 20 ordering conversion kit 73 ordering bar code 74 rack mount rail kit 74 ordering custom bar code 74 host server setup NDMP 63 drive 24 pulsing 25 HTTP interface robotic picker 23 security 43 status 24...
- Page 91 Index Phone Numbers Europe 9 Spectra Logic 9 support 9 maintenance 66 AIT data cartridges 67 phone Spectra Logic cleaning tape drives 64 sales 79 fuses 69 technical support 79 library 68 policies media limited warranty 76 inserting into DCM 13...
- Page 92 AIT data cartridges 81 release notes 8 fuse 84 repair policy 75 operating environment 84 repairs power 83 out-of-warranty 77 Spectra Logic replacements contacting 9 ordering accessories 73 sales 79 RMA numbers technical support 9, 79 contacting technical support 79...
- Page 93 9 warranty 76 shipping 77 Web interface configuration 34 connecting 30 logout 44 maintenance 42 security 43 status 32 using 30 Web site Spectra Logic 9, 79 Knowledge Base 79 write-protect tab 22 write-protecting and recording 22...
Need help?
Do you have a question about the Spectra 2K Library and is the answer not in the manual?
Questions and answers