Table of Contents
Advertisement
Quick Links
Advertisement
Table of Contents

Subscribe to Our Youtube Channel
Related Manuals for Avid Technology Artist DNxIV


Summary of Contents for Avid Technology Artist DNxIV
- Page 1 ® Avid Artist DNxIV Installation and Operations Guide...
- Page 2 Legal Notices Product specifications are subject to change without notice and do not represent a commitment on the part of Avid Technology, Inc. This product is subject to the terms and conditions of a software license agreement provided with the software. The product may only be used in accordance with the license agreement.
-
Page 3: Table Of Contents
Avid Artist DNxIV Operation ........ - Page 4 Control Screen ............25 Format Screen .
- Page 5 European Union and European Free Trade Association (EFTA) Regulatory Compliance . . . 60 Korea KCC Compliance Statement ..........61 Taiwan Compliance Statement .
-
Page 6: If You Need Help
Using This Guide Important Information Avid recommends that you read all the information in this document before connecting or using your new hardware and software. If You Need Help If you are having trouble using your Avid product: 1. Retry the action, carefully following the instructions given for that task in this guide. It is especially important to check each step of your workflow. -
Page 7: Avid Artist Dnxiv
Avid Artist DNxIV Overview ® Avid Artist | DNxIV, developed in cooperation with AJA Video Systems, offers a full set of professional video and audio connectivity with support for the latest 4K and UltraHD devices and High Frame Rate workflows. The power of Thunderbolt 3 enables Avid Artist | DNxIV to handle a wide range of formats from SD to HD, UltraHD and full 4K over both SDI and HDMI and support 4K frame rates up to 60p, plus HDR 10 and HLG support over HDMI for HDR workflows. -
Page 8: High Quality Down Conversion
CPU load. Avid Artist | DNxIV Audio Avid Artist DNxIV provides up to 16 channels of SDI embedded audio, and up to eight channels of embedded HDMI audio. Eight channels of analog audio I/O is supported via a DB25 industry standard Tascam style audio breakout cable. -
Page 9: System Requirements
System Requirements AJ System Test System Test provides accurate and detailed evaluations of drive and PCIe performance statistics, allowing you to measure the capabilities of your system for recording and playing back various resolutions and codecs. 3rd-Party Plugins Plugins for popular 3rd-party Professional Video Applications from Adobe, Avid, Apple, Telestream, and others. -
Page 10: What's In The Box
What’s In the Box? What’s In the Box? As you unpack the shipping box, carefully examine the contents. Ensure you received everything and that nothing was damaged during shipment. If you find any damage, immediately notify the shipping service and supply them with a complete description of the damage, and contact your dealer or distributor for details on how to have your Avid Artist | DNxIV repaired or replaced. -
Page 11: Chapter 2 Installation
Installation Installation Overview 1. If not previously installed on your Thunderbolt equipped computer, ensure that appropriate third party application software is installed as detailed in its user documentation. 2. Download and install the latest Avid Artist | DNxIV software from your Avid Master Account here. -
Page 12: Cable Connections
Installation Overview Cable Connections Connector Descriptions Thunderbolt 3 The Avid Artist | DNxIV provides the third-generation Thunderbolt 3 (USB-C) ports to support increased bandwidth between host computer and I/O device. Two ports are provided for daisy- chained network configurations. Bi-directional SDI I/O Four bidirectional BNC connectors can be configured in a variety of ways via the AJA Control Panel, including: •... - Page 13 Installation Overview HDMI Input and Output Two HDMI connectors provide input and output of HDMI video and multi- channel embedded audio. • HDMI 2.0 input and output, supporting UltraHD and 4K resolutions at up to 60p (4:2:2), 10-bit and 8-bit •...
-
Page 14: Installing Software
Installing Software Installing Software If your computer has previously had another video capture or multimedia device installed, ensure you uninstall any related software before installing Avid Artist | DNxIV. This will prevent any hardware or software conflicts. Before installing the software package, ensure that Media Composer is installed on your system. See the Media Composer Installation Guide here for details on installing the editing application software. -
Page 15: Avid Artist Dnxiv Operation
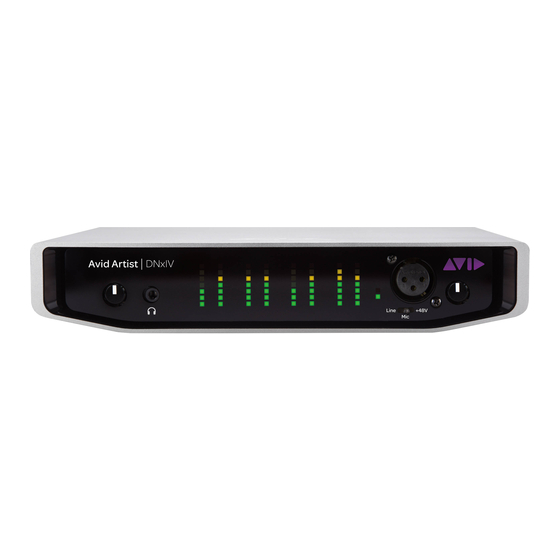
Avid Artist DNxIV Operation Front Panel Operation The Avid Artist | DNxIV front panel has the following controls and indicators: Monitor Output and Gain Control A 1/8 inch TRS connector is available for monitoring two channels of audio, selectable in channel pairs using the Control Panel application. -
Page 16: Power Led
AJA Control Panel Overview dBfs LED Color and Location -20 db Yellow LED 1 -30 db Green LED 4 -40 db Green LED 3 -50 db Green LED 2 -60 db Green LED 1 (bottom) These audio level meters are for guidance only. Third-party audio metering should be employed when doing critical audio editing and mixing. -
Page 17: Aja Control Panel Operating Modes
AJA Control Panel Overview AJA Control Panel Operating Modes AJA Control Panel has two fundamental operating modes. • Playback Mode - Used for playing back video files from the computer, usually with a non-linear editing application (NLE) or AJA Control Room, through the Avid Artist | DNxIV to that card’s video/audio outputs for viewing and/or external recording. - Page 18 AJA Control Panel Overview Currently Selected Controlling Function Application Screen Inputs Outputs Operating Mode Parameter Controls Some controlling applications can switch the card's mode from Playback to Capture, and vice-versa. When Control Panel is not being controlled by an external application, you can change the operating mode in the Control Panel Control Screen using the Default Output settings.
-
Page 19: Controlling Application
AJA Control Panel Overview Color Meanings All items in the AJA Control Panel block diagram are color-coded to show what is happening in real time. This applies to both icons and text. These colors indicate: • Blue - Video is same format as the Device Format (framebuffer) •... -
Page 20: Controlling Application Format Selection
AJA Control Panel Overview Control Panel In Use Message (in red) In the top right corner, the Control Panel displays the name of the application controlling the unit. In some cases, applications may not always properly “let go” of the I/O interface as another takes over- you'll be able to tell by looking at the Control Panel. -
Page 21: Default Preferences
AJA Control Panel Overview Mac OS Preset Files Storage Location • From the Finder, hold down the Option key (to display the Library directory) and click on Go/ Library/Application Support/AJA/<device name>/Presets/ Windows Preset Files Storage Location • c:\Users\<username>\AppData\Local\AJA\Control Panel\<device name> Presets\ Default Preferences When an AJA device starts up, a preference can determine what settings it will have it when it begins to operate. -
Page 22: Function Screens
AJA Control Panel Overview To establish a Global Preference, the administrator first configures the AJA device (which automatically creates a “com.aja.devicesettings” Local Preference file in the location identified above) and then copy or move or that file to the correct computer locations (manually or by pushing it out across the network) on all the computers that use the AJA device. -
Page 23: Using Avid Artist | Dnxiv For Ultrahd/4K
Using Avid Artist | DNxIV for UltraHD/4K Screen Functions DS Keyer Setup and control the insertion of keyed video from the frame buffer or graphics files with alpha channel. Load a lookup table (LUT) file to adjust the calibration of color for any source. Timecode Monitors SMPTE 12M-2 timecode and configure timecode window burn output. - Page 24 Using Avid Artist | DNxIV for UltraHD/4K Mapping of Quad SDI Outputs 2SI Mode Two Sample Interleave is an alternative method to organize the data of SDI UltraHD and 4K formats. Instead of dividing the picture raster into quadrants, this method samples pixels to create four lower resolution versions of the entire picture.
-
Page 25: Avid Artist | Dnxiv Audio Monitoring
Avid Artist | DNxIV Audio Monitoring able to either input or output a high frame rate SDI signal, not both at the same time. In this situation, you can use the down-converted SDI monitor output to monitor the input signal, or use the HDMI output. - Page 26 Avid Artist | DNxIV Audio Monitoring Audio Capture Punch In/Voice Over Record to File Non Linear Video Editor Application NOTE: NLE audio output is disabled in Capture mode. Control Panel Control Panel AJA Hardware Input Select Audio Mixer Audio Monitoring Screen Screen Audio...
-
Page 27: Aja Control Panel Function Screens
AJA Control Panel Function Screens AJA Control Panel Function Screens Control Screen The Control Screen is where you set the Default Output, what the device outputs when no application has control of the board. This screen also has controls for setting the genlock source, and for setting the Horiz and Vert timing offsets. - Page 28 AJA Control Panel Function Screens Video Output • Pass Through (Cap) - This selection directs Avid Artist | DNxIV to route video from its selected input through the card for processing and output. • Test Pattern - This selection directs Avid Artist | DNxIV to output a preset pattern when no other application is in control.
-
Page 29: Format Screen
AJA Control Panel Function Screens Genlock Selects how Avid Artist | DNxIV will synchronize program video: • Freerun: Generates sync without an external reference source • Ref In: Use the Ref Video source for sync (usually an analog black burst video signal) •... - Page 30 AJA Control Panel Function Screens The Format Screen shows the video format currently in use by the Avid Artist | DNxIV Plus framebuffer (called the Device Format) and allows you to change it. All throughout the Control Panel, choices are always presented based on what Avid Artist | DNxIV can do with the signals available and the inputs/outputs selected.
-
Page 31: Input Select Screen
AJA Control Panel Function Screens Input Select Screen On the Input Select screen you can view or set the currently selected video and audio input sources and map audio sources to the channels supported by your editing application. Two information panes in the screen are provided: Video Input and Audio Input. - Page 32 AJA Control Panel Function Screens SDI RGB Rng Sets the RGB range. Select from Auto, SMPTE, or Full. LTC/Ref Use the LTC/Ref menu pulldown to identify the type of signal being received by the LTC/Ref BNC: • Reference - BNC is used as a video reference input. •...
-
Page 33: Sdi Output Screen
AJA Control Panel Function Screens SDI Output Screen The SDI Output screen shows the current settings for the SDI outputs. The outputs can be configured independently. If an input/output has no video, it will be indicated on the block diagram (“No Video”). - Page 34 AJA Control Panel Function Screens RGB Range Sets the RGB range. Select from Auto, SMPTE, or Full. 3G Transport Sets the output transport. Select from: • Auto - Auto selection based on input or selected format • 3Gb - Single link HD output using one BNC. The Level B-DS format is the dualstream carriage of two independent HD-SDI/SMPTE 292M signals (720p up to 60 fps or 1080i/1080p up to 30 fps) in a single serial digital interface at the nominal 3 Gbit/s.
-
Page 35: Hdmi Screen
AJA Control Panel Function Screens HDMI Screen The HDMI input and output are configured with this screen. The 4K Transport setting on the SDI Out screen also affects the Avid Artist | DNxIV HDMI output signal, even if the SDI inputs are not being used. A 12G/6G 1-Wire or SMPTE 2Si setting is required for UltraHD/4K HDMI output. - Page 36 AJA Control Panel Function Screens Audio Ch 3/4 Swap This checkbox controls HDMI input audio channel placement. Some multi- channel audio decoder systems route the low frequency effects audio to channel 4, and some to channel 3. If you want to monitor or pass audio though to another device, this control can be used to align these two channels correctly.
-
Page 37: Hdr Screen
AJA Control Panel Function Screens HDR Screen The HDR screen provides a mechanism to inform an HDMI sink device (such as a TV or monitor) that the video content is HDR. This includes generation of the Dynamic Range and Mastering Infoframe and the static metadata descriptors as defined in CTA-861.3 and HDMI v2.0a. - Page 38 AJA Control Panel Function Screens Luminance • Auto - (default) • YCbCr - • ICtCp - IPT color space Digital Primaries Selecting Custom HDR Mode allows the editing of digital primaries information that is passed as metadata accompanying the video signal. However, when HLG selected as the EOTF digital primaries information cannot be edited, because HLG does not use metadata.
-
Page 39: Video Setup Screen
AJA Control Panel Function Screens Video Setup Screen The Video Setup screen shows various other settings which will affect how video inputs and outputs behave, and how Avid Artist | DNxIV interacts with some software applications. Video Setup Progressive Pref This feature is used to default the hardware to use either p or PsF output over SDI when it has not been specified by the application. - Page 40 AJA Control Panel Function Screens Quad 2 SDI4 Quad 3 SDI1 Quad 4 SDI2 SDI Output Quad Swap Same as SDI Input Quad Swap above, but is applied to the SDI outputs. VANC Checkbox When checked, the VANC checkbox tells the Avid Artist | DNxIV to capture and process any ancillary data in the SDI stream.
-
Page 41: Audio Setup Screen
AJA Control Panel Function Screens Audio Setup Screen The Audio Setup screen shows the current settings for the analog audio output, allowing you to re- configure it when desired. Audio Monitor This control selects which pair of channels from the NLE will be monitored. For most editing scenarios this should remain as Ch 1-2, since most NLEs default to dual track / stereo monitoring as a sum of the entire timeline. -
Page 42: Audio Mixer Screens
AJA Control Panel Function Screens • 4-Out 4-In (Ch 1-4 out, Ch 5-8 in) • 8-In Delay In and Out Here you can set up to 6 frames (in tenths of a frame) of delay for the AJA device's audio input and output. - Page 43 AJA Control Panel Function Screens Audio Mixer Screen Example Each source has a confidence meter, which enables you to tell immediately if you have a source arriving correctly at the AJA hardware (without having to launch any other software). The level sliders allow a simple plus or minus adjustment to the Source level being monitored.
-
Page 44: Audio Mixer Playback Monitor Mode Screen
AJA Control Panel Function Screens Audio Mixer Playback Monitor Mode Screen Audio Mixer Screen, Playback Monitor Mode Playback Source Selection Clicking the On checkbox selects the audio for that item for playback to the audio monitor outputs. Multiple sources can be selected simultaneously. Main App If an external application is controlling the Avid Artist | DNxIV, it will be displayed in the Item Select column and its audio can be selected for playback with the checkbox. - Page 45 AJA Control Panel Function Screens • SDI Ch 1-16 - The embedded audio being received on the Avid Artist | DNxIV SDI In connectors. • Mic In - Audio from the Avid Artist | DNxIV front panel XLR connector. Select Mic, Line, or +48 with the front panel switch, and control the level with the front panel Gain knob.
-
Page 46: Audio Mixer Capture Monitor Mode Screen
AJA Control Panel Function Screens Audio Mixer Capture Monitor Mode Screen Audio Mixer Screen, Capture Monitor Mode The Capture Monitor Mode screen is used to select and mix audio to be monitored during capture operations. Even though you can hear changes in the signals and levels adjusted with the Audio Mixer screen, these changes are NOT recorded to disk during NLE Capture or Audio Punch In / Voice Over to Timeline. -
Page 47: Ds Keyer Screen
AJA Control Panel Function Screens DS Keyer Screen The Avid Artist | DNxIV has a hardware-based downstream keyer that is ideal for putting logos, “bugs” or other video material with an alpha channel on top of video being played out or printed to tape. - Page 48 AJA Control Panel Function Screens • Graphic over Video In - Places a graphics file having an alpha channel (chosen in “Graphic File” pulldown) over the video input for playout or print-to-tape. • Graphic over Frame Buffer - Places a graphics file having an alpha channel (chosen in “Graphic File”...
-
Page 49: Lut Screen
AJA Control Panel Function Screens LUT Screen The LUT screen controls allow you to create a custom color look up table (LUT) on the output, for matching a production “look” on a specific display. Users can also specify their own custom LUTs by creating a LUT file and uploading it to an AJA Video Device using the LUT (lookup table) screen in the Control Panel. - Page 50 AJA Control Panel Function Screens • SMPTE->FullRange - A conversion LUT from SMPTE to Full Range is applied. • FullRange->SMPTE - A conversion LUT from Full Range to SMPTE is applied. • User Linear - Activates the Gain and Offset controls, allowing the manual creation of a custom LUT.
- Page 51 AJA Control Panel Function Screens Uploading Custom User LUT file Once the LUT file is created, you can upload it with the following steps: 1. Before loading a LUT, make sure you are using an RGB/RGBA frame buffer format, and that you have a AJA Video Device that supports LUTs.
-
Page 52: Timecode Screen
AJA Control Panel Function Screens Timecode Screen The Timecode screen is used to select the timecode stream read for applications that use it (for example, in AJA Control Room when the Timecode Source preference is set to “Control Panel Setting” that application will read the selected stream). This screen is also used for monitoring the RP-188 timecode embedded in the digital data stream, for selecting a timecode offset (if required), and setting timecode outputs. -
Page 53: Presets Screen
AJA Control Panel Function Screens User Bits For monitoring a variable framerate (VFR) timecode (such as Varicam), you may wish to check the User-bits box. If you set this checkbox, Avid Artist | DNxIV will detect and interpret the user-bits and display them next to the checkbox. - Page 54 AJA Control Panel Function Screens Transferring Saved Presets If you want to use a saved Preset on another workstation, you can simply copy the file on removable storage and install it at the new location. The Preset files are stored at: •...
-
Page 55: Firmware Screen
AJA Control Panel Function Screens Firmware Screen Use the Firmware screen to access the firmware install screen. Click install to erase current firmware and load the firmware version contained in your current driver installation. Note the Installation message shown below. You will be required to power-cycle your computer and Avid Artist | DNxIV to finish the update. -
Page 56: Info Screen
AJA Control Panel Function Screens Info Screen The Info Screen shows the software files that have been installed on your system. This information may be needed if you talk to a Customer Service representative to determine if files are missing or need updating. -
Page 57: Appendix A Specifications
Specifications Avid Artist | DNxIV Tech Specs Video Formats • (4K) 4096 x 2160p 23.98, 24, 25, 29.97, 30, 47.95, 48, 50, 59.94, 60 • UltraHD) 3840 x 2160p 23.98, 24, 25, 29.97, 30, 50, 59.94, 60 • (2K) 2048 x 1080p 23.98, 24, 25, 29.97, 30, 47.95, 48, 50, 59.94, 60 •... -
Page 58: Video Outputs
Avid Artist | DNxIV Tech Specs Video Outputs • 12G-SDI*, SMPTE-2082, 12-bit**, 10-bit and 8-bit • 6G-SDI*, SMPTE-2081, 10-bit and 8-bit • 3G-SDI, SMPTE-259/292/296/424, 12-bit*, 10-bit and 8-bit • 4K/UltraHD 4:4:4 (4 x BNC) • 1.5G-SDI, SMPTE 372M, Dual Link HD 4:4:4 (2x BNC), 12-bit**, 10-bit and 8-bit •... -
Page 59: Audio Outputs Digital
Avid Artist | DNxIV Tech Specs Audio Outputs Digital • 16-Channel, 24-bit SDI embedded audio, 48 kHz sample rate, synchronous • 8-Channel, 24-bit HDMI embedded audio, 48 kHz sample rate, synchronous Audio Outputs Analog • 8-Channel, 24-bit D/A analog audio, 48 kHz sample rate, balanced, using industry standard 8 x XLR on DB-25 breakout cable (cable not included) •... -
Page 60: Size (W X D X H)
Avid Artist | DNxIV Tech Specs 5 No Connection 6 GND 7 RX+ 8 TX- 9 GND Shell GND Size (w x d x h) 8.74" x 8.11" x 1.65" (222mm x 206mm x 42mm) Weight 3.4 lbs (1.5 kg) Power (device only) 10-20V, 30W typical, 36W max, 70W max with USB-C power delivery to external devices Environment... -
Page 61: Appendix B Safety And Compliance
Safety and Compliance Federal Communications Commission (FCC) Compliance Notices Class A Interference Statement This equipment has been tested and found to comply with the limits for a Class A digital device, pursuant to Part 15, Subpart B of the FCC Rules. These limits are designed to provide reasonable protection against harmful interference in a residential installation. -
Page 62: European Union And European Free Trade Association (Efta) Regulatory Compliance
European Union and European Free Trade Association (EFTA) Regulatory Compliance European Union and European Free Trade Association (EFTA) Regulatory Compliance This equipment may be operated in the countries that comprise the member countries of the European Union and the European Free Trade Association. These countries, listed in the following paragraph, are referred to as The European Community throughout this document: AUSTRIA, BELGIUM, BULGARIA, CYPRUS, CZECH REPUBLIC, DENMARK, ESTONIA, FINLAND, FRANCE, GERMANY, GREECE, HUNGARY, IRELAND, ITALY, LATVIA,... -
Page 63: Korea Kcc Compliance Statement
Korea KCC Compliance Statement Achtung! Dieses ist ein Gerät der Funkstörgrenzwertklasse A. In Wohnbereichen können bei Betrieb dieses Gerätes Rundfunkstörungen auftreten, in welchen Fällen der Benutzer für entsprechende Gegenmaßnahmen verantwortlich ist. Attention! Ceci est un produit de Classe A. Dans un environnement domestique, ce produit risque de créer des interférences radioélectriques, il appartiendra alors à... -
Page 64: Japan Compliance Statement
Japan Compliance Statement Japan Compliance Statement This is a Class A product based on the standard of the VCCI Council (VCCI-32: 2016). If this equipment is used in a domestic environment, radio interference may occur, in which case, the user may be required to take corrective actions. China Compliance Statement This product has been tested to the following Chinese standards: GB/T13837-2012, GB8898-2011, and GB17625.1-2012... - Page 65 Before Operation Please Read These Instructions Warning! Do not use this device near water and clean only with a dry cloth. Advertissement! N'utilisez pas cet appareil près de l'eau et nettoyez-le seulement avec un tissu sec. Warnung! Das Gerät nicht in der Nähe von Wasser verwenden und nur mit einem trockenen Tuch säubern ¡Advertencia! No utilice este dispositivo cerca del agua y límpielo solamente con un paño seco.
- Page 66 Before Operation Please Read These Instructions Warning! Unplug this device during lightning storms or when unused for long periods of time. Avertissement! Débranchez cet appareil pendant les orages avec éclairsou s'il est inutilisé pendant de longues périodes. Warnung! Das Gerät ist bei Gewitterstürmen oder wenn es über lange Zeiträume ungenutzt bleibt vom Netz zu trennen.
- Page 67 Before Operation Please Read These Instructions Avviso! Utilizzare soltanto i collegamenti e gli accessori specificati e/o venduti dal produttore. Warning! Refer all servicing to qualified service personnel. Servicing is required when the device has been damaged in any way, such as power-supply cord or plug is damaged, liquid has been spilled or objects have fallen into the device, the device has been exposed to rain or moisture, does not operate normally, or has been dropped.
- Page 68 Before Operation Please Read These Instructions Warnung! Der Sicherheitszweck des gepolten bzw. Schukosteckers ist zu berücksichtigen. Ein gepolter Stecker verfügt über zwei Pole, von denen einer breiter als der andere ist. Ein Schukostecker verfügt neben den zwei Polen noch über einen dritten Pol zur Erdung. Der breite Pol bzw.
- Page 69 Before Operation Please Read These Instructions Aviso! Dado que a ficha principal é utilizada como a desconexão para o dispositivo, esta deve manter-se prontamente acessível e funcional. Avviso! Poiché il cavo di alimentazione viene usato come dispositivo di sconnessione, deve rimane prontamente accessibile e operabile.
Need help?
Do you have a question about the Artist DNxIV and is the answer not in the manual?
Questions and answers