Table of Contents
Advertisement
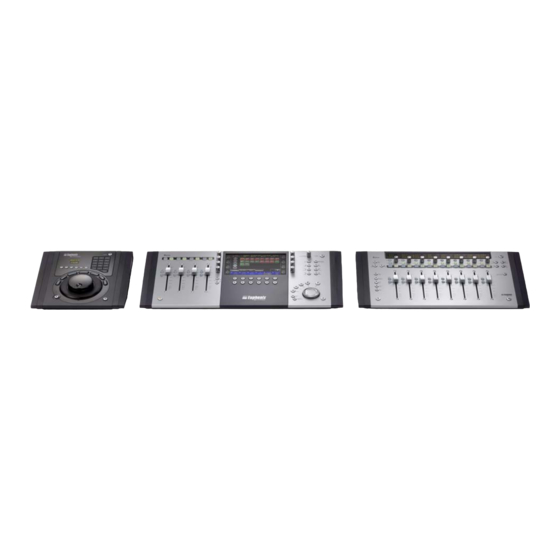
Quick Links
Advertisement
Table of Contents

Subscribe to Our Youtube Channel
Related Manuals for Avid Technology MC Control


Summary of Contents for Avid Technology MC Control
- Page 1 MC Control User Guide...
- Page 2 Legal Notices This guide is copyrighted ©2011 by Avid Technology, Inc., (hereafter “Avid”), with all rights reserved. Under copyright laws, this guide may not be duplicated in whole or in part without the written consent of Avid. 003, 96 I/O, 96i I/O, 192 Digital I/O, 192 I/O, 888|24 I/O, 882|20 I/O,...
-
Page 3: Table Of Contents
Contents Chapter 1. Introduction: The Artist Media Controller ..........1 What’s Included . - Page 4 EMC (Electromagnetic Compliance) ..............51 MC Control User Guide...
-
Page 5: Chapter 1. Introduction: The Artist Media Controller
Chapter 1: Introduction: The Artist Media Controller MC Control, MC Mix, and MC Transport comprise the Artist Series family of media controllers. They use a 100 Mbs Ethernet EUCON™ connection to control audio and video applications running on a workstation computer. EUCON is a high-speed communication protocol and enables control of virtually every application feature. -
Page 6: System Requirements And Compatibility
Important Notices include information that could affect your data or the performance of your system. Shortcuts show you useful keyboard or mouse shortcuts. Cross References point to related sections in this guide and other Avid guides. MC Control User Guide... -
Page 7: About Www.avid.com
Hardware Keys on Artist Series Units The names of keys on Artist Series hardware are in bold (such as SEL). The SHIFT key on Artist Series hardware is indicated by bold text, in all-caps (SHIFT) to distinguish it from references to the Shift key on your QWERTY keyboard. - Page 8 MC Control User Guide...
-
Page 9: Chapter 2. Setup And Installation
Chapter 2: Setup and Installation Unpacking and Elevating the MC Control Unpack MC Control, its power adapter, AC power cord, Installer disc, Ethernet crossover cable, and riser brackets. MC Control can be elevated or angled using small foldout legs on the bottom of the unit or elevated and angled by attaching the larger riser brackets. -
Page 10: Attaching An Mc Control To Additional Units
To join an MC Control to an MC Mix: On the MC Control, use a #2 Phillips screwdriver to remove the two silver screws. The screws may be tight, so you may have to use some force. Removing screws from the bottom panel MC Control User Guide... -
Page 11: Installing Software And Hardware
Lift the black plastic connecting part and side panel up and out of MC Control. Removing connecting part and side panel On the MC Mix, remove the side panel on the end where it will attach to MC Control. Slide the connecting part of MC Control into MC Mix to attach them together. MC Mix and MC Control attached by connecting at side panel Installing Software and Hardware You must install EuControl software before using your Artist Series media controller. - Page 12 Connect the DC output cable from the power adapter to DC In on the left side of the rear panel. Connecting the power adapter Plug one end of the Ethernet crossover cable into the Ethernet jack (labeled with) on the rear panel of the MC Control. Ethernet cable and rear panel jack MC Control User Guide...
- Page 13 Plug the other end of the Ethernet crossover cable into an open Ethernet jack on your computer, router, or Ethernet switch. • Note that connecting directly to the computer may require removing your Internet cable. If you have a Mac with two Ether- net ports, use Ethernet 1, rather than Ethernet 2.
- Page 14 The MC Control has a ¼-in FOOTSWITCH input on the rear panel. The footswitch can be used to punch in and out of recording. Plug the footswitch in before powering on the MC Control. See “Footswitch” on page 37 for details. FOOTSWITCH input on rear panel MC Control User Guide...
-
Page 15: Chapter 3. Common Tasks
Chapter 3: Common Tasks If you completed the steps in Chapter 2, “Setup and Installation”, you are ready to start learning MC Control. The following important user interface items and terms are used in tasks: • The Soft Knobs can be turned like a conventional knob and pressed like a switch to access an additional context-sensitive function (some do not have a second function). -
Page 16: Fader Strip
Press the Soft Knob beside the desired plug-in name to select it. The plug-in parameters are distributed across the Soft Knobs. Turn the Soft Knob beside the desired parameter to adjust its value. Press the PAGE keys to access more parameters. Press the BACK key to exit that plug-in. MC Control User Guide... - Page 17 Transport Keys and Jog Wheel To use the Transport Keys and the Jog Wheel: Use the PLAY, STOP, FF, and REW buttons to navigate the timeline of the edit window of your application. Press the JOG key. Spin the Jog Wheel clockwise and counterclockwise to move forward and backward, respectively, on the timeline. SHUTTLE ZOOM VERT ZOOM HORIZ...
- Page 18 MC Control User Guide...
-
Page 19: Chapter 4. Surface Controls
Chapter 4: Surface Controls MC Control has four channel strips each with a touch-sensitive fader, eight touch-sensitive knobs surrounding a 7-inch touch- screen, twelve soft keys, transport switches, a Jog wheel, and various navigation buttons. MC Control comes with an external DC power supply. -
Page 20: Power Switch
SEL key. (See “Preferences” on page 36.) Holding down the SHIFT key and touching a fader sets it to unity gain. The track is on (unmuted) when the strip On key is lit and off (muted) when the strip On key is not lit. MC Control User Guide... -
Page 21: Navigation Controls
SOLO The SOLO key lights red when that strip’s track is soloed and is unlit otherwise. Pressing a fader SEL key selects that track in the application and focusses it on MC Control. The SEL key lights yellow when the track is selected and is unlit otherwise. - Page 22 While attached to a second workstation, your computer keyboard and mouse can be configured to control that workstation (see “Workstations” on page 34). Navigating Among Multiple Artist Media Controllers The BANK and NUDGE keys perform the identical actions on the combined set of tracks. MC Control User Guide...
-
Page 23: Knobs
Knobs Eight touch-sensitive knobs surround the Touchscreen. Each is a continuously rotating knob that adjusts parameters such as pan and aux send levels. The knob has a built-in switch allowing it to be pressed from the top. This is called the Knob Top key and is typically used to access sub-menus but also to turn parameters on and off. -
Page 24: Knob Functions
Press the BACK key once to return to the previous knob set. Press the BACK key repeatedly to back out of all sub-menus and dis- play the top level knob set. Press the TOP key to immediately back out of all sub-menus and display the top level knob set. This is equivalent to pressing the BACK key repeatedly. MC Control User Guide... -
Page 25: Keys
Keys MC Control supports Surface Soft Keys (discussed in this section) and Touchscreen Soft keys (see “Soft Key View” on page 27). This is one of the most powerful features of MC Control (see Chapter 7, “Soft Keys”). Below the Touchscreen are 12 soft keys (six per row). The bottom of the Touchscreen contains labels for each soft key. Soft Key labels contain text plus an optional icon. -
Page 26: Control Room/Monitor Knob
Turn the MONITOR knob (SHIFT + CONTROL ROOM) to adjust the volume of Monitor A, commonly used as a headphone volume. Press the MONITOR Knob Top key to mute the monitor volume. Press it again to unmute. MC Control User Guide... -
Page 27: Chapter 5. Touchscreen And Controls
Chapter 5: Touchscreen and Controls MC Control has a wide aspect ratio Touchscreen mounted in its center. The Touchscreen always shows the following: 1 Knob Displays Show the current knob function for their corresponding knob. There are four on each side of the Touchscreen. 2 Info Area Shows the application and workstation name, the primary and secondary time code displays, or the attentioned track name. -
Page 28: Tracks View
MC Control or the workstation keyboard and touch one of these buttons to scroll up or down a full page (32 tracks). The track scroll arrow buttons are disabled if there are no further tracks to display. MC Control User Guide... -
Page 29: Soft Key View
Soft Key View Soft Key View This view displays 24 Touchscreen Soft Keys in four lines of six each. v Scrolls forward to the next page of Soft Keys (unless on last page). ^ Scrolls back to the previous page of Soft Keys (unless on page 1). Touch a Soft Key to execute its function. -
Page 30: Setup Screens
Studio Monitor Express graphic user interface (GUI). Dim Dims the control room volume (lit when dim is active). Cut Mutes the control room volume (lit when cut is active). MC Control User Guide... - Page 31 Monitor The Monitor Touchscreen selects the source of the monitor volume knob or mutes monitor A. Holding down SHIFT and turning the control room knob changes the volume of Monitor A in Studio Monitor Express or the attached application if it supports a EUCON monitor section.
- Page 32 MC Control User Guide...
-
Page 33: Chapter 6. Eucontrol
Chapter 6: EuControl EuControl is launched automatically upon starting your computer and runs in the background. EuControl is responsible for find- ing, linking, and communicating with all Artist Series media controllers on the network. EuControl’s configuration tasks are ac- cessed by clicking the green icon on the taskbar (Mac) or in the Hidden Icons view (Windows) and selecting EuControl Settings. Accessing EuControl Settings To open the EuControl Settings window: Do one of the following:... -
Page 34: Surfaces
Click Add to add the selected All Surfaces entry to My Surfaces. This connects this Artist Series controller to your instance of EuControl. You can also click and drag an Artist media controller from All Surfaces to My Surfaces. Add is disabled if all Artist media controllers in All Surfaces are connected to any instance of EuControl. MC Control User Guide... - Page 35 Remove Click Remove to remove the selected surface from My Surfaces and make it available to other instances of EuControl. Remove is disabled if no surface is selected. Automatically Add The Automatically Add menu has two settings that control what happens to stored Surfaces between shutdown and startup. All Surfaces (default) This setting is best used when you are the only person running EuControl in your home or studio.
-
Page 36: Workstations
Select a workstation in the My Workstations list and click Attach. A check mark appears in the Attach column next to that work- station. This workstation is now communicating with the Artist media controller(s) connected to your instance of EuControl. If the selected workstation is already attached, the button displays Detach. MC Control User Guide... -
Page 37: General
Redirect Keyboard and Mouse Control to Attached External Workstation Your computer keyboard and mouse can control a second external workstation, if desired. Select this option to redirect keyboard and mouse control to the attached workstation. Note that the keyboard and mouse will no longer control your primary worksta- tion. -
Page 38: Preferences
Click the Reset button to restore the center position. Preferences Preferences tab MC Mix and MC Transport Display Screen Dim Time This slider only affects MC Mix and MC Transport. MC Control Display This slider adjusts the brightness of the MC Control Touchscreen. MC Control User Guide... -
Page 39: Assign
Footswitch MC Control lets you connect a footswitch for hands-free punch in and out. Connect a footswitch to the 1/4-inch FOOTSWITCH input on the back panel. To configure the Footswitch in EuControl: In the Footswitch section of the Preferences tab, click to select the desired Punch In and Punch Out assignments: ... -
Page 40: Layouts
This tab controls assignments and programming for all MC Control keys (including the Jog Wheel, Shuttle Ring, and Numeric Pad), not just the six Soft Keys. See Chapter 7, “Soft Keys” for information on configuring the Soft Keys. MC Control User Guide... -
Page 41: Chapter 7. Soft Keys
Chapter 7: Soft Keys Soft Keys tab This tab controls Surface and Touchscreen Soft Key assignments. The only difference between them is that the Surface Soft Keys are accessed by the 12 circular buttons below the Touchscreen, while the Touchscreen Soft Keys are accessed from the Soft Keys Setup Touchscreen (see “Soft Key View”... -
Page 42: Restore
Icon Click the Icon button and select an icon from the dialog. Font Click the Font button and select a font from the dialog. Color Click the Color button and select a color from the dialog. MC Control User Guide... -
Page 43: Command
Command Select a Soft Key (its outline highlights yellow) and click Command to view or edit the command(s) assigned to that Soft Key. Command Editor The figure above shows a EUCON Key Command that sets a right locator marker. The type of command is set in the left column (under Details). - Page 44 The primary function of the MC command type is to recall a Layout (see “Layouts” on page 38). Select Recall Layout from the Ac- tion menu and select the Layout number from the Layout menu. The other commands are for compatibility with MC Pro and are not used with MC Control. Recall Layout Command MC Control User Guide...
-
Page 45: Jog Wheel Commands
Create a New Soft Key The Record command is created in the default application set for most, if not all, applications. This section shows how to create a new Soft Key using the Record command as an example. To create a new Soft Key: Select Touchscreen or Surface from the Section pop-up menu. - Page 46 In most audio applications, this scrolls through the displayed tracks. To create a custom Jog command: Select Wheel from the Section pop-up menu. Note that you must select the MC Control wheel icon. The Soft Key Wheel window opens. Soft Key Wheel MC Control User Guide...
- Page 47 Double-click the Jog label. The Jog Wheel Command Editor opens. Jog Wheel command editor Click the + and enter arrow keys as the name for the command. Note that the lower pop-up is set to Turn Jog Right. The Jog Wheel must be programmed to turn right and left.
- Page 48 Close the Soft Key Command Editor. Press the Jog Soft Key and spin the Jog Wheel to experiment with the new Wheel command. To set the Wheel Sensitivity to suit your needs, see “Wheel Sensitivity” on page 36. MC Control User Guide...
-
Page 49: Assignable Knob
Assignable Knob In some applications, the Jog Wheel can control knobs and sliders. Some applications require clicking on the control while others allow the cursor to hover over it. To assign the Jog Wheel to an Assignable Know: Select MC Control’s Surface from the Section pop-up. The Soft Keys window opens. Soft Keys dialog Find a a blank Soft Key and double-click it. - Page 50 MC Control User Guide...
-
Page 51: Chapter 8. Setting The Ip Address
Chapter 8: Setting the IP Address Most MC Control users will never have to set a static Internet Protocol (IP) address but in the rare cases that require it, use the instructions in this section. Normally MC Control uses Dynamic Host Configuration Protocol (DHCP) to obtain its IP address, typically from a router. MC Control reverts to link-local addressing to generate an IP address if a DHCP server is not found on the network, such as when an MC Control is connected directly to a computer with an Ethernet cable. - Page 52 Use this technique to adjust all values of the IP Address and the Subnet Mask fields. Touch the Cancel button to cancel changes made to the IP address at any time. Touch the OK button to save this static IP address. Power MC Control off and on to use the new IP address. MC Control User Guide...
-
Page 53: Environmental Compliance
Appendix A: Compliance Information Environmental Compliance EMC (Electromagnetic Compliance) This model MC Control complies with the following standards regulating Disposal of Waste Equipment by Users in the interference and EMC: • FCC Part 15 Class B European Union • EN 55022 Class B •... - Page 54 17) For products with a power switch: The main power switch is located on the top panel of MC Control. It should remain accessible after installation. 18) The equipment shall be used at a maximum ambient temperature of 40° C. MC Control User Guide...
- Page 55 Avid Technical Support (USA) Product Information 2001 Junipero Serra Boulevard Visit the Online Support Center at For company and product information, Daly City, CA 94014-3886 USA www.avid.com/support visit us on the web at www.avid.com...
Need help?
Do you have a question about the MC Control and is the answer not in the manual?
Questions and answers