
Related Manuals for Prolitec AirQ 1280


Summary of Contents for Prolitec AirQ 1280
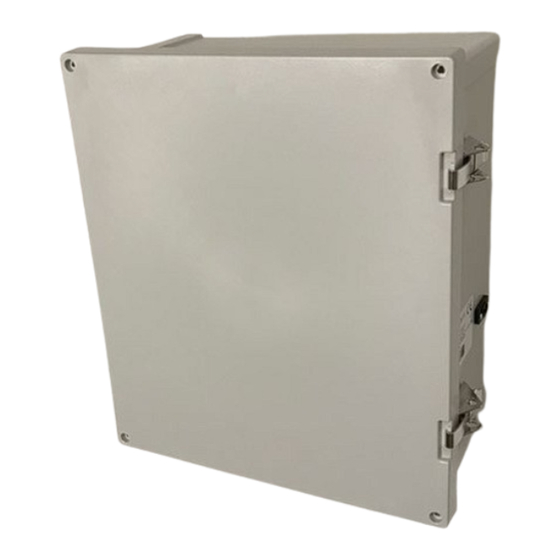
- Page 1 P ERFEC T LY S C E N TE D E N V IR O NM E N TS AirQ 1280 Original Instructions Rev. 2019-07-01...
-
Page 2: Table Of Contents
Installation Kit for HVAC Sensor Fragrance Precautions HVAC Sensor Installation FCC Statement – Class B Digital Device Chapter 10: INSTALLATION: Chapter 2: About AirQ 1280 Diffusion via Direct Indoor Fan Chapter 3: Unpacking Installation Kit for Fan Pre-installation Checklist Chapter 4: MOVING AND STORAGE... -
Page 3: Chapter 1: Important Safety Instructions
• Never put your nose to the output of the AirQ 1280. Within 12 inches of the output, the fragrance is highly concentrated. The improper inhalation of high concentrations of fragrance may cause irritation including watery eyes, headache, cough and upper respiratory discomfort. -
Page 4: Fragrance Precautions
Fragrance Cartridge Precautions • Use only AirQ by Prolitec fragrance cartridges. • Read the Consumer Product Safety Information Sheet and the Material Safety Data Sheet provided with each shipment of Cartridges. Insure that these information sheets are available for review by employees. -
Page 5: Chapter 2: About Airq 1280
A single AirQ 1280 can do both odor control and ambient scenting at the same time. The AirQ 1280 with Prolitec odor control formulations and fragrances will cancel a wide range of offensive odors and replace them with pleasant scents available from the Prolitec fragrance catalog or custom developed to meet client requirements. - Page 6 This is not an accident. The scientists and engineers at Prolitec are committed to the highest ecological and human safety standards. This user guide is easy to read. It is also important to read. AirQ 1280 is a high-performance appliance that, installed and used correctly, will meet the most demanding requirements.
-
Page 7: Chapter 3: Unpacking
& Unpacking Remove AirQ 1280 from the container. The following items should be included: 1. AirQ 1280 Appliance 2. HVAC kit 3. Plume kit 4. AC Cord 5. Mounting Hardware MOVING AND STORAGE INSTRUCTIONS 1. Remove the cartridge. 2. Unplug the appliance. -
Page 8: Chapter 5: Cartridge Life & Room Size Table
Fragrance type, room size, number of fresh air changes per hour, temperature, humidity and user preference will determine the final setting. Best practice is to use AirQ’s ‘S4 Tool’ at AirQ Tools. AirQ 1280 Cartridge Life & Room Size Table... - Page 9 Appliance & Controls Plume Kit Control Display Control Buttons Air Stem Programming USB Port Recyclable ScenXus Cartridge Connector AC Inlet AirQ 1280 Appliance & Controls...
-
Page 10: Chapter 7: User Maintenance
7. Insert air nozzle and rotate the handle 90 degrees until secured (by stem retaining tab on cartridge head). 8. Turn appliance ON. Verify that the plume is not escaping inside the enclosure and that all connections are tight. Close the door when complete. AirQ 1280 USER MAINTENANCE... -
Page 11: Seal Replacement
Air Filter and Check Valve Replacement (every 6 months or sooner depending on use) AirQ 1280 is equipped with a filter and a check valve. The filter (PN 5251) collects fine dust. Replace every 6 months or sooner depending on use. A layer of black dust on top of the filtering media is a sign that the filter should be replaced. -
Page 12: Chapter 8: Operating Instructions
24/7 Mode. • If you want AirQ 1280 to run continuously — 7 days a week, 24 hours a day — press until 24/7 is displayed above the time. If not, skip to Step 5. -
Page 13: Using The Online Programming Tool
Each program set will require a name. • Each program set can contain 21 unique programs, which can be turned on or off within the set. • Programs, identified by number 1-21, include a day or days, on/off times, and intensity settings. AirQ 1280 OPERATING INSTRUCTIONS... - Page 14 9. Be sure that the power is on and the appliance is in RUN PROGRAM mode prior to closing and locking the door. Programming the Appliance from a USB stick 1. Copy schedule.txt to a USB stick. AirQ 1280 OPERATING INSTRUCTIONS...
- Page 15 8. Be sure that the power is on and the appliance is in RUN PROGRAM mode prior to closing and locking the door. 9. The new file created on the USB stick will be called “outsche.txt.” Changing it to “schedule.txt” allows the programs to be loaded on another appliance. AirQ 1280 OPERATING INSTRUCTIONS...
-
Page 16: Setting Scent Intensity
If you followed the Room-Size Table or S4 Tool, you have set AirQ 1280 to the low end of the range for your room size. If after one hour you feel the scent is not detectable, increase the setting by about 10%. -
Page 17: Chapter 9: Installation: Diffusion Via Hvac System
Installation Kit Installation Kit for Appliance (included) 1. One (1) AirQ 1280 appliance (not pictured) with: 2. Eight (8) #10 self-tapping sheet metal screws for mounting in sheet metal 3. Plume connector: A: (1) Tubing; B: (1) Bulkhead Connector; C: (2) Washers; D: (1) Nut; E: (3) Cable Ties;... -
Page 18: Hvac Pre-Installation Checklist
< < < AIRFLOW < < < HEAT FILTER, SANITIZER, EXCHANGER HUMIDIFIER, ETC. < < < AIRFLOW < < < < < < AIRFLOW < < < < < < AIRFLOW < < < AirQ 1280 INSTALLATION: DIffusion via HVAC System... - Page 19 AirQ AHU and Duct Injection Locations PREFERRED AVOID AirQ HVAC and Duct Injection Locations CONDITIONED AIR TO ROOMS PREFERRED AVOID A/C EVAPORATOR COIL RETURN AIR DUCT FURNACE AIR & EXHAUST GAS LINE GAS FURNACE AIR FILTER CONDENSATE DRAINS AirQ 1280 INSTALLATION: DIffusion via HVAC System...
- Page 20 6” MINIMUM DIAMETER APPLIANCE Open gas flames should absolutely be avoided. If installation must be over gas heated coils or open gas flames, contact Prolitec Technical Support. The best location for the Appliance is below the injector tube (Fig. A). The injector hose should be run upward as short a distance as possible and NEVER MORE THAN 3 FEET.
-
Page 21: Appliance Installation
Fig. A Injector Hose Injector Tube Power Source AirQ 1280 Fig. B CORRECT INCORRECT Appliance Installation 1. Place the appliance onto the desired location on the wall or AHU and ensure that it is level. 2. Fasten the appliance to the wall or AHU using necessary screws. - Page 22 Apply gasket over exposed threaded portion of the assembly (Fig 10) • Firmly tighten nut in place to create a water tight installation (Fig 11) Fig. 8 Fig. 9 Fig. 10 Fig. 11 AirQ 1280 ]INSTALLATION: DIffusion via HVAC System...
-
Page 23: Universal Hvac Kit Installation
Note: not all parts are used in all installations. KITHVACSENSOR (Optional accessory, sold separately) adds these COMPONENTS: ADAPTER TUBING 1” SENSOR CABLE 1 ea SELF DRILLING SCREW 2 ea SET SCREW 1 ea SENSOR 1 ea AirQ 1280 ]INSTALLATION: DIffusion via HVAC System... - Page 24 Step Drill Bit 1/8” – 1/2”+ capacity #2 Phillips Screwdriver #2 Phillips Screwdriver Bit (for use with Electric Drill) Tubing Cutter w/ Deburring Tool (capacity to cut 3/8” Aluminum tube) Diagonal Cutter Torpedo Level Tape Measure AirQ 1280 ]INSTALLATION: DIffusion via HVAC System...
- Page 25 2. Confirm the hole size is large enough using the Aluminum tube. Enlarge the hole as necessary. While securely holding the Aluminum tube, check the fit to the hole – it should pass freely into the injection port with a minimum gap: AirQ 1280 ]INSTALLATION: DIffusion via HVAC System...
- Page 26 1” of tube exposed as shown. Gently hand tighten the set screw as needed to positively maintain the position of the Aluminum tube: #2 Philips Screwdriver Center of Duct Outside of Duct 1” Minimum AirQ 1280 ]INSTALLATION: DIffusion via HVAC System...
- Page 27 1” of tube is left exposed: 1” 6. If you cut the tube, deburr the Inside Diameter (ID) of the Aluminum tube, then clean out any debris from the inside of the tube: AirQ 1280 ]INSTALLATION: DIffusion via HVAC System...
- Page 28 ‘UP’ arrows are pointing vertically up in both planes as shown. Note: the vertical orientation of these planes is important to help prevent condensation from draining into the HVAC system Mark the (2) mounting holes that you will use to mount the injection assembly: AirQ 1280 ]INSTALLATION: DIffusion via HVAC System...
- Page 29 9. Remove the injection assembly and pilot drill the marked mounting holes with a 1/8” diameter drill: 10. Attach the injection assembly to the duct with the top self drilling screw, tightening it to hold the injection assembly in position as needed: AirQ 1280 ]INSTALLATION: DIffusion via HVAC System...
- Page 30 HVAC system while maintaining the vertical orientation set forth previously: 12. Attach the injector tubing to the injection assembly, fully covering the exposed Aluminum tube as shown: AirQ 1280 ]INSTALLATION: DIffusion via HVAC System...
- Page 31 13. Secure the tube with a zip tie at the midpoint of the Aluminum tube. Tighten the zip tie as needed to secure the tubing in place: 14. Cut off the excess zip tie to complete the injector installation: AirQ 1280 ]INSTALLATION: DIffusion via HVAC System...
- Page 32 16. Secure the tube with a zip tie as shown. Tighten the zip tie as needed to secure the tubing in place: 17. Cut off the excess zip tie to complete the appliance connection: AirQ 1280 ]INSTALLATION: DIffusion via HVAC System...
- Page 33 (green forming type, and if this step is not completed as instructed, you will not have the sensitivity needed to properly tighten the screw later. AirQ 1280 ]INSTALLATION: DIffusion via HVAC System...
- Page 34 3. Align the center hole of the mount with the sensing port. Ensure that the ‘UP’ arrows are pointing vertically up and mark the two holes shown: 4. Drill the marked holes with a 1/8” diameter drill: AirQ 1280 ]INSTALLATION: DIffusion via HVAC System...
- Page 35 HVAC system: 6. Attach the terminals of the sensor cable to the tabs on the terminal side of the sensor as shown: Back Side Terminal Side AirQ 1280 ]INSTALLATION: DIffusion via HVAC System...
- Page 36 (green arrow). Align the cover of the sensor over the port as shown (red arrow), then snap the cover fully into place: 8. Push the adapter tube over the sensor port as shown: AirQ 1280 ]INSTALLATION: DIffusion via HVAC System...
- Page 37 9. Gently guide the adapter tube portion of the sensor assembly fully into the mount as shown: 10. Use a level to ensure that the surface marked “THIS SURFACE MUST REMAIN VERTICAL” is vertical. Note: if this surface is not vertical, the sensor can give a false ‘ON’ signal. AirQ 1280 ]INSTALLATION: DIffusion via HVAC System...
- Page 38 While maintaining the vertical orientation, GENTLY HAND TIGHTEN the set screw just enough to compress the adapter tube and hold the sensor in place, completing the sensor installation. #2 Phillips Screwdriver 12. Remove the access plug from the appliance: AirQ 1280 ]INSTALLATION: DIffusion via HVAC System...
- Page 39 13. Remove the HVAC JUMPER plug: 14. Connect the HVAC SENSOR CABLE as shown to complete the appliance connection: AirQ 1280 ]INSTALLATION: DIffusion via HVAC System...
-
Page 40: Chapter 10: Installation: Diffusion Via Direct Indoor Fan
INSTALLATION: Diffusion via Direct Indoor Fan Installation Kit for Fan (accessory sold separately) 1. One (1) Prolitec Diffusion fan and cable for direct indoor diffusion 2. Three (3) drywall anchors for mounting fan onto dry wall 3. Three (3) screws for mounting in drywall and concrete 4. -
Page 41: Pre-Installation Checklist
Then secure with clamp, ensuring that the hose connector is still free to rotate. 5. Connect the power cord to a junction box or connect AC plug to a nearby outlet. AirQ 1280 INSTALLATION: DIffusion via Direct Indoor Fan... -
Page 42: Diffusion Fan Installation
5. Measure the length of cable raceway needed and cut to length using a pair of scissors or a cutting blade (Fig. 8). Fold into an “L” shape and peel off liner (Fig. 9). Fasten adhesive side to the wall between appliance and Diffusion Fan assembly. Fig. 7 AirQ 1280 INSTALLATION: DIffusion via Direct Indoor Fan... - Page 43 9. Extend the hose from appliance toward the diffusion fan hose barb, cut to proper length (Fig. 13) and secure to the hose barb of the diffusion fan assembly. (Fig. 14) 10. Turn the APPLIANCE on and verify that a plume is produced. AirQ 1280 INSTALLATION: DIffusion via Direct Indoor Fan...
-
Page 44: Chapter 11: Scenxus Installation
2. Remove the extra labels from the ScenXus module. 3. Adhere the remaining ScenXus label inside the appliance door, adjacent to the serial number, and take a photograph. 4. Attach the ScenXus module to the appliance by pressing the connector into place. AirQ 1280 ScenXus Installation... - Page 45 5. While remaining in the approximate installation location of the appliance, open “settings” on your smart phone and locate “Wi-Fi settings.” 6. Under “Wi-Fi settings,” make sure you see the network that will provide ScenXus internet access. AirQ 1280 ScenXus Installation...
- Page 46 8. Power on the appliance and look for the firmware on the display. 9. The network icon will blink 10. Refresh the list of Wi-Fi networks on the phone until you see a network titled “ScenXus...” AirQ 1280 ScenXus Installation...
- Page 47 14. Wait as your smart phone disconnects from ScenXus, ScenXus connects to the router, and the router connects to the internet. When ScenXus is connected to the cloud, you’ll see the message: “connection complete.” 15. The network icon should stop flashing and Wi-Fi signal strength should appear AirQ 1280 ScenXus Installation...
-
Page 48: Controlling The Appliance Remotely
Be sure to check your junk and spam folders. 2. On your iPad or Laptop, go to scenxus.com and sign in using your email address and the aforementioned token. 3. Depending on your account, you will see a slightly different version of this homepage. AirQ 1280 ScenXus Installation... - Page 49 5. Go to the “Monitor/Control” page and adjust the appliance options and settings as needed. 6. For complex programming, navigate to the SD card programming tool on airqtools.com and download the schedule.txt file to your laptop. 7. Upload the schedule.txt file to the appliance via the “Monitor/Control” page at scenxus.com. AirQ 1280 ScenXus Installation...
- Page 50 Internet Explorer relies heavily on cached data, meaning that changes may have been sent to the cloud, but your browser may still show old values. There are settings to prevent this behavior, and other browsers (Chrome, Firefox, Safari, Edge, etc.) do not have this issue. AirQ 1280 ScenXus Installation...
-
Page 51: Chapter 12: Troubleshooting
Unplug the power at the panel. Using a known good Prolitec provided 15VDC power supply, reapply power at the panel. If the appliance works, replace internal power supply. The fragrance cannot... - Page 52 Do not hesitate to repeat this process every time but after a while you that you doubt the presence of the fragrance in no longer notice it. the area. AirQ 1280 Troubleshooting...
-
Page 53: Chapter 13: General Care And Customer Support
General Care and Customer Support • Do not drop AirQ 1280 on the floor. Do not drop it in or position it near an open basin of water. • Do not paint or otherwise try to alter the color of the outer cover. -
Page 54: Chapter 14: Applications
Applications AirQ 1280 is used to enhance indoor air quality by neutralizing odors or introducing and maintaining a scent in the air or both at the same time. This is accomplished by blending ultra-low concentrations of odor neutralizers and fragrance ingredients (“Air-Treatment Agents”) into the air. In fact, AirQ 1280 is fully effective with air concentrations of Air-Treatment Agents less than 1 part per million (ppm). -
Page 55: Product Marketing
Scent is the main feature of these products. Using AirQ 1280 to present that scent to a customer is the best way to present and sell the product. In this way, AirQ 1280 delivers a true and complete experience of the scent to clients and passersby without intrusion or sales associate intervention. -
Page 56: Aromatherapy & Performance Scenting
AirQ 1280 and Prolitec aromatherapy chemistry can help make a workspace a more comfortable and appealing place to be. As examples of the positive effect of aromatherapy on the workplace, below are results of several relevant studies: •... -
Page 57: Chapter 15: Frequently Asked Questions
Do I need to adjust AirQ 1280? Yes! AirQ 1280 is a powerful machine. AirQ 1280 can handle small and very large rooms. If it is set too high for the room size, it can cause discomfort for some people. Adjusting is simple. Take the time to do it right. - Page 58 The more expensive aerosols can produce a very pleasant scent, but only for a few minutes and in very high concentrations just in the area they were sprayed. AirQ 1280 is what is known as a “continuous action” air freshener. AirQ 1280 is programmed to deliver an evenly distributed scent throughout the room.
-
Page 59: Chapter 16: Specifications
Specifications Dimensions AirQ 1280 Appliance 15 1/2” x 13 3/8” x 6 3/4” (39.4 cm x 34.0 cm x 17.2 cm) Weight 13.7 lbs (6.2 kg) with 1250mL cartridge 15.4 lbs. (7.0kg) with 2500mL cartridge Power Supply Input — 100 – 240V AC at 0.6A Max Frequency —...
Need help?
Do you have a question about the AirQ 1280 and is the answer not in the manual?
Questions and answers