Table of Contents
Advertisement
Advertisement
Table of Contents

Related Manuals for Prolitec AirQ AQ550


Summary of Contents for Prolitec AirQ AQ550
- Page 1 Prolitec AQ/PS/RZ 550/550-SOC Original Instructions Rev. 2015-05-07...
-
Page 2: Table Of Contents
Contents Chapter 6: OPERATING INSTRUCTIONS Chapter 1: About AQ 550 Features and Controls Chapter 2: Unpacking Setting Up the Cartridge Chapter 3: MOVING AND STORAGE Programming the Appliance INSTRUCTIONS Setting Scent Intensity Chapter 4: INSTALLATION Scent Control General Chapter 7: Plume Dispersion Accessory Location Chapter 8: Special Concerns for Track-Light Service Area... -
Page 3: Chapter 1: About Aq 550
About AQ/PS/RZ 550 Welcome to a whole new world of air treatment from Prolitec, the technology leader in air care with scent. The AQ550 appliance is the most advanced commercial air-treatment system on the market today. It is the world’s first fully adjustable commercial air-treatment system engineered to serve indoor spaces ranging in size from 200 to 30,000 cubic feet (10 to 850 cubic meters). -
Page 4: Chapter 2: Unpacking
Unpacking Remove AQ550 from the container. The following items should be included: AQ550 Appliance Power Supply Two Keys Mounting Hardware Cartridge Removal Tool One plastic output-extension tube (to be used out of the top port only, if needed) – white or black, to match the appliance AQ/PS/RZ 550 Chapter 2... -
Page 5: Chapter 3: Moving And Storage Instructions
MOVING AND STORAGE INSTRUCTIONS Remove the cartridge. Unscrew and remove the long round-head screws in the lower corners. Lift the appliance upward, off the mounting posts. Unplug the appliance. Unscrew the mounting plate. Store at -4°F (-20°C) to 158°F (70°C), 5% to 95% humidity AQ/PS/RZ 550 Chapter 3 MOVING AND STORAGE INSTRUCTIONS... -
Page 6: Chapter 4: Installation
Installation General Location AQ550 is designed for permanent installation on wall surfaces over a 110 to 240V outlet (Fig. 1), mounted to a ceiling track-lighting system (Fig. 2), used as a table- or shelf-top unit (Fig. 3) or strapped to a column or pillar (Fig. -
Page 7: Estimating Cartridge Life
Estimating Cartridge Life Estimating how long a cartridge will last and the number of days between services is critical to performing an installation that can be serviced efficiently. This includes determining the number of AQ550s needed for a space. Please refer to AirQ’s ‘S3 (Sizing, Service & Success) Tool,’ available at AirQ Tools. -
Page 8: Appliance Location
AQ550 can use, rather than fight, the natural air currents in a room. Air currents in a room are determined by using a SMOKE TEST KIT available from Prolitec or any source of smoke or vapor, such as a candle or match. - Page 9 Step 2 – Mounting Kit, Parts and Tools mounting kit provided with AQ550 includes a mounting plate, which holds the appliance to the wall, and 4 screws and wall anchors suitable for plastered drywall — 2 short flat-head screws and 2 longer round- head screws.
-
Page 10: Installing The Top Anchors
Step 4 – Installing the Top Anchors Set the mounting bracket aside. Use an electric drill to make a 1/8” hole at the exact location you marked. This will serve as a guide for the anchors. Use a hammer to tap the anchors in far enough so they stay well in position. -
Page 11: Hanging The Mounting Bracket
Step 7 – Hanging the Mounting Bracket Hang the mounting bracket by holding the bracket so the top holes match up with the anchors, then screw the 2 flat-head screws through the hole in the bracket into the anchors. Tighten the screws firmly, but do not crack the bracket. -
Page 12: Fitting The Appliance In Place
Step 9 – Fitting the Appliance in Place Place the appliance so that the big holes in the top of the back cover fit over the rounded locking posts. In doing this, make sure the appliance is flush with the wall and the posts are in the holes of the appliance. Slide the appliance downward to lock on the posts. -
Page 13: Chapter 5: Scenting Via Hvac System
Scenting via HVAC System Unpacking Remove all parts from the container. The following items should be included: 1. The AQ/PS/RZ Appliance 2. 110/220V to 12V power adapter 3. Universal Adapter Kit 4. Sensor Housing comprising: a. Airflow Switch cable b. Three (3) Airflow Switch mounting screws c. - Page 14 Unpacking AQ/PS/RZ Appliance (not pictured) AQ/PS/RZ 550 Chapter 5 Scenting via HVAC System...
-
Page 15: Operation
Installation for HVAC System Scenting Operation The AirQ generates micro-droplets 1/100th the diameter of a human hair from a reservoir of liquid in a disposable cartridge. These micro-droplets behave like a vapor. They are passed through a silicon tube and injected into the airflow of the air handler using an injector tube that is installed in a hole in the ductwork. -
Page 16: Positioning The Machine
Positioning the Machine The AirQ 550 machine is mounted on a flat vertical surface — either a wall or on an air duct. The maimum run of the silicon injector hose between the Cartridge and the Injector Tube is 18”. The shortest possible run length is better. -
Page 17: Wall Mounting Or Duct Mounting
Wall Mounting or Duct Mounting the Machine Step 1: Mounting Kit, Parts and Tools The mounting kit provided with the AQ550 (with HVAC kit) includes a mounting plate, which holds the appliance to the wall or duct surface; 4 screws and wall anchors suitable for attaching the mounting plate to drywall and 4 sheet-metal screws suitable for attaching the mounting plate to ductwork;... - Page 18 Step 3: Installing the Top Anchors or Screws Set the mounting bracket aside. Use an electric drill to make a 1/8” pilot hole at the exact location you marked. This will serve as a guide for the anchors or sheet metal screws. If the appliance is being mounted on drywall, use a hammer to gently tap the tip of the anchors into the wall.
- Page 19 Step 8: Fitting the Appliance in Place Place the appliance so that the big holes in the top of the back cover fit over the rounded locking posts. In doing this, make sure the appliance is flush with the wall and the posts are in the holes of the appliance. Slide the appliance downward to lock on the posts.
- Page 20 Step 11: Installing the Airflow Switch The air-flow switch must be installed on a vertical plane at a distance of between 6-12” above the appliance. Using installation template mark 2# location holes. Drill 2# 1/8” dia. pilot holes. Locate step drill within left-hand pilot hole. Drill 1# 11/16” dia. mounting hole therein. Holding the device in one hand as illustrated, insert dual tubular feature at its rear into the 13/16”...
- Page 21 Step 12: Installing the Supply tube…Device-to-switch Cut supply tube to appropriate length, re: distance, switch-to-appliance. Insert barbed end of Connector into supply tube lumen. Insert connectorized supply tube into appliance. Insert air switch plug into corresponding receptacle in appliance. AQ/PS/RZ 550 Chapter 5 Scenting via HVAC System...
-
Page 22: Chapter 6: Operating Instructions
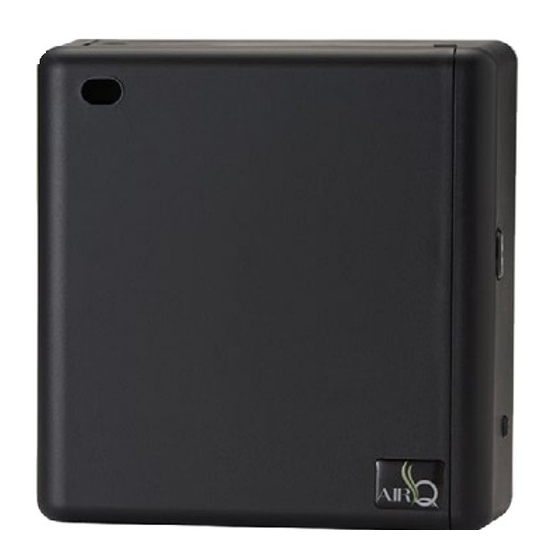
OPERATING INSTRUCTIONS Features and Controls Output Ports Lock Air Stem Fragrance Cartridge Programming Panel AQ/PS/RZ 550 Chapter 6 OPERATING INSTRUCTIONS... -
Page 23: Setting Up The Cartridge
Setting Up the Cartridge Use the key to unlock and open the door. Prepare the cartridge. • Remove the plug from the TOP port (b) of the cartridge • Remove the big plug from the air-intake port (a) on the flat surface (back side) of the top of the cartridge. - Page 24 Insert the cartridge into the recess so that the air-intake port fits over the air stem. After inserting the cartridge, insert the plastic tube into the cartridge through the port on the top of the appliance. Remove tube when changing cartridge. If the appliance has been previously programmed (see Programming the Appliance), press...
-
Page 25: Programming The Appliance
Programming the Appliance Unlock and open the door. Turn on the power by pressing on the control panel. Set the Clock. • Turn the dial to Set Clock. The day-of-the-week icon will blink. • Adjust the day forward or backward using on the right side of the control panel. -
Page 26: Setting Scent Intensity
HINT: To set the same programs for Monday to Friday, you may set the programs for everyday first and then disable Saturday and Sunday. You may review the programs by doing the same as in programming. Just beware not to accidentally set the everyday programs as this will also set and change the programs of all the days. -
Page 27: Chapter 7: Plume Dispersion Accessory
Plume Dispersion Accessory The Plume Dispersion accessory adds a fan to the appliance. This fan reduces visibility of the plume and helps disperse fragrance within a room. The top port of the cartridge must be used for output with this accessory. -
Page 28: Chapter 8: Special Concerns For Track-Light Mounted Appliances
Special Concerns for Track Light-Mounted Appliances Track Light-Mounted installations (AQ550TL) occasionally encounter a problem with fragrance deposits on the door of the appliance. Left uncorrected for several days the condensation can begin to drip, creating the appearance of a leak in the machine and damaging the floor. Cause This is caused by fragrance droplets from the output of the AQ550TL being blown back onto the surface of the machine by the ambient air flow. -
Page 29: Chapter 9: User Maintenance
USER MAINTENANCE Cartridge Change When the reservoir is empty the cartridge needs to be changed. The change process is simple. Best practice to wear gloves when manipulating the cartridge. Unlock and open the door. Turn off the power by pressing the power button. Remove the plastic tubing from the Top Output Port. -
Page 30: Cartridge Change Maintenance Checklist Items
Inspect the o-rings on the air stem for breakage or deterioration. Replace as needed. Remove the plug from the Top Output Port first, then remove the large plug from the Air Intake port. Insert the new cartridge and replace the plastic tubing. Remove the empty cartridge from the property and deliver to a recycling center at a later date. -
Page 31: Changing An Appliance
Changing an Appliance Appliance malfunctions are not intended to be serviced in the field. If there is no plume after following the procedure outlined above or there is any excessive noise level, then the appliance must be replaced with a new one. -
Page 32: General Care
General Care • AQ550 is an electronic appliance. Treat it like a laptop. • Do not place or store AQ550 or its cartridges in extreme heat (more than 130˚ F) or in freezing temperatures. • Do not drop AQ550 on the floor. Do not drop it in or position it near water. •... -
Page 33: Chapter 10: Applications
There are four basic applications for AQ550: ambient scenting, product marketing, odor control and aromatherapy. These applications are different in terms of their objectives, but they all employ the same combination of Prolitec’s proprietary air-treatment chemistry and AQ550 computer-controlled delivery system. -
Page 34: Product Marketing
• Hotel hallways The Prolitec approach to odor remediation uses a proprietary and patented neutralizer that inhibits the human olfactory system from detecting the odor and then injecting a small amount of scent to create an ultra-low concentration in the air of less than 1 ppm. This approach is unique and much more effective than traditional approaches that simply douse the odor with a high concentration of scent. -
Page 35: Aromatherapy And Performance Scenting
AQ550 and Prolitec aromatherapy chemistry can help make a workspace a more comfortable and appealing place to be. As examples of the positive effect of aromatherapy on the workplace, below are results of several relevant studies: •... -
Page 36: Chapter 11: Important Safety
IMPORTANT SAFETY INSTRUCTIONS IMPORTANT SAFETY INSTRUCTIONS – SAVE THESE INSTRUCTIONS Appliance Precautions WARNING – When using electric products, basic precautions should always be followed, including the following: • Read all the instructions before using the product. • Children should be supervised not to play with the appliance. •... -
Page 37: Fragrance Cartridge Precautions
Fragrance Cartridge Precautions • Use only AirQ by Prolitec fragrance cartridges. • Read the Consumer Product Safety Information Sheet and the Material Safety Data Sheet provided with each shipment of Cartridges. Insure that these information sheets are available for review by employees. -
Page 38: Chapter 12: Frequently Asked Questions
Frequently Asked Questions (FAQs) How does AQ550 work? AQ550 uses a patented technology to convert liquid fragrance compounds into tiny droplets less than 1/100th the diameter of a human hair. By comparison, an aerosol droplet is 100 times bigger and 1,000,000 times heavier. - Page 39 How does AQ550 differ from aerosol room fresheners? The more expensive aerosols can produce a very pleasant scent, but only for a few minutes and in very high concentrations just in the area they were sprayed. AQ550 is what is known as a “continuous action” air freshener.
-
Page 40: Chapter 13: Specifications
Liquid Capacity 265 mL & 500 mL cartridges Service Area Up to 30,000 cu. ft. (850 m ) served Prolitec, Incorporated 1235 W. Canal Street Milwaukee, WI 53223 1-866-387-4333 www.airq.com All contents © 2015 Prolitec, Inc AQ/PS/RZ 550 Chapter 13 Specifications...