Table of Contents
Advertisement
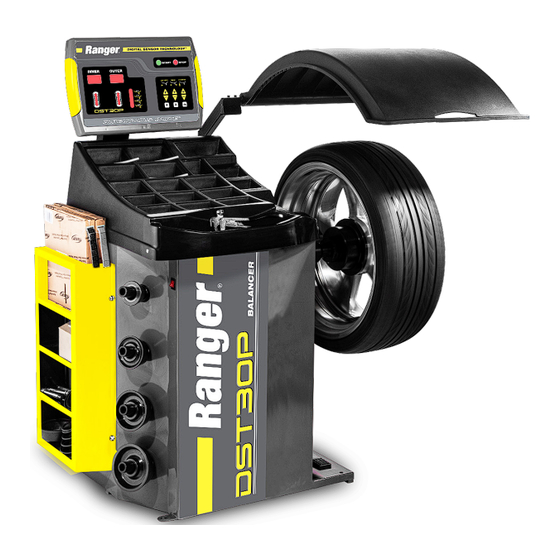
Installation and Operation Manual
Manual P/N 5900163 — Manual Revision C1 — March 2020
Model:
• DST30P
Designed and engineered in Southern California, USA. Made in China.
⚠
DANGER
Wheel Balancer
entire
contents of this manual
Read the
Failure to follow the instructions and safety precautions in this manual can
result in serious injury or death. Make sure all other operators also read
this manual. Keep the manual near the product for future reference.
proceeding with installation and operation, you agree that
you fully understand the contents of this manual and
assume full responsibility for product use.
1645 Lemonwood Dr.
Santa Paula, CA 93060 USA
Toll Free: (800) 253-2363
Telephone: (805) 933-9970
rangerproducts.com
before
using this product.
By
Advertisement
Table of Contents

Related Manuals for Ranger DST30P


Summary of Contents for Ranger DST30P
- Page 1 Telephone: (805) 933-9970 rangerproducts.com Wheel Balancer Installation and Operation Manual Manual P/N 5900163 — Manual Revision C1 — March 2020 Model: • DST30P Designed and engineered in Southern California, USA. Made in China. ⚠ entire contents of this manual before using this product.
- Page 2 Warranty. The BendPak Ranger warranty is more than a commitment to you: it is also a commitment to the value of your new product. For full warranty details, contact your nearest BendPak Ranger dealer or visit bendpak.com/support/warranty.
-
Page 3: Table Of Contents
Maintenance Log Installation Introduction This manual describes the BendPak Ranger DST30P Wheel Balancer, which is a computer-controlled Wheel Balancer that provides fast, accurate Wheel balancing for a wide variety of Wheels. More information about BendPak Ranger products is available at rangerproducts.com. -
Page 4: Shipping Information
Do not make any modifications to the product; this voids the warranty and increases the chances of injury or property damage. • Make sure all Operators read and understand the Installation and Operation Manual. Keep the manual near the device at all times. DST30P Wheel Balancer P/N 5900163 — Rev. C1 — March 2020... - Page 5 . Do not use the product if you find any missing or damaged parts. Instead, take the unit out of service, then contact an authorized repair facility, your distributor, or Ranger Products at (805) 933-9970. • BendPak Ranger recommends making a thorough inspection of the product once a month.
-
Page 6: Components
Anchor Bolt Holes. Used to anchor the Balancer to the ground. • Brake Pedal. Step on to hold the Wheel in place. The Inner Arm/Distance Ruler is not visible in this view. DST30P Wheel Balancer P/N 5900163 — Rev. C1 — March 2020... - Page 7 Wheels, so you need to know where you want to put the Weights and select the appropriate ALU Mode. ALU Modes generally use Adhesive Weights, which are less visible than Clip-On Weights. DST30P Wheel Balancer P/N 5900163 — Rev. C1 — March 2020...
-
Page 8: Faq
<5g button on the Control Panel to see specific values. Q: What do I do if I have a problem with the Balancer that I cannot solve? A: Contact BendPak Ranger; we are here to help. Using a web browser, visit the BendPak... -
Page 9: Specifications
48 in / 1,219 mm Depth, Hood Up 40 in / 1,016 mm Depth, Hood Down 41 in / 1,041 mm Power Cord Length 58 in / 1,473 mm Sound < 70 dB DST30P Wheel Balancer P/N 5900163 — Rev. C1 — March 2020... -
Page 10: Installation Checklist
9. Install the Hood. ☐ 10. Install the Shaft. ☐ 11. Anchor the Unit. ☐ 12. Connect to a Power Source. Requires a licensed, certified Electrician ☐ 13. Test the Balancer. DST30P Wheel Balancer P/N 5900163 — Rev. C1 — March 2020... -
Page 11: Installation
Certain parts of installing the Balancer are difficult for just one person. BendPak CAUTION Ranger strongly recommends having two or more persons work together to install the Balancer. If you have to use an extension cord, make sure its current rating is equal to or greater than that of the equipment being used. - Page 12 Balancer and you could electrocute yourself. Clearances A certain amount of space around the Balancer is required. above You also need enough room the Balancer for the Hood to move up and down freely. DST30P Wheel Balancer P/N 5900163 — Rev. C1 — March 2020...
- Page 13 Do not lift the Balancer by the Shaft Housing; it is not strong enough to bear the weight of the Balancer. ⚠ Ranger recommends having at least two people move the Balancer; it is heavy. If it CAUTION is dropped or falls, it could cause injuries and/or the Balancer could be damaged.
- Page 14 • Hood. Connects to the Hood Mount Bar. The following drawing shows the components on the back of the Balancer. Not necessarily to scale. Not all components shown. DST30P Wheel Balancer P/N 5900163 — Rev. C1 — March 2020...
- Page 15 The Control Panel lets you control the Balancer; it also displays Balancer information. at least two people BendPak Ranger recommends having perform this step: one person to hold the Control Panel Mount Bar in position and the other person to connect the wiring and re-install the bolts and washers.
- Page 16 The two pins go into the two holes in the connector. Make sure the connector and the pins click into position. 5. When the wiring is connected, reinstall the top of the Hood Mount Box. DST30P Wheel Balancer P/N 5900163 — Rev. C1 — March 2020...
- Page 17 12. Replace the two hex bolts and split lock washers you just removed; tighten them securely. 13. Test the Hood to make sure it moves back and forth smoothly. DST30P Wheel Balancer P/N 5900163 — Rev. C1 — March 2020...
- Page 18 Installing the Shaft The Shaft holds the Wheels you are balancing. rags nearby BendPak Ranger recommends having ; the Shaft comes greased to protect it during transport. It’s not ‘if’ you are going to get grease on you, but ‘when’.
- Page 19 3/8 in diameter Anchor Bolt, for example, use a 3/8 in diameter drill bit. 3. Vacuum each hole clean. BendPak Ranger recommends using a vacuum to get the hole very clean. ream the hole. Do make the hole any wider than the drill bit made it.
- Page 20 Electrician. If you do not use a licensed, certified Electrician, you void your warranty and put everyone who uses the Balancer in danger of injury or, in rare cases, death. DST30P Wheel Balancer P/N 5900163 — Rev. C1 — March 2020...
- Page 21 Electrical codes may require direct connection to the facility’s power system (sometimes called “hard-wiring”) when the Balancer is bolted to the floor. Consult a licensed, certified Electrician regarding the applicable codes for your location. DST30P Wheel Balancer P/N 5900163 — Rev. C1 — March 2020...
- Page 22 To get used to the Balancer, we recommend having all potential Operators balance multiple customer Wheels before working on customer Wheels. The Balancer may work differently than other Balancers you or the other Operators have used before. DST30P Wheel Balancer P/N 5900163 — Rev. C1 — March 2020...
-
Page 23: Operation
Keep the work area around the Balancer clean and well lit. Dirty, cluttered, and dark work areas increase the chances of an accident happening. • Do not remove the Trays on the top of the Balancer unless instructed to do so by BendPak Ranger Support. There are no user serviceable parts underneath. must •... - Page 24 When all of the indicators are lit, press the Brake to hold the Wheel and then add the specified weight to Top Dead Center (also known as 12 o’clock high) on the Wheel. DST30P Wheel Balancer P/N 5900163 — Rev. C1 — March 2020...
- Page 25 7 grams. If you want to see Weight values at a more granular level, press and hold <5g. Weight values are shown rounded off while you press and hold <5g. For example: DST30P Wheel Balancer P/N 5900163 — Rev. C1 — March 2020...
- Page 26 So the Balancer will spin and weight to be added will appear, but without correct measurements it is virtually guaranteed that the balance will be accurate. DST30P Wheel Balancer P/N 5900163 — Rev. C1 — March 2020...
- Page 27 Rear-Cone Mounting. Use this method if the Wheel you are balancing cannot be mounted with Front-Cone Mounting. The Spring goes on first, then an appropriately sized Cone, the Wheel, the Quick Nut Cap, and finally the Quick Nut. DST30P Wheel Balancer P/N 5900163 — Rev. C1 — March 2020...
- Page 28 You may want to spin the Wheel some as you tighten the Quick Nut; this can help you get a strong, secure fit. Important: Do not hammer or hit the Quick Nut to tighten it. You will damage the Quick Nut, which covered under the Warranty. DST30P Wheel Balancer P/N 5900163 — Rev. C1 — March 2020...
- Page 29 Because we are doing a Dynamic Mode balance, all four of the Indicators need to be off. all off 7. If any of the indicators are on, press the F button until they are DST30P Wheel Balancer P/N 5900163 — Rev. C1 — March 2020...
- Page 30 –L– to –d– and displays the default value of 14.0 in the Outer Window. The value in the Outer Window changes as you press the + and – buttons under Diameter. DST30P Wheel Balancer P/N 5900163 — Rev. C1 — March 2020...
- Page 31 31. Lower the Hood to spin the Wheel again. The Wheel is balanced when both the Inner and Outer Windows show 00. It may take more than one time adding weights to get to 0.0 | 0.0. DST30P Wheel Balancer P/N 5900163 — Rev. C1 — March 2020...
- Page 32 12. When the Distance value is correct, use the Caliper to measure the width of the Rim, Inner Edge to Outer Edge. 13. Input the distance you measured using the Calipers using the + and – buttons under Width. DST30P Wheel Balancer P/N 5900163 — Rev. C1 — March 2020...
- Page 33 22. Lower the Hood to spin the Wheel again. The Wheel is balanced when both the Inner Window shows 00. It may take more than one time adding weights to get to 0.0 | 0.0. DST30P Wheel Balancer P/N 5900163 — Rev. C1 — March 2020...
- Page 34 9. On the Inner Arm Ruler, note the distance from the Balancer to the Inner Edge. 10. Return the Inner Arm to its normal location. 11. Input the distance you noted on the Inner Arm Ruler using the + and – buttons under Distance. DST30P Wheel Balancer P/N 5900163 — Rev. C1 — March 2020...
- Page 35 (12 o’clock high) on the Inner Edge or the Inner Plane, as appropriate for the ALU Mode. If you are adding Adhesive Weight with multiple sections, center them on Top Dead Center. DST30P Wheel Balancer P/N 5900163 — Rev. C1 — March 2020...
- Page 36 If the values have decimal points, Ounces are active. – If the values do not have decimal points, Grams are active. Note: The Ounces/Grams setting, whichever setting is active, is saved if you restart the Balancer. DST30P Wheel Balancer P/N 5900163 — Rev. C1 — March 2020...
- Page 37 If the values have decimal points, Millimeters are active. Note: The Inches/Millimeters setting for Wheel Width is saved if you restart the Balancer. Instead, it resets to the default, Inches. DST30P Wheel Balancer P/N 5900163 — Rev. C1 — March 2020...
- Page 38 To enable Auto Hood Start if it is disabled, press Stop and then press the R button. You will hear a beep. The setting has been changed. Note: The Auto Hood Start setting, whether enabled or disabled, is saved if you restart the Balancer. DST30P Wheel Balancer P/N 5900163 — Rev. C1 — March 2020...
-
Page 39: Maintenance
Do not operate your Balancer if you find issues; instead, take the unit out of service, WARNING then contact your dealer, visit www.bendpak.com/support/, call BendPak Ranger at (805) 933-9970, or email support@bendpak.com. DST30P Wheel Balancer P/N 5900163 — Rev. C1 — March 2020... -
Page 40: Troubleshooting
Stones or other objects caught in Tire tread; remove the objects, rebalance if necessary. If you continue to have problems with your Wheel Balancer, visit www.bendpak.com/support/, call BendPak Ranger at (805) 933-9970, or email support@bendpak.com. DST30P Wheel Balancer P/N 5900163 — Rev. C1 — March 2020... - Page 41 11. Remove the Calibration Weight from the Wheel. The Dual-Plane Self-Calibration Procedure is complete. Important: If the Dual-Plane Self-Calibration Procedure does not complete successfully, visit www.bendpak.com/support/, call BendPak Ranger at (805) 933-9970, or email for assistance. support@bendpak.com DST30P Wheel Balancer...
- Page 42 If the Calibration Weight is not at Bottom Dead Center for both Inner and Outer Important: Edges or any different values appear in the Outer or Inner Windows, the Balancer is not calibrated correctly. Visit www.bendpak.com/support/, call BendPak Ranger at (805) 933-9970, or email for assistance. support@bendpak.com DST30P Wheel Balancer...
-
Page 43: Wiring Information
Information about color code conventions in other regions and countries is available online. Make sure your Electrician installs the Plug or hard wires the Balancer in accordance with all applicable local electrical codes. DST30P Wheel Balancer P/N 5900163 — Rev. C1 — March 2020... -
Page 44: Labels
Labels DST30P Wheel Balancer P/N 5900163 — Rev. C1 — March 2020... - Page 45 DST30P Wheel Balancer P/N 5900163 — Rev. C1 — March 2020...
-
Page 46: Parts
Parts Main Cabinet DST30P Wheel Balancer P/N 5900163 — Rev. C1 — March 2020... - Page 47 Washer, Ø6 flat Motor Assembly 5328245 Injection Molded Hood 5328246 Injection Molded Hood Bracket SHCS. M6 by 25 SHCS. M6 by 25 Adjusting Plate Tire Guard Department Spring Pad, 6 mm DST30P Wheel Balancer P/N 5900163 — Rev. C1 — March 2020...
- Page 48 Resistor 5327148 Electrical Mounting Plate B MODE Spring Spacer Nuts Cross Slot Screws Hexagon Socket Large Flat Head Screw 5327100 Anchor Bolt, 3/8 inch wide by 3.5 inch deep DST30P Wheel Balancer P/N 5900163 — Rev. C1 — March 2020...
- Page 49 Hood Mounting Assembly DST30P Wheel Balancer P/N 5900163 — Rev. C1 — March 2020...
- Page 50 Hood Mounting Assembly 5327164 Hood Mounting Assembly Cover 5327165 Hood Mounting Assembly Bracket 5327166 Hood Rotating Shaft 5327167 Hood Shaft Bushing 5327168 Hood Spring 5327179 Snap Ring, 36 mm DST30P Wheel Balancer P/N 5900163 — Rev. C1 — March 2020...
- Page 51 5327870 SHCS, M8 by 20 HHB, M8 by 30 5327870 SHCS, M8 by 20 Washer, 8 mm 5327143 Spindle with Position Board SHCS, M10 by 16 Sensor Flat Mat DST30P Wheel Balancer P/N 5900163 — Rev. C1 — March 2020...
- Page 52 Brake Assembly DST30P Wheel Balancer P/N 5900163 — Rev. C1 — March 2020...
- Page 53 HHB, M6 by 25 Nut, M12 Pin, 4 by 16 Cotter Pin, 2 by 20 SHCS, M6 by 16 Nut, M6 Nut, M20 Washer, Φ6 flat Washer, Φ8 flat Brake Warp DST30P Wheel Balancer P/N 5900163 — Rev. C1 — March 2020...
- Page 54 Accessories DST30P Wheel Balancer P/N 5900163 — Rev. C1 — March 2020...
- Page 55 Anchor Bolt, 3/8 inch wide by 3.5 inch deep 5328055 Hex Wrench, 6 mm 5327720 Hex Wrench, 12 mm 5328056 Hex Wrench, 4 mm 5328057 Allen Wrench, 3 mm DST30P Wheel Balancer P/N 5900163 — Rev. C1 — March 2020...
- Page 56 Display Panel DST30P Wheel Balancer P/N 5900163 — Rev. C1 — March 2020...
- Page 57 SHCS, M12 by 30 Spacer, φ12 Nut M12 Transposition Link Board, installed and welded Cover Piece, installed and welded SHCS, M4 by 12 Fixed Block Spring Spacer, φ8 SHCS, M8 by 20 DST30P Wheel Balancer P/N 5900163 — Rev. C1 — March 2020...
-
Page 58: Maintenance Log
Maintenance Log DST30P Wheel Balancer P/N 5900163 — Rev. C1 — March 2020... - Page 59 Maintenance Log DST30P Wheel Balancer P/N 5900163 — Rev. C1 — March 2020...
- Page 60 1645 Lemonwood Drive Santa Paula, CA 93060 USA © 2020 BendPak Inc. All rights reserved. bendpak.com...
Need help?
Do you have a question about the DST30P and is the answer not in the manual?
Questions and answers