Canon DR-1210C Service Manual
Hide thumbs
Also See for DR-1210C:
- User manual (98 pages) ,
- Pocket manual (32 pages) ,
- Manual (28 pages)
Table of Contents
Advertisement
Quick Links
Download this manual
See also:
User Manual
Advertisement
Table of Contents
Troubleshooting

Related Manuals for Canon DR-1210C


Summary of Contents for Canon DR-1210C
- Page 1 FIRST EDITION MY8-13A8-000 FEB. 2006 COPYRIGHT © 2006 CANON ELECTRONICS INC. CANON DR-1210C FIRST EDITION FEB. 2006...
- Page 2 COPYRIGHT © 2006 CANON ELECTRONICS INC. Use of this manual should be strictly supervised to avoid disclosure confidential information.
-
Page 3: Contents
This is one way of fostering response for ensuring prolonged quality and function, and for investigating the cause of trouble during troubleshooting. Quality Assurance Center Canon Electronics Inc. COPYRIGHT © 2006 CANON ELECTRONICS INC. CANON DR-1210C FIRST EDITION FEB. 2006... -
Page 5: Table Of Contents
READING SYSTEM .........2-4 ELECTRICAL PARTS LAYOUT .....2-15 III. FEED SYSTEM ........2-8 VI. PARTS LAYOUT ON EACH PCB...2-16 CHAPTER 3 DISASSEMBLY & REASSEMBLY OVERALL FLOWCHART ......3-1 PARTS PROCEDURES ......3-2 COPYRIGHT © 2006 CANON ELECTRONICS INC. CANON DR-1210C FIRST EDITION FEB. 2006... - Page 6 ERROR DISPLAY........5-1 IMAGE TROUBLESHOOTING ....5-14 LIST OF ERRORS........5-4 VERSION INDICATION ......5-20 III. OPERATION TROUBLESHOOTING ..5-7 APPENDIX ELECTRICAL BLOCK DIAGRAM ...A-1 III. SCRAPPING..........A-4 PARTS CATALOG ........A-2 COPYRIGHT © 2006 CANON ELECTRONICS INC. CANON DR-1210C FIRST EDITION FEB. 2006...
- Page 7 CHAPTER 1 GENERAL DESCRIPTION FEATURES ..........1-1 NAME OF PARTS ........1-8 SPECIFICATIONS........1-2 USER OPERATION .......1-11 III. PRECAUTIONS ........1-7 COPYRIGHT © 2006 CANON ELECTRONICS INC. CANON DR-1210C FIRST EDITION FEB. 2006...
-
Page 9: Features
"Windows" is a trademark of Microsoft Corporation in the U.S. and other countries. Other company names and product names mentioned in this document are registered trademarks or trademarks of the respective companies. COPYRIGHT © 2006 CANON ELECTRONICS INC. CANON DR-1210C FIRST EDITION FEB. 2006... -
Page 10: Specifications
3) Flatbed: 20,000 sheets (A4) Installation By users Packaged software ISIS/TWAIN driver, CapturePerfect3.0, Adobe Acrobat7.0, Job registration tool, others Consumable parts Separation pad, roller unit (commercial goods) Table 1-201 COPYRIGHT © 2006 CANON ELECTRONICS INC. CANON DR-1210C FIRST EDITION FEB. 2006... -
Page 11: Copyright © 2006 Canon Electronics Inc. Canon Dr-1210C First Edition Feb
CHAPTER 1 GENERAL DESCRIPTION *Dimensions unit: mm (28) Figure 1-201 COPYRIGHT © 2006 CANON ELECTRONICS INC. CANON DR-1210C FIRST EDITION FEB. 2006... - Page 12 2.7 ppm * Default values should be applied to other function set- tings. The values listed above may differ depending on the computer and other specifications. Table 1-202 COPYRIGHT © 2006 CANON ELECTRONICS INC. CANON DR-1210C FIRST EDITION FEB. 2006...
- Page 13 * Smoothing is not available in color mode. Default values should be applied to other function settings. The values listed above may differ depending on the computer and other specifications. Table 1-203 COPYRIGHT © 2006 CANON ELECTRONICS INC. CANON DR-1210C FIRST EDITION FEB. 2006...
- Page 14 2) Job buttons (fixed × 3, option × 5, scroll × 2) 3) Status display LCD 4) Power switch Table 1-204 Specifications are subject to change for improvement. COPYRIGHT © 2006 CANON ELECTRONICS INC. CANON DR-1210C FIRST EDITION FEB. 2006...
-
Page 15: Precautions
This machine complies with some stan- dards regarding electromagnetic wave interference, such as VCCI and FCC. However, the user may have to take coun- termeasures if the machine causes elec- tromagnetic wave interference. COPYRIGHT © 2006 CANON ELECTRONICS INC. CANON DR-1210C FIRST EDITION FEB. 2006... -
Page 16: Iv. Name Of Parts
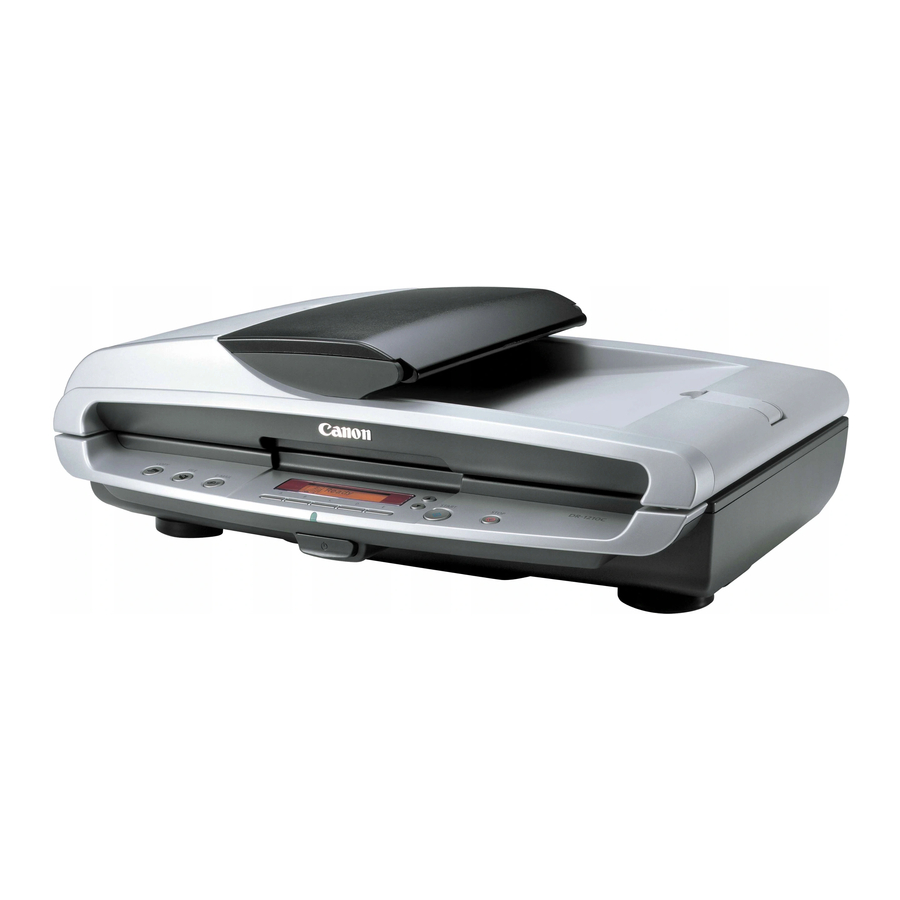
Feeder cover Document eject opening Operation panel Power indicator Paper release lever Power switch Figure 1-401 Note: The service part called the “pickup tray” includes the document guide adapter. COPYRIGHT © 2006 CANON ELECTRONICS INC. CANON DR-1210C FIRST EDITION FEB. 2006... -
Page 17: Rear Side
Note: Names enclosed in parentheses are used in CHAPTER 2 and subsequent sections of this manual. They are shown for reference. 2. Rear Side USB connector Power connector ADF connector Figure 1-403 COPYRIGHT © 2006 CANON ELECTRONICS INC. CANON DR-1210C FIRST EDITION FEB. 2006... - Page 18 Display panel Job title/Status/Message Selectable job buttons (A-E) Jobs assigned by user. Scroll buttons Scrolls registered job. START button Executes job/Starts scanning. STOP button Stops scanning/Cancels error message. 1-10 COPYRIGHT © 2006 CANON ELECTRONICS INC. CANON DR-1210C FIRST EDITION FEB. 2006...
-
Page 19: V. User Operation
ISIS driver. 1) Basic setup dialog box Figure 1-501 Note: The circled numbers have been adapted to those in the user manual. (Same in subsequent figures.) 1-11 COPYRIGHT © 2006 CANON ELECTRONICS INC. CANON DR-1210C FIRST EDITION FEB. 2006... -
Page 20: Paper Source
CHAPTER 1 GENERAL DESCRIPTION Save User Preferences Dots per inch (resolution) Mode Paper Source Feeding Option Page Size Batch Separation Figure 1-502 1-12 COPYRIGHT © 2006 CANON ELECTRONICS INC. CANON DR-1210C FIRST EDITION FEB. 2006... - Page 21 CHAPTER 1 GENERAL DESCRIPTION 2) Scan area dialog box Figure 1-503 3) Advanced settings dialog box Figure 1-504 1-13 COPYRIGHT © 2006 CANON ELECTRONICS INC. CANON DR-1210C FIRST EDITION FEB. 2006...
- Page 22 Figure 1-505 Selectable job button settings dialog box New/editing dialog box (save as file) Admin settings dialog box *See next page for details. SMTP method Figure 1-506 1-14 COPYRIGHT © 2006 CANON ELECTRONICS INC. CANON DR-1210C FIRST EDITION FEB. 2006...
- Page 23 *Use the TWAIN driver as the job function. File name (PDF/TIFF settings) File type Function (Print) Access setting (Windows2000/XP) Function (Attach to E-mail) Add E-mail address Function (Send by E-mail) Figure 1-507 1-15 COPYRIGHT © 2006 CANON ELECTRONICS INC. CANON DR-1210C FIRST EDITION FEB. 2006...
-
Page 24: Clearing Paper Jam
If no document is left in the feeder cover, check the back of the feeder and the document eject opening as well. Figure 1-510 1-16 COPYRIGHT © 2006 CANON ELECTRONICS INC. CANON DR-1210C FIRST EDITION FEB. 2006... - Page 25 4) Return the paper release lever and/or the roller unit after clearing the jam. Close the feeder cover gently. Figure 1-512 5) Press the STOP button to clear the error indication. STOP button Figure1-513 1-17 COPYRIGHT © 2006 CANON ELECTRONICS INC. CANON DR-1210C FIRST EDITION FEB. 2006...
- Page 27 CHAPTER 2 FUNCTIONS & OPERATION OUTLINE..........2-1 CONTROL SYSTEM ......2-11 READING SYSTEM .........2-4 ELECTRICAL PARTS LAYOUT .....2-15 III. FEED SYSTEM ........2-8 VI. PARTS LAYOUT ON EACH PCB...2-16 COPYRIGHT © 2006 CANON ELECTRONICS INC. CANON DR-1210C FIRST EDITION FEB. 2006...
-
Page 29: Outline
Setting conditions and processing images Low level driver (LLD) Controlling DR-1210C (equivalent to firmware) USB driver Interface between LLD and USB host USB host Interface for image data input Table 2-101 COPYRIGHT © 2006 CANON ELECTRONICS INC. CANON DR-1210C FIRST EDITION FEB. 2006... -
Page 30: Control System
It further processes the read image data and outputs it to the computer. Note, however, that the computer also proc- esses the image data. COPYRIGHT © 2006 CANON ELECTRONICS INC. CANON DR-1210C FIRST EDITION FEB. 2006... - Page 31 The CCD PCB, the inverter PCB and the the reading unit. fluorescent lamp (CCFL) are built in the reading unit, which is connected to the main COPYRIGHT © 2006 CANON ELECTRONICS INC. CANON DR-1210C FIRST EDITION FEB. 2006...
-
Page 32: Reading System
For flatbed scanning, on the chine has a scanner motor unit, a timing belt other hand, the document does not move and a pair of guide shafts. and the reading unit moves. COPYRIGHT © 2006 CANON ELECTRONICS INC. CANON DR-1210C FIRST EDITION FEB. 2006... - Page 33 “Warming up” on the dis- The shading sheet is placed between play, and does not carry out scanning before the reading glass and the flatbed cover, so resuming the normal condition. COPYRIGHT © 2006 CANON ELECTRONICS INC. CANON DR-1210C FIRST EDITION FEB. 2006...
-
Page 34: Flatbed Scanning
Then it moves at a speed appropriate COPYRIGHT © 2006 CANON ELECTRONICS INC. CANON DR-1210C FIRST EDITION FEB. 2006... -
Page 35: Feeder Scanning
After completing reading unit reads the shading sheet and image reading, the reading unit goes back to reconfirms the home position. Then it the home position. COPYRIGHT © 2006 CANON ELECTRONICS INC. CANON DR-1210C FIRST EDITION FEB. 2006... -
Page 36: Feed System
The feed roller shift of the detection lever. feeds the document to the image reading COPYRIGHT © 2006 CANON ELECTRONICS INC. CANON DR-1210C FIRST EDITION FEB. 2006... - Page 37 When correctly set, the document pushes and rotates this lever, which turns the document sensor on. Unless the document is pushed COPYRIGHT © 2006 CANON ELECTRONICS INC. CANON DR-1210C FIRST EDITION FEB. 2006...
- Page 38 2nd document, to the position just before the the ADF sensor detects the document. ADF sensor. The feed motor restarts feed- ing at the reading speed after the machine 2-10 COPYRIGHT © 2006 CANON ELECTRONICS INC. CANON DR-1210C FIRST EDITION FEB. 2006...
-
Page 39: Control System
(IC13) (IC14) (IC12) Controller SDRAM (IC1) (IC7) X'tal 12MHz AC adapter DC/DC Analog Reading processor converter unit (IC2/IC4/IC6) (IC8) Regulator Power (IC3/IC5) switch Figure 2-401 2-11 COPYRIGHT © 2006 CANON ELECTRONICS INC. CANON DR-1210C FIRST EDITION FEB. 2006... - Page 40 Drives the feed motor. IC13 Motor driver Drives the scanner motor. Saves the control data: 128 KB (128 K × 8 bits) IC14 Flash ROM Table 2-401 2-12 COPYRIGHT © 2006 CANON ELECTRONICS INC. CANON DR-1210C FIRST EDITION FEB. 2006...
-
Page 41: Image Processing
Size detection • Black border removal 1-dimensional gamma correction • Punch hole removal • Others Edge emphasis Binarizing Color Grayscale Binary Data after image processing Figure 2-402 2-13 COPYRIGHT © 2006 CANON ELECTRONICS INC. CANON DR-1210C FIRST EDITION FEB. 2006... - Page 42 In case of a resolution of 300 dpi or less, however, this machine converts the resolu- tion from 600 dpi to 300 dpi. If smoothing is specified, the resolution is kept at 600 dpi. 2-14 COPYRIGHT © 2006 CANON ELECTRONICS INC. CANON DR-1210C FIRST EDITION FEB. 2006...
-
Page 43: Electrical Parts Layout
Operation PCB PCB3 CCD PCB PCB4 Inverter PCB PCB5 Fluorescent lamp (CCFL) Liquid-crystal display module Document sensor ADF sensor Feeder Feed motor ADF PCB PCB6 Table 2-501 2-15 COPYRIGHT © 2006 CANON ELECTRONICS INC. CANON DR-1210C FIRST EDITION FEB. 2006... -
Page 44: Parts Layout On Each Pcb
1. ADF PCB JADF1 JDS1 JDES1 JDFM1 Figure 2-601 Connector Description JDFM1 Feed motor JDES1 ADF sensor JADF1 Flatbed assembly JDS1 Document sensor Table 2-601 2-16 COPYRIGHT © 2006 CANON ELECTRONICS INC. CANON DR-1210C FIRST EDITION FEB. 2006... -
Page 45: I. Overall Flowchart
CHAPTER 3 DISASSEMBLY & REASSEMBLY OVERALL FLOWCHART ......3-1 PARTS PROCEDURES ......3-2 COPYRIGHT © 2006 CANON ELECTRONICS INC. CANON DR-1210C FIRST EDITION FEB. 2006... - Page 47 5. ADF bottom 5. ADF front cover cover 5. Feeder cover 2. Separation pad (pressure board) 6. Hinge 7. ADF PCB 8. Feed unit 8. Feed motor Figure 3-101 COPYRIGHT © 2006 CANON ELECTRONICS INC. CANON DR-1210C FIRST EDITION FEB. 2006...
-
Page 48: Parts Procedures
Note: Put the removed feeder on a clean surface. Be careful not to damage or soil the outer cover, the pressure board and the feed unit. Figure 3-203 Figure 3-202 COPYRIGHT © 2006 CANON ELECTRONICS INC. CANON DR-1210C FIRST EDITION FEB. 2006... - Page 49 Note: Other parts can be disassembled in this state. Take the following procedure to Note: When assembling, hook the 2 fitting remove the cover stopper. parts on the other side first. Figure 3-206 COPYRIGHT © 2006 CANON ELECTRONICS INC. CANON DR-1210C FIRST EDITION FEB. 2006...
- Page 50 1) Remove the pickup tray and the cover stopper. 2) Remove the feeder (entire). 3) Facing the pressure board side upward, put the removed feeder on a clean, stable surface. Figure 3-207 COPYRIGHT © 2006 CANON ELECTRONICS INC. CANON DR-1210C FIRST EDITION FEB. 2006...
- Page 51 Figure 3-208 6) Lift up the ADF bottom cover a little at the hinge side. Note: This unhooks the fitting parts on one side of feed cover. Figure 3-210 COPYRIGHT © 2006 CANON ELECTRONICS INC. CANON DR-1210C FIRST EDITION FEB. 2006...
- Page 52 It is recommended to wrap the tool tip with cloth and so forth for the cover protection. Protection material Figure 3-211 Figure 3-212 COPYRIGHT © 2006 CANON ELECTRONICS INC. CANON DR-1210C FIRST EDITION FEB. 2006...
- Page 53 7. If it is uneasy to remove the ADF front cover, press down the fitting parts to remove it. Figure 3-213 Figure 3-214 COPYRIGHT © 2006 CANON ELECTRONICS INC. CANON DR-1210C FIRST EDITION FEB. 2006...
- Page 54 Then press the entire ADF front cover for complete fitting. Note: Press the ADF front cover so that there is no gap between the covers. Figure 3-215 Figure 3-216 COPYRIGHT © 2006 CANON ELECTRONICS INC. CANON DR-1210C FIRST EDITION FEB. 2006...
- Page 55 1) Assemble the ADF bottom cover before sticking the pressure board on it. Note: Be sure to stick the screw head seals. Figure 3-217 COPYRIGHT © 2006 CANON ELECTRONICS INC. CANON DR-1210C FIRST EDITION FEB. 2006...
- Page 56 Figure 3-220 Note: The right and left hinges are the same parts. Figure 3-219 3) Slowly close the feeder. Then lightly press it to stick the pressure board. 3-10 COPYRIGHT © 2006 CANON ELECTRONICS INC. CANON DR-1210C FIRST EDITION FEB. 2006...
- Page 57 Figure 3-221 Figure 3-223 × 4) Remove screw self-tapping) that holds the ground cable Figure 3-222 3-11 COPYRIGHT © 2006 CANON ELECTRONICS INC. CANON DR-1210C FIRST EDITION FEB. 2006...
- Page 58 The red cable for document sensor must be inserted in JDS1 (white) and the black one for ADF sensor, in JDES1 (black). Figure 3-225 3-12 COPYRIGHT © 2006 CANON ELECTRONICS INC. CANON DR-1210C FIRST EDITION FEB. 2006...
- Page 59 In addition, lay the cable in the groove in the cover to avoid it from being caught. Figure 3-227 3-13 COPYRIGHT © 2006 CANON ELECTRONICS INC. CANON DR-1210C FIRST EDITION FEB. 2006...
- Page 60 Do not remove any other parts (upper cover, etc.) from the flat- bed assembly. 1) Remove the 4 screws (M3 x L6, self-tapping) on the bottom side. Figure 3-229 Figure 3-230 3-14 COPYRIGHT © 2006 CANON ELECTRONICS INC. CANON DR-1210C FIRST EDITION FEB. 2006...
- Page 61 Figure 3-232 Note: In these procedures, the light guide for the power indicator may be removed from the operation panel. Do not lose it. Figure 3-231 3-15 COPYRIGHT © 2006 CANON ELECTRONICS INC. CANON DR-1210C FIRST EDITION FEB. 2006...
- Page 63 CHAPTER 4 INSTALLATION & MAINTENANCE INSTALLATION ........4-1 III. MAINTENANCE ........4-11 PARTS REPLACEMENT......4-9 COPYRIGHT © 2006 CANON ELECTRONICS INC. CANON DR-1210C FIRST EDITION FEB. 2006...
-
Page 65: Installation
(Depending on the sales region) the sales region) Figure 4-101 Note: It is recommended to keep the pack- aging and the packing materials for storing and transporting the machine. COPYRIGHT © 2006 CANON ELECTRONICS INC. CANON DR-1210C FIRST EDITION FEB. 2006... - Page 66 5) Remove the protective sheet (for roller). Figure 4-103 Figure 4-106 3) Peel off the tape holding the pickup tray and open it. Figure 4-104 COPYRIGHT © 2006 CANON ELECTRONICS INC. CANON DR-1210C FIRST EDITION FEB. 2006...
- Page 67 Figure 4-110 Figure 4-107 7) Gently close the pickup tray. Figure 4-108 8) Open the feeder and remove the protec- tive sheet (for feeder). Figure 4-109 COPYRIGHT © 2006 CANON ELECTRONICS INC. CANON DR-1210C FIRST EDITION FEB. 2006...
-
Page 68: Installing The Software
Unless the recommended conditions are satisfied, such specifications as the scan- ning speed may not be satisfied. Refer to 2) Insert the DR-1210C Setup Disc into the user manual for details. CD drive. The setup wizard automatically * CPU: Pentium4 1.8 GHz or higher starts up. - Page 69 Refer to “Easy Start Guide” for details. * DR-1210C Driver (including job tools) * CapturePerfect3.0 * Other items (differing depending on sales region) Click [Exit] to complete. Figure 4-114 Figure 4-116 COPYRIGHT © 2006 CANON ELECTRONICS INC. CANON DR-1210C FIRST EDITION FEB. 2006...
- Page 70 Message “B” indicates that the scanner has started up but is not ready to scan because the computer does not recog- nize it. Check the connection to the computer unless message “A” appears. COPYRIGHT © 2006 CANON ELECTRONICS INC. CANON DR-1210C FIRST EDITION FEB. 2006...
- Page 71 CHAPTER 4 INSTALLATION & MAINTENANCE 6) Windows recognizes “DR-1210C” as a new device. 7) Depending on the type of Windows, the procedures of driver installation (alloca- tion) differ as follows. Windows2000 Automatically installs the driver and shows a confirmation window.
- Page 72 4) When “Sending complete.” appears on the display, the scanning operation completes. Check the saved image. 5) If necessary, repeat scanning of the image in other conditions to check the results. COPYRIGHT © 2006 CANON ELECTRONICS INC. CANON DR-1210C FIRST EDITION FEB. 2006...
-
Page 73: Parts Replacement
2. The consumable parts are those that are replaced when in failure. They are assigned as products and/or service parts. The users or the service technicians replace them. COPYRIGHT © 2006 CANON ELECTRONICS INC. CANON DR-1210C FIRST EDITION FEB. 2006... - Page 74 220-240 V 680400001400 1 AC adapter (AUS) 220-240 V CA 680400001500 1 AC adapter (UK) 220-240 V UK 680300007900 1 AC adapter (MLC) 220-240 V CN Table 4-202 4-10 COPYRIGHT © 2006 CANON ELECTRONICS INC. CANON DR-1210C FIRST EDITION FEB. 2006...
-
Page 75: Iii. Maintenance
See section 3). Table 4-301 2) Reading glass and pressure board Where to clean is as follows. Reading glass Pressure board For feeder For flatbed Figure 4-301 Figure 4-302 4-11 COPYRIGHT © 2006 CANON ELECTRONICS INC. CANON DR-1210C FIRST EDITION FEB. 2006... - Page 76 Gently open the feeder cover. Figure 4-303 Figure 4-305 Raise the roller locking lever. Holding both sides of the separation pad, remove it. Figure 4-304 Figure 4-306 4-12 COPYRIGHT © 2006 CANON ELECTRONICS INC. CANON DR-1210C FIRST EDITION FEB. 2006...
- Page 77 Lay the locking lever to lock the roller unit. Figure 4-307 Align the fitting parts of the separation pad and press it until it clicks. Figure 4-310 Close the feeder cover. Figure 4-308 Figure 4-311 4-13 COPYRIGHT © 2006 CANON ELECTRONICS INC. CANON DR-1210C FIRST EDITION FEB. 2006...
-
Page 78: Service Maintenance
Recommend the user to replace consumable part(s) if necessary. To transport this machine, lock the read- ing unit using the lock switch. Lock switch Unlock Lock Figure 4-312 4-14 COPYRIGHT © 2006 CANON ELECTRONICS INC. CANON DR-1210C FIRST EDITION FEB. 2006... - Page 79 CHAPTER 5 TROUBLESHOOTING ERROR DISPLAY ........5-1 IMAGE TROUBLESHOOTING....5-14 LIST OF ERRORS ........5-5 VERSION INDICATION......5-20 III. OPERATION TROUBLESHOOTING ..5-7 COPYRIGHT © 2006 CANON ELECTRONICS INC. CANON DR-1210C FIRST EDITION FEB. 2006...
-
Page 81: Chapter 5 Troubleshooting
Should the “Recognized by computer” ready message not appear, there must be failure(s) in the USB cable connection and/or software installation. Check and take measures. COPYRIGHT © 2006 CANON ELECTRONICS INC. CANON DR-1210C FIRST EDITION FEB. 2006... - Page 82 Lamp Error The lamp is not lit. Light intensity Reset the power./Restart is abnormal. the computer. Hardware Unknown hardware abnormality Reset the power./Restart Error occurs. the computer. Table 5-102 COPYRIGHT © 2006 CANON ELECTRONICS INC. CANON DR-1210C FIRST EDITION FEB. 2006...
- Page 83 3-11 Port Number incorrect. 3-12 Connection reset. 3-13 Mail Server replied an error. 3-14 Canceled to send mail or Failed to send mail. 3-15 Sending failed. Table 5-103 COPYRIGHT © 2006 CANON ELECTRONICS INC. CANON DR-1210C FIRST EDITION FEB. 2006...
- Page 84 The user is advisable to refer to the error messages and take measures for such Figure 5-101 COPYRIGHT © 2006 CANON ELECTRONICS INC. CANON DR-1210C FIRST EDITION FEB. 2006...
-
Page 85: List Of Errors
No power. Not recognized by computer. Scanning does not start. Slow scanning speed. Motor does not work. Document is not fed. Jam/double feed/skew. Table 5-201 COPYRIGHT © 2006 CANON ELECTRONICS INC. CANON DR-1210C FIRST EDITION FEB. 2006... - Page 86 Completely black/ completely white. Too dark/too light. Black borders around image. Image skews. Moire on image. Spots and streaks on image. Outer areas of im- age disappear. Table 5-202 COPYRIGHT © 2006 CANON ELECTRONICS INC. CANON DR-1210C FIRST EDITION FEB. 2006...
-
Page 87: Operation Troubleshooting
Does the fluorescent lamp Properly connect the Flatbed assembly of the reading unit work? operation PCB. Or re- place operation panel. Faulty flatbed assem- bly. Replace the main body. Table 5-301 COPYRIGHT © 2006 CANON ELECTRONICS INC. CANON DR-1210C FIRST EDITION FEB. 2006... - Page 88 USB cable Is the problem solved by End. Use the packaged replacing the USB cable? USB cable or any other appropriate cable on the market. Table 5-302 COPYRIGHT © 2006 CANON ELECTRONICS INC. CANON DR-1210C FIRST EDITION FEB. 2006...
-
Page 89: Scanning Does Not Start
“Lamp Control” on the next page for de- product should be replaced. tails. Scanning by the job function is impossible if “Disable device events” is selected on the Windows event setting screen. Figure 5-301 COPYRIGHT © 2006 CANON ELECTRONICS INC. CANON DR-1210C FIRST EDITION FEB. 2006... - Page 90 1) Open the control panel of Windows and select [Scanners and Cameras Proper- ties]. Figure 5-303 2) Select [CANON DR-1210C USB], then select [Properties]. 4) Select [Time before turning off the CCFL (Cold Cathode Fluorescent Lamp)]. It is defaulted to 12 minutes.
-
Page 91: Slow Scanning Speed
Hi-Speed USB2.0 is Is the USB card supported? Use a recommended not supported USB card. Is the USB cable sup- Use a supported USB ported? cable. Table 5-304 5-11 COPYRIGHT © 2006 CANON ELECTRONICS INC. CANON DR-1210C FIRST EDITION FEB. 2006... - Page 92 Is the document sensor Properly connect. properly connected? Is the problem solved by End. replacing the feed unit? Table 5-307 5-12 COPYRIGHT © 2006 CANON ELECTRONICS INC. CANON DR-1210C FIRST EDITION FEB. 2006...
- Page 93 Is the feed unit properly Properly mount. mounted? Is the surface contacting the Clean or replace the documents smooth? feed unit. (Dirt, damages, burrs, etc.) Table 5-308 5-13 COPYRIGHT © 2006 CANON ELECTRONICS INC. CANON DR-1210C FIRST EDITION FEB. 2006...
-
Page 94: Iv. Image Troubleshooting
Dirty glass (FB) Dirty glass (ADF) Dirty shading (FB) Dirty shading (ADF) Moire (100 dpi) Special document Automatic sizing Skew correction-1 Skew correction-2 Black border removal Figure 5-401 5-14 COPYRIGHT © 2006 CANON ELECTRONICS INC. CANON DR-1210C FIRST EDITION FEB. 2006... - Page 95 Should an error be found at this time, the machine gives an error message. Thereafter, however, the error message may not be shown and the scanner may only make an output of completely black or completely white image. Table 5-401 5-15 COPYRIGHT © 2006 CANON ELECTRONICS INC. CANON DR-1210C FIRST EDITION FEB. 2006...
- Page 96 Setting of Is “Auto-detection” or “Bor- Set. “Auto-detection” for der Removal” set? Black border can be paper size or removed by image “Border Removal” processing. Table 5-403 5-16 COPYRIGHT © 2006 CANON ELECTRONICS INC. CANON DR-1210C FIRST EDITION FEB. 2006...
- Page 97 600 dpi, suppressing occurrence of moire. Cause/Faulty Step Check item Result Action location “Color Smoothing” set- Is the “Color Smoothing” Set. ting set? Heighten the resolution. Table 5-405 5-17 COPYRIGHT © 2006 CANON ELECTRONICS INC. CANON DR-1210C FIRST EDITION FEB. 2006...
- Page 98 (for both flatbed and feeder if scratches are found or scanning) the back surface is dirty. The reading unit or the shading sheet is faulty. Replace the main body. Table 5-406 5-18 COPYRIGHT © 2006 CANON ELECTRONICS INC. CANON DR-1210C FIRST EDITION FEB. 2006...
- Page 99 Does any of the document Scan the document edges have object(s) that is using the “24-bit Color”. brighter than black? This may result in a correctly scanned im- age. Table 5-407 5-19 COPYRIGHT © 2006 CANON ELECTRONICS INC. CANON DR-1210C FIRST EDITION FEB. 2006...
-
Page 100: Version Indication
“About” CapturePerfect3.0, then [About]. This shows screen to appear. The LLD should be indi- screens as follows. cated as the firmware. Figure 5-502 Figure 5-501 5-20 COPYRIGHT © 2006 CANON ELECTRONICS INC. CANON DR-1210C FIRST EDITION FEB. 2006... -
Page 101: Appendix
APPENDIX ELECTRICAL BLOCK DIAGRAM ... A-1 III. SCRAPPING ........... A-4 PARTS CATALOG ........A-2 COPYRIGHT © 2006 CANON ELECTRONICS INC. CANON DR-1210C FIRST EDITION FEB. 2006... -
Page 103: I. Electrical Block Diagram
Appendix I. ELECTRICAL BLOCK DIAGRAM COPYRIGHT © 2006 CANON ELECTRONICS INC. CANON DR-1210C FIRST EDITION FEB. 2006... -
Page 104: Ii. Parts Catalog
Appendix II. PARTS CATALOG COPYRIGHT © 2006 CANON ELECTRONICS INC. CANON DR-1210C FIRST EDITION FEB. 2006... - Page 105 XB1-2401-005 SCREW, BH M4x10 XB4-7300-605 SCREW, TAPPING B, BH M3x6 XB4-7301-005 SCREW, TAPPING B, BH M3x10 XB4-7400-805 SCREW, TAPPING B, BH M4x8 XB4-7401-205 SCREW, TAPPING B, BH M4x12 COPYRIGHT © 2006 CANON ELECTRONICS INC. CANON DR-1210C FIRST EDITION JAN. 2006...
-
Page 106: Scrapping
3) Remove the 4 screws on the bottom vicing work. side. 1. Fluorescent Lamp 1) Remove the feeder Refer to “CHAPTER3, DISASSEMBLY & REASSEMBLY” for details. Figure A-303 Figure A-301 COPYRIGHT © 2006 CANON ELECTRONICS INC. CANON DR-1210C FIRST EDITION FEB. 2006... - Page 107 Figure A-305 6) Remove the 2 screws and cable cover . Then disconnect the cable of the reading unit. Figure A-304 Figure A-306 COPYRIGHT © 2006 CANON ELECTRONICS INC. CANON DR-1210C FIRST EDITION FEB. 2006...
- Page 108 Note: Do not damage the fluorescent lamp. Figure A-307 8) Lifting up one end of the guide shaft remove reading unit from the guide shaft. Figure A-310 Figure A-308 COPYRIGHT © 2006 CANON ELECTRONICS INC. CANON DR-1210C FIRST EDITION FEB. 2006...
- Page 109 Prepared by Quality Assurance Center Canon Electronics Inc. 3-17-7 Shibaura, Minato-ku Tokyo 108-0023, Japan FIRST EDITION: FEB. 2006 (63999)
- Page 110 0206TG...
Need help?
Do you have a question about the DR-1210C and is the answer not in the manual?
Questions and answers