
Related Manuals for BRAND dispensette S


Summary of Contents for BRAND dispensette S
- Page 1 Liquid Handling · Easy Handling! ® Dispensette Trace Analysis F I R S T C L A S S · B R A N D Gebrauchsanleitung Operating Manual Mode d'emploi Instrucciones de manejo Istruzioni per l'uso...
-
Page 2: Table Of Contents
Table of Contents Page Safety Instructions Functions and Limitations of Use Recommended Application Range Operating Elements First Steps Assembly Priming Dispensing Accessories Error Limits Checking the Volume (Calibration) Adjustment Cleaning Standard cleaning Cleaning for trace analysis Replacement of discharge tube/ valves Dismantling the instrument Replacing the dispensing cartridge Ordering Information... -
Page 3: Safety Instructions
Safety Instructions This instrument may sometimes be used with hazardous materials, operations, and equipment. It is beyond the scope of this manual to address all of the potential safety risks associated with its use in such applica- tions. It is the responsibility of the user of this instrument to consult and establish appropriate safety and health practices and determine the applicability of regulatory limitations prior to use. -
Page 4: Functions And Limitations Of Use
Functions and Limitations of Use Limitations of Use Operating Limitations This instrument is designed for dispensing liquids, Liquids, which form deposits may accelerate wear observing the following physical limits: on the piston seal, and make the piston difficult to move or may cause jamming (e.g., crystallizing –... -
Page 5: Recommended Application Range
The above recommendations reflect testing completed prior to publication. Always follow instructions in the operating manual of the instrument as well as the reagent manufacturer‘s specifications. Should you require information on chemicals not listed, please feel free to contact BRAND. Status as of: 0915/2... -
Page 6: Operating Elements
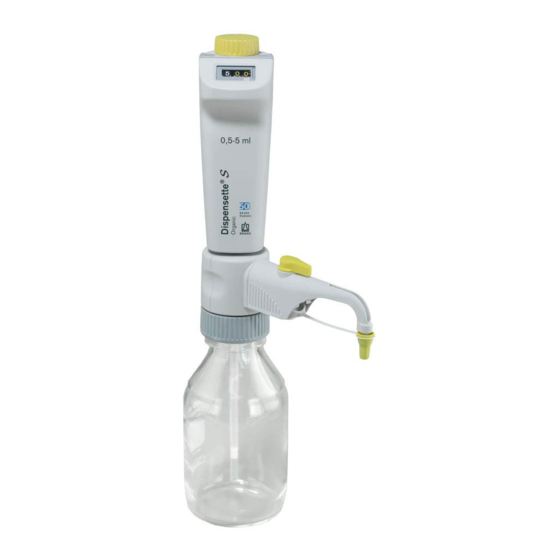
Operating Elements Cover plate Piston seat Replaceable dispensing cartridge supplied with certificate Housing Pointer Volume adjustment Recirculation valve lever Safety ring Discharge tube Recirculation valve (optional) Valve block (GL 45 bottle thread) Screw cap Recirculation tube (optional) Telescoping filling tube Mounting tool Filling tube Recirculation tube... -
Page 7: First Steps
First Steps Is everything in the package? Confirm that your package includes: Bottle-top dispenser Dispensette ® S Trace Analysis, telescoping filling tube, discharge tube or discharge tube with recirculation valve, telescoping filling tube, recirculation tube (included only in recirculation valve models), mounting tool, three bottle adapters, a performance certificate and this operating manual. - Page 8 First Steps Mounting and Screw the instrument (GL 45 thread) onto the reagent bottle and then align aligning the instru- ment on a bottle the discharge tube with the bottle label by turning the valve block (Fig. 3). To prevent tipping over use a bottle stand for small bottles (page 46).
-
Page 9: Priming
Priming Warning! Wear protective clothing, eye protection and gloves! Never press down the piston when the screw cap is screwed on! Avoid splash- ing the reagent! Liquid may accumulate in the screw cap. To avoid splashes dispense slowly. Follow all safety instructions and observe limitations of use and operating limitations (page 29). -
Page 10: Dispensing
Dispensing Setting the volume Loosen the volume selector thumb screw three-fourths turn (1), set the pointer to the desired volume (2) and then retighten the volume thumb screw (3). Dispensing Warning! Wear protective clothing, eye protection and gloves! Never press down the piston when the screw cap is screwed on! Avoid splash- ing the reagent! Liquid may accumulate in the screw cap. -
Page 11: Accessories
Accessories The following optional original accessories are available for the bottle- S Trace Analysis: top dispenser Dispensette ® Flexible discharge tube For serial dispensing, except for HF, the flexible discharge tube can be used ('Accessories', page 45). The specified accuracy and coef- ficient of variation of the instrument are only obtained for volumes >... - Page 12 Accessories Drying tube Use of a drying tube, filled with a suitable absorbent (purchased separately), might be necessary for moisture- and CO - sensitive media ('Accessories', page 46). Assembly Use a coin to unscrew the air vent cap (Fig. 1). Screw the filled drying tube in (Fig.
-
Page 13: Error Limits
Error limits Error limits according DIN EN ISO 8655-5 related to the nominal capacity (= maximum volume) indicated on the instrument, obtained when instrument and distilled water are equilibrated at ambient temperature (20 °C/68 °F). Testing 20 °C takes place according DIN EN ISO 8655-6 with a completely filled instrument and with uniform and smooth dispensing. -
Page 14: Checking The Volume (Calibration)
This time frame should be adjusted to correspond with individual requirements. The complete testing procedure (SOP) can be downloaded at www.brand.de. In addition, you can also carry out function checks at shorter intervals, e.g. dispensing the nominal volume into a volumetric test flask (volumetric flask with 3 marks, DAkkS calibrated). -
Page 15: Adjustment
Adjustment After a long period of use an adjustment of the instrument might be necessary. ■ Calibrate for example at nominal volume (see page 39). ■ Calculate mean volume (result of weighing) (see page 39). ■ Adjust the instrument (to the calculated mean volume). ■... -
Page 16: Cleaning
Cleaning The instrument must be cleaned in the following situations to assure correct operation: ■ prior to changing the valves ■ before the first use ■ regularly when using liquids which form ■ immediately when the piston is difficult to move deposits (e.g., crystallizing liquids) ■... -
Page 17: Cleaning For Trace Analysis
Cleaning Cleaning for trace analysis Before use in trace analysis, the instrument must first be thoroughly cleaned. Pure chemicals used for analytical purposes are used for this cleaning procedure. If contamination of the bottle contents must be avoided, use the instrument without the recirculation valve. If the instrument is used with the recirculation valve, it must be cleaned in both dispensing and recirculation modes (Fig. -
Page 18: Replacement Of Discharge Tube/ Valves
Replacement of discharge tube/ valves The valve, telescoping filling tube and dispensing tube are full of reagent! For this reason, Warning! always perform a standard cleaning before dismantling the instrument. The dispensing unit must not be disassembled! Follow the safety instructions (page 28)! Replacing the discharge tube Instruments with a recirculating valve should be set to 'Recircu- late', and the valve lever pulled upwards to remove (Fig. -
Page 19: Dismantling The Instrument
Replacement of discharge tube/ valves Replacing valves (cont.) Discharge valve After disassembling the discharge tube (see 'Replacing the discharge tube', page 43), use the mounting tool to unscrew the discharge valve (Fig. 1). Screw in the new discharge valve first by hand, then tighten it securely with the mounting tool (the threads should no longer be visible). -
Page 20: Ordering Information
Ordering Information Dispensette ® S Trace Analysis, Analog-adjustable Capacity Valve spring Without recirculation With recirculation valve valve Cat. No. Cat. No. Platinum-iridium 4640 040 4640 041 Tantalum 4640 240 4640 241 Note: Items supplied see page 32. Accessories · Spare Parts Bottle adapters ETFE/PTFE. - Page 21 Accessories · Spare Parts Dispensette ® S Trace Analysis discharge Telescoping filling valve tubes PFA/sapphire. Valve FEP. Adjusts to various spring: Valve marking 'Pt-Ir' or 'Ta'. Pack of 1. bottle heights. Pack of 1. For nominal volume Valve spring Cat. No. Nominal Outer Ø...
-
Page 22: Troubleshooting
Troubleshooting Problem Possible cause Corrective action Liquid is above the Piston is leaking. Perform a standard cleaning, replace the piston/ piston cylinder assembly (see page 41-44). Piston difficult Formation of crystals, dirty Stop dispensing immediately. Follow all cleaning to move instructions (page 41). -
Page 23: Repairs · Contact Addresses
– Complete the “Declaration on Absence of Health Hazards” and send the instru- ment to the manufacturer or supplier. Ask your supplier or manufacturer for the form. The form can also be downloaded from www.brand.de. In the U.S. and Canada: –... -
Page 24: Calibration Service
Just send in the instruments to be calibrated, accompanied by an indication of which kind of calibration you wish. Your instruments will be returned within a few days together with a test report (BRAND Calibration Service) or with a DAkkS Calibration Certificate. For further information, please contact your dealer or BRAND. -
Page 25: Warranty Information · Disposal
Warranty We shall not be liable for the consequences of improper handling, use, servicing, operation or unauthorized repairs of the instrument or the consequences of normal wear and tear especially of wearing parts such as pistons, seals, valves and the breakage of glass as well as the failure to follow the instructions of the operating manual.
Need help?
Do you have a question about the dispensette S and is the answer not in the manual?
Questions and answers
Can I please have a phone number to speak to someone