
Related Manuals for Dalsa Pantera DS-21-01M60


Summary of Contents for Dalsa Pantera DS-21-01M60
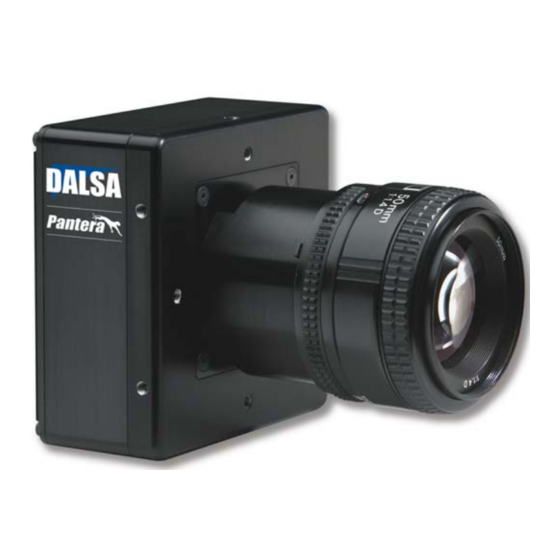
- Page 1 Pantera 1M60 and 1M30 DS-21-01M60 DS-1A-01M30 DS-22-01M60 DS-1B-01M30 User’s Manual and Reference 15-Jun-07 03-032-10033-09 www.dalsa.com...
- Page 2 Pantera 1M60 and 1M30 User’s Manual © 2007 DALSA. All information provided in this manual is believed to be accurate and reliable. No responsibility is assumed by DALSA for its use. DALSA reserves the right to make changes to this information without notice.
-
Page 3: Table Of Contents
3.12 Setting the Video Mode and Generating Test Patterns .....................29 Optical and Mechanical Considerations________________________________________ 35 4.1 Mechanical Interface..............................35 4.2 Lens Mounts.................................36 4.3 Mounting the Camera..............................36 4.4 Thermal Management..............................36 4.5 Environment ................................36 Cleaning and Maintenance ________________________________________________ 37 5.1 Cleaning..................................37 5.2 Maintenance ................................38 DALSA 03-032-10033-09... - Page 4 6.2 Troubleshooting Using the Serial Interface.........................41 6.3 Specific Solutions .................................42 6.4 Product Support................................44 Camera Link™ Reference, Timing, and Configuration Table__________________________ 46 B1 All Available Commands ..............................54 B2 Error Messages ................................56 EMC Declaration of Conformity______________________________________________ 58 Manual Revision History __________________________________________________ 59 Index _______________________________________________________________ 61 DALSA 03-032-10033-09...
-
Page 5: Introduction To The Pantera 1M60 And 1M30 Area Scan Cameras
Four vertical binning modes: 1, 2, 4, and 8 • Four horizontal binning modes: 1, 2, 4, and 8 Programmability • Simple ASCII protocol controls gain, offset, frame rates, trigger mode, test pattern output, up to 8x8 binning, and camera diagnostics DALSA 03-032-10033-09... -
Page 6: Image Sensor
Description The Pantera 1M60 and 1M30 digital cameras provide high-sensitivity 12-bit images with a 1k x 1k spatial resolution. The cameras use DALSA’s TrueFrame progressive scan CCDs to simultaneously achieve outstanding resolution and gray scale characteristics. A square pixel format and high fill factor provide superior, quantifiable image quality even at low light levels. -
Page 7: Camera Performance Specifications
1M60: Dual or Single 1M30: Single Mechanical Units Notes Interface Size 94 x 94 x 45 Electrical Interface Units Notes Power Dissipation < 15 Input Voltage Power Connector 6 pin Hirose Data Output Format Bits Programming Base Camera Link™ Connector DALSA 03-032-10033-09... - Page 8 4095 Amplitude DC Offset Antiblooming >100x Responsivity DN/(nJ/cm 40@540 nm Power Up Duration Regulatory Regulatory Compliance Notes: Nominal output. Light source: broadband quartz halogen, 3200K, 750nm and IR cutoff filter. No binning, full resolution, and Exposure Control disabled. DALSA 03-032-10033-09...
- Page 9 • Ambient test temperature 25°C Figure 2: Pantera 1M60 and 1M30 Responsivity Pantera TF 1M60 and 1M30 Responsivity Wavelength (nm) Figure 3: Typical Normalized Noise vs Ambient Temperature Tap 1 Tap 2 1.15 1.05 0.95 Tem perature (°C) DALSA 03-032-10033-09...
- Page 10 Pantera 1M60 and 1M30 User’s Manual Figure 4: Typical Dark Offset vs Ambient Temperature Tap 1 50.4 Tap 2 50.2 49.8 49.6 49.4 49.2 Am bient Tem perature (°C) Figure 5: Typical FPN vs Ambient Temperature Tap 1 Tap 2 Tem perature (°C) DALSA 03-032-10033-09...
-
Page 11: Camera Hardware Interface
Connect data, serial interface, and power cables. After connecting cables, apply power to the camera. After a few seconds, the status LED on the back of the camera should be green to indicate that the camera is operating and ready to receive commands. DALSA 03-032-10033-09... -
Page 12: Input/Output
1M30 cameras. A Base Configuration uses 1 MDR26 connector and 1 Channel Link chip. The main characteristics of the Base Configuration are: • Ports supported: A, B, C • Serializer bit width: 28 • Number of chips: 1 • Number of MDR26 connectors: 1 DALSA 03-032-10033-09... -
Page 13: Data Connector
*Exterior Overshield is connected to the shells of the connectors on both ends. **3M part 14X26-SZLB-XXX-0LC is a complete cable assembly, including connectors. Unused pairs should be terminated in 100 ohms at both ends of the cable. Table 5: DALSA Camera Control Configuration Signal Configuration... -
Page 14: Power Connector
This camera’s data should be sampled on See Appendix A for the complete Camera Link timing, DALSA Camera Link the rising edge of configuration table, and refer to the DALSA Web site for the official Camera Link STROBE. document. 2.4.2 Power Connector... -
Page 15: Control Inputs
Pantera 1M60 and 1M30 User’s Manual Visit the Support area of the DALSA Vision website for a list of companies that make power supplies that meet the camera’s requirements. The companies listed should not be considered the only choices. 2.5 Control Inputs The camera accepts an EXSYNC control input through the Camera Link MDR26F connector. - Page 16 Pantera 1M60 and 1M30 User’s Manual DALSA 03-032-10033-09...
-
Page 17: Software Interface: How To Control The Camera
Retrieving Camera Settings To read current camera settings, send the command 3.1 Communications Protocol Overview Serial Protocol Defaults: • 8 data bits • 1 stop bit • No parity • No flow control • 9.6Kbps DALSA 03-032-10033-09... -
Page 18: Overview: Setting Up The Camera To Send Commands
Once the framegrabber is set up for data processing and the camera is powered up, run your image processing software. You should be able to see an image from the camera when exposed to a light source. You can now set the other camera parameters described in this chapter. DALSA 03-032-10033-09... -
Page 19: Saving And Restoring Settings
In the table below, ports A-C refer to the Camera Link specification. The Pantera 1M30 contains one output tap that sends 12 bits of data. DALSA 03-032-10033-09... -
Page 20: Setting Baud Rate
With five different exposure mode settings, the Pantera 1M60 and 1M30 deliver many possibilities for flexible camera timing. Table 7 outlines each of these five exposure modes, and is followed by a full explanation on how to set the camera’s frame rate and exposure time. DALSA 03-032-10033-09... - Page 21 You must first set the camera mode using the command. Refer to Step One on the next page for details. If operating in exposure mode 3, use the command to enable or disable exposure control. DALSA 03-032-10033-09...
- Page 22 (see page 25 for an explanation on how to disable or enable exposure control), an extra line is transferred to the storage area. While the last line is being transferred, the charge reset also occurs. DALSA 03-032-10033-09...
- Page 23 Readout Readout Ignored Rising exsync pulse Ignored Falling exsync pulse rising is moved to end of falling is moved to end of exsync transfer stage exsync readout stage pulse pulse DALSA 03-032-10033-09...
- Page 24 Example 6: Trigger period is Nonreptitive and Occasionally Shorter than Read Out Time E xposure Time E xposure Time P rogrammable P eriod E xposure time has been extended to correspond with readout tim e Readout E xternal E xternal Ignored Ignored Trigger Trigger Trigger Trigger DALSA 03-032-10033-09...
- Page 25 Exposure control is only programmable when the camera is operating in exposure mode 3. See Table 7: Overview of Pantera 1M60 and 1M30 Exposure Modes for details on which exposure modes operate with exposure control enabled and which operate with exposure mode disabled. Example: sec 1 DALSA 03-032-10033-09...
-
Page 26: Setting Frame Rate
1000000.0 µs. Line times are listed in Table 15 to Table 18 for each camera operating mode. Notes: To read the current line rate frequency, use the command If you enter an invalid exposure time, the valid range of values will be displayed. Related Commands: sem, ssf Example: set 5500.3 DALSA 03-032-10033-09... -
Page 27: Setting Gains
1 4000 Setting Digital Gain To set the digital gain, use the command: Syntax: gm i Syntax Elements: 1x Output Gain Mode (Factory setting) 2x Output Gain Mode 4x Output Gain Mode Related Commands: Example: gm 2 DALSA 03-032-10033-09... -
Page 28: Increasing Sensitivity With Binning
1x8, 2x8, 4x8, 8x8 4.9152 ms 159.89 fps Table 10: Pantera 1M30 or 1M60 (Using Single Output) Binning vs. Speed and Exposure Control Enabled Binning (HxV) Readout Time (ms) Frame Rate 1x1, 2x1, 4x1, 8x1 29.978 ms 31.903 fps DALSA 03-032-10033-09... -
Page 29: Rebooting The Camera
Example: sp 10 3.12 Setting the Video Mode and Generating Test Patterns To set the video mode, use the command: Syntax: svm i Syntax Elements: Video mode to use. Notes: • All modes are available in the 1M60. DALSA 03-032-10033-09... - Page 30 Flip image both sides. Test pattern left side. Available in the 1M60 only. Flip image both sides. Test pattern right side. Available in the 1M60 only. Flip image both sides. Test pattern both sides. Available in both the 1M60 and 1M30. DALSA 03-032-10033-09...
- Page 31 Pantera 1M60 and 1M30 User’s Manual Test Patterns Figure 11: 8 Bit Test Pattern (One Output) Figure 12: 10 Bit Test Pattern (One Output) DALSA 03-032-10033-09...
- Page 32 Pantera 1M60 and 1M30 User’s Manual Figure 13: 12 Bit Test Pattern (One Output) Figure 14: 8 Bit Test Pattern (Two Outputs-1M60 Only) DALSA 03-032-10033-09...
- Page 33 Pantera 1M60 and 1M30 User’s Manual Figure 15: 10 Bit Test Pattern (Two Outputs-1M60 Only) Figure 16: 12 Bit Test Pattern (Two Outputs- 1M60 Only) DALSA 03-032-10033-09...
- Page 34 Pantera 1M60 and 1M30 User’s Manual DALSA 03-032-10033-09...
-
Page 35: Optical And Mechanical Considerations
36.83±.40 31.3 5.51 17.52±.30 IS ±1.25°) OPTICAL DISTANCE 73.66±.40 93.9 50.80±.15 57.9 36.83±.40 46.96±.40 36.8 21.56 10.13 10.13 6.56±.30 93.9 OPTICAL DISTANCE 46.95±.40 M42 x 1 x 4 DEEP M4 x .7 x 6 DEEP 4x C-MOUNT CONFIGURATION DALSA 03-032-10033-09... -
Page 36: Lens Mounts
4.5 Environment The camera and cables should be shielded from environmental noise sources for best operation. The camera should also be kept as cool as possible. The specified operating temperature is 0–40°C measured at the top of the camera. DALSA 03-032-10033-09... -
Page 37: Cleaning And Maintenance
24 hours and the sensor returns to normal operation. Preventing ESD Damage To prevent ESD damage, DALSA advises you to take the following handling precautions. Ground yourself prior to handling cameras. Ensure that your ground and your workbench are also properly grounded. Install conductive mats if your ground or workbench is non-conductive. -
Page 38: Maintenance
We recommend using lint free, ESD safe cloth wipers that do not contain particles that can scratch the window. Wipe the window carefully and slowly. 5.2 Maintenance There are no user serviceable parts on this camera. Please contact DALSA service. DALSA 03-032-10033-09... - Page 39 Pantera 1M60 and 1M30 User’s Manual DALSA 03-032-10033-09...
-
Page 40: Troubleshooting
EXSYNC When the camera is powered on for the first time, the factory setting is exposure mode 2 (no external inputs required). After a user has saved settings, the camera powers up with the saved settings. DALSA 03-032-10033-09... -
Page 41: Troubleshooting Using The Serial Interface
To check the camera’s internal temperature, use the command. If it is within the proper range, the camera returns the temperature of the sensor board and the digitizer. If the temperatures are out of specification, then the camera command returns an out of specification message. DALSA 03-032-10033-09... -
Page 42: Specific Solutions
The goal is to prevent solvent from evaporating from the window surface, as this will end up leaving residue and streaking behind. 7. Repeat steps 2-4 using a clean tissue until the entire window has been cleaned. 8. Blow off any adhering fibers or particles using dry, filtered compressed air. DALSA 03-032-10033-09... - Page 43 If you have verified that your exposure time is consistent and patterns of low frequency intensity variations still occur, ensure that you are using a DC or high frequency light source. DALSA 03-032-10033-09...
-
Page 44: Product Support
If including images, save them in the .tiff format. In addition to your local DALSA representative, you may need to call DALSA Technical Sales Support: North America Europe Asia Voice:... - Page 45 Pantera 1M60 and 1M30 User’s Manual DALSA 03-032-10033-09...
-
Page 46: Camera Link™ Reference, Timing, And Configuration Table
The DALSA Camera Link Implementation Road Map (available from the DALSA website) details how DALSA standardizes its use of the Camera Link interface. LVDS Technical Description Low Voltage Differential Signaling (LVDS) is a high-speed, low-power general-purpose interface standard. -
Page 47: Camera Control Signals
All four enable signals must be provided by the camera on each Channel Link chip. All unused data bits must be tied to a known value by the camera. For more information on image data bit allocations, refer to the official Camera Link specification on the http://vfm.dalsa.com Web site. Camera Control Signals Four LVDS pairs are reserved for general-purpose camera control. -
Page 48: Camera Link Video Timing
EXSYNC This camera uses the tTRANSFER tREADOUT tREADOUT tOVERHEAD falling edge of EXSYNC FRAME VALID to trigger line readout, unlike previous DALSA tLINE tLINE tLVAL_LOW tLVAL_LOW cameras, which used the LINE VALID rising edge. DATA DVAL Table 15: 1 Output, ECE Mode of Operation... - Page 49 25.6 μs 25.6 μs 25.6 μs tLINE (LVAL high time) 3.675 μs 4.975 μs 7.975 μs 12.8 μs tLVAL_LOW (LVAL low time) 1.0 μs 1.0 μs 600 ns 600 ns (time from last LVAL to end of FVAL) DALSA 03-032-10033-09...
- Page 50 8 x 2 8 x 4 8 x 8 twSYNC 100 ns 100 ns 100 ns 100 ns (min sync pulse, not SMART SYNC) 1.339 ms 1.339 ms 1.339 ms 1.339 ms twSYNC (min sync pulse in SMART SYNC) DALSA 03-032-10033-09...
- Page 51 (time from last LVAL to end of FVAL) Camera Link™ Configuration Table The following table provides tap reconstruction information. DALSA is working with the machine vision industry to use this table as the basis for auto configuration. Visit the http://vfm.dalsa.com Web site and view the DALSA Camera Link Implementation Road Map document, 03-32-00450, for further details.
- Page 52 Pixel Reset Pulse Minimum Width <xx ns> 0 if not applicable Internal Pixel Reset Time Resolution <xx ns> 0 if not applicable Pixel Reset to Exsync Hold time <xx ns> BAUD Rate <9600….> 9600 9600 CC1 <Exsync> Exsync Exsync DALSA 03-032-10033-09...
- Page 53 | ) CC2 <Spare> Spare Spare CC3 <Forward, Spare> Spare Spare CC4 <Spare> Spare Spare DVAL out <Strobe Valid, Alternate> Tied High Tied High FVAL out <Frame Valid, Alternate> Frame Valid Frame Valid Spare out <Spare> Spare Spare DALSA 03-032-10033-09...
-
Page 54: B1 All Available Commands
Restore the camera’s factory settings. settings restore user Restore the camera's last saved user settings. settings set baud rate Set the speed of camera serial communication port. Baud rates: 9600, 19200, 57600, and 115200. Default baud: 9600 DALSA 03-032-10033-09... - Page 55 The first value is the tap value. Either 1 for the left tap or 2 (1M60 only) for the right tap. The second value is the analog gain with an available range from 0-4095. DALSA 03-032-10033-09...
-
Page 56: B2 Error Messages
>85ºC will produce an error condition. B2 Error Messages Code Description Suggested Cause SUCCESS Command executed without major error detected Invalid command Command not recognized Command parameters incorrect or Command parameters are invalid or out of range out of range DALSA 03-032-10033-09... - Page 57 CRC check failure while attempting Camera setting will initialize to to restore the camera settings default settings, since restore of USER/FACTORY settings failed (internal micro EE memory failure) Camera settings not saved rus, rfs attempted but settings were not saved DALSA 03-032-10033-09...
-
Page 58: Emc Declaration Of Conformity
73/23/EEC and the EMC Directive 89/336/EEC and carries the CE mark accordingly. Place of Issue Waterloo, ON, CANADA Date of Issue January 2004 Hank Helmond Name and Signature of authorized person Quality Manager, DALSA Corp. This Declaration corresponds to EN 45 014. DALSA 03-032-10033-09... -
Page 59: Manual Revision History
Pantera 1M60 and 1M30 User’s Manual Appendix D Manual Revision History The following table summarizes changes made to this manual. The latest manual revisions can be obtained at http://vfm.dalsa.com/docs/docs.asp. Table 20: Manual Revision History Revision Number Description Change Rev 00... - Page 60 Dark Offset vs Temperature), and 5 (Typical FPN vs Temperature), pages 9 and 10. -Reference to the LED on camera back, changed to "status LED." -Revised references to specific pages on the DALSA website. -Changed heading "Online Help" to "Help Command," page 17.
-
Page 61: Index
8 line dropout, 42 LVAL, 14, 46 LVDS, 46 pairs, 47 EIA-644 Reference, 46 EMC Declaration of Conformity, 51, 58 exposure MDR26 connector, 12, 13 control, 20 models, 6 modes, 20 modes, 22 setting, 21 default, 24 DALSA 03-032-10033-09... - Page 62 30 timing, 48 camera, 48 readout Camera Link, 48 configuring, 19 exposure, 26 rebooting, 29 mode 7, 25 resolution, 7 troubleshooting, 40 responsivity, 8 graph, 9 video data, 46 video modes, 30 sensor, 6 alignment, 8 drawing, 7 DALSA 03-032-10033-09...
Need help?
Do you have a question about the Pantera DS-21-01M60 and is the answer not in the manual?
Questions and answers