
Related Manuals for MKS nPC PCA0


Summary of Contents for MKS nPC PCA0
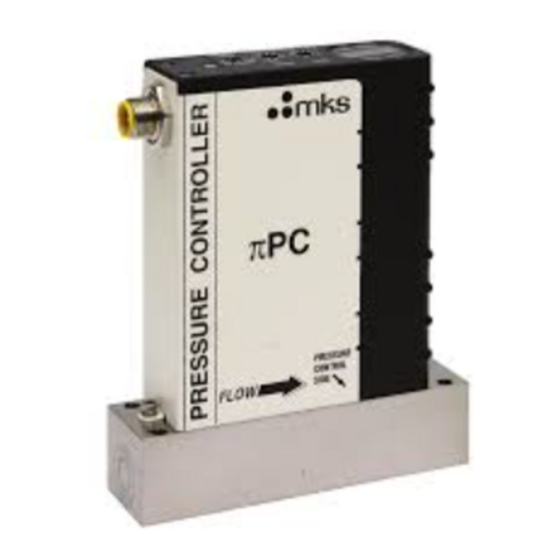
- Page 1 MKS Type πPC PCA & P99A Digital Pressure Controller Instruction Manual Ninety Industrial Way 1003195-001 Wilmington Revision A, 3/08 MA 01887 Instruction Manual Main: 978.284.4000 Fax: 978.284.4999 www.mksinst.com...
- Page 2 For the period commencing with the date of shipment of this equipment and ending one year later, MKS will, at its option, either repair or replace any part which is defective in materials or workmanship or with respect to the date-related operations warranty without charge to the purchaser.
- Page 3 1003195-001 Rev A, 3/08 MKS Type πPC PCA & P99A Digital Pressure Controller Instruction Manual...
- Page 4 All rights reserved. No part of this work may be reproduced or transmitted in any form or by any means, electronic or mechanical, including photocopying and recording, or by any information storage or retrieval system, except as may be expressly permitted in writing by MKS Instruments, Inc. Printed in the United States of America ®...
-
Page 5: Table Of Contents
Table of Contents Table of Contents List of Figures..............................iii List of Tables ..............................v List of References............................vii Pressure Transducer Safety Information ......................1 Symbols Used in This Instruction Manual ........................1 Symbols Found on the Unit............................1 Safety Procedures and Precautions..........................1 Sicherheitshinweise für den Druckmeßumformer..................3 In dieser Betriebsanleitung vorkommende Symbole ..................... - Page 6 Table of Contents Operation of the πPC PC99 Model with Gases other than Nitrogen (Multi Gas)............67 Versions of the πPC (Electrical Interface Related, i.e. Pinouts, cables, etc.) ..............68 Interface Cables for Analog I/O ..........................71 Overview of the Analog πPC Operation........................73 Overview of πPC DeviceNet Digital Operation ......................75 DeviceNet Protocol..............................76 Overview of πPC RS-485 Digital Operation .......................77...
-
Page 7: List Of Figures
List of Figures List of Figures Figure 1: 4-VCR Front View – DeviceNet .......................15 Figure 2: 4-VCR Front View – 9-Pin D RS-485....................16 Figure 3: 4-VCR Front View – 15-Pin D Analog .....................16 Figure 4: 4-VCR Left and Right Side Views – DeviceNet ................17 Figure 5: 4-VCR Left and Right Side Views –... - Page 8 List of Figures Figure 39: Controller Response with New Kp and Ki term values ..............65 Figure 40: Controller Response with New Kp and Ki term values ..............66 Figure 41: DeviceNet Connector Pin Diagram....................70 Figure 42: Orifice Selection Graph ......................... 111...
- Page 9 List of Tables List of Tables Table 1: Definition of Symbols Found on the Unit.....................1 Tabelle 2: Bedeutung der am Gerät angebrachten Symbole ................3 Tableau 3: Définition des symboles sur l'unité ....................5 Tabla 4: Definición de los símbolos hallados en la unidad.................7 Table 5: DeviceNet Network Status LED Indicators..................24 Table 6: RS-485 Module Status LED Indicators ....................25 Table 7: Pinout, PC90 Model, 15 Pin Analog I/O ....................68...
- Page 10 List of Tables This page intentionally left blank.
-
Page 11: List Of References
List of References List of References The documents listed below are referenced throughout this manual. [1] “DeviceNet Specification, Volume I: DeviceNet Communication Model and Protocol”, Open DeviceNet Vendors Association, Inc. Release 2.0. ERRATA 4.0 [2] “DeviceNet Specification, Volume II: DeviceNet Profiles and Object Library”, Open DeviceNet Vendors Association, Inc. - Page 12 List of References This page intentionally left blank. viii...
-
Page 13: Pressure Transducer Safety Information
Failure to comply with these precautions or with specific warnings elsewhere in this manual violates safety standards of intended use of the instrument and may impair the protection provided by the equipment. MKS Instruments, Inc. assumes no liability for the customer’s failure to comply with these requirements. - Page 14 Do not install substitute parts or perform any unauthorized modification to the instrument. Return the instrument to an MKS Calibration and Service Center for service and repair to ensure that all safety features are maintained. SERVICE BY QUALIFIED PERSONNEL ONLY Operating personnel must not attempt component replacement and internal adjustments.
-
Page 15: Sicherheitshinweise Für Den Druckmeßumformer
Eine Missachtung der Sicherheitsvorschriften und sonstiger Warnhinweise in dieser Betriebsanleitung verletzt die für dieses Gerät und seine Bedienung geltenden Sicherheitsstandards, und kann die Schutzvorrichtungen an diesem Gerät wirkungslos machen. MKS Instruments, Inc. haftet nicht für Missachtung dieser Sicherheitsvorschriften seitens des Kunden. - Page 16 Ersetzen Sie keine Teile mit baugleichen oder ähnlichen Teilen, und nehmen Sie keine eigenmächtigen Änderungen am Gerät vor. Schicken Sie das Gerät zwecks Wartung und Reparatur an den MKS-Kalibrierungs- und -Kundendienst ein. Nur so wird sichergestellt, dass alle Schutzvorrichtungen voll funktionsfähig bleiben.
-
Page 17: Informations Relatives À La Sécurité Concernant Le Transducteur De Pression
Informations relatives à la sécurité concernant le transducteur de pression Informations relatives à la sécurité concernant le transducteur de pression Symboles utilisés dans ce manuel d'utilisation Définitions des indications AVERTISSEMENT, MISE EN GARDE, et REMARQUE utilisées dans ce manuel. Avertissement Un AVERTISSEMENT signale un danger pour le personnel. - Page 18 NE PAS SUBSTITUER DE PIÈCES NI MODIFIER L'APPAREIL Ne pas susbstituer des pièces ni effectuer des modifications non autorisées sur l'appareil. Renvoyer l'appareil à un centre de réparation et de calibrage MKS pour toute intervention ou réparation afin de garantir l'intégrité des dispositifs de sécurité.
-
Page 19: Medidas De Seguridad Del Transductor De Presión
Medidas de seguridad del transductor de presión Medidas de seguridad del transductor de presión Símbolos usados en este manual de instrucciones Definiciones de los mensajes de advertencia, precaución y de las notas usados en el manual. Advertencia El símbolo de advertencia indica la posibilidad de que se produzcan daños personales. - Page 20 No instale piezas que no sean originales ni modifique el instrumento sin autorización. Para asegurar el correcto funcionamiento de todos los dispositivos de seguridad, envíe el instrumento al Centro de servicio y calibración de MKS toda vez que sea necesario repararlo o efectuar tareas de mantenimiento.
-
Page 21: Chapter One: General Information
Introduction MKS Instruments π series digital active pressure controllers (πPC) represent state-of-the-art technology meeting the advanced process requirements of next generation toolsets. This unique device integrates MKS Baratron® technology with a normally-closed or normally-open proportioning control valve, (optional) integrated flow meter, and closed-loop control electronics through an innovative, real-time feedback control system. - Page 22 Introduction Chapter One: General Information Model Name( Part Number ) PC90 (PCA0) PC99 (P99A) Absolute Pressure Control Direction Upstream and Downstream Downstream Only Integrated Flow Meter MG(Multi Gas) Flow MR(Multi Range) Flow The design of the π PC PC99 incorporates an advanced flow sensor and an optimized bypass. The latest generation two-element sensing circuit provides accurate, repeatable flow measurement performance even in low flow ranges (as low as 10sccm full-scale range).
-
Page 23: How This Manual Is Organized
Chapter One: General Information How This Manual is Organized How This Manual is Organized Before installing the device in a system and/or operating it, carefully read and familiarize yourself with all precautionary notes in the Pressure Transducer Device Safety Information section at the front of this manual. -
Page 24: Customer Support
A returned instrument will not be examined without a signed Health and Safety form indicating that the unit is free of harmful materials. The Health and Safety form can be obtained on the last page of this manual or through the MKS website at: http://www.mksinst.com/service/servicehowtoorder.aspx. -
Page 25: Chapter Two: Installation And Configuration
If you find any damage, notify your carrier and MKS immediately. If it is necessary to return the unit to MKS, please refer to the Customer Support section of Chapter 1 on page 12 for instructions on obtaining a RMA (Return Material Authorization) number and details on the Health and Safety form that is required with every return. -
Page 26: Product Location And Requirements
Warning Your corporate policy on handling toxic or hazardous gases supersedes the instructions in this manual. Comply with your corporate policy. MKS assumes no liability for the safe handling of such materials. Install the πPC in a “flowing” system where gas is continually added and evacuated. Do not use the controller in a “dead-ended”... -
Page 27: Dimensions
Chapter Two: Installation and Configuration Dimensions Warm up time and zeroing: 1. πPC and Pressure sensor warm up: After installation and power up, allow the πPC to warm up for a minimum of 30 minutes while under vacuum. This will require opening the device’s π... -
Page 28: Figure 2: 4-Vcr Front View - 9-Pin D Rs-485
Dimensions Chapter Two: Installation and Configuration Figure 2: 4-VCR Front View – 9-Pin D RS-485 Figure 3: 4-VCR Front View – 15-Pin D Analog... -
Page 29: Figure 4: 4-Vcr Left And Right Side Views - Devicenet
Chapter Two: Installation and Configuration Dimensions Figure 4: 4-VCR Left and Right Side Views – DeviceNet Figure 5: 4-VCR Left and Right Side Views – 9-Pin D RS-485... -
Page 30: Figure 6: 4-Vcr Left And Right Side Views - 15-Pin D Analog
Dimensions Chapter Two: Installation and Configuration Figure 6: 4-VCR Left and Right Side Views – 15-Pin D Analog Figure 7: 4-VCR Top View (15-Pin D Analog Shown) Figure 8: 4-VCR Bottom View... -
Page 31: Figure 9: C Or W Seal Front View - Devicenet
Chapter Two: Installation and Configuration Dimensions Figure 9: C or W Seal Front View – DeviceNet Figure 10: C or W Seal Front View – 9-Pin D RS-485... -
Page 32: Figure 11: C Or W Seal Front View - 15-Pin D Analog
Dimensions Chapter Two: Installation and Configuration Figure 11: C or W Seal Front View – 15-Pin D Analog Figure 12: C or W Seal Left and Right Views – DeviceNet... -
Page 33: Figure 13: C Or W Seal Left And Right Side Views - 9-Pin D Rs-485
Chapter Two: Installation and Configuration Dimensions Figure 13: C or W Seal Left and Right Side Views – 9-Pin D RS-485 Figure 14: C or W Seal Left and Right Side Views – 15-Pin D Analog Figure 15: C and W Seal Top View (DeviceNet Shown) -
Page 34: Device Information (Labels, Display, Communication, Mounting, Leak Integrity)
Device Information Chapter Two: Installation and Configuration Figure 16: C and W Seal Bottom View Device Information (Labels, Display, Communication, Mounting, Leak Integrity) Labels Each πPC has three labels, two of which are located on the device itself and one that's located on the packaging. -
Page 35: Figure 18: Push Button Display Readouts
Chapter Two: Installation and Configuration Device Information The Local Display Each πPC has a fully integrated local display on the top panel of the device, which includes a four-character dot matrix LED readout and four LED indicator lights that are used for various purposes. Its features, which are described in detail below, include the scrolling display, the ability to be rotated 270°... -
Page 36: Table 5: Devicenet Network Status Led Indicators
Device Information Chapter Two: Installation and Configuration π Analog PC LED Indicator Lights From top to bottom, left to right, the LEDs are labeled TPA, TPB, MOD and ZERO for an Analog πPC. TPA and TPB are the trip point LEDs. TPA will illuminate solid red when Trip Point A has been activated and TPB will illuminate solid red when Trip Point B has been activated. -
Page 37: Table 6: Rs-485 Module Status Led Indicators
Chapter Two: Installation and Configuration Device Information Table 6: RS-485 Module Status LED Indicators LED Status Meaning Flashing Red The device is online and functioning properly. The Module Status LED flashes red when receiving commands from Host. Solid Red Critical link failure. The device has detected an error that prevents network communication (Duplicate MAC_ID or bus-off.) Dark... - Page 38 Device Information Chapter Two: Installation and Configuration MAC ID (Node Address) Switches Two 10-position rotary switches, shown below, are used to set the MAC ID (node address). The MAC ID is an integer identification value assigned to each node on the DeviceNet or RS-485 network. For DeviceNet: The valid MAC ID switch positions are 0 to 63.
-
Page 39: Installation And Startup Procedure
Chapter Two: Installation and Configuration Installation Procedure Installation and Startup Procedure Install the πPC DO NOT make any electrical connections to the πPC until directed to do so. Note Connect the πPC to your system so that the gas flows in the direction of the flow arrow on the Note front of the unit. - Page 40 Note supply/readout unit along with the proper power supply/readout cable. See the Interface Cables for Analog I/O section of Chapter 5 on page 71 for details on cables and MKS power supply/readout units. When using Ethernet interface for setup, a crossover cable (similar to null modem) is required Note when the πPC is connected directly to a computer.
- Page 41 πPC before operation. Warm Up and Zero the πPC Although MKS devices are zeroed at the factory prior to shipment, it is normal to check the zero and re-zero them, if needed, when they are first installed on the tool.
- Page 42 Installation Procedure Chapter Two: Installation and Configuration This page intentionally left blank.
-
Page 43: Chapter Three: Ethernet Interface Setup And Configuration
OTHERWISE perform the following steps: Download the (2) files listed below from the MKS website (www.mksinst.com/MDsw.html) by clicking on the link "piMFC java plugin file for web access". The MKS download includes an installation script to properly load the plug-in. -
Page 44: Step 2: Setup Network For Communication Through Ethernet
A software script allows you to rapidly create a network connection to the πPC. Once connected a series of web-browser type windows allow you to easily monitor and configure the πPC. Logon to the MKS website (www.mksinst.com/MDsw.html) and download a copy of the IP setup script, HostIP.cmd by clicking on the HostIP.cmd link. - Page 45 Chapter Three: Ethernet Interface Setup and Configuration Step 2, Option 1 4. From your computer's "Start" menu, select “Run...” then enter the word “command” and click OK. At the command prompt, if you find that you are not in the C-drive, then enter the command “C:”. If you find yourself in a sub-directory of your C-drive, then enter the command “CD \”.
- Page 46 Step 2, Option 2 Chapter Three: Ethernet Interface Setup and Configuration Option 2: Manual Setup If you have not setup automatic network script in Option 1, a manual setup is required to access the πPC Ethernet interface. Connect a crossover network cable to the πPC and your laptop computer. A crossover cable is required when the πPC is connected directly to a computer.
- Page 47 "IP Settings" tab and then click "Add" in the "IP Addresses" section. If you have a πMFC or any of the other MKS "π" Series products, you may also need to add the IP Address 192.168.2.X, where "X"...
- Page 48 Step 2, Option 3 Chapter Three: Ethernet Interface Setup and Configuration 8. Launch Internet Explorer (or a similar program) and enter "http://xx.xx.xx.xx" in the address field, where xx.xx.xx.xx stands for the IP address of the πPC you wish to connect to, then click "Go". Internet Explorer will open and display the device Monitor screen which displays the device's model code, pressure range, valve type, control direction and DeviceNet status (if applicable) for the PC90.
- Page 49 Chapter Three: Ethernet Interface Setup and Configuration Step 2, Option 3 5. Open the Local Area Connection by doing one of the following options: Option 1: Select My Network Places (On Desktop typically). Right-Click on the icon, then select Properties. In the "Network and Dial-Up Connections"...
- Page 50 Step 2, Option 3 Chapter Three: Ethernet Interface Setup and Configuration 8. Select Use the following IP address. Now do the following to configure your computer so that it can still connect to the Internet: Type in the "IP address", the "Subnet mask" and the "Default gateway" fields with values returned from the “ipconfig /all”...
- Page 51 10.X.X.X address, more addresses can be added by repeating steps 10 and 11 above. If you have a πMFC or any of the other MKS "π" Series products, you may also need to add the IP Address 192.168.2.X, where "X"...
- Page 52 Step 2, Option 3 Chapter Three: Ethernet Interface Setup and Configuration 14. In the "WINS addresses, in order of use" section, click “Add…”. Enter in the Primary WINS server address that was returned from the “ipconfig /all” query in the DOS command window, then click “Add”. If there were any alternate WINS servers listed in the DOS window, enter them now.
-
Page 53: Chapter Four: Embedded Web-Based Gui And Diagnostics
Chapter Four: Embedded Web-Based GUI and Diagnostics Logging On To Your πPC Chapter Four: Embedded Web-Based GUI and Diagnostics Logging On To Your πPC Before trying to log on to your πPC you must have your network setup correctly. To do this, complete the steps listed in Chapter Three, Ethernet Interface Setup and Configuration, starting on page 31. -
Page 54: Figure 19: Embedded Gui, Device Page In Monitor Mode (Devicenet Pc90 Shown)
Monitor Mode, Device Page Chapter Four: Embedded Web-Based GUI and Diagnostics Figure 19: Embedded GUI, Device Page in Monitor Mode (DeviceNet PC90 shown) Figure 20: Embedded GUI, Device Page in Monitor Mode (DeviceNet PC99 shown) - Page 55 Chapter Four: Embedded Web-Based GUI and Diagnostics Monitor Mode, Plot Page Plot Page This page enables you to see real-time performance of the device. In Monitor Mode you are able to select variables to plot, the rate at which to display them, and save the data that has been plotted. The Plot Page requires a java applet to use the plot program.
-
Page 56: Figure 21: Embedded Gui, Plot Page In Monitor Mode (Pc90 Shown)
(if applicable). These tests can be run individually or all at once. The "Snapshot" section is a tool designed to help MKS diagnose a device should a problem ever occur. Both of these sections are explained in detail below. -
Page 57: Figure 22: Embedded Gui, Diagnostics Page (Pc99 Shown)
Contact your local MKS representative to let them know the file is coming. In an email, forward the file to your local MKS representative. If the problem is performance related and you were able capture the performance problem on the Plot Page, please send this information too. -
Page 58: Setup Mode
Monitor Mode, Configuration Page Chapter Four: Embedded Web-Based GUI and Diagnostics Configuration Page This page displays the TCP/IP settings and the current Firmware version for the πPC. In "Monitor Mode" you are only able to view this information. At the bottom of this page you are able to enter the password to change into "Setup Mode". -
Page 59: Figure 24: Embedded Gui, Device Page In Setup Mode (Devicenet Pc90 Shown)
Chapter Four: Embedded Web-Based GUI and Diagnostics Setup Mode, Device Page Device Page In "Setup Mode" this page gives you the ability to change the local display setting and modify the gas settings (PC99 only). Local Display: All πPC's allow the user to change what's displayed on the local display through the use of the pull-down menu in the "Display Settings"... -
Page 60: Figure 25: Embedded Gui, Device Page In Setup Mode (Devicenet Pc99 Shown)
Setup Mode, Device Page Chapter Four: Embedded Web-Based GUI and Diagnostics Figure 25: Embedded GUI, Device Page in Setup Mode (DeviceNet PC99 shown) Creating A New Gas Instance (PC99 only) In the "Create A Gas" section of the Device Page: (Refer to Figure 26a during the following steps) Click on the "select gas"... -
Page 61: Figure 25B: Embedded Gui, Multi Range, Changing The Full Scale Flow Range (Pc99 Only)
Chapter Four: Embedded Web-Based GUI and Diagnostics Setup Mode, Plot Page Changing the Full Scale Flow Range (PC99 only) In the "Gas Settings" section of the Device Page (see Figure 25b below) you are able to change the full scale gas flow range to any number between the "Min Full Scale (sccm)"... -
Page 62: Figure 27: Embedded Gui, Plot Page In Setup Mode (Devicenet Pc90 Shown)
Setup Mode, Plot Page Chapter Four: Embedded Web-Based GUI and Diagnostics Figure 27: Embedded GUI, Plot Page in Setup Mode (DeviceNet PC90 shown) Figure 28: Embedded GUI, Plot Page in Setup Mode (Analog) Before a πPC leaves the factory the performance is checked with Nitrogen in a typical application. During this test the control parameters are set so that the device's performance is optimized. -
Page 63: Figure 29: Embedded Gui, Configuration Page In Setup Mode (Devicenet Pc99 Shown)
Chapter Four: Embedded Web-Based GUI and Diagnostics Setup Mode, Configuration Page Configuration Page As was noted earlier, the Configuration Page is where you are initially directed once you've entered "Setup Mode". Here the πPC can be zeroed, the "Setup Mode" password can be changed, changes can be made to the Ethernet settings and firmware can be updated. - Page 64 πPC. Updating Firmware Updating firmware can only be done by your local MKS representative. If updates are necessary, then your local representative will be in contact to set up a time to complete the upgrade. Pressure Output Switch (Analog15-Pin and RS-485 only) This option allows you to change the Full Scale input/output voltage for your πPC from the default setting of...
-
Page 65: Figure 31: Embedded Gui, Optional Pc Page In Setup Mode (Analog Πpc Only)
Chapter Four: Embedded Web-Based GUI and Diagnostics Setup Mode, Optional PC Page Optional PC Page The Optional PC page is only available in Setup Mode for Analog 15-Pin devices. Here the πPC can be setup to control to an external signal, e.g. a Baratron, the external signal full scale input voltage can be set to 10 VDC (default) or 5 VDC, and the TCP/IP settings can be viewed. -
Page 66: Figure 32: Embedded Gui, Plot Page With Enabled Optional Input (Analog Pc99 Shown)
Setup Mode, Optional PC Page Chapter Four: Embedded Web-Based GUI and Diagnostics Changing the Optional Input Full Scale Voltage In the Optional Input Full Scale Voltage section of the page you have the ability to tell the πPC whether or not the Optional Input signal has a full scale voltage of 10 Volts (default) or 5 Volts. -
Page 67: Figure 33: Embedded Gui, Dnet Settings Page In Setup Mode (Pc99 Shown)
Chapter Four: Embedded Web-Based GUI and Diagnostics Setup Mode, DNet Settings Page DNet Settings Page As the name suggests, this page only applies to πPC's with a DeviceNet interface. Here you are able to view the πPC's current DeviceNet settings for Flow (PC99 only), Pressure, Temperature, and a few miscellaneous parameters. - Page 68 Chapter Four: Embedded Web-Based GUI and Diagnostics This page intentionally left blank.
-
Page 69: Chapter Five: Overview
The πPC provides the first three components with the PC90 and PC99 models. The PC99 model offers the additional ability to measure flow rate through the system. The pressure transducer is an MKS Baratron capacitance manometer. The electronics are what is necessary for pressure control. - Page 70 2 to 100 Torr. Measurement Technique The pressure measurement is based on MKS Baratron technology that uses capacitance to determine pressure. Baratron capacitance manometers − well known for their percent of Reading accuracy, stability, and resolution − provide precise measurements at lower pressures and over wider dynamic ranges than strain gage transducers.
-
Page 71: How The Πpc Pressure Controller Works
How the πPC Pressure Controller Works How the πPC Pressure Controller Works The MKS πPC pressure controller can control pressure upstream or downstream of the device depending on the configuration ordered. Both configurations are described in detail below, but in general the controller compares the pressure reading to the setpoint and positions the valve to maintain, or achieve, the set point pressure. -
Page 72: Figure 35: Πpc Controller In Upstream Control Position (Pc90 Only)
How the πPC Pressure Controller Works Chapter Five: Overview Upstream Pressure Control Configuration For an upstream PC90 configuration, the controlled pressure volume is positioned before the πPC controller so the controller will regulate the amount of gas exiting the pressure system. Figure 35: πPC Controller in Upstream Control Position (PC90 only) When the actual pressure reading is less than the setpoint value, the πPC closes its control valve. -
Page 73: Tuning The Πpc Pressure Controller
Chapter Five: Overview Tuning the πPC Pressure Controller Tuning the πPC Pressure Controller Tuning optimizes the way the πPC unit controls your pressure system. As noted in the previous section, How π PC Pressure Controller Works, the controller functions as a PID (Proportional-Integral-Derivative) controller, but the recommended use is with the Derivative term off, i.e. -
Page 74: Figure 37: Effects Of The Integral Control
(Ki) can be set over the electrical interface if the interface is DeviceNet or RS-485 or they can be set through the Embedded GUI. All methods are described below. For more information on commands for DeviceNet, please see the DeviceNet supplement, MKS Note P/N 1005676-001. - Page 75 Chapter Five: Overview Tuning the πPC Pressure Controller Over DeviceNet you have the ability to get and set both the proportional control setting (Kp) and the integral control setting (Ki) through the S-Single Stage Controller Object by using the following DeviceNet commands: Get Kp Service 0x0E, Class 0x33, Instance 1, Attribute 94...
-
Page 76: Figure 38: Controller Response With Initial Kp And Ki Term Values
Tuning the πPC Pressure Controller Chapter Five: Overview Over Ethernet you have the ability to view the current values for the proportional control setting (Kp) and the integral control setting (Ki) and change them. To do this, follow the steps listed below: π... -
Page 77: Figure 39: Controller Response With New Kp And Ki Term Values
Chapter Five: Overview Tuning the πPC Pressure Controller The controller response reaches the setpoint without a problem, however, there is oscillation once the controller reaches setpoint. This is very apparent when looking at the Valve Command, which is a variable that has a direct correlation to the electrical current being applied to the valve. -
Page 78: Figure 40: Controller Response With New Kp And Ki Term Values
Tuning the πPC Pressure Controller Chapter Five: Overview Controller Response with Optimized Terms The new values (Kp = 7; Ki = 50) yielded: Figure 40: Controller Response with New Kp and Ki term values This time the controller reaches the setpoint without a problem. The valve does not oscillate and the settling time has improved. -
Page 79: Operation Of The Πpc Pc99 Model With Gases Other Than Nitrogen (Multi Gas)
Chapter Five: Overview Operation of the πPC PC99 with Gases other than Nitrogen Operation of the πPC PC99 Model with Gases other than Nitrogen (Multi Gas) The πPC PC99’s flow metering capability which does not use gas correction factors, is a unique feature shared by very few Mass Flow Meters (MFM). -
Page 80: Versions Of The Πpc (Electrical Interface Related, I.e. Pinouts, Cables, Etc.)
Versions of the πPC (Electrical Interface Related) Chapter Five: Overview Versions of the πPC (Electrical Interface Related, i.e. Pinouts, cables, etc.) The πPC is available in three communications versions: the 15 Pin D analog communications version, the DeviceNet digital communications version, and the RS-485 digital communication version using a 9 pin D connector. -
Page 81: Table 8: Pinout, Pc99 Model, 15 Pin Analog I/O
Chapter Five: Overview Versions of the πPC (Electrical Interface Related) 15 Pin D Male Connector (Analog I/O Interface) for PC99 Model Connector Pinout – Standard Assignments (Model Code “B”) Table 8: Pinout, PC99 Model, 15 Pin Analog I/O Pin Number Signal Description Pin 1 Valve Test Point, 0 to 5 VDC... -
Page 82: Figure 41: Devicenet Connector Pin Diagram
Versions of the πPC (Electrical Interface Related) Chapter Five: Overview 9 Pin D Male Connector (RS-485 Digital I/O) Connector Pinout – Standard Assignments (Model Code “5”) Table 9: Pinout, πPC, RS-485, 9 Pin Digital I/O Pin Number Signal Description Pressure Signal Output, 0 to 10 VDC (default), 0 to 5 VDC (user-switchable). Pin 1 (See Note 2 below) Pin 2... -
Page 83: Interface Cables For Analog I/O
To order an overall metal, braided, shielded cable, add an “S” after the cable type designation. Note For example, to order a standard cable to connect the πPC 15-Pin Analog I/O device to a MKS Type 246 Power Supply/Readout unit, use part number CB259-5-xx, where xx indicates the length. - Page 84 Chapter Five: Overview Generic Shielded Cable Description MKS offers a full line of cables for all MKS equipment. Should you choose to manufacture your own cables, follow the guidelines listed below: 1. The cable must have an overall metal braided shield, covering all wires. Neither aluminum foil nor spiral shielding will be as effective;...
-
Page 85: Overview Of The Analog Πpc Operation
Chapter Five: Overview Start-Up Procedure for the Analog πPC Overview of the Analog πPC Operation Power Requirements The πPC requires an input voltage of +15.0 to +24.0 VDC @ 350mA max. The input voltage is introduced to the pressure controller through the 15-Pin Male D connector located on side of the instrument. For more information on the connector see the pinout information on page 68 for a PC90, page 69 for a PC99. - Page 86 Start-Up Procedure for the Analog πPC Chapter Five: Overview The Trip Points The πPC pressure controller offers two alarm trip points; Trip Point A and Trip Point B. Each trip point has an LED on the local display. When a trip point is on, the LED for the respective trip point will light solid red. When the trip point is off, the LED will not be lit.
-
Page 87: Overview Of Πpc Devicenet Digital Operation
5. When the device establishes communication with other devices on the network, the Network Status LED illuminates GREEN. If the power up LED sequence does not function properly, contact MKS for assistance. Note See Network and Module Status LED (NET & MOD), page 24, for more information on the... -
Page 88: Devicenet Protocol
Use this manual with the ODVA DeviceNet Specification Volume I and Volume II [1, 2], and the SEMI Standards Common and Specific Device Models [3, 4]. Refer to those documents for a complete functional description of the πPC Pressure Control device. See πPC DeviceNet Manual, MKS part number 1005676-001 for specific commands and command structures. -
Page 89: Overview Of Πpc Rs-485 Digital Operation
Refer to the Zero Adjustment section of Chapter 6 on page 79 for more on the warm-up and the zeroing procedure of the πPC. RS-485 Protocol See πPC RS-485 Manual, MKS part number 1005677-001 for specific commands and command structures. - Page 90 Chapter Five: Overview This page intentionally left blank.
-
Page 91: Chapter Six: Maintenance
Any damage should be reported to the freight carrier and MKS Instruments immediately. If there is no obvious damage, and the unit fails to operate properly through your network, obtain a RMA (Return Material Authorization) number before returning the unit to MKS Instruments for service to expedite handling and ensure proper servicing of your instrument. - Page 92 Zero Procedure for the πPC Pressure and Flow (PC99 only) Chapter Six: Maintenance 5. The final step prior to zeroing the πPC is to setup your gas panel configuration correctly. This may be done by one of the following procedures: a.
-
Page 93: Table 12: Highest Pressures Suggested For Proper Zero Adjustment
Chapter Six: Maintenance Zero Procedure for the πPC Pressure and Flow (PC99 only) To zero the pressure transducer to zero pressure the adjustment must be made at a pressure less Note than the pressure transducer’s resolution (0.01% of Full Scale). 6. - Page 94 Opening & Closing the πPC’s Process Control Valve Chapter Six: Maintenance Opening & Closing the πPC’s Process Control Valve There are different ways to open/close the πPC’s process control valve depending on the electrical interface. Each electrical interface has a unique way to open/close the valve and these are listed below. If the πPC’s process control valve is ever opened or closed through one of the electrical Note interfaces, then it is mandatory to set the valve back to Normal Operating Mode prior to use.
- Page 95 Chapter Six: Maintenance DeviceNet Zeroing Commands DeviceNet Zeroing Commands The πPC must be in the executing state before you can zero the pressure and flow (if applicable). The following assumes explicit messaging only using the DeviceNet communication protocol. 1. Place the device in the Executing State through the S-Device Supervisor Object. Note the response Status: Success.
- Page 96 RS-485 Zeroing Commands Chapter Six: Maintenance RS-485 Zeroing Commands The πPC must be in the executing state before you can zero the pressure or flow (if applicable). 1. To zero the pressure, you must use the “Requested Pressure Zero Enable” message. Send the following message from the Host to the πPC: MAC ID (πPC MAC ID), STX 0x02, Command Code 0x81, Packet Length 0x07, Class ID 0x68, Instance ID 0x01, Attribute ID 0xBA, Target Value(Byte 1―LSB),...
-
Page 97: Chapter Seven: Troubleshooting
Verify correct DNet I/O instance Provide setpoint, gas & pressure to device, Control circuit failure run diagnostic using Ethernet GUI. If error results, contact MKS service center. Check inlet pressure @ πPC. Check outlet pressure @ πPC using pressure gauge. Make Contamination/Clogged - blocked sure adequate vacuum. - Page 98 No gas supply Turn on gas source Run πPC diagnostics using Ethernet GUI. If πPC fault pressure transducer output error results, contact MKS service center. Downstream valves open to Check status of pneumatic valves air lines & vacuum, upstream valves closed solenoid valves &...
- Page 99 Outlet pressure too high Decrease outlet pressure Run πPC diagnostics using Ethernet GUI. If Control electronics failure, sensor failure error results, contact MKS service center. kP and/or kI values not adjusted Check / readjust values through Ethernet πPC output signal oscillates correctly GUI.
- Page 100 Refer to zeroing instructions on page 79. MFC device zero offset Fault in valve adjustment, gap Contact MKS service center between plug & orifice Pressure output signal different than Zero offset in pressure transducer Re-zero pressure transducer using known confirmed line pressure pressure standard &...
- Page 101 Chapter Seven: Troubleshooting Troubleshooting Chart LED INDICATOR (COLOR) STATE INDICATION DNET Network status LED The device in on-line and has connection in Link OK, On-line, Connected Solid Green the established state. Device is on-line but has no connection in On-line, Not Connected Flashing Green the established state.
- Page 102 Troubleshooting Chart Chapter Seven: Troubleshooting Minor Fault Recoverable Fault Flashing Red The Device is in Self Test. Reference the Device Self Testing Identity Object in Volume II for Device Flashing Red & Green states. No power There is no power applied to the device...
-
Page 103: Appendix A: Product Specifications For The Pc90 Model
Appendix A: Product Specifications for the PC90 Model Physical Specifications Appendix A: Product Specifications for the PC90 Model Physical Specifications Pressure Type Absolute Pressure Full Scale Ranges 100 Torr, 1000 Torr, 2000 Torr, 100 Psi Transducer Over Pressure Limit 2x Full Scale for all ranges Orifice Full Scale Ranges (sccm) 50, 200, 1000, 5000, 10000, 20000, 30000, 50000 45 Psid... -
Page 104: Environmental Specifications
Environmental Specifications Appendix A: Product Specifications for the PC90 Model Environmental Specifications Operating Temperature Range 10° to 50°C (50° to 122°F) Storage Temperature Range -20° to 80°C (-4° to 176°F) Storage Humidity Range 0 to 95% Relative Humidity, non-condensing Mechanical Specifications Fittings Swagelok 4 VCR Male, 1-1/8”... - Page 105 Appendix A: Product Specifications for the PC90 Model Electrical Specifications Digital I/O (DeviceNet) Input Power Required +11 to +25 VDC per DeviceNet specification (@ <3.5 watts) Data Rate Switch 4 positions: 125, 250, 500K (Default), PGM (programmable over the network) Data Rate (User Selectable) 125 Kbps, 500 meters (1,640 feet) Data Rate / Network Length...
- Page 106 Electrical Specifications Appendix A: Product Specifications for the PC90 Model Digital I/O (RS-485) with Analog Pressure Out Input Power Required +15 to +24 VDC @ 350mA max 9-pin Type “D” Male Connector Analog Pressure Output Signal 0 to 10 VDC (Default), 0 to 5 VDC (User Switchable) Data Rate Switch 3 positions: 9.6, 19.2, 38.4K (Default) Data Rate (User Selectable)
-
Page 107: Appendix B: Model Code Explanation For The Pc90 Model
Appendix B: Model Code Explanation for the PC90 Model Model Code Description Appendix B: Model Code Explanation for the PC90 Model Model Code Description This model code is for the πPC, type PC90 model. It defines features of the unit such as device type, pressure range, fittings, electrical connector type, valve configuration, seal material and firmware revision. - Page 108 Model Code Description Appendix B: Model Code Explanation for the PC90 Model Fittings (Y) The fitting options are designated by a single letter code. All options are for a 1.125” foot print. Ordering Code Fitting Style Swagelok VCR-4 male Downport, 1.125” C-Seal Downport, 1.125”...
- Page 109 Appendix B: Model Code Explanation for the PC90 Model Model Code Description Valve Configuration / Seal Material (S) The seal material option is designated by a single letter code. The letter code also designates whether or not the valve is normally open or normally closed. Currently, the normally open valve is only available with Teflon, and the Metal valve is only available for orifice sizes of 5,000 sccm and below.
- Page 110 Model Code Description Appendix B: Model Code Explanation for the PC90 Model This page intentionally left blank.
-
Page 111: Appendix C: Product Specifications For The Pc99 Model
Appendix C: Product Specifications for the PC99 Model Physical Specifications Appendix C: Product Specifications for the PC99 Model Physical Specifications Pressure Type Absolute Pressure Full Scale Ranges 100 Torr, 1000 Torr, 2000 Torr, 100 Psi Flow Full Scale Ranges (N (sccm) 10, 20, 50, 100, 200, 500, 1000, 2000, 5000, 10000, 20000, 30000 Equivalent) Transducer Over Pressure Limit... -
Page 112: Environmental Specifications
Environmental Specifications Appendix C: Product Specifications for the PC99 Model Flow Reading Measurement Range 2 to 100% of Full Scale Accuracy ± 1.0% of Reading for > 10% of Full Scale ± 0.21% of Full Scale for 2 to 10% of Full Scale ±... -
Page 113: Electrical Specifications
Appendix C: Product Specifications for the PC99 Model Electrical Specifications Electrical Specifications Analog I/O +15 to +24 VDC @ 350mA max Input Power Required Pressure Set Point Command / Output Signal 0 to 10 VDC (Default), 0 to 5 VDC (User Switchable) Flow Output Signal 0 to 5 VDC Valve Test Point Signal... - Page 114 Electrical Specifications Appendix C: Product Specifications for the PC99 Model Select units: counts (Default), torr, psi, kpa Remote Zero Set/read control pressure Monitor πPC status – valve drive level and trip points (alarm for high pressure, alarm for low pressure, warning for high pressure, warning for low pressure) Digital Functions (pressure) Reset factory defaults Set PID control parameters...
- Page 115 Appendix C: Product Specifications for the PC99 Model Electrical Specifications LED network status (green/red) LED module status (green/red) Visual Communication Indicators Scrolling LED displays(πPC Type, Pressure Full Scale, IP address) Push-Button Display toggles between (Pressure in TORR & KPA or PSI & KPA, Temperature and Scrolling display) BAUD rate: 9.6, 19.2, 38.4 Kbps (Default) Data bits: 8...
- Page 116 Appendix C: Product Specifications for the PC99 Model This page intentionally left blank.
-
Page 117: Appendix D: Model Code Explanation For The Pc99 Model
Appendix D: Model Code Explanation for the PC99 Model Model Code Description Appendix D: Model Code Explanation for the PC99 Model Model Code Description This model code is for the πPC, type PC99 model. It defines features of the unit such as device type, pressure range, flow range, fittings, electrical connector type, valve configuration, seal material and firmware revision. - Page 118 Model Code Description Appendix D: Model Code Explanation for the PC99 Model Flow Range Full Range, N Equivalent (F) The πPC’s flow full scale range is indicated by a single letter code. All ranges are Nitrogen equivalent. Ordering Code Mass Flow Rate 10 sccm 20 sccm 50 sccm...
- Page 119 Appendix D: Model Code Explanation for the PC99 Model Model Code Description Valve Orifice Number (Z) The valve orifice number is designated by a single letter code or a single digit code. The flow rates given are with 15 psig of Nitrogen on the inlet and atmosphere on the outlet. Ordering Code Valve Orifice Number 50 sccm...
- Page 120 Model Code Description Appendix D: Model Code Explanation for the PC99 Model This page intentionally left blank.
-
Page 121: Appendix E: Valve Orifice Selection
Appendix E: Valve Orifice Selection General Information Appendix E: Valve Orifice Selection General Information The πPC, Type PC90 is available in eight valve orifice sizes while the Type PC99 is available with seven orifice sizes. You should confirm that the valve orifice in your πPC pressure controller is the correct size for your application before ordering. -
Page 122: How To Verify The Orifice Selection
How to Verify the Orifice Selection Appendix E: Valve Orifice Selection How to Verify the Orifice Selection The flow through any orifice depends on the size of the orifice, the inlet and outlet pressures and the gas density. To simplify orifice selection, use the following procedure: The procedure below is a useful tool for most typical configurations and applications. -
Page 123: Figure 42: Orifice Selection Graph
Appendix E: Valve Orifice Selection How to Verify the Orifice Selection 6. Use the index number and your maximum flow rate to determine the orifice size from the Orifice Selection Graph, Figure 42. Locate the Index Number along the bottom axis and then draw a vertical line at the Index Number. - Page 124 How to Verify the Orifice Selection Appendix E: Valve Orifice Selection Using Different Gases The valve orifice selection data is based on nitrogen gas. If you will be using a gas other than nitrogen, you need to compensate for the density difference between nitrogen and your process gas before you can select the appropriate valve orifice.
- Page 125 ALL PRODUCTS MUST BE RETURNED IN SEALED BAGS MKS will not accept delivery of equipment that has been chemically, radioactively or biologically contaminated, without written evidence of decontamination or laboratory analysis. Alternately, we will require evidence that the biological process is not harmful.
Need help?
Do you have a question about the nPC PCA0 and is the answer not in the manual?
Questions and answers