
Subscribe to Our Youtube Channel
Related Manuals for Fuji Xerox DocuWide 6035


Summary of Contents for Fuji Xerox DocuWide 6035
- Page 1 DocuWide 6035/6055 Before Using the Machine Copy Scan Direct Scan Printing Job Status Stored Programming Maintenance Ploblem Solving Authentication System Settings Machine Status Appendix...
- Page 2 Microsoft, Windows, Windows Server, Windows Vista, and Microsoft Network are trademarks or registered trademarks of Microsoft Corporation in the U.S. and other countries. Adobe, Acrobat, PostScript, and Adobe PostScript 3 are trademarks of Adobe Systems Incorporated. HP, HP-GL, HP-GL/2, and HP RTL, are registered trademarks of Hewlett-Packard Corporation. All product/brand names are trademarks or registered trademarks of the respective holders. Permission has been obtained from Microsoft Corporation for use of software screen shots. For information on license, refer to About License. In this manual, safety instructions are preceded by the symbol Always read and follow the instructions before performing the required procedures. The data saved in the hard disk of the machine may be lost if there is any problem in the hard disk. Fuji Xerox is not responsible for any direct and indirect damages arising from or caused by such data loss. As for the data set for Authentication / Logical Printers / Stored Programming / Mailboxes, we recommend that you back it up with CentreWare Internet Services. Fuji Xerox is not responsible for any breakdown of machines due to infection of computer virus or computer hacking. Important 1. This manual is copyrighted with all rights reserved. Under the copyright laws, this manual may not be copied or modified in whole or part, without the written consent of the publisher. 2. Parts of this manual are subject to change without prior notice. 3. We welcome any comments on ambiguities, errors, omissions, or missing pages. 4. Never attempt any procedure on the machine that is not specifically described in this manual. Unauthorized operation can cause faults or accidents. Fuji Xerox is not liable for any problems resulting from unauthorized operation of the equipment. An export of this product is strictly controlled in accordance with Laws concerning Foreign Exchange and Foreign Trade of Japan and/or the export control regulations of the United States. XEROX, the sphere of connectivity design, CentreWare, and DocuWide are trademarks or registered trademarks of Xerox Corporation in the U.S. or Fuji Xerox Co., Ltd. DocuWorks is a trademark of Fuji Xerox Co., Ltd.
-
Page 3: Table Of Contents
Table of Contents Table of Contents Preface ......................... 8 About the DocuWide 6035/6055 Models ............... 9 About the Provided CD-ROM ................10 Types of Manuals ....................11 Using This Guide ..................... 12 Safety Notes ......................14 Electrical Safety ........................... 14 Machine Installation ........................16 Operational Safety ........................ - Page 4 Table of Contents Step1 Selecting Features ......................48 Step2 Entering the Quantity ......................49 Step3 Scanning Document......................49 Stopping the Copy Job ..................51 Copying Multiple Documents (Collated Output) ..........52 Registering Distribution Patterns ....................54 Copying with Manual Feeding ................55 Copying with Auto R/E ................... 56 Interrupting for a Copy Job ...................
- Page 5 Table of Contents Mirror Image ..........................93 Scan Speed ..........................93 Scan Overview of Scanning..................... 96 Preparation for Network Scanning ..............97 Network Settings.......................... 97 Creating Mailboxes ........................98 Deleting Mailboxes ........................100 Installing Scanning Software ....................101 Network Scanning Procedure ................103 Step1 Selecting Mailboxes .......................103 Step2 Selecting Features......................104 Step3 Starting Scan Jobs ......................105 Step4 Importing Documents from Mailboxes ................105...
- Page 6 Table of Contents Overview of Direct Scanning ................130 Preparation for Direct Scanning................. 131 Installing USB TWAIN Driver....................131 Importing Documents by Direct Scanning............132 Using USB TWAIN Driver ......................132 Printing Setting up your Printer..................136 Data Formats ..........................136 Setting up Your Printer......................136 Network Settings........................
- Page 7 Table of Contents Problem Solving Troubleshooting ....................176 General Trouble ..................... 177 Image Quality Problems ..................178 Jam Problems ......................182 Trouble during Copying/Scanning/Printing ............. 183 Trouble during Copying/Scanning....................183 Trouble during Printing ......................184 Error Message ......................185 Document Jams ..................... 186 Paper Jams ......................187 Paper jams in roll tray (mis-setting of roll, feeding failure) ............188 Paper jams in roll tray (jam in the area from feeding area to developer area) ....
- Page 8 Table of Contents Scan Start Mode ........................217 Toner Density..........................217 Watermark..........................217 Folder Settings........................... 218 Maintenance..........................219 Other Settings ..........................219 Detailed Settings........................221 Network Settings ....................222 Port Settings..........................222 Protocol Settings........................223 Stored Document Settings .................. 225 Copy Settings......................228 Presets............................
- Page 9 Table of Contents 12 Machine Status Overview of Machine Status................258 Machine Information ..................... 259 Billing Meter......................261 Media/Settings......................262 13 Appendix Specifications......................266 List of Options......................276 Document Catch Tray ................... 278 Notes and Restrictions..................279 Notes and Restrictions on Using the Machine................279 Index .........................
-
Page 10: Preface
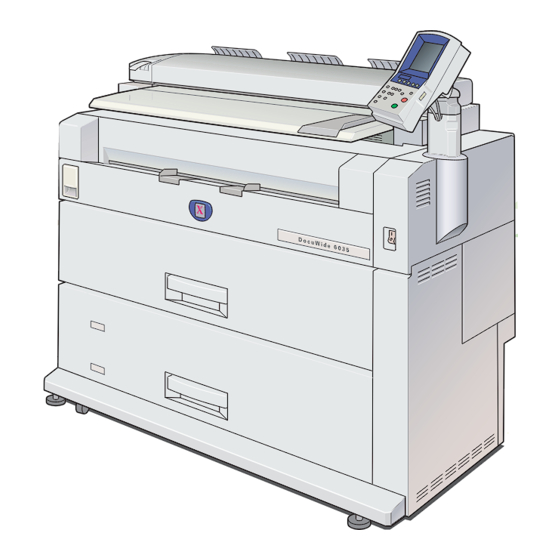
Preface Preface Thank you for selecting the DocuWide 6035/6055 (hereafter referred to as the "machine"). This is a multi-function product capable of corresponding to wide A0 size. This guide explains how to operate the machine and the precautions that must be followed during operation. -
Page 11: About The Docuwide 6035/6055 Models
About the DocuWide 6035/6055 Models About the DocuWide 6035/6055 Models The DocuWide 6035/6055 has two models as follows: DocuWide 6035/6055 DocuWide 6035/6055 MF This model has only print func- This model has copy/print/scan functions. tion. This type provides two rolls for paper feeding. -
Page 12: About The Provided Cd-Rom
Stamp Tool Create stamp data with a computer, and send it to DocuWide 6035/6055. DocuWide 6035/6055 Utilities help The help describes procedures to install the printer driver and scanner driver and to configure the print settings. -
Page 13: Types Of Manuals
Types of Manuals Types of Manuals This section describes the manuals of this machine and the manuals of optional accessories. Included Manuals The following manuals are provided with the machine. This guide describes all the necessary steps for copy/print/scan, User Guide (This Document) clearing paper jams, daily care, various settings items and safety information. -
Page 14: Using This Guide
Using This Guide Using This Guide This section describes the notations and configuration of this manual. Contents of this Guide This guide consists of the following chapters: 1 Before Using the Machine Describes basic information such as identifying the major components, how to switch the machine on and off, how to use the touch screen, how to set the power saver feature, usable media, cautions for handling media, and how to load media. - Page 15 Using This Guide Conventions The screen images and illustrations that are used in this guide are based on the machine configuration with the various options installed. Some of the items in the screen images may not be displayed or there may be features that cannot be used depending on the machine configuration.
-
Page 16: Safety Notes
Any unauthorized alteration including an addition of new functions or connection to external devices may not be covered by the product warranty. Contact your local Fuji Xerox representative for more information. Follow all warning instructions marked on this product. The warning marks... - Page 17 If the power cord is damaged or insulated wires are exposed, contact your local Fuji Xerox representative for its replacement. Do not use a damaged or uninsulated cord to avoid the risk of electric shock and a fire accident.
-
Page 18: Machine Installation
Once you notice any unusual condition, switch off and unplug this product first and contact your local Fuji Xerox representative Machine Installation Do not locate this product where people might step on or trip over the power cord. -
Page 19: Operational Safety
Safety Notes Do not incline the product at more than 10 degree angle. Otherwise, it may fall over and cause injuries. To keep this product in a good performance and condition, always use it in the following environment: Temperature 10 - 32 °C Humidity 15 - 85 %... - Page 20 (3) If the power of the power breaker is turned off, the circuit is working properly, If the circuit does not work properly, contact your local Fuji Xerox representative. Do not attempt to remove a paper jammed deeply inside the product, particularly a paper wrapped around a fuser or a heat roller.
-
Page 21: Consumable
It may catch fire by electric sparks inside the vacuum cleaner and cause explosion. If you spill a large volume of toner, contact your local Fuji Xerox representative. Never throw a toner cartridge into an open flame. Remaining toner in the cartridge may catch fire and cause burn injuries or explosion. -
Page 22: Locations Of Warning And Caution Labels
Safety Notes Locations of Warning and Caution Labels Always follow all warning instructions marked on or supplied with this product. To avoid the risk of burns and injuries, never touch the area with the "High Temperature" or "Sharp Edges" marks on. Never touch the exposed connectors around this label . -
Page 23: Regulation
Regulation Regulation Radio Frequency Emissions (Class A) This product has been tested and found to comply with the limits for a Class B digital device, pursuant to the International Standard for Electromagnetic Interference (CISPR Publ. 22) and Radiocommunications Act 1992 in Australia/New Zealand. These limits are designed to provide reasonable protection against harmful interference in a residential installation. -
Page 24: Environment
Environment Environment For environmental protection and efficient use of resources, Fuji Xerox reuses returned "toner cartridges or toner containers and drums (photoreceptors)" to make recycle parts, recycle materials, or energy recovery. Proper disposal is required for "toner cartridges or waste toner containers and drums (photoreceptors)"... -
Page 25: Legal Notice
Legal Notice Legal Notice Copying or printing certain documents may be illegal in your country. Penalties of fines or imprisonment may be imposed on those found guilty. The following are examples of items that may be illegal to copy or print in your country. Currency Banknotes and checks Bank and government bonds and securities... -
Page 27: Before Using The Machine
1 Before Using the Machine Describes the basic operation of the machine such as naming each component, switching the machine on and off, the operation of the touch screen, and power saving settings. Machine Components and their Functions ..........26 Power On/Off ....................33 Power Saver Mode ..................35 About Documents ..................38 Media Types ....................39... -
Page 28: Machine Components And Their Functions
1 Before Using the Machine Machine Components and their Functions This section describes the main components of the DocuWide 6035/6055 and their functions. Names and Functions of Components of Machine Front Component Function Document Thickness This adjusts the Document Cover in seven levels according to the Adjustment Lever thickness of the document. - Page 29 Machine Components and their Functions Component Function Power Switch Used to switch the power to the machine on/off. Roll Tray Load roll media here. Upper Unit Access the upper unit to clear a paper jam. Upper Unit Releasing Lever Lift this lever to open the upper unit. Right and Rear Inside Component...
- Page 30 1 Before Using the Machine Component Function Power Breaker Used to switch the main power to the machine on/off. (Main Power Switch) Interface Cover Contains the LAN port and service port. Do not use the service port. It is intended to be used only by our customer engineers. Important •...
-
Page 31: Control Panel
By factory default, the <Custom 1> and <Custom 2> buttons of the DocuWide 6035/6055 are assigned to [Copy] and [Scan], respectively. The <Custom 1> button of the DocuWide 6035/6055 printer is assigned to [Language], and cannot be changed. The <Custom 2> button is not available for use. - Page 32 * The <Scan> button, <Menu> button, <Copy from Memory> button, <Clear All> button, <Interrupt> button, and <Start> button are not used in the DocuWide 6035/6055 printer. Note • The machine comes with "Control Panel Feature Name Labels". As necessary, place the...
-
Page 33: Using The Touch Screen
Machine Components and their Functions Using the Touch screen This section describes how to use the touch screen. Note • The displayed tabs and buttons may vary depending on models, options installed, and machine settings. Unavailable items and buttons are displayed with thin dotted lines. Names and Functions of Touch screen This section describes components and the functions of touch screen on the illustrative copy screen. - Page 34 1 Before Using the Machine Feature setup screen Scan Size Cancel Close Auto (100 -15000) Detect Entry Area Selection Buttons Preset (100 -914) Size Custom Arrow Buttons Size Component Function Entry Area Press the entry range for numerical values, then use the numeric keypad to enter the numerical value directly.
-
Page 35: Power On/Off
Power On/Off Power On/Off Ensure the power is switched on before operating the machine. The machine is ready for operation within about four minutes after the power is switched on. Turn off the machine at the end of the day or when it is not in use for a long period of time. -
Page 36: Powering Off
1 Before Using the Machine Powering Off The procedure for turning the power off is as follows. Before turning the power off, ensure that all copy or print jobs have completely fin- ished. Also, ensure that the <Transmitting> indicator is not lit. Important •... -
Page 37: Power Saver Mode
Power Saver Mode Power Saver Mode The machine is installed with a Power Saver feature that will automatically power down the machine if no copy or print data is received after a predetermined time. The Power Saver feature has two modes, "Low Power mode" and "Sleep mode". The machine enters the "Low Power mode"... - Page 38 1 Before Using the Machine Select [System Settings]. System Administrator Menu User Mode System Settings Select [System Settings]. Check/Repair Rgquests Select [Common Settings]. Select [Machine Clock/Timer Settings]. Common Settings Close Machine Clock/ Audio Tones Timer Settings Custom Buttons Default Language Scan Start Mode Toner Density Watermark...
-
Page 39: Exiting The Power Saver Mode
Power Saver Mode From Last Selection to Sleep Mode Set the time to go from last operation to sleep mode from 5 to 240 minutes, in 1 minute increments. Note • The [From Last Selection to Sleep Mode] time cannot be shorter than the [From Last Selec- tion to Low Power Mode] time. -
Page 40: About Documents
Documents that are stapled together Documents to which glue or adhesive tape or filing strips has been stuck. Note • For details about document carriers, contact your Fuji Xerox Customer Support Centre. Precautions When Handling Documents Observe the following precautions when handling documents. -
Page 41: Media Types
To maintain maximum machine performance, we recommend using only media recommended by Fuji Xerox. Please contact your Fuji Xerox Customer Support Centre for advice on your other media requirements not listed below. Important • The printed image may fade due to moisture such as water, rain or vapor. For more informa- tion, contact your Fuji Xerox Customer Support Centre. -
Page 42: Handling And Storing Media
1 Before Using the Machine Important • If you use unsuitable paper for the media setting you specified or inappropriate paper is set in the media source, it may result in paper jams. Select the correct media size, type, and the media source to print appropriately. -
Page 43: Loading Media
Loading Media Loading Media This section describes how to load roll paper and cut paper. Loading Roll Media/Trimming Roll Media Load Roll 1, Roll 2, Roll 3, or Roll 4 in the roll tray. When loading media, ensure to trim the lead edge. WARNING This product uses roll printing paper. - Page 44 1 Before Using the Machine Pinching the lever at the end of the shaft (1), remove the shaft from the core of the roll media (2). Note • Pinching the lever releases the lock of the roll media, and you can remove the shaft. Pinching the lever at the end of the shaft (1), insert the shaft into the new roll media so that it aligns with the media size guide (2).
-
Page 45: Using The Manual Feed Tray (Bypass)
Loading Media Gently slide the Roll Tray for Roll 1, Roll 2, Roll 3, or Roll 4 into the machine until it stops. Using the Manual Feed Tray (Bypass) When using cut sheets for copying or printing, load the cut sheet via the manual feed tray. -
Page 46: Media Settings
1 Before Using the Machine Media Settings Ensure to set the media settings when initially loading paper in the machine or when changing the type or size series of the media. Press the <Machine Status> button. Select the [Media/Settings] tab. Machine Billing Media /... - Page 47 Media Settings Select [Type Weight] for the media source to be Machine Billing Media / Close Info. Meters Settings set. Media Size Series Type Weight ISO/JIS A ISO A0 Bond Standard ISO/JIS A ISO A1 Bond Standard ISO/JIS A ISO A2 Bond Standard ISO/JIS A...
-
Page 49: Copy
2 Copy This chapter describes the [Copy] screen and copy features. Copying Procedure ..................48 Stopping the Copy Job ................51 Copying Multiple Documents (Collated Output)..........52 Copying with Manual Feeding ..............55 Copying with Auto R/E................56 Interrupting for a Copy Job .................58 Reprinting (Copy from Memory) ..............59 Making Sample Copies................61 Applying Stamp to Copies ................63 Printing Control Number on the Background (Watermark) ......65... -
Page 50: Copying Procedure
2 Copy Copying Procedure This section describes the basic copy operations. Step1 Selecting Features Select the features from the [Copy] screen. Press the <Copy> button. Copy from Transmitting Memory Copy Scan Menu Note • To display the [Copy] screen, you can also Power Saver Job in memory select [Copy] on the [Menu] screen that is dis-... -
Page 51: Step2 Entering The Quantity
Copying Procedure Step2 Entering the Quantity Enter up to 99 for the number of copies. Enter the required number of copies using the Copy from numeric keypad. Transmitting Memory Copy Scan Menu Power Saver Job in memory Note • To correct a value, press the <C (Clear)> but- ton and enter the correct value. - Page 52 2 Copy Scanning Thick Documents You can scan documents up to 12.7mm thick on this machine. When scanning thick documents, use the document thickness adjustment lever on the document cover. Each lever position and its corresponding document thickness are shown below: Lever Position Document Thickness 1st (scale 0mm)
-
Page 53: Stopping The Copy Job
Stopping the Copy Job Stopping the Copy Job This section describes the procedure for stopping the copy job. Press the <Stop> button on the control panel Copy from while the document is being scanned or output. Transmitting Memory Copy Scan Menu Power Saver Job in memory... -
Page 54: Copying Multiple Documents (Collated Output)
2 Copy Copying Multiple Documents (Collated Output) When copying multiple documents, you can set the output method as follows: Uncollated With Uncollated output, the machine outputs the specified number of copies and sorts sheets by page. 3.3... 2.2... 1.1... Collated With Collated output, the machine outputs sheets sorted 1.2.3... - Page 55 Copying Multiple Documents (Collated Output) Enter the required number of copies using the Copy from numeric keypad. Transmitting Memory Copy Scan Menu Power Saver Job in memory Job Status Clear All Interrupt Stop Machine Status Start Log In/Out Numeric Keypad Set the first document.
-
Page 56: Registering Distribution Patterns
2 Copy Press the <Start> button. Copy from Transmitting Memory Copy Scan Menu The machine starts outputting copies. Power Saver Job in memory Job Status Clear All Interrupt Stop Machine Status Start Log In/Out <Start> button Registering Distribution Patterns When selecting [Program] for copying, register distribution patterns beforehand. Select the <Menu>... -
Page 57: Copying With Manual Feeding
Copying with Manual Feeding Copying with Manual Feeding Set media on the manual feed tray when copying or printing with media of a type or size that cannot be set in roll tray. Important • If the sheet you set is different in size from the media specified, the image may be clipped or be printed with unwanted margins. -
Page 58: Copying With Auto R/E
2 Copy Copying with Auto R/E Auto R/E allows you to use copy settings you set in advance such as the orientation, type, and size of media for the orientation and size of the document. The machine automatically selects the correct scaling factor and media source, based on the detected size of the document and the media size selected. - Page 59 Copying with Auto R/E Set the document with its edge aligned to the document guide. The machine starts scanning, and then copies are output per the settings for media size, output orientation, and media type. • "Step3 Scanning Document" (P.49)
-
Page 60: Interrupting For A Copy Job
2 Copy Interrupting for a Copy Job By interrupting, you can execute an urgent copy job even when the machine is occu- pied with a continuing copy/print job. The settings of the copy job you interrupt will not be changed. Note •... -
Page 61: Reprinting (Copy From Memory)
Reprinting (Copy from Memory) Reprinting (Copy from Memory) The Copy from Memory feature allows you to make additional copies of your immedi- ately previous document without setting the document again. A complete set of sorted copies will be reprinted if the most recent job included sort copying (collation). - Page 62 2 Copy Press the <Start> button. The most recently copied document is printed. When the copy from memory operation is completed, press the <Copy from Memory> button/indicator again. The Copy from Memory mode is canceled. Note • The Copy from Memory mode is automatically canceled after a predetermined interval has elapsed without any copy operation.
-
Page 63: Making Sample Copies
Making Sample Copies Making Sample Copies This feature allows you to optimize the print results by changing the settings for part of the document and printing a sample copy. The area to be copied can be specified arbitrarily. You can change the enlarge/reduce settings, the image density, the image type and all other settings for the specified area of the document. - Page 64 2 Copy Set the document with its edge aligned to the document guide. The machine starts scanning, and then the sam- ple copy is output per the conditions set. • "Step3 Scanning Document" (P.49) Note • Repeat procedures 1 to 4 to print additional sample copies.
-
Page 65: Applying Stamp To Copies
You can apply stamps or the date to the copies you make. To use this feature, create stamp data using the stamp data creation tool and transfer it to the machine beforehand. Fuji Xerox 2008/08/08 Important • To use the Stamp feature, DW6035/6055-Stamper-Key-AP (optional) is required. - Page 66 2 Copy Select the stamp number, and then press Cancel Close Stamp Number [Close]. Go to (01- 99) Set additional items as needed. • "Stamp" (P.82) Press [Close]. Page 1 of 5 Set the document with its edge aligned to the document guide.
-
Page 67: Printing Control Number On The Background (Watermark)
Printing Control Number on the Background (Watermark) Printing Control Number on the Background (Watermark) You can lightly print a sequential control number on the background of each copy set. For example, if you set "1" for the start number, "1" is printed on all pages of the first copy set and "2"... -
Page 68: Folding Copies
2 Copy Folding Copies The Simple Folder (optional) allows you to fold copies to A4 size. Cross Fold Fan Fold Important • This feature is available only when the optional Simple Folder is installed. • Paper folding is available only in one direction with this machine. •... -
Page 69: Copy Features
Copy Features Copy Features The following copy features are available on this machine. Interface Feature Notes Page [Basic Copy] Reduce/ Selects the ratio to make enlarged or reduced copies. Enlarge Basic Image More Auto R/E Copy Quality Features Reduce/Enlarge Media Supply Media Type Media Supply Selects the media size. - Page 70 2 Copy Interface Feature Notes Page [More Features] Folder Selects the folding method for a model with Folder installed. Basic Image More Auto R/E Copy Quality Features Folder Collation Uncollated Collation Selects the output method for copying multiple documents Stamp Watermark installed.
-
Page 71: [Copy - Basic Copy] Screen
[Copy - Basic Copy] screen [Copy - Basic Copy] screen The [Basic Copy] screen allows you to set the basic features of the copy operation. Note • Items and buttons displayed with thin dotted lines are disabled. Reduce/Enlarge [Copy] > [Basic Copy] This feature allows you to select the ratio to enlarge or reduce copies. -
Page 72: Media Supply
2 Copy Variable Allows you to specify any ratio for copying within a range from 25 to 400% in 0.1% increments. ratios Touch the entry area for numerical values, and enter the numerical values using the numeric keypad, [ ] [ ] in 1% increments, or [+0.1] [-0.1] in 0.1% increments. -
Page 73: Media Type
[Copy - Basic Copy] screen More... The [Media Supply] screen appears. This screen allows you to select media a size or media source that is not displayed in the [Basic Copy] screen. Auto Select Based on the document size and Cancel Close Media Supply... -
Page 74: Media Cut Mode
2 Copy Media Cut Mode [Copy] > [Basic Copy] Allows you to select the media cutting method Basic Basic Image Image More More Auto R/E Auto R/E Copy Copy Quality Quality Features Features from [Standard], [Synchronized], and [Variable Reduce/Enlarge Reduce/Enlarge Media Supply Media Supply Media Type Media Type... -
Page 75: [Copy - Basic Copy (Auto R/E)] Screen
[Copy - Basic Copy (Auto R/E)] screen [Copy - Basic Copy (Auto R/E)] screen Auto R/E allows you to make copies according to the media size, output orientation and media type set for each document orientation and size. The machine automati- cally selects the correct scaling factor and media source, based on the detected size of the document and the media size selected. -
Page 76: Media Size
2 Copy Media Size [Copy] > [Basic Copy (Auto R/E)] Allows you to select the media size and output orientation. When [Synchronized] is set for [Original], select the media by width. There are three orientations you can select: Standard Size Portrait Standard Size Landscape Standard Size Auto Select Note... -
Page 77: Advanced Settings Of Auto R/E
[Copy - Basic Copy (Auto R/E)] screen Advanced Settings of Auto R/E [Copy] > [Basic Copy (Auto R/E)] Allows you to set the media size and media type Close Auto R/E per document orientation and document size Original Media Settings series. -
Page 78: [Copy - Image Quality] Screen
2 Copy [Copy - Image Quality] screen The [Image Quality] screen allows you to set the image quality adjustment features. Note • Items and buttons displayed with thin dotted lines are disabled. Basic Image More Basic Image More Auto R/E Auto R/E Copy Quality Features... -
Page 79: Copy Density
[Copy - Image Quality] screen Uneven-Toned Background Uneven-Toned Cancel Close Background Most suitable for documents having a non-uni- Large Spot Fine Spot form background typically due to cut-and- pasted pieces attached. Selecting [Uneven-Toned Background] under [Others...] displays the [Uneven-Toned Back- ground] screen, where you can calibrate the size of unevenness in 80 levels. -
Page 80: Sharpness
2 Copy On (Manual) Background Cancel Close Suppression Erases the background color of the document uniformly. Normal High (13) (25) The suppression can be calibrated in 39 steps On(Auto) from [Low] to [High]. (13-0-25) Note • If your document is one of the following types, select [On (Manual)], and calibrate the sup- On(Manual) pression level. -
Page 81: Adjust Color Density
[Copy - Image Quality] screen Adjust Color Density [Copy] > [Image Quality] Allows you to adjust the density on a color-by- color basis to enhance or erase some colors. [Adjust] checkbox Selecting the checkbox activates the [Adjust Color Density] feature. Density can be calibrated in seven levels for each of Red, Yellow, Green, Cyan, Blue, Violet, and Black. -
Page 82: [Copy - More Features] Screen
2 Copy [Copy - More Features] screen The [More Features] screen allows you to set the image printing position, edge erase, scan start position, and margins. Note • Items and buttons displayed with thin dotted lines are disabled. Basic Image More Basic Image More... -
Page 83: Collation
[Copy - More Features] screen Collation [Copy]>[More Features] Allows you to set the output method of copies. Uncollated Cancel Close Collation Outputs the specified number of copies page by Banner Sheet page. Uncollated Collated Collated Outputs the copies set by set in page order. Collation Order Forward Program... -
Page 84: Stamp
2 Copy Banner Sheet Allows you to insert banner sheets when [Collated] or [Program Distrib.] is selected. The set number and date will be printed on the banner sheets. • For details of the media source and length of banner sheets, refer to "Detailed Copy Set- tings"... - Page 85 [Copy - More Features] screen Numbering Cancel Close Numbering No Print Prints no stamp text. Fixed Text Number No Print Fixed Num- The same alphanumeric string 0000 (arbitrary 12-digit string) is printed An 8-character Fixed Number Fixed on all of the copies. and 4-digit Number Number String is printed for each...
-
Page 86: Watermark
2 Copy Watermark [Copy]>[More Features] Allows you to print a sequential control number Watermark Cancel Close lightly on the background of each copy set. Control Number User Account Note • This option is invalid when [Force watermark- Number Copy] is set to [On] with [System Set- tings]>[Common Settings]>[Watermark]. -
Page 87: Sample Copy
[Copy - More Features] screen Sample Copy [Copy]>[More Features] This feature allows you to copy part of the document with desired settings as a sample before determining the settings. Important • The [Sample Copy] operation is disabled in the following situations. -When [Standard Size] is selected for [Media Source] under [Media Supply]. -
Page 88: Multi-Job
2 Copy Original Allows you to output a sample copy of seven document types. Type List Note • When [Original Type List] and [On(Auto)] for [Background Suppres- sion] are selected concurrently, sample copying is disabled for [Picture] and [Photo]. Therefore, an document type list containing only five vari- ations will be output. - Page 89 Stamp No. 3 C C C B Document A Document A Document A Document B B A2 100% 100% A Fuji Xerox Fuji Xerox 2008/08/08 2008/08/08 Fuji Xerox 2008/08/08 C Document C C B B A3 Document Document A Document A...
-
Page 90: Scan Size
2 Copy Scan Size [Copy]>[More Features] Allows you to select the scan size of the docu- Scan Size Cancel Close ment. Auto Detect Auto Detect JIS A0 Wide JIS B2 Wide JIS A1 Wide JIS B3 Wide Recognizes the document size automatically. Preset JIS A2 Wide JIS B4 Wide... - Page 91 [Copy - More Features] screen Head to Right Select this item when setting the right edge as the lead edge (so that the characters are positioned horizontally). Head to Left Select this item when setting the left edge as the lead edge (so that the characters are positioned horizontally).
-
Page 92: Image Location
2 Copy Image Location [Copy]>[More Features] This feature allows you to shift the print position of the image to create margins for binding, etc. Note • The shift amount is set relative to the media size. Therefore, the image is printed on the media as you specify for the copy position, unaffected by any reduce/enlarge settings. -
Page 93: Scan Start Position
[Copy - More Features] screen Scan Start Position [Copy]>[More Features] Allows you to set the position on the document where scanning is to be started. Document Set the position relative to the lead edge of the Scan Start Position Cancel Close document in the range of 0 to 999mm in 1mm increments. -
Page 94: Lead & Tail Margins
2 Copy Lead & Tail Margins [Copy]>[More Features] Adds lead and tail margins to copies. Lead Document Tail The lead and tail margins can be set within the Lead & Tail Margins Cancel Close range of 0 to 999mm in 1mm increments. Lead (0-999) Tail... -
Page 95: Mirror Image
[Copy - More Features] screen Mirror Image [Copy]>[More Features] Allows you to flip the image horizontally to make Mirror Image Cancel Close a mirror image. Copies the document as is. Flips the document image horizontally on the copy. Note • When the media size is larger than the document size, the image is inverted within the docu- ment image area, creating margins on the right side of the copy. - Page 97 3 Scan This chapter describes the scan features. Important • Color scan function is an optional package and is not available for some models. For more information, contact your Fuji Xerox Customer Support Centre. Overview of Scanning.................96 Preparation for Network Scanning..............97 Network Scanning Procedure................103...
-
Page 98: Overview Of Scanning
3 Scan Overview of Scanning The following two scanning methods are available on the machine: Network Scanning Direct Scanning Imports the scanned documents to the computer connected to this machine with USB. • "Direct Scan" (P.129) This chapter describes the operation procedures and features available for Network Scanning. -
Page 99: Preparation For Network Scanning
Preparation for Network Scanning Preparation for Network Scanning This section describes the preparation required for network scanning using this machine. Network Scanning Preparation Flow Using Using Using Scanner Driver CentreWare Internet Services Wide Format Scan Service Setting on the machine Network Settings Creating a Mailbox Settings on your computer... -
Page 100: Creating Mailboxes
3 Scan Creating Mailboxes Up to 100 mailboxes can be created on the machine. Note • Mailboxes can also be created with CentreWare Internet Services. For details of how to create mailboxes via CentreWare Internet Services, refer to Centre- Ware Internet Services Help. Press the <Menu>... - Page 101 Preparation for Network Scanning Select the item to be set. Mailbox 002 Close Items Current Settings Mailbox Name (Not Entered) Password Delete After Retrieval Cancel Delete Expired Delete Select the setting value, and press [Save]. Delete Documents Cancel Save After Retrieval Documents will be Cancel Press [Close].
-
Page 102: Deleting Mailboxes
3 Scan Delete Documents After Retrieval Delete Documents Cancel Save After Retrieval Set whether to delete a document stored in a Documents will be Cancel mailbox when retrieving to a computer. deleted from the Mailbox after they have been retrieved by external Cancel source. -
Page 103: Installing Scanning Software
Preparation for Network Scanning Select [Mailbox]. Setup Menu Close Stored Copy Program Scan Program Stored Multi- Mailbox Job Program Program Distribution Select the number of the mailbox to delete, and Mailbox Close press [Create/Edit]. Go to Mailbox Name (001-100) Note •... - Page 104 3 Scan Both programs are included on the CD-ROM that is supplied with the machine. Note • For the installation procedure, refer to the help included on the CD-ROM.
-
Page 105: Network Scanning Procedure
Network Scanning Procedure Network Scanning Procedure This section describes the basic procedure for network scanning. Step1 Selecting Mailboxes ..................103 Step2 Selecting Features ..................104 Step3 Starting Scan Jobs ..................105 Step4 Importing Documents from Mailboxes ............105 Step1 Selecting Mailboxes Select the mailbox in which to store documents. -
Page 106: Step2 Selecting Features
3 Scan Enter the password, and press [Confirm]. Cancel Mailbox 002: B Mailbox Note • When the mailbox password feature is set to [Off], this screen does not appear. Password **** Confirm Press [Close]. Ready to Scan Close Mailbox Go to Mailbox Name (001-100) 001. -
Page 107: Step3 Starting Scan Jobs
Network Scanning Procedure Select the features to set from the [More Fea- Basic Image More tures] tab as required. Scan Quality Features • "[Scan - More Features] screen" (P.126) Scan Size Edge Erase Auto Detect Normal Erase Scan Speed Scan Start Position 0 mm B&W:Normal Color:Normal... -
Page 108: Importing Documents From Mailboxes
3 Scan Importing Documents from Mailboxes This section describes the procedure for importing documents from a mailbox to your computer. For the procedures and details on importing documents to your computer, refer to: Using Scanner Drivers ....................106 Using Wide Format Scan Service ................108 Using CentreWare Internet Services................. - Page 109 Importing Documents from Mailboxes From the [File] menu, select [Select source]. From [Sources], select [Wide Format Network TWAIN Source], and click [Select]. Note • If there is no need to change the scanner, skip this procedure. Importing the Scanned Documents Import the scanned document.
-
Page 110: Using Wide Format Scan Service
• For details of how to operate Wide Format Scan Service, refer to Wide Format Scan Service Help. Creating a Mailbox Create a mailbox for the machine on Wide Format Scan Service. From the [Start] menu, open [Program]>[Fuji Xerox]>[Wide Format Scan Ser- vice]>[Wide Format Scan Service]. From [New] of the [File] menu, select [Mailbox]. - Page 111 • You can set to automatically import the scanned data stored in a mailbox. For the setting method, refer to Wide Format Scan Service Help. From the [Start] menu, open [Program]>[Fuji Xerox]>[Wide Format Scan Ser- vice]>[Wide Format Scan Service]. Select the mailbox that contains the document to import.
-
Page 112: Using Centreware Internet Services
3 Scan Specify the save destination, and then click [OK]. Using CentreWare Internet Services This section describes the procedure for importing documents from a machine mail- box to your computer using CentreWare Internet Services. CentreWare Internet Services allows you to import the mailbox-stored documents in the machine to your computer without using any application software. - Page 113 Importing Documents from Mailboxes Select the checkbox of the doc- ument to import, and then click the [Retrieve document] button. The document is downloaded to your computer.
-
Page 114: Deleting Documents In Mailboxes
3 Scan Deleting Documents in Mailboxes This feature allows you to delete unnecessary documents in mailboxes. Note • When imported to a computer, the document is automatically deleted from the mailbox. For details of how to disable automatic deletion, refer to "Creating Mailboxes" (P.98). Press the <Scan>... -
Page 115: Scanning Multiple Documents As One Set
Scanning Multiple Documents as One Set Scanning Multiple Documents as One Set Selecting [Multi-page TIFF], [Multi-page PDF], or [Multi-page DocuWorks] under [File Format] allows you to scan multiple documents as one set of data. Up to 500 pages can be contained in one set. Under [File Format] on the [Basic Scan] screen, Ready to scan select [Multi-page TIFF], [Multi-page PDF], or... - Page 116 3 Scan Select [Last Original] when there are no more Scan documents to be scanned. Save in : Mailbox 002 - B Mailbox Document Name : 002-081001-003.tif Pages Stop Change Delete Prev. Last Settings Image Original...
-
Page 117: Stopping Scan Job
Stopping Scan Job Stopping Scan Job To stop scanning the document, use the following procedure: Stopping Single-page Scanning You can stop a scanning job when the document sheet skews, etc. Press the <Stop> button on the control panel Copy from Transmitting while the document is being scanned. -
Page 118: Interrupting For A Scan Job
3 Scan Interrupting for a Scan Job By interrupting, you can execute an urgent scan job even when the machine is occu- pied with a continuing print job. Note • During an interrupt, operations related to Stored Programming cannot be executed. •... -
Page 119: Scan Features
Scan Features Scan Features The following scan features are available on this machine. Interface Feature Notes Page [Basic Scan] Output Color/ Allows you to set the Output Color or Halftone for scan- Halftone ning. Save in: Not Entered Mailbox Basic Image More Scan... -
Page 120: [Scan - Basic Scan] Screen
3 Scan [Scan - Basic Scan] screen The [Basic Scan] screen allows you to set the basic features of the scan operation. Note • Items and buttons displayed with thin dotted lines are disabled. Output Color/Halftone [Scan]>[Basic Scan] This feature allows you to set the Output Color or Save in: Not Entered Mailbox Halftone for scanning. -
Page 121: Scan Resolution
DocuWorks JPEG Saves the document in JPEG format. Note • xdw is the file format for Fuji Xerox DocuWorks, which allows you to view or output scanned documents. Scan Resolution [Scan]>[Basic Scan] This feature allows you to specify the resolution... -
Page 122: Reduce/Enlarge
3 Scan Reduce/Enlarge [Scan]>[Basic Scan] This feature allows you to specify the magnifica- Save in: Not Entered Mailbox tion at which to scan the document. Basic Image More Scan Quality Features Output Color File Format Scan Resolution Single 600dpi Color Page TIFF Multi-page Grayscale TIFF... -
Page 123: [Scan - Image Quality] Screen
[Scan - Image Quality] screen [Scan - Image Quality] screen The [Image Quality] screen allows you to optimize the settings such as document type and scanning density. Note • Items and buttons displayed with thin dotted lines are disabled. Save in: Mailbox 002 Save in: Mailbox 002 Save in: Mailbox 002 Mailbox... -
Page 124: Scan Density
3 Scan Uneven-Toned Background Uneven-Toned Cancel Close Background Most suitable for documents with non-uniform Large Spot Fine Spot background typically due to cut-and-pasted pieces being attached. Selecting [Uneven-Toned Background] under [Others...] displays the [Uneven-Toned Back- ground] screen, where you can calibrate the size of unevenness in 80 levels. -
Page 125: Image Q/F Size
[Scan - Image Quality] screen - Documents inserted in a document carrier - Documents with densely printed areas Image Q/F Size [Scan]>[Image Quality] This feature allows you to select the image qual- Image Quality/ Cancel Close ity settings for scanning. File Size Max Quality/ Note... -
Page 126: Black/White Threshold
3 Scan Black/White Threshold [Scan]>[Image Quality] This feature allows you to assign the halftone pixels of the document to black or white. In Black/White Threshold When [Output Color/Halftone] is set to [Black & feature, White], you can select the threshold value from the color of the original 255 levels. - Page 127 [Scan - Image Quality] screen Saturation can be calibrated in seven levels for each Red, Yellow, Green, Cyan, Blue, Violet, and Black. Use [ ] [ ] to calibrate each saturation level. The higher the level is set, the more saturated the color will become.
-
Page 128: [Scan - More Features] Screen
3 Scan [Scan - More Features] screen The [More Features] screen allows you to configure settings such as scan size and scan start position. Note • Items and buttons displayed with thin dotted lines are disabled. Basic Image More Scan Quality Features Scan Size Edge Erase... -
Page 129: Scan Start Position
[Scan - More Features] screen Border Erase Edge Erase Cancel Close Edge erase is applied to the same margin width Normal along the top/bottom/left/right edges. The edge Erase (0-50) erase width can be set within the range of 0 to Border 50mm in 1mm increments. -
Page 130: Scan Speed
3 Scan Scan Speed [Scan]>[More Features] This feature allows you to set slower document Scan Speed Cancel Close scanning speed for additional reliability. Black&White Color Black&White Normal Normal Normal Slow Slow Scans the document at the normal speed (152.4mm/sec). Super Slow Slow Reduces the scanning speed to 1/2 of the nor- mal speed. -
Page 131: Direct Scan
This chapter describes the direct scan features and operations. Important • Color scan function is an optional package and is not available for some models. For more information, contact your Fuji Xerox Customer Support Centre. Overview of Direct Scanning ..............130 Preparation for Direct Scanning..............131... -
Page 132: Overview Of Direct Scanning
4 Direct Scan Overview of Direct Scanning Import the scanned documents to the computer connected to this machine with USB. You can adjust and edit the scanned image data while previewing it on the computer screen. According to the setting, scanning may be required only once. The methods for scanning are as follows: Using USB TWAIN driver Using DW-ScanIII Service (optional) -
Page 133: Preparation For Direct Scanning
Preparation for Direct Scanning Preparation for Direct Scanning This section describes the preparation required for the direct scanning using this machine. Preparation for direct scan Setting on your computer Installing software for importing documents Installing USB TWAIN driver Setting on the machine Connecting USB Importing by using DocuWorks, the TWAIN-based software for... -
Page 134: Importing Documents By Direct Scanning
4 Direct Scan Importing Documents by Direct Scanning This section describes how to import documents to the computer connected to this machine with USB. Using USB TWAIN Driver This describes the procedure for importing documents to a computer. Import with the document importing software on the computer. Here DocuWorks is used as an example. - Page 135 Importing Documents by Direct Scanning Starting the Scan Job Select [Acquire] from the [File] menu. Set the color mode and scan size on the [Basic] tab, and image quality such as scan density on the [Image options] tab. [Show Preview] checkbox If you select this, the preview screen appears after the docu- ment is scanned.
- Page 136 4 Direct Scan Set the document. With the side to be scanned facing down, align the document with the document guide, and then insert it until the leading edge touches the inte- rior of the machine. Once placed, the document is automatically fed in and then stops at a certain position.
-
Page 137: Printing
5 Printing This chapter describes how to use the printing features of the DocuWide 6035/ 6055 printer in a Windows environment. Note • The printing capabilities explained in this chapter are not available on all machines, and may require optional accessories to execute such features. For more informa- tion, contact your Fuji Xerox Customer Support Centre. -
Page 138: Setting Up Your Printer
5 Printing Setting up your Printer This section describes how to set up your printer and the printing formats you can select when printing a document. Data Formats The data formats you can instruct from your computer to the machine are provided in the following table. -
Page 139: Network Settings
Setting up your Printer Network Settings This section describes how to set up your printer to operate with the network in use. • "Network Settings" (P.222) Browser Settings CentreWare Internet Services is a software application that enables you to monitor communications between your computer and printer, confirm the current printing sta- tus, and change your printer settings via a browser. -
Page 140: Logical Printer Settings
5 Printing Setting Up Your Browser CentreWare Internet Services requires cache memory. Therefore before using the service, confirm whether the following settings can be performed with your browser. Select [Internet Options] from the [Tools] menu. Select the [General] tab, and click the [Settings] button in the Temporary Internet files field. - Page 141 Setting up your Printer BT-PlotAssistant If you use BT-PlotAssistant, and your printer software corresponds to the available data formats, then you will be able to print multiple files with different file formats simultaneously. Note • BT-PlotAssistant is an optional software application. •...
-
Page 142: Printing
5 Printing Printing This section describes how to print a document. Using the Printer Driver to Print a Document This section explains how to print a document with a printer driver. • For details on the capabilities and features of the printer driver, click [Help] on the Printer Driver screen. -
Page 143: Cancel Printing (Operating The Machine From Its Control Panel)
Printing To Confirm Printing Status Start up the browser. Enter the machine IP address in the browser address field and press the <Enter> key on your keyboard. Click the [Job and Log] tab. Displays a list of completed jobs. Cancel Printing (Operating the machine from its control panel) This section describes how to stop printing a document. -
Page 144: About Confidential Print
5 Printing About Confidential Print A document you want to print at a later time can be saved and stored in printer mem- ory, and later retrieved and printed by the owner of the file from the printer. We call this feature "Confidential Print". Confidential Print is a convenient method of keeping documents confidential and enabling owners of documents to print their documents with a user identification num- ber and password. -
Page 145: Secure Print
About Confidential Print For details on Confidential Printing, refer to: Specifying Secure Print from your Computer ............144 Selectting Secure Print from the Machine ..............145 Setting Authentication Data from your Computer ............147 Specifying Private Charge Print from your Computer ..........148 Selecting Private Charge Print from the Machine ............. - Page 146 5 Printing Specifying Secure Print from your Computer This section describes how to set [Secure Print] in your computer. Select [Print] from the [File] menu. Confirm [Printer Name] and click [Prop- erties]. Click the [Basic] tab. Select [Secure Print] from [Job Type] to display the [Secure Print] screen.
- Page 147 About Confidential Print Selectting Secure Print from the Machine The printer control panel can be used to set [Secure Print] to save and print a docu- ment. Press the <Job Status> button. Copy from Transmitting Memory Copy Scan Menu Power Saver Job in memory Job Status Clear All...
- Page 148 5 Printing Select the document you want to print. Secure Refresh Close Print Note • If you send a document name from the com- Go to Doc. Name (0001-0012) puter to the printer containing a font the printer 0001. 001-081001_Print does not support, the name of the document 0002.
-
Page 149: Private Charge Print
About Confidential Print Private Charge Print The following flowchart illustrates the steps to create a Private Charge Print docu- ment. Set authentication data from your computer Set authentication data using your printer driver Specify Private Charge Print from your computer Specify Print Select Private Charge Print from the machine Authenticate the IC card, User ID (Password) - Page 150 5 Printing Select the [Always use default user details] radio button, and select [Use login name] or [Enter user ID] from the [User ID options] pull down menu. Enter [User ID] and [Password]. Note • You can enter up to 32 alphanu- meric characters for [User ID].
- Page 151 About Confidential Print Authenticating Private Charge Print from the Control Panel Press the <Log In/Out> button. Copy from Transmitting Memory Copy Scan Menu Power Saver Job in memory Job Status Clear All Interrupt Stop Machine Status Start Log In/Out <Log In/Out> button Enter a User ID, and password, if required, using Cancel Save...
- Page 152 5 Printing Select the document you want to print, and press Private Charge Refresh Close Print [Print Start]. Go to Doc. Name (0001-0012) Note • If you send a document from the computer to 0001. 001-081001_Print the printer containing a font the printer does 0002.
-
Page 153: Job Status
Job Status This chapter describes the Job Status feature. Overview of Job Status................152 Confirming a Completed Job ..............153 Printing and Deleting Stored Documents..........154... -
Page 154: Overview Of Job Status
6 Job Status Overview of Job Status In the Job Status screen, you can confirm a com- Copy from pleted job, or print or delete a Secure Print or Pri- Transmitting Memory Copy Scan Menu Power Saver vate Charge Print confidential document. Job in memory Job Status Clear All... -
Page 155: Confirming A Completed Job
Confirming a Completed Job Confirming a Completed Job This section describes how to verify a completed job. You can verify whether you have completed a job. Up to 200 jobs can be verified. To view the details of a print job, select the job on the tab. Press the <Job Status>... -
Page 156: Printing And Deleting Stored Documents
6 Job Status Printing and Deleting Stored Documents This section explains how to print or delete a document stored with the Confidential Print feature. The [SecurePrint Jobs&More] screen allows you to print or delete the document stored for Confidential Print. • "About Confidential Print" (P.142) Refer to the following items to learn more about Confidential printing. - Page 157 Printing and Deleting Stored Documents Enter the password, and select [Confirm]. Fuji Taro Cancel Password Confirm Select the document you want to print or delete. Secure Refresh Close Print Note • If you send a document from the computer to Go to Doc.
-
Page 158: Private Charge Print
6 Job Status Private Charge Print This section describes how to print and delete a document saved as a [Private Charge Print] document. Note • This item is displayed only when [Save to Pvt Mailbox] is selected from [Private Charge Print Settings] >... - Page 159 Printing and Deleting Stored Documents Select this button to delete a document. Delete Private Charge Print Documents Important • A deleted document can- The following document will be deleted. not be recovered. User ID :Fuji Taro Doc. Name :001-081001_Print Stored Date :2008.10.21 13:00 Cancel Select this button to cancel the...
-
Page 161: Stored Programming
7 Stored Programming This chapter describes the Stored Programming features. Overview of Stored Programming.............160 Registering Stored Programming .............161 Deleting Information from Stored Programming ........163 Recalling Stored Programming..............164... -
Page 162: Overview Of Stored Programming
7 Stored Programming Overview of Stored Programming Stored Programming is a feature that enables you to save the settings used to copy or scan a document. If you register commonly-used settings in Stored Programming, you can easily recall these set- tings from the [Stored Programming] screen. There are three types of Stored Programming. -
Page 163: Registering Stored Programming
Registering Stored Programming Registering Stored Programming This section explains how to register information in Stored Programming. Press the <Menu> button. Select [Setup Menu]. Please select the required service. Menu Language Copy Scan Setup Menu Stored Programming Select [Stored Copy Program], [Stored Scan Setup Menu Close Program] or [Stored Multi-Job Program]. - Page 164 7 Stored Programming Enter the name, and press [Save]. Keyboard Cancel Save Note • Enter up to 20 alphanumeric characters for the Job 03 Stored Programming name. Back When using CentreWare Internet Services to Space specify a name, you can enter up to 20 alpha- Shift numeric characters (10 in double byte charac- ters).
-
Page 165: Deleting Information From Stored Programming
Deleting Information from Stored Programming Deleting Information from Stored Programming This section describes how to delete information from Stored Programming. Press the <Menu> button Select [Setup Menu]. Please select the required service. Menu Language Copy Scan Setup Menu Stored Programming Select [Stored Copy Program], [Stored Scan Close Setup Menu... -
Page 166: Recalling Stored Programming
7 Stored Programming Recalling Stored Programming This section describes how to recall Stored Programming. Note • You can recall a Stored Multi-job Program using [Multi-job] in the [Copy - More Features] screen. Press the <Menu> button. Copy from Transmitting Memory Copy Scan Menu Power Saver... -
Page 167: Maintenance
8 Maintenance This chapter describes how to replace consumables and maintain the machine. Replacing Consumables................166 Cleaning the Machine ................172... -
Page 168: Replacing Consumables
Use a broom or a wet cloth to wipe off spilled toner. Never use a vacuum cleaner for the spills. It may catch fire by electric sparks inside the vacuum cleaner and cause explosion. If you spill a large volume of toner, contact your local Fuji Xerox representative. -
Page 169: Loading Toner
Use a broom or a wet cloth to wipe off spilled toner. Never use a vacuum cleaner for the spills. It may catch fire by electric sparks inside the vacuum cleaner and cause explosion. If you spill a large volume of toner, contact your local Fuji Xerox representative. - Page 170 8 Maintenance Note • For DocuWide 6035/6055 printers, open the toner cartridge panel cover. Shake the toner bottle to mix toner that has set- tled on the bottom of the bottle and to load toner smoothly. Note • Shake the toner bottle about 20 times.
-
Page 171: Replacing The Waste Toner Bottle
Replacing Consumables Close the toner cartridge panel cover, and lower the document table into its original position. Note • Close the toner cartridge panel cover on Docu- Wide 6035/6055 printers. Replacing the Waste Toner Bottle When the waste toner bottle becomes full, a message displays on the touch screen. Follow the message instructions. - Page 172 8 Maintenance Open the panel on the right side of the machine. Grasp the rear side of the waste toner bottle and rotate it outwards. Important • Do not release the bottle while rotating it out- wards. Separate the waste toner bottle from the waste spout and remove it from the machine.
- Page 173 Replacing Consumables Close the upper unit of the machine. Note • If you do not return the waste toner bottle into its original position correctly, a message dis- plays, even after closing the upper unit. The machine will not operate.
-
Page 174: Cleaning The Machine
8 Maintenance Cleaning the Machine This section describes how to clean the machine. If the reflection plate or glass of the document scanning unit is dirty, it may result in black lines or bands on the entire copy. CAUTION When cleaning this product, switch off the product and its switchboard (branch cir- cuit). - Page 175 Cleaning the Machine Wipe the glass of the document scanning unit with a dried cloth. Important • Do not apply excessive force on the glass, since it may result in malfunctions or physical damage. Close the document cover.
-
Page 177: Problem Solving
9 Problem Solving This chapter describes what to do when an error occurs on the machine. Troubleshooting ..................176 General Trouble..................177 Image Quality Problems ................178 Jam Problems...................182 Trouble during Copying/Scanning/Printing ..........183 Error Message ..................185 Document Jams..................186 Paper Jams....................187... -
Page 178: Troubleshooting
Refer to "Trouble during Copying/Scanning" (P.183). Trouble during Copying/Scan- ning Trouble during Printing Action Refer to "Trouble during Printing" (P.184). If the machine does not operate normally even if you follow the troubleshooting below, contact your Fuji Xerox Customer Support Centre. -
Page 179: General Trouble
Has a paper jam occurred? See • "Paper Jams" (P.187). played. Has an document jam See • "Document Jams" (P.186). occurred? Is the message "Please If the message is displayed for more than 4 wait..." displayed? minutes, contact your Fuji Xerox Customer Support Centre. -
Page 180: Image Quality Problems
9 Problem Solving Image Quality Problems When image quality of the printed/copied/scanned result is poor, choose the closest symptom in the following table, and perform the required remedy. If image quality is not improved by performing the relevant remedy, contact your Fuji Xerox Customer Support Centre. - Page 181 See • "Loading Media" (P.41) Dirt appears at Media transport path is Copy/print a few pages. regular intervals. soiled. Internal components are Contact your Fuji Xerox Customer Support soiled. Centre. Unwanted black Internal components are Contact your Fuji Xerox Customer Support dots are printed.
- Page 182 Unwanted black Is the scanning area soiled? Clean the scanning area. lines are printed. See • "Cleaning the Machine" (P.172) Internal components are Contact your Fuji Xerox Customer Support soiled. Centre. Unwanted white Is the correct type of media Load a correct type of media.
- Page 183 Image Quality Problems Symptoms Check Remedy Part of the Is the document placed Load the document correctly. scanned image properly? See • For copying, refer to"Step3 Scanning is cut off. Document" (P.49). • For scanning, refer to "Step3 Starting Scan Jobs" (P.105). Is the media loaded cor- Load the media correctly.
-
Page 184: Jam Problems
9 Problem Solving Jam Problems This section describes how to solve paper jam problems. Symptoms Check Remedy Document jams Is the document usable for Load the correct type of document. occur frequently. this machine? See • For copying, refer to"Step3 Scanning Document"... -
Page 185: Trouble During Copying/Scanning/Printing
Trouble during Copying/Scanning/Printing Trouble during Copying/Scanning/Printing This section describes troubles during copying/scanning/printing. Trouble during Copying/Scanning This describes how to solve copying/scanning problems. Symptoms Check Remedy Document is not Is the document too small? The minimum size of the document that fed into the origi- can be loaded is 176 x 210 mm. -
Page 186: Trouble During Printing
9 Problem Solving Trouble during Printing This section describes how to solve printing problems. Symptoms Check Remedy Unable to print. Can the printer be con- Check the printer by displaying [Status] on firmed with CentreWare the CentreWare Internet Services. Internet Services? See •... -
Page 187: Error Message
XXX-XXX contents [XXX-XXX]. Turn the machine off immediately, wait until the touch screen goes out, and then contact your Fuji Xerox Customer Support Centre. A fault has occurred. [Cause] A fault has occurred. Press [Restart] to start recovery. [Remedy]Press the [Restart] button on the touch screen. -
Page 188: Document Jams
9 Problem Solving Document Jams If an document jam occurs on the document table, the machine stops and an error message is displayed on the touch screen. According to the message, clear the jam and then set the document again. Document Jam 1. -
Page 189: Paper Jams
Paper Jams Paper Jams If a paper jam occurs, the machine stops and an alarm sounds. In addition, an error message appears on the touch panel display. Remove the jammed paper according to the message displayed. Paper jams in roll tray (mis-setting of roll, feeding failure) (P.188) Paper jams in roll tray (jam in the area from feeding area to developer area) (P.189) Paper Jam Paper Jam... -
Page 190: Paper Jams In Roll Tray (Mis-Setting Of Roll, Feeding Failure)
9 Problem Solving When you have finished clearing a paper jam, printing is automatically resumed from the status before the paper jam occurred. CAUTION Do not apply excess force to remove the media jammed in the machine, especially when the jammed media is wound around the fuser unit or roller units. It may result in burns or physical damage. -
Page 191: Paper Jams In Roll Tray (Jam In The Area From Feeding Area To Developer Area)
Paper Jams Insert the lead edge of the roll paper under the roller by turning the roll paper. The roll media is automatically loaded, and then stops. Important • If the roll media cannot be loaded properly because its lead edge is damaged, trim the lead edge of the media with your cutter knife before setting it in place. -
Page 192: Paper Jams In Manual Feed Tray
9 Problem Solving Rotate the roll media to reel in the paper. Then, set the roll media again. • "Paper jams in roll tray (mis-setting of roll, feeding failure)" (P.188) Close the cover of the roll tray. Note • If the cover is opened, the paper jam message will not disappear from the touch screen. -
Page 193: Paper Jams In Folder
Paper Jams Check to ascertain that a green stopper is located at the back of the unit. Push it to the back if it is located at the front. If the jammed media can be seen from the front, pull it forward slowly. Important •... -
Page 195: 10 Authentication
10 Authentication This chapter describes how to control the operation with the authentication fea- ture. Note • The IC card authentication feature is optional. Authentication Feature................194 Authentication Feature Settings..............199 Authentication ...................202... -
Page 196: Authentication Feature
• A UserID is registered in the card for the IC Card Reader in advance. • When connecting the IC Card Reader, contact your Fuji Xerox Customer Support Centre. • For details on how to manage or use IC Card Reader, refer to "IC Card Authentication"... -
Page 197: Functions Restricted By Authentication
Authentication Feature Functions Restricted by Authentication This section describes the functions whose operation in the machine can be restricted by the authentication feature. The functions controlled by authentication vary depending on how the machine is used. There are the following two ways of use: Local access Remote access Local Access... -
Page 198: Users Controlled By Authentication
10 Authentication Users Controlled by Authentication This section describes the different user types that are controlled by the authentication feature. User information is registered on the control panel on the machine or CentreWare Internet Services. • "Step2 User Registration (on the Control Panel on the Machine)" (P.201) •... -
Page 199: Authentication And Mailboxes
Authentication Feature Authentication and Mailboxes When Authentication Feature is not used You can use the following two types of mailboxes without the authentication feature (scanner authentication): Commonly Shared Mailbox A mailbox created by a user. All users who use the machine can share the mailbox and change its settings. System Administrator Shared Mailbox A mailbox created by a system administrator. - Page 200 10 Authentication When Authentication Feature is used on the Machine The following two types of mailboxes can be used when the authentication feature (scanner authentication) is used: Personal Mailbox A mailbox created by an authenticated user. Available only for the authenticated user who created it. System Administrator Shared Mailbox A mailbox created by a system administrator Only the system administrator can change the settings.
-
Page 201: Authentication Feature Settings
Authentication Feature Settings Authentication Feature Settings This section describes the settings for using the authentication feature. The opera- tional flow for this procedure and reference sources are shown below. Step1 Authentication Settings ..............199 Step2 User Registration (on the Control Panel on the Machine) ..201 Step1 Authentication Settings Set the authentication mode and restricted functions. - Page 202 10 Authentication Press [Login Settings]. Check/Repair Rgquests Press [Login Setup]. Close Login Settings Create Reset User Account User Accounts Password Entry Private Charge Control Panel Print Settings Login Setup Select [Local Machine Access] on the [Login Cancel Save Login Setup Setup] screen. Copy No Login •...
-
Page 203: Step2 User Registration (On The Control Panel On The Machine)
Authentication Feature Settings Step2 User Registration (on the Control Panel on the Machine) This section describes the user registration operation. Up to 100 user IDs can be registered. Note • You can register a user via CentreWare Internet Services. • To register a user via CentreWare Internet Services, refer to CentreWare Internet Services help. -
Page 204: Authentication
10 Authentication Authentication You can execute authentication on the machine by the following two ways: Entering a user ID on the control panel on the machine Using an IC card • "IC Card Authentication" (P.203) Authenticate from Machine Control Panel Authenticate using IC Card Use a valid card. Press <Log In / Out>... -
Page 205: Changing Passwords
By using an IC Card Gate Reader, you can set restrictions on users. Note • Optional products are required to use the IC Card Reader. Contact your Fuji Xerox Cus- tomer Service Centre for details. • The IC Card Reader is a device that executes authentication using IC cards for applying restrictions on copy/scan/printing on the control panel on the machine. -
Page 207: 11 System Settings
11 System Settings When delivered to you, the machine is set to factory defaults. However, these settings can be customized as needed. To change the settings, enter System Administration mode, and use the [System Settings] screen. This chapter describes, with the System Administrator in mind, how to config- ure the system defaults with the System Settings feature. -
Page 208: System Settings Overview
11 System Settings System Settings Overview The System Settings feature allows you to change the default values for the system- related settings and features, and to set authentication features. System Settings Allows you to change the default values of the system-related settings and features. To display the [System Settings] screen, you must enter the System Admin ID. -
Page 209: System Settings Menu List
System Settings Menu List System Settings Menu List The following table shows a list of the items that can be set. Note that the items dis- played depend on the configuration of the machine. Interface/Feature Notes Page System Settings The [System Settings] screen has the following four features to be set. - Page 210 11 System Settings Interface/Feature Notes Page Network Settings Allows you to configure network-related settings. Network Settings Close Port Settings Protocol Settings Port Settings Allows you to configure the port to be used. Protocol Settings Allows you to configure communication settings such as IP address and subnet mask. Stored Document Settings Allows you to set whether to automatically delete the scan/print documents stored in the machine.
- Page 211 System Settings Menu List Interface/Feature Notes Page Detailed Settings Allows you to set additional functions related to the copying feature. Scan Settings Allows you to set the scanning feature defaults, button indications, etc. Scan Settings Close Presets Scan Defaults Preset Size Reduce / Enlarge Buttons Buttons...
- Page 212 11 System Settings Interface/Feature Notes Page Stamp Data Admin Settings Allows you to set the information on the stamp data administrator who is allowed to register Stamp Data Admin Settings Close stamp data to the machine. Stamp Data Stamp Data Admin ID Admin Password Stamp Data Admin ID Allows you to set the ID for the stamp data admin-...
-
Page 213: System Settings Procedure
System Settings Procedure System Settings Procedure To configure or change the system settings, you must enter the System Administration mode. This section describes the basic operations of the System Settings. Configure the sys- tem settings in the following order: Step1 Entering System Administration Mode........211 Step2 Entering System Administrator UserID and Password ....211 Step3 Selecting Operation Mode with System Administrator Menu..212 Step4 Selecting/Configuring Items ............212... -
Page 214: Step3 Selecting Operation Mode With System Administrator Menu
11 System Settings Step3 Selecting Operation Mode with System Administrator Menu Select [System Settings]. System Administrator Menu User Mode System Settings User Mode Allows the use of functions such as copying and scanning as usual without logging out of the Sys- tem Administration Mode. -
Page 215: Common Settings
Common Settings Common Settings [System Settings]>[System Settings] The [Common Settings] screen allows you to configure settings common to the copy- ing/scanning/printing functions of the machine. • For the items that can be set, refer to "System Settings Menu List" (P.207). Select [System Settings] on the [System Set- tings] screen. -
Page 216: Machine Clock/Timer
11 System Settings Machine Clock/Timer [System Settings]>[System Settings]>[Common Settings] This screen allows you to set the date and time, Machine Clock/ Close Timer Settings or the timer interval until power saving or reset Items Current Settings features take effect. 1.Machine Clock 2.Time Zone GMT +9:00 3.Auto Power Saver... -
Page 217: Audio Tones
Common Settings Audio Tones [System Settings]>[System Settings]>[Common Settings] This screen allows you to select whether to sound tones when an operation is com- pleted or the machine malfunctions. All factory default values are [On]. Close Close Audio Tones Audio Tones Items Current Settings Items... -
Page 218: Custom Buttons
[Setup Menu]. To leave the button unassigned, select [Not in Use]. By factory default, the <Custom 1> and <Custom 2> buttons of the DocuWide 6035/ 6055 are assigned to [Copy] and [Scan], respectively. For the DocuWide 6035/6055 printers, the <Custom 1> button is assigned to [Lan- guage], and cannot be changed, and the <Custom 2>... -
Page 219: Scan Start Mode
Common Settings Scan Start Mode [System Settings]>[System Settings]>[Common Settings] This screen allows you to set whether to start scanning automatically or by pressing the Scan Start Mode Cancel Save <Start> button after loading the document. Auto Start: Auto Start Set the originals and the machine will automatically The factory default value is [Auto Start]. -
Page 220: Folder Settings
11 System Settings The following items can be set: Items Notes Date Format Set the date format used for the Watermark. Factory default value: [20yy/mm/dd] [20yy/mm/dd] [dd/mm/20yy] [mm/dd/20yy] [20yy-mm-dd]: Displayed only when [English] is selected as the default language. [- 年 - 月 - 日 ]: Displayed only when [ 日本語 (Japanese)] is selected. -
Page 221: Maintenance
Common Settings The following items can be set: Items Notes Finished Size Select the finished size of the folded copies. Factory default value: [210mm(ISO A4)] [205mm] [210mm(ISO A4)] [215mm] Bind Margin Set the binding margin for A0 and A1 sizes. •... - Page 222 11 System Settings Original Size System This screen allows you to set the document size series for detecting the document size. Set the frequently used document size series by width. The factory default value is: [ISO Series]. Cancel Save Original Size System ISO/JIS A A0, A1, A2, A3, A4 JIS B...
-
Page 223: Detailed Settings
• During the overwrite, the machine may operate slower than usual. Note • This feature requires installation of an optional component. For more information, contact your Fuji Xerox Customer Support Centre. Software Download This feature is for customer engineer use. For more information, contact our Customer Support Centre. -
Page 224: Network Settings
11 System Settings Network Settings [System Settings]>[System Settings] The [Network Settings] feature includes [Port Settings] and [Protocol Settings] required to configure communication. The values set take effect after the machine is powered off and on again. Note • CentreWare Internet Services allows you to configure additional network settings. For details, refer to CentreWare Internet Services Help. -
Page 225: Protocol Settings
Network Settings The following items can be set with [Port Settings]. Items Notes HTTP Select [Enabled] when using CentreWare Internet Services. • For details of CentreWare Internet Services, refer to CentreWare Internet Services Help. Select [Enabled] when outputting via LPR. Select [Enabled] when connecting via FTP. - Page 226 11 System Settings TCP/IP-IP Address Select the item to be set, and enter using the TCP/IP Cancel Save - IP Address numeric keypad. 000.000.000.000 Next Items Notes IP Address Enter in the XXX.XXX.XXX.XXX format. Each three-digit seg- ment (xxx) must be in the range of 0 to 255. Subnet Mask Note •...
-
Page 227: Stored Document Settings
Stored Document Settings Stored Document Settings [System Settings]>[System Settings] The [Stored Document Settings] screen allows you to set whether to automatically delete the documents stored in the machine. You can set the expiration function, stor- age duration (number of days), and deletion time. You can also determine whether to delete documents on a type-by-type basis. - Page 228 11 System Settings The following items can be set: Items Notes Select this item when you do not want to set the storage dura- tion for documents. Documents will not be automatically deleted. Set the period for which the documents are to be stored. Docu- ments will be automatically deleted at the time specified as [Documents deleted at:].
- Page 229 Stored Document Settings Show Print Confirmation This screen allows you to select whether to Show Print Cancel Save delete the confidential print documents automati- Confirmation cally when they are printed or to display a dialog Select Yes to prompt user to specify the action after when printing to confirm whether to delete these document is printed when...
-
Page 230: Copy Settings
11 System Settings Copy Settings [System Settings]>[System Settings] The [Copy Settings] screen allows you to set the details of the copy function. • For the items that can be set, refer to "System Settings Menu List" (P.207). Select [System Settings] on the [System Set- tings] screen. -
Page 231: Presets
Copy Settings Presets [System Settings]>[System Settings]>[Copy Settings] This screen allows you to change the media Close source or magnification ratio to be displayed in Preset Buttons the [Basic Copy] screen, or [Image Quality] Items Current Settings - >A2 1.R/E - Button 3 screen. -
Page 232: Copy Defaults
11 System Settings Original Type buttons - 1st, 2nd, and 3rd buttons Allows you to set the document type to be displayed Basic Image More Auto R/E next to the first, second and third buttons under Copy Quality Features [Original Type] in the [Image Quality] screen. Original Type Copy Density Text/Line... - Page 233 Copy Settings Items Notes Factory Default Media Type Set the default value for [Media Type] on the Bond [Basic Copy] screen. Media Cut Mode Set the default value for [Media Cut Mode] on the Standard [Basic Copy] screen. Original Type Set the default value for [Original Type] on the Text/Line [Image Quality] screen.
-
Page 234: Media Size Buttons
11 System Settings Items Notes Factory Default Sample Copy Set- Set the default value for [Sample Copy Settings] Part Output tings when [Yes] is selected for [Sample Copy] on the Scan Start: 0mm [More Features] screen. Measurement: 50mm Stamp 1 Set the default value for [Stamp 1] on the [More Features] screen. -
Page 235: Reduce/Enlarge Buttons
Copy Settings Select twelve priority standard sizes from the Close Media Size Buttons standard sizes that can be used on the machine. • For details of available media sizes, refer to ISO A0 JIS B2 "Media Settings" (P.44). ISO A1 JIS B3 ISO A2 JIS B4... -
Page 236: Scan Size Preset Size Buttons
11 System Settings Scan Size Preset Size Buttons [System Settings]>[System Settings]>[Copy Settings] This screen allows you to set the document size to Scan Size Cancel Close be displayed in [Preset Size] under [Scan Size] in the [More Features] screen. Auto Detect An document size is assigned to each of the twelve JIS A0 Wide JIS B2 Wide... -
Page 237: Stamp Default Value Settings
Copy Settings Set the length on a size by size basis within the Variable Length Close range of 210 to 15000mm. Settings Items Current Settings The factory default values are as follows: 1.ISO A0 Wide 1189mm 2.ISO A1 Wide 841mm ISO A0, A1, A2, A3: 1189, 841, 594, 3.ISO A2 Wide... - Page 238 11 System Settings Items Notes Factory Default Stamp 1 - Numbering Select from [No Print], [Fixed Number (12-digit)], No Print and [Sequential Number (8-digit alphanumeric + 4-digit number)]. Stamp 1 - Date Select from [Off], [System Date], and [Variable Date (20yy/mm/dd)]. Stamp 1 - Date Fmt Format Select from [20yy/mm/dd], [mm/dd/20yy], 20yy/mm/dd...
-
Page 239: Stamp Location Auto Settings
Copy Settings Stamp Location Auto Settings System Settings]>[System Settings]>[Copy Settings] This screen allows you to set the stamp position by media size. Two options are available. Items Notes Top of the Page The position can be specified for x-direction and y-direction rel- ative to the top-left corner of the media. -
Page 240: Original Direction
11 System Settings Original Direction [System Settings]>[System Settings]>[Copy Settings] This screen allows you to select the document Original Cancel Save Direction direction from [Auto Detect], [Standard Portrait], Auto Automatically Determine and [Standard Landscape]. Detect Size of Original. The factory default value is [Auto Detect]. Standard Portrait Standard... -
Page 241: Detailed Settings
Copy Settings Select the media size under [Output Media Size]. Close Auto R/E Original Size Output Media Size Media Type ISO A0 Port. ISO A0 Port. Bond ISO A1 Port. ISO A1 Port. Bond ISO A2 Port. ISO A2 Port. Bond ISO A3 Port. -
Page 242: Scan Settings
• The color scanner feature is an optional product and is not displayed on some models. For more information, contact your Fuji Xerox Customer Support Centre. • For the items that can be set, refer to "System Settings Menu List" (P.207). -
Page 243: Scan Defaults
Scan Settings File Formats (1st and 2nd buttons) This screen allows you to set the file format to be Save in: Not Entered Mailbox displayed next to the first and second buttons under [File Format] on the [Basic Scan] screen. Basic Image More... - Page 244 11 System Settings Items Notes Factory Default File Format Set the default value for [File Format] on the Single Page [Basic Scan] screen. TIFF Scan Resolution Set the default value for [Scan Resolution] on the 600 dpi [Basic Scan] screen. Set the default value for [Reduce/Enlarge] on the 100.0% Reduce/Enlarge [Basic Scan] screen.
-
Page 245: Preset Size Buttons
Scan Settings Preset Size Buttons [System Settings]>[System Settings]>[Scan Settings] This screen allows you to set the document size to Cancel Close Scan Size be displayed in [Preset Size] under [Scan Size] in the [More Features] screen. Auto Detect An document size is assigned to each of the twelve ISO A0 ISO A3 buttons. -
Page 246: Reduce/Enlarge Buttons
11 System Settings Reduce/Enlarge Buttons [System Settings]>[System Settings]>[Scan Settings] This screen allows you to set the default ratios to be Reduce / Enlarge Cancel Close displayed in [Reduce/Enlarge] on the [Basic Scan] 70.7% screen. (25.0 - 400.0) 100.0% 25.0% 141.4% Factory default values: +0.1 [25.0%], [35.3%], [50.0%], [70.7%], [141.4%], 200.0%... -
Page 247: Detailed Settings
Scan Settings TIFF Format Select the TIFF format (JPEG-compressed) to TIFF Format Cancel Save be applied to [File Format] on the [Basic Scan] screen. TIFF V6 The factory default value is: [TIFF V6]. TTN2 Select [TIFF V6] or [TTN2] depending on the scanning software. -
Page 248: Printer Settings
11 System Settings Printer Settings [System Settings]>[System Settings] This screen allows you to configure printer-related features. Note • For the items that can be set, refer to "System Settings Menu List" (P.207). Select [System Settings] on the [System Set- tings] screen. •... -
Page 249: Other Settings
Printer Settings Other Settings [System Settings]>[System Settings]>[Printer Settings] This screen allows you to set the drawing options for each data format. Close Other Settings The factory default values do not need to be Items Current Settings 1.VPI-DottedLineAlloc RASTERIZER changed under normal conditions. 2.VPI-Symbol Mode 1 3.VPI-Font Number... -
Page 250: Detailed Settings
11 System Settings Items Notes Factory Default Long Edge Det. - Select the allowance range for the long edge size ISO A1 ISO A0 of the input data for each standard size. The default values do not need to be changed Long Edge Det. -
Page 251: System Administrator Settings
System Administrator Settings System Administrator Settings [System Settings]>[System Settings] The [System Administrator Settings] screen allows you to set the ID and password for the System Administrator. It is recommended to change the default ID and password to prevent setting changes and to ensure security. -
Page 252: System Administrator Password
11 System Settings System Administrator Password [System Settings]>[System Settings]>[System Administrator Settings] This screen allows you to set the password for System Admin Cancel Save the System Administrator. Password New Password It is recommended to set the password for better ******* security. The factory default value is "x-admin". -
Page 253: Stamp Data Admin Settings
Stamp Data Admin Settings Stamp Data Admin Settings [System Settings]>[System Settings] Stamp Data Administrator refers to a user authorized to register stamps to the machine via a computer on the network. With [Stamp Data Admin Settings], you can set the ID and password for the Stamp Data Administrator. -
Page 254: Stamp Data Administrator Password
11 System Settings Stamp Data Administrator Password [System Settings]>[System Settings]>[Stamp Data Admin Settings] This screen allows you to set the password for Stamp Data Cancel Save Admin Password the Stamp Data Administrator. New Password It is recommended to set the password for better ************* security. -
Page 255: Login Settings
Login Settings Login Settings [System Settings]>[System Settings] The [Login Settings] screen allows you to set the details of registration and authentica- tion of users. Select [Login Settings] on the [System Settings] screen. • For details of how to display the [System Set- tings] screen, refer to "System Settings Proce- dure"... -
Page 256: Reset User Accounts
11 System Settings Items Notes User Name Set a user name. Setting via Control Panel: Enter up to 32 characters. Setting via CentreWare Internet Services: Enter up to 32 (16) characters. • For details of how to enter text, refer to "Entering Text" (P.32). -
Page 257: Private Charge Print Settings
Login Settings When [Yes] is selected, the settings configured in "System Administrator Password" (P.250) and the password settings configured in "Password" (P.254) take effect. When [No] is selected, a password is not required to operate the machine even if a password is set with the features described above. -
Page 258: Login Setup
11 System Settings Login Setup [System Settings]>[System Settings]>[Login Settings] This screen allows you to set the authentication Cancel Save Login Setup method and to select the feature to be restricted. Copy No Login Service Scan Local Machine Service Access No Login Print Service No authentication feature is used on the... - Page 259 12 Machine Status This chapter describes the features for checking the machine status. Overview of Machine Status ..............258 Machine Information .................259 Billing Meter ....................261 Media/Settings ..................262...
-
Page 260: Overview Of Machine Status
12 Machine Status Overview of Machine Status You can confirm the machine status and the Copy from count numbers of copying/printing/stamping by Transmitting Memory Copy Scan Menu Power Saver pressing the <Machine Status> button. Job in memory Job Status Clear All Interrupt Stop Machine Status... -
Page 261: Machine Information
Machine Information Machine Information The serial number, machine configuration, and Machine Billing Media / Close software version can be checked on the Info. Meters Settings [Machine Info.] screen. Also, the print mode can Machine config. be set. For support contact your Software service representative. - Page 262 The temperature and the idle of the fuser can be Close Fuser Settings set. Items Current Settings A Fuji Xerox customer engineer will set them. Auto Select 1. Fuser Temp. Settings - - - 2. Fuser Idle Fuser Temp Settings Fuser Temp.
-
Page 263: Billing Meter
Billing Meter Billing Meter The total count number of prints can be checked Machine Billing Media/ Close Settings on the [Billing Meters] screen. Info. Meters Current Reading Meter 1 1234 Meter 1 Meter 2 Displays the total amount in units of square Meter 3 meters of paper printed until now. -
Page 264: Media/Settings
12 Machine Status Media/Settings The [Media/Settings] screen allows you to con- Machine Billing Media / Close firm and set the media size series/media type/ Info. Meters Settings media thickness of each media source. Media Size Series Type Weight ISO/JIS A ISO A0 Bond Standard •... - Page 265 Media/Settings The following are the media types for each media weight. Note • Plain paper and tracing paper are displayed respetively as "Bond" and "Vellum" on the screen. Weight Media Type Name G.S.M. Light Bond Vellum Film Standard Bond Premium 75g/m Perfomance 75g/m...
-
Page 267: 13 Appendix
13 Appendix This chapter describes the specifications, list of options, and notes and restric- tions. Specifications....................266 List of Options...................276 Document Catch Tray................278 Notes and Restrictions................279... -
Page 268: Specifications
13 Appendix Specifications This section describes the specifications of the machine. In the interests of product development, product specifications and external appearance are subject to change without prior notice. Specifications Item Description Type Console Type Resolution Data processing resolution: 600 x 600 dpi (23.6 x 23.6 dots/ mm) Output resolution: 600 x 600 dpi (23.6 x 23.6 dots/ mm) Continuous Copy... - Page 269 64 to 81.4 g/m Vellum 55 to 112 g/m Film 75 to 100 um Important • It is recommended to use Fuji Xerox recommended paper. Copying may not be performed correctly depending on the use conditions. Image size Width :210 to 914mm...
- Page 270 13 Appendix Copy Function Item Description Original Feed System Original transfer type Original Size Max. Width : 914.4 mm, Max. Width176 mm, Max. Length : 15,000 mm, Max. Length : 210 mm Original Thickness 0.05 to 0.2 mm (Max. thickness when ejecting rearward 12.7 mm Original Type Text/Line, Text/Photo, Picture, Photo, Transparent, Blueprint, Uneven-Toned Background...
- Page 271 Specifications Print Function Item Description Print Size Same as the copy size Important • The maximum length may be restricted depending on the software used. Continuous Printing 99 sheets Important • The machine may pause temporarily to execute image sta- bilization process.
- Page 272 13 Appendix Scan Function Item Description Type Monochrome scanner/color scanner Width: 176 to 914.4 mm Scanning Size Length: 210 to 15,000 mm (600 dpi) Up to 7,500 mm for color scan Important • The maximum length may be restricted depending on the software used.
- Page 273 Specifications Copy Length/Print Length Standard + Add. Memory Media Width Standard (1GB) (1.5GB) 36" 24" 18" 12" Special A0 (880 mm) Special A1 (625 mm) Special A2 (440 mm) Note • For vellum and film, the maximum length of the printout is 2.5 meters. Copy Magnification List Docu- JIS B3...
- Page 274 13 Appendix Media Size List Media sizes are listed below: Size Series Media Size Width Length (mm) (mm) A size series JIS/ISO A0 1189 JIS/ISO A1 JIS/ISO A2 JIS/ISO A3 JIS/ISO A4 JIS B size series JIS B1 1030 JIS B2 JIS B3 JIS B4 JIS B5...
- Page 275 Specifications Custom Presets/Detailed Settings List Detailed Common Settings Code Notes New Value Factory Default Set the plus-direction margin to determine 0 to 20(mm) 5(mm) whether the document size is standard or not. When setting to 5 mm, the machine deter- mines a document of up to 5 mm longer than the standard size as a standard size.
- Page 276 13 Appendix Detailed Copy Settings Code Notes New Value Factory Default Set whether or not to display a screen for 0: off 1: on confirming the number of copies when the 1: on machine has scanned a document using the collation feature. Set the media source for the banner 0: roll 1 0: roll 1...
- Page 277 Specifications Scanner Settings Code Notes New Value Factory Default Set the initial display of the scan- 1: Basic Scan 1: Basic Scan ner screen. 2: Image Quality 3: More Features Set the initial display of the feature button of [Image Quality] tab. Tab 2 Top left 0: Off...
-
Page 278: List Of Options
13 Appendix List of Options The following principal options are available. To purchase these, contact your Fuji Xerox Customer Support Centre. Product Name Notes Paper Roll Shaft A shaft to replace roll media. Long Size Original Holder A holder used to insert long size documents into the scanner. - Page 279 List of Options The following major related software is available: Product Name Notes Wide Format Scan Service A tool to store documents scanned by the machine in the specified folder of the computer and edit the images. Scanner driver A software to import documents scanned on the (Wide Format Network TWAIN machine to the TWAIN supported application on your Source)
-
Page 280: Document Catch Tray
13 Appendix Document Catch Tray A tray on which documents ejected from the rear of this machine are stocked flatly. Extension tray Document catch tray The document catch tray can hold up to 50 documents of the same size of normal 36" size normal paper or smaller. -
Page 281: Notes And Restrictions
Notes and Restrictions on Using the Machine Installing and Moving the Machine When moving the machine, contact your Fuji Xerox Customer Support Centre. Do not jolt the body while the machine is operating. Do not place things close to the ventilation openings of the extractor fan of the machine. -
Page 283: Index
Index Numerics Cancel Printing ........... 141 , CentreWare Internet Services ....110 170mm Fold ............80 Changing Default Language ......216 , Changing the scan start position ..... 91 Character String (System Settings) ....232 Cleaning the Machine ........172 Account Number (System Settings) ....232 Clear All Button ............. 29 Adding margins to lead & tail edges .... - Page 284 Index Folder (System Settings) ........232 Date Time (System Settings) ......232 Default Language (System Settings) ....216 General Users ............. 196 Default Mode (Auto R/E) (System Settings) .. 230 Generally Shared Mailbox ......... 197 Delete Documents After Retrieval ....100 Delete Expired Documents ....... 100 Deleting Documents in Mailboxes ....112 Halftone (System Settings) ....... 241 ...
- Page 285 Index Lead & Tail Margins (System Settings) ...231 Option Interface Connector ......... 27 Loading Toner ............167 Original Direction ..........238 Local Access ............195 Original Feed System ......... 268 Log In/Out Button ..........30 Original Jams ............186 Original Size ............268 Original Size Series ..........220 Original Thickness ..........
- Page 286 Index , Private Charge Print Settings (System Settings) Scan Start Position ........91 ................255 , Scan Start Position (System Settings) .. 231 , Protocol ............269 Scanner Driver ............ 106 Scanning Halftone ..........270 Scanning Mode ........... 270 Recalling Stored Programming ......164 Scanning Multiple Documents ......113 , ...
- Page 287 Index Stored Scan Program .........160 System Administration Mode ......211 Warm-up Time ............. 267 System Administrator - Password (System Settings) ..........249 , , Waste Toner Bottle ......27 , System Administrator Shared Mailbox ...197 Watermark (System Settings) ......217 System Settings Menu List ........207 Weight (Excluding Paper and Options) ... 267 Wide Format Scan Service ....... 108 ...
- Page 289 DocuWide 6035/6055 User Guide DE3988E2-1(Edition 1) September 2008 © Fuji Xerox Co., Ltd. Copyright 2008 by Fuji Xerox Co., Ltd.
- Page 290 Before Using the Machine Copy Scan Direct Scan Printing Job Status Stored Programming Maintenance Ploblem Solving Authentication System Settings Machine Status Appendix Edition 1 September 2008 DE3988E2-1 604E34290...
Need help?
Do you have a question about the DocuWide 6035 and is the answer not in the manual?
Questions and answers