
Related Manuals for OMT FREE.STAND 9029


Summary of Contents for OMT FREE.STAND 9029
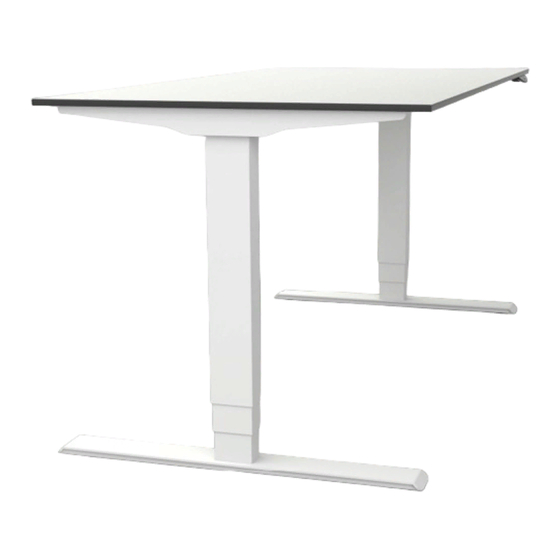
- Page 1 Installation and operating instructions Electrically height-adjustable sit/stand work desks System: 9029 FreeStand with SMART motor control (E-components 9901 + 9902)
-
Page 2: Table Of Contents
Table of contents Preface ................................4 1.1 Use as intended ............................. 4 1.2 Target group and previous knowledge ......................4 1.3 Symbols used in the safety instructions ...................... 5 1.4 Safety Instructions ............................5 1.4.1 General safety instructions ........................5 1.4.2 Before installation, deinstallation or troubleshooting ................ - Page 3 Troubleshooting ............................. 21 Error messages in the hand-switch display (optional) ................... 22 Click codes of the controller .......................... 23 Technical data ............................... 24 Tests and certificates ............................. 25 Address ................................. 26...
-
Page 4: Preface
Preface Dear customer, We are pleased that you have decided to purchase our product. These instructions explain how to assemble, use and maintain the sit/stand desk. All sit/stand desks are put through a thorough quality inspection before leaving our factory. If you ever have any problems with our desk base, feel free to contact our service department any time. -
Page 5: Symbols Used In The Safety Instructions
Symbols used in the safety instructions Danger: These safety instructions point out an imminent danger for the life and health of persons! Non-compliance with these warnings can result in danger to life, life-threatening injuries and property damage. Attention: These safety instructions point out possible dangers from electrical current! Non-compliance with these warnings can result in injuries and property damage! Note: These safety instructions point out important information which you must follow for the safe operation of the FreeStand sit/stand desk. - Page 6 Before commissioning, make sure the mains voltage on the rating plate of the motor controller matches your mains voltage! Danger: This unit can be used by children aged 8 years and above and by persons with reduced physical, sensory or mental capabilities or lack of experience and knowledge when they are supervised or instructed on the safe use of the device and understand the resulting risks.
-
Page 7: Before Installation, Deinstallation Or Troubleshooting
Danger: The optionally available corrosion protection is not activated during any reset process (Section 5). During this process, always watch out for the possible danger of being crushed. Attention: If the product is visibly damaged, never assembly it or continue to use it! 1.4.2 Before installation, deinstallation or troubleshooting •... -
Page 8: Indication Service Note
Note: Be sure to enclose operating instructions in your finished product that include all safety instructions required by the consumer for the safe handling of your product. Note: The operating instructions for your finished product must include the following warning: You must read these operating instructions before you start using the product (height-adjustable workstation). -
Page 9: Repairs
Repairs In case of a technical defect on this device, please contact an authorised customer service representative. You can find solutions for simple faults in Section 7! Attention: In the interest of preventing malfunctions, only authorised service personnel are permitted to make any repairs. Attention: Opening any components of this desk base produces risks for the following malfunctions. -
Page 10: Assembly
Assembly Use only screws that correspond to the enclosed base drawing for the assembly of your desk base. Attention: Incorrect screws can cause damage to the desk. Danger: The power cable of the motor controller must be disconnected during assembly of the desk base! Attention: Before assembly and commissioning of the FreeStand sit/stand desk, make sure the product is acclimatised for the temperature and relative humidity values stated in the technical... -
Page 11: Assembly Of The Worktop Support And Cross-Beams
Assembly of the worktop support and cross-beams Now assemble the two cross-beams and the support elements on both side elements. To do that, use solely the M8 bolts as per the base drawing! The max. tightening torque for these bolts is 20 Nm. From the inside, screw two bolts into the cross- head threads. -
Page 12: Commissioning
raised or cylindrical head. The tightening torque depends on the desktop material, but should not exceed 2 Nm. The screws are not included in the scope of delivery since they have to be selected depending on the material and the thickness of the desktop. Commissioning Commissioning includes all jobs that are necessary for electrical height adjustment of the FreeStand sit/stand desk with the aid of the SMART motor controller. -
Page 13: Procedure During Commissioning
4.5.2 Procedure during commissioning Attention: Plug in the power supply cable/mains cable only after all other electrical connections have been made! (All motors, the hand-switch and possibly additional accessories are connected to the controller.) To commission the FreeStand sit/stand desk, proceed as follows: 4.5.3 Connect the drives Make sure that the connection cables of the drives reach from both sides up to the corresponding controller connection. -
Page 14: Connect The Hand-Switch
4.5.4 Connect the hand-switch Connect the hand-switch to the 7-pin hand-switch socket (HS) of the controller. Note: You can choose from a large number of hand-switches that fit the SMART motor controller! Please ask Oelschläger Metalltechnik for information on the available types! 4.5.5 Connect the power supply cable /mains cable Attention: Before you plug in the power supply cable, check again •... -
Page 15: Control
To initialise, move the desk to the bottom position; to do that, press the down key on the hand-switch until all drives have reached the lowest position. Press the down key once again and keep it pressed (approx. 5 seconds) until the desk moves slightly down and then back up. Let go of the button only after the desk stops moving. -
Page 16: Operation With 9901 1810 Hand-Switch With Display (Optional)
Operation with 9901 1810 hand-switch with display (optional) This hand-switch is additionally equipped with a display for indication of the current desk height in centimetres or inches. The reset LED indicates that initialisation is required (see initialisation section). It stays illuminated until the initialisation is concluded. -
Page 17: How To Save A Position
The display shows the current desk height in centimetres or inches and on top of that it shows the operating condition of the controller along with any detected problems with the error code “Exx”. You can find a list of all possible error codes in the troubleshooting section. -
Page 18: 9901 1910 Hand-Switch With Display And Memory (Optional)
To exit the menu, wait about 10 seconds until the height display reappears. 6.3.1 9901 1910 Hand-switch with display and memory (optional) This hand-switch is equipped with a display to indicate the current desk height in centimetres or inches. In addition, it is possible to save 4 “Memory”... -
Page 19: 9901 1970 Hand-Switch With Display And Memory (Optional)
6.3.2 9901 1970 Hand-switch with display and memory (optional) with TOUCH functioning for undertable assembly This hand-switch has a drawer push function and is equipped with a display to indicate the current desk height in centimetres or inches. In addition, it is possible to save 4 “Memory” positions (desk heights). A button lock is integrated to protect against accidental operation. -
Page 20: 9901 1970 Hand-Switch With Display And Memory (Optional)
Note: The display must be active (e.g. show the current height) when you activate/deactivate the button lock. Briefly press a button, e.g. the UP button, to activate the display if applicable. 6.3.3 9901 1970 Hand-switch with display and memory (optional) with TOUCH function for installation in the desktop This hand-switch is for installation in a desktop from the top and is equipped with a display to indicate the current desk height in centimetres or inches. -
Page 21: Troubleshooting
Note: The swiping direction is irrelevant. Note: Make sure you only swipe lightly over the display without pressing any buttons! Note: The display must be active (e.g. show the current height) when you activate/deactivate the button lock. Briefly press a button, e.g. the UP button, to activate the display if applicable. Troubleshooting Fault Cause... -
Page 22: Error Messages In The Hand-Switch Display (Optional)
Error messages in the hand-switch display (optional) Display Cause Repair The controller monitors Wait until the controller has cooled off and the “HOT” display has the operating time (time- disappeared. The desk is then operational again. controlled) and its max. temperature value was ATTENTION! exceeded. -
Page 23: Click Codes Of The Controller
Display Cause Repair Sensor – configuration An (optionally) mounted sensor was removed or the connection has changed been lost. Comply with the separate instructions for the sensor! Internal error Reinitialise desk (RESET) Pull the power supply cable and reconnect after several seconds. If the error occurs regularly, unplug the power supply cable and contact customer service. -
Page 24: Technical Data
Technical data System: 9029 FreeStand with SMART motor controller General Operating voltage 207-253 V / 50-60 Hz Nominal voltage 220-230 V / 50-60 Hz Standby power at nominal voltage, ≤0.3 W primary (typical) Ambient temperature during operation 0-30°C Permissible relative humidity 5-85% (non-condensing) (for operation) Storage and transport temperature... -
Page 25: Tests And Certificates
Tests and certificates The drive system has been tested in accordance with the following standards: Electromagnetic compatibility (EMC Standard 2004/108/EEC) EN 61000-6-2:2005 Electromagnetic compatibility (EMC) EN 61000-6-3:2007 Electromagnetic compatibility (EMC) EN 61000-3-2:2006 Electromagnetic compatibility (EMC) EN 61000-3-3:2008 Electromagnetic compatibility (EMC) Low Voltage Directive (Low Voltage Directive 2006/95/EC) EN 62233:2008 Measurement methods for electromagnetic fields of household appliances and similar... -
Page 26: Address
Address Oelschläger Metalltechnik GmbH Hertzstraße 1-3 27318 Hoya - Germany Tel.: +49 (0) 4251 - 816 - 0 Fax: +49 (0) 4251 - 816 - 81 E-mail: info@oelschlaeger.de Internet: www.oelschlaeger.de Company Headquarters: Hoya District Court – HRB 31030 Managing Director: Andreas Spreen 9029_Bedienungsanleitung_SMART_E9901_Rev1.doc - Version: 07/07/2015 - MR...
Need help?
Do you have a question about the FREE.STAND 9029 and is the answer not in the manual?
Questions and answers