
Related Manuals for Leica RM2235


Summary of Contents for Leica RM2235
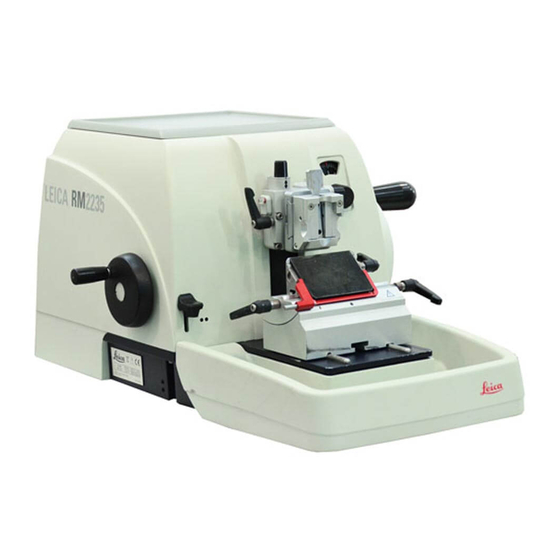
- Page 1 Instructions for Use Leica RM2235 Rotary Microtome Leica RM2235 V 2.3, English 05/2018 Order No.: 14 0500 80101 RevH Always keep this manual with the instrument. Read carefully before working with the instrument.
- Page 3 Leica reserves the right to change technical following thorough investigation in this field. specifications as well as manufacturing process- We are under no obligation to update the pres- es without prior notice.
-
Page 4: Table Of Contents
Table of Contents Important Information ....................... 4 Safety ............................6 Safety notes ........................... 6 Warnings ............................6 Integrated safety devices......................8 Instrument Components and Specifications ............... 10 Overview — instrument components ..................10 Instrument specifications......................11 Technical Data ..........................12 Instrument Setup ........................ - Page 5 7.1 Possible faults ........................... 64 7.2 Instrument malfunctions ......................... 66 Troubleshooting ........................66 Cleaning and Maintenance ...................... 67 Cleaning the instrument......................67 Maintenance instructions ......................69 Lubricating the instrument ......................70 Warranty and Service ....................... 71 Decontamination Certificate (Master) ..................72 Leica RM2235...
-
Page 6: Important Information
Important Information Symbols in the text and their meanings The package must be kept in a dry environment. Warnings appear in a gray box and are marked Indicates the correct upright position by a warning triangle of the package. Notes, It allows maximum 3 stacks layers. - Page 7 Intended use of instrument The RM2235 is a manually operated rotation microtome specifically designed for creating thin sections of human tissue specimens of varying hardness for histological medical diagnosis, e.g.
-
Page 8: Safety
The protective devices located on the instrument and the accessories must not be removed or modified. Only service personnel qualified by Leica may repair the instrument and access the instrument's internal components. Warnings The safety devices installed in this instrument by the manufacturer only constitute the basis for accident prevention. - Page 9 • Do not use any solvents containing acetone or xylene for cleaning! • Ensure that liquids do not enter the interior of the instrument during cleaning! • When using cleaners, please comply with the safety instructions of the manufacturer and the laboratory safety regulations! Leica RM2235...
-
Page 10: Integrated Safety Devices
Safety Integrated safety devices Locking the handwheel There are two ways of locking the handwheel (12): Using the lever (3) on the right side of the micro- tome base plate, the handwheel can be braked in almost any position. • To brake, rotate the lever in a counterclock- wise direction to position . - Page 11 Knife holder E-TC tions of the knife holder can occur. Clamping lever for the blade (10) at the right, clamping lever for the lateral displacement (11) at the left. Fig. 4 Leica RM2235...
-
Page 12: Instrument Components And Specifications
Instrument Components and Specifications Overview — instrument components Tray Handwheel Universal locking cassette clamp mechanism Knife holder base, Smooth- non-orientable turning Handwheel Lever for Removable section activating the waste tray Handwheel brake Clamping lever of the knife holder base Window for Directional displaying specimen holder... -
Page 13: Instrument Specifications
Instrument Components and Specifications Instrument specifications Basic instrument with mechanical trim function, lateral coarse drive The Leica RM2235 rotary microtome is equipped with a low-maintenance, slack-free micrometer drive, with vertical and horizontal specimen feed realized via low-maintenance cross roller bearings. -
Page 14: Technical Data
Instrument components and specifications Technical Data General Approvals: The instrument-specific marks are located on the rear panel of the instrument next to the nameplate. Operating temperature range: +10 °C to +35 °C Temperature range during storage: +5 °C to +50 °C Relative humidity: max. -
Page 15: Instrument Setup
Instrument Setup Standard delivery The Leica RM2235 standard delivery includes: 1 Leica RM2235 basic instrument 1 handwheel, complete ..............14 0500 38181 1 section waste tray ............... 14 0502 37931 1 tool set, consisting of: ..............14 0500 38600 1 Allen key with handle No. 5........... 14 0194 04760 1 Allen key with handle No. -
Page 16: Unpacking And Installation
Instrument Setup Unpacking and installation When the instrument is delivered, check the tilt indicators on the packaging. If the arrowhead is blue, the shipment was transported laying flat, was tilted at too great an angle or fell over during transport. Note this on the shipping documents and check the shipment for possible damage. - Page 17 • To move the instrument, hold it by the front of the base plate, lift it up gently and slide it on its slides. Observe the correct resting angle to the table to avoid pinching your fingers. Fig. 8 Leica RM2235...
-
Page 18: Assembling The Handwheel
Instrument Setup Assembling the handwheel The feather key (4) is loosely The handwheel has to be assembled before attempting placed in the handwheel shaft (1) to use the instrument. and fixed in place with a cable tie The necessary parts and tools can be found in the toolkit during transport. -
Page 19: Inserting The Universal Cassette Clamp
(61) clockwise as far as it will go. Fig. 10 Since all stage clamps available as accessories are equipped with the same kind of guide on the back, they are inserted in the same way described here using the example of the cassette clamp. Leica RM2235... -
Page 20: Inserting The Knife Holder
Instrument Setup Inserting the knife holder Setting up the knife holder base • Release the clamping lever (50) by rotating it counterclockwise. • Insert the knife holder base (51) using the notch (52) on the bottom into the T-piece (55) of the microtome base plate (53). • To secure the knife holder base, turn the clamping lever (50) clockwise. -
Page 21: Operation
The coarse driving wheel also turns during sectioning. Therefore it must not block whilst the handwheel is be- ing turned during sectioning; other- wise, no feed motion can take place and thus also no sectioning. Fig. 14 Leica RM2235... -
Page 22: Mechanical Trimming Function
Fig. 15 5.1.4 Mechanical trimming function The RM2235 is fitted with a mechanical trimming function. The trim- ming lever has 3 notching positions (0, 10 µm, 30 µm). The points (36) mark the two trimming stages: = 10 µm... -
Page 23: Specimen Holder With Precision Orientation
For ease of estimation, there is a white mark on The usable angle is only about ± 4° in the handle and a click stop that is noticeable this case. during turning. • To lock the current orientation, turn the ec- centric lever (29) backwards. Leica RM2235... -
Page 24: Adjusting The Clearance Angle
Operation Adjusting the clearance angle • The index marks (0°, 5° and 10°) for adjustment of the clearance angle (59.1) are located on the right side of the knife holder (57). • There is also an index mark (59.2) on the right side of the knife holder base (51) which serves as a reference point when adjusting the clear- ance angle. -
Page 25: Fine Adjustment Of The Force Balance
No. 5 (with handle) for the adjustment. • If the specimen head moves downwards, turn the screw approx. turn clockwise. • If the specimen head moves upwards, turn the screw (34) approx. turn counterclockwise. • Continue this procedure until the specimen head no longer moves once released. Fig. 20 Leica RM2235... -
Page 26: Clamping The Specimen
Operation Clamping the specimen Always clamp the specimen block BEFORE clamping the knife or the blade. Lock the handwheel and cover the knife edge with the knife guard prior to any manipulation of knife or specimen, prior to changing the specimen block and during all work breaks! • Rotate the handwheel until the specimen clamp is in the uppermost posi- tion. -
Page 27: Sectioning
• For sectioning, turn the handwheel evenly in a clockwise direction. Take care not to block the coarse driving wheel when turning the handwheel! Otherwise there will be no feed motion of the section thickness and thus no sectioning will occur. • Pick up the sections and mount them on microscope slides. Leica RM2235... -
Page 28: Changing The Specimen Or Interrupting Sectioning
Operation Changing the specimen or interrupting sectioning Lock the handwheel and cover the knife edge with the knife guard prior to any manipulation of knife or specimen head, as well as pri- or to changing the specimen block and during all work breaks! • Raise the specimen to the upper end position and activate the mechani- cal handwheel lock. -
Page 29: Optional Accessories
• Insert the spring (5a) and pin (5b) with the flatter side into the thrust piece (5). Completely screw • Finally, place the dovetail holder (2) and fasten in the thrust piece with a flat-tip screwdriver. by screwing in the 4 screws (1) using an Allen • Completely screw in the setscrews (3+4). key No. 3. Leica RM2235... -
Page 30: Fine-Directional Fixture For Specimen Clamps
Optional Accessories 6.1.3 Fine-directional fixture for specimen clamps • Before the fine-directional fixture for specimen clamps can be mounted, loosen 4 screws (10) (Allen key No. 3) and carefully remove the fixture for specimen clamps from the baseplate (9). • Using the 4 supplied screws (11) and the Allen key No. 3, fasten the baseplate to the specimen head (12). -
Page 31: Quick Clamping System
It is used as specimen holder for use with the fine-directional fixture for specimen clamps with zero point indicators or the directional fixture for specimen clamps. • Screw the 4 screws (13) into bore A with an Allen key No. 2.5 and tighten them. Fig. 24 Leica RM2235... -
Page 32: Specimen Clamps And Holders
Optional Accessories Specimen clamps and holders All specimen clamps available as accessories can be integrated into either the directional or non-directional specimen holder fixture. 6.2.1 Standard specimen clamp The standard specimen clamp is available in two sizes: 40 x 40 mm and 50 x 55 mm. They are designed for direct clamping of rectan- gular blocks. -
Page 33: Vee Insert
• Insert the pin (70.1) of the vee insert (70) in the hole (69) of the lower jaw (68). • Mount the specimen as required. • Turn the knurled screw (66) clockwise to move the movable jaw with the vee insert upward against the fixed jaw to securely clamp the sample. 70.1 Fig. 26 Leica RM2235... -
Page 34: Foil Clamp Type 1
Optional Accessories 6.2.3 Foil clamp type 1 Clamping of foil pieces • Move the movable jaw (74) to the right as re- The foil clamp type 1 is appropriate both for quired by turning the setscrew with an Allen clamping very small and thin foil pieces and flat, key No. -
Page 35: Universal Cassette Clamp
• To clamp the cassette, release the lever (60). Fig. 29 Leica / Surgipath cassettes with minimum dimensions of 39.8 x 28 mm and maximum dimen- sions of 40.9 x 28 mm may be clamped in the universal cassette clamp (UCC) horizontally as well as vertically. -
Page 36: Super Mega-Cassette Clamp
Optional Accessories 6.2.5 Super mega-cassette clamp Fig. 30 Assembly of the super mega-cassette clamp The super mega cassette clamp should preferably be used with the rigid fixture for specimen clamps. To do so, proceed as follows: Remove the rubber ring (5) only after having attached the cassette clamp on the specimen head! • Screw the rigid fixture for specimen clamps (4) onto the specimen head (3): Remove the screw (1), place the specimen holder fixture (4) onto the specimen head (3) from... -
Page 37: Holder For Round Specimens
You can now rotate the specimen so that the side you want faces upwards. • To lock it in the position you have chosen, tighten the pin (92) by turning it clockwise. Fig. 31 Leica RM2235... -
Page 38: Knife Holder Base And Knife Holder
Optional Accessories Knife holder base and knife holder The plastic handles of all clamping levers on the instrument and knife holders can be turned to the position that is most convenient for each user. Pull the grip (94) out of the lever, hold it in this position, and rotate it to the desired position. -
Page 39: Knife Holder E/E-Tc
Optional Accessories 6.3.2 Knife holder E/E-TC The knife holder E-TC is designed Prior to inserting the blade, both knife for the Leica TC-65 tungsten carbide holder and knife holder base must blades. have been installed on the instrument! Inserting the blade, knife holder E and E-TC • Fold knife guard (9) downward. - Page 40 Leica Biosystems offers special prices for new clamp mounts in case of damages to the clamp mount after the warranty has expired. In this way, perfect function of the device can be ensured over the course of many years.
- Page 41 The vessel is filled with water up to the blade. After trimming, remove the section waste from the tray and create the sections to be prepared. The sections floating on the surface of the water can be removed using the glass slide. Fig. 38 Leica RM2235...
-
Page 42: Knife Holder N/Nz
Optional Accessories 6.3.3 Knife holder N/NZ The knife holders N and NZ are appropriate for standard steel and tungsten carbide knives, profile c and d, up to 16 cm long. The integrated height adjustment feature allows you to also use knives that have been resharpened numerous times. Mounting the knife support bar • Push knife guard (8) to the center. - Page 43 • Loosen the clamping screws (49) by turning them counterclockwise. • Push the knife (47) to the left or right as required. • To clamp the knife (47), always tighten the clamping screw (49) first which is located on the side to which the knife has been repositioned by turning it clockwise. Leica RM2235...
-
Page 44: Section Waste Tray
Optional Accessories Section waste tray • Push the section waste tray (18) from the front to the microtome base plate (53) until it is held in place by the two magnets (39) (on the front of the microtome base plate). To remove the section waste tray, lift it slightly and pull it off towards the back. -
Page 45: Tray
(Fig. 42) must be removed. • Remove the freezer plate from the insulation jacket and place it in a deep freezer, ideally overnight (but for at least six hours) at approx. -23 °C. • Reassemble the freezer plate and insulation jacket and place them on the bench or the Fig. 43 instrument. Leica RM2235... -
Page 46: Universal Microscope Carrier
(c) Fig. 44 3 - Horizontal arm with cross-member (d) and support ring (e) 4 - Support plate, large (for RM2235, RM2245 and RM2255) 5 - Support plate, small (for RM2265) 6 - Allen key size 3 7 - 4 countersunk screws to install support plate 8 - Allen key size 8 Fig. - Page 47 • Slide the horizontal arm (3), flat side facing the lock screw (g), into the cross-member (d) and tighten. For more information on connecting and using the microscope, magnifying lens or cold-light source, please see the appropriate Instructions for Use. Fig. 49 Leica RM2235...
-
Page 48: Magnifying Lens
Optional Accessories Magnifying lens The magnifying lens provides a 2x magnification and can be used with all Leica 2200 series rotary microtomes. • Open the screw (3) on the horizontal arm of the microscope carrier in a counterclockwise direction. • Insert the silver connection piece (1) as far as it will go. -
Page 49: Additional Accessories
16 cm in length, knife pressure plate for extreme stability and full utilization of the knife blade, height adjustment of the knife blade, separate clearance angle adjustment, movable knife guard. Order No..........14 0502 37994 Fig. 55 Leica RM2235... - Page 50 Optional Accessories Knife holder E, for low-profile disposable blades, (80 x 8 x 0.25 mm), silver, for RM22xx Quick clamp system with ability to shift the blade laterally. 3 click-stop positions make it easier to utilize the entire blade. Color-coded, foldaway knife guard. With blade ejector Fig.
- Page 51 10 packages of 50 pcs.....14 0358 38382 Fig. 59 — Disposable blades high-profile (818) 80 x 14 x 0.35 mm 01 package of 50 pcs......14 0358 38926 10 packages of 50 pcs.....14 0358 38383 Fig. 60 Leica RM2235...
- Page 52 Optional Accessories Disposable blades Leica TC-65 Leica TC-65 microtome, disposable blade system for sectioning hard specimen materials. The Leica TC-65 carbide metal disposable blades were specially developed for the requirements in labs where hard, blunt materials are routinely sectioned. The one-of-a-kind fine-grain carbide metal guarantees sections to approx.
- Page 53 Fig. 64 Knife case Variable knife case (plastic), for 1 or 2 knives: 10 - 16 cm long (Carbide metal or SM2500 knife: only for 1 knife!) Order No..........14 0213 11140 Fig. 65 Leica RM2235...
- Page 54 Optional Accessories Universal cassette clamp with adapter RM2125 RTS, silver For use with standard cassettes with dimensions that are 39.8 x 28 mm at minimum and 40.9 x 28 mm at maximum. Order No..........14 0502 37999 Fig. 66 Standard specimen clamp 50 x 55 mm, with adapter, silver Order No.
- Page 55 Specimen holder fixture, fine directional, silver, with 2 zero point indicators, XY orientation 8° per direction, click stops every 2° Note: Quick clamping system 14 0502 37718 must be ordered separately. Order No..........14 0502 37717 Fig. 71 Leica RM2235...
- Page 56 Optional Accessories Quick clamping system, for specimen holder for use with the fine-direc- tional fixture for specimen clamps with zero point indicators 14 0502 37717 or the directional fixture for specimen clamps 14 0502 38949 Order No..........14 0502 37718 Fig.
- Page 57 Special wrench, for EM specimen holder Order No..........14 0356 10869 Fig. 76 EM specimen holder fixture, for EM specimen holder, black For samples with a 10 mm diameter Order No..........14 0502 29968 Fig. 77 Leica RM2235...
- Page 58 Optional Accessories EM universal specimen holder, For samples with a 8.5 mm diameter Order No..........14 0356 10868 Fig. 78 EM flat specimen holder, Opening width up to 4.5 mm Order No..........14 0355 10405 Fig. 79 Super Mega cassette clamp, with adapter, silver Note: Use only together with non-orientable specimen...
- Page 59 Optional Accessories Leica RM CoolClamp Electrically cooled universal cassette clamp with adapter for the Leica RM2200 series rotary mi- crotomes. For use with standard cassettes with dimensions that are 39.8 x 28 mm at minimum and 40.9 x 28 mm at maximum.
- Page 60 Optional Accessories Magnifier, For assembly on microscope carriers (14 0502 40580), 2x magnification Note: Magnifier includes an adapter for holding the optional fiber-optic light guide (14 0502 30028) Order No..........14 0502 42790 Fig. 82 Universal microscope carrier, universal assembly Order No.
- Page 61 Order No..........14 0502 30216 Fig. 85 Backlighting, Note: For RM2235 and RM2245 only together with external power supply 14 0500 31244. Backlighting cannot be used in connection with a Super Mega cassette clamp 14 0502 38967. Order No..........14 0502 38719 Fig.
- Page 62 Optional Accessories Tray, for rotary microtome series Leica RM2200 Order No..........14 0502 37932 Fig. 88 Cooling plate, with one freezer pack Order No..........14 0386 38325 Fig. 89 Section waste tray, large, included in the standard scope of delivery of RM2235, RM2245, and RM2255.
- Page 63 Optional Accessories Brush, "Leica" with magnet for blade removal tool for knife holder E. Order No..........14 0183 40426 Fig. 91 Leica RM2235...
-
Page 64: Ordering Information
Disposable blades – high-profile, 1 pack of 50 (80 x 14 x 0.35 mm) ........14 0358 38926 Disposable blades – high-profile, 10 packs of 50 ..............14 0358 38383 Disposable blades Leica TC-65 ....................14 0216 26379 Knife 16 cm - profile c - steel ...................... 14 0216 07100 Knife 16 cm - profile d - steel ...................... - Page 65 Optional Accessories Cold light sources Leica CLS 100X, 100-120 V/50-60 Hz ..................14 0502 30214 Leica CLS 100X, 230 V/50-60 Hz ..................... 14 0502 30215 Leica CLS 100X, 240 V/50-60 Hz ..................... 14 0502 30216 Backlighting assembly ......................... 14 0502 38719 External power supply assembly ....................
-
Page 66: Troubleshooting
Troubleshooting In the following table there is a list of the most common problems which can arise while work- ing with the instrument, along with possible causes and troubleshooting procedures. Problem Possible cause Corrective action 7.1 Possible faults 1. Thick/thin sections The sections alternate between • The blade, knife holder or orien- • Reclamp the blade, knife holders... - Page 67 Possible cause Corrective action • When using cassettes, particu- larly thin-walled cassettes, from a company other than Leica or Surgipath, the cassette may be- come deformed or other clamp- ing problems may arise. If while trying to clamp the cassette you...
-
Page 68: Instrument Malfunctions
Troubleshooting Problem Possible cause Corrective action • The sectioning speed is too fast. • Turn the handwheel at a slower 4. Noises during sectioning The knife "sings" when section- speed. ing hard specimens. The sec- • The clearance angle is too wide. • Systematically decrease the tions show scratches or chatter clearance angle until the opti-... -
Page 69: Cleaning And Maintenance
The instrument must be completely dry before it can be used again. Always wipe the knife from the back of the knife to the cutting edge. NEVER wipe in the opposite direction - risk of injury! Clean using an alcohol-based solution or acetone. Leica RM2235... - Page 70 Cleaning and Maintenance Knife holder E Take the knife holder apart for cleaning. To do so, proceed as follows: • Fold knife guard (9) downward. • Rotate the clamping lever (11) of the lateral displacement forwards and pull it out sideways. • Push the knife holder base plate (86) with the pressure plate (83) until it can be removed from the segment arch (87).
-
Page 71: Maintenance Instructions
2. Enter into a service contract at the latest at the end of the warranty period. For more informa- The intervals depend on how heavily the in- tion, please contact your local Leica technical strument is used. service center. We recommend the following inspection intervals depending on the general workload of the instru-... -
Page 72: Lubricating The Instrument
Cleaning and Maintenance Lubricating the instrument Once a month, lubricate the following parts with the included drive parts oil No. 405 (1 - 2 drops are enough). Instrument and specimen holder: • The clamping key (95) of the quick clamping system. • The T-piece (55) on the microtome base plate. • Guide rails (96) for the knife holder base on the microtome base plate. -
Page 73: Warranty And Service
Leica Biosystems Nussloch GmbH guarantees that the contractual product delivered has been subjected to a comprehensive quality control proce- dure based on the Leica in-house testing standards, and that the product is faultless and complies with all technical specifications and/or agreed characteristics warranted. -
Page 74: Decontamination Certificate (Master)
Dear Customer, Any product that is to be returned to Leica Biosystems or serviced on site, must be cleaned and decontaminated in the appropriate manner. Since it is not possible to decontaminate for prion diseases, such as CJD, BSE, CWD etc., equipment exposed to specimens containing prion diseases cannot be returned to Leica Biosystems for repair. - Page 75 If no**, please indicate why not: Decontamination Certificate (Master) Such equipment must not be returned without the written agreement of Leica Biosystems. The equipment has been prepared to ensure safe handling/transportation. Whenever possible, please use the original transportation case/box. Important - to avoid refusal of shipment: Place one copy in the unit prior to packaging, or hand it over to the service engineer.
- Page 76 Notes Instructions for Use V 2.3 RevH – 05/2018...
- Page 78 Leica Biosystems Nussloch GmbH Heidelberger Straße 17-19 D- 69226 Nussloch Phone: +49 - (0) 6224 - 143 0 Fax: +49 - (0) 6224 - 143 268 Web: www.LeicaBiosystems.com...
Need help?
Do you have a question about the RM2235 and is the answer not in the manual?
Questions and answers