Table of Contents
Advertisement
Advertisement
Table of Contents

Related Manuals for Assa Abloy VingCard Essence


Summary of Contents for Assa Abloy VingCard Essence
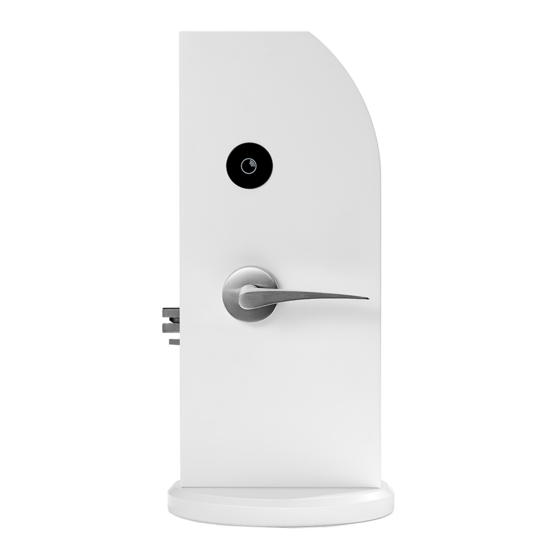
- Page 1 User Manual VingCard Essence (v2) ASSA ABLOY Hospitality 66 1000 023-4...
- Page 2 ASSA ABLOY does not assume any responsibility for incidental or consequential damages arising from the use of this manual. All information and drawings in this document are the property of ASSA ABLOY. Unauthorized use and reproduction is prohibited. VingCard and Elsafe are registered trademarks of ASSA ABLOY.
-
Page 3: Table Of Contents
4.4.2 EURO specific parts ..........................24 4.5 Installation ..........................25 4.5.1 To access the service jack ..........................34 5. To check the installation ..........................35 5.1 Checklist for installation and cut-out ..........................35 5.1.1 Lock mortise ..........................35 ASSA ABLOY Hospitality 66 1000 023-4... - Page 4 Appendix D: Online ..........................49 Introduction ..........................49 Technical specification ..........................49 Online kit ..........................50 To install an online lock ..........................51 Battery maintenance ..........................60 Appendix E: Firmware change in LCU 5350 ..........................61 ASSA ABLOY Hospitality 66 1000 023-4...
- Page 5 Appendix F: Summary of notes ..........................62 Revision history ..........................65 ASSA ABLOY Hospitality 66 1000 023-4...
-
Page 6: Fcc And Ised (Ic) Statements
The term "IC" before the equipment certification number only signifies that the Industry Canada technical specifications were met. Le terme "IC" devant le numéro de certification signifie seulement que les specifications techniques Industrie Canada ont été respectées. ASSA ABLOY Hospitality 66 1000 023-4... -
Page 7: Introduction
1. Introduction The purpose of this document is to give the distributors of VingCard Essence (v2) locks sufficient information to install and support this type of lock. This manual contains descriptions and drawings needed for installation, maintenance and troubleshooting of VingCard Essence (v2). Site survey before installation is also covered in this document. -
Page 8: Site Survey
The A-dimension is the entire door thickness. The B-dimension is from the outside door edge to the center of the lock case. The C-dimension is from the inside door edge to the center of the lock case. ASSA ABLOY Hospitality 66 1000 023-4... -
Page 9: Door Handing
The A-, B- and C-dimensions are important to know when ordering VingCard Essence (v2) or certain parts for it. See Appendix A: Part dimensions table for Signature/Essence for detailed information about length of screws, spindles etc according to the A-, B- and C-dimensions. -
Page 10: Type Of Lock Case To Be Ordered (Euro/Ansi)
Important: If you are going to install the security cylinder Hydra, remember to make space for the cylinder fastening clip when making the cut-out for the lock case. ASSA ABLOY Hospitality 66 1000 023-4... -
Page 11: Check The Door Frames/Striker Plates
2.6 Beveled doors If the door is beveled (edge is not at 90º to door), the dimensions should be based on the shortest side. Standard beveling is 3.2 mm; 1/8". Figure 8: Beveled doors ASSA ABLOY Hospitality 66 1000 023-4... -
Page 12: Rebated Doors
When it comes to rebated doors and rebated frames, be extra observant regarding protrusion for the deadbolt on the frame side. See Figure 9 for examples of rebated doors and door frames. Figure 9: Examples of rebated doors and door frames ASSA ABLOY Hospitality 66 1000 023-4... -
Page 13: To Mortise The Door
ANSI (DA) without cylinder Online AN-238 ANSI (DA) without cylinder Offline AN-243 ANSI (DB) with cylinder Online AN-241 ANSI (DB) without cylinder Online AN-239 EURO with cylinder Online AN-242 EURO without cylinder Online AN-240 Table 4 ASSA ABLOY Hospitality 66 1000 023-4... -
Page 14: To Mortise For The Lock Case
3.2.1 Tools needed to make the cut-out for the lock case Hammer and chisel are needed to make the corners for the lock front. ASSA ABLOY Hospitality 66 1000 023-4... -
Page 15: To Mortise For The Striker Plate
(lower) cut-out and the deadbolt cut-out must be 12 mm (0,47") in order for the auxiliary latch to work. 3.3.1 Tools needed to make the cut-out for the striker plate Use an ordinary drilling machine, hammer and chisel. ASSA ABLOY Hospitality 66 1000 023-4... -
Page 16: To Install The Lock
If cylinder is applicable: Unbrako 2 mm (5/64)''; only used to fasten the cylinder fastening screw 4.2 Door handle selection It is possible to choose between a variety of standard door handles. Gothic ANSI Straight Wing Figure 13: Standard VingCard Essence (v2) door handles ASSA ABLOY Hospitality 66 1000 023-4... -
Page 17: Exploded Views
4.3 Exploded view 4.3.1 ANSI (DA) Figure 14: Components for a VingCard Essence (v2) lock, ANSI (DA) variant with cylinder Description Available as Available as kit single item Screw Signature M5 HW kit Essence/Sig 1000-series Handle on inside rose Signature... - Page 18 Description Available as Available as kit single item LCU 5351 VingCard Essence (v2) main assembly Service cover VingCard Essence (v2) main assembly Cylinder rose Cylinder ring kit Signature Spring cylinder rose Signature Cylinder ring kit Signature Cyl 5-lev Std thread front prof R...
-
Page 19: Ansi (Db)
4.3.2 ANSI (DB) Figure 15: Components for a VingCard Essence (v2) lock, ANSI (DB) variant with cylinder Description Available Available as kit single item Screw Signature M5 HW kit Essence/Sig 1000-series Handle on inside rose Signature 3, 18 Handle retainer*Signature... - Page 20 Description Available Available as kit single item LCU 5351 VingCard Essence (v2) main assembly Service cover VingCard Essence (v2) main assembly Cylinder rose Cylinder ring kit Signature Spring cylinder rose Signature Cylinder ring kit Signature Cyl 5-lev Std thread front prof R...
-
Page 21: Euro
4.3.3 EURO Figure 16: Components for a VingCard Essence (v2) lock, EURO variant with cylinder Description Available as Available as kit single item Screw Signature M5 HW kit Essence/Sig 1000-series Handle on inside rose Signature 3, 18 Handle retainer*Signature HW kit Essence/Sig 1000-series... - Page 22 Description Available as Available as kit single item LCU 5351 VingCard Essence (v2) main assembly Service cover VingCard Essence (v2) main assembly Cylinder rose Cylinder ring kit Signature Spring cylinder rose Signature Cylinder ring kit Signature Cyl 5-lev Std thread front prof R...
-
Page 23: Parts Included For A Complete Lock
4.4 Parts included for a complete lock Figure 17: Parts included for a complete VingCard Essence (v2) lock; see details in Table 6 (ANSI DA), Table 7 (ANSI DB) and Table 8 (EURO). The online kit and cylinder kit are purchased separately, when applicable. -
Page 24: Ansi (Da) Specific Part
Figure 20: The lock case is the only part which is specific for ANSI (DB). 4.4.2 EURO specific parts Figure 21, from the left: front cover rounded, striker plate EURO 5994 steel, cylinder set screw for cylinders ex threaded ANSI ADB and lock case EURO. ASSA ABLOY Hospitality 66 1000 023-4... -
Page 25: Installation
2. Position the lock case into the edge of the door and fasten it with two screws wood, countersunk 5X25 mm (23). Note: If applicable, do not forget to Figure 24 install the cylinder fastening clip before inserting the lock case. ASSA ABLOY Hospitality 66 1000 023-4... - Page 26 5. Insert the spindle handles into the lock case from the outside of the door so that the hole that goes through the spindle handle is visible on the inside (room side) of the door. Note: The spindle handle marked 'EXT' must be on the outside of the door. ASSA ABLOY Hospitality 66 1000 023-4...
- Page 27 Important: For both left handles and right handles, make sure that the handle retainer*Signature is in the "click" position within the groove on the shank of the handle. Figure 29 ASSA ABLOY Hospitality 66 1000 023-4...
- Page 28 Insert the inside handle onto the spindle handle and screw the handles together. 9. Insert the inside handle including the handle retainer*Signature (3) onto the spindle handle. Fasten the handles together using screws Signature M5 (1). Figure 30 ASSA ABLOY Hospitality 66 1000 023-4...
- Page 29 - The nomal way; insert the 2 mm Unbrako into the screw, and insert the screw in the hole facing towards the lock front. Tighten the cylinder in the Figure 33 lock case as illustrated in Figures 31-33. ASSA ABLOY Hospitality 66 1000 023-4...
- Page 30 “snap-lock” functionality lock onto the LCU. Additional spacers can be added on top of the other spacers. Figure 36 *) The sprocket is only partly locking the LCU in place after installation. ASSA ABLOY Hospitality 66 1000 023-4...
- Page 31 Figure 39 19.Connect the LCU cable to the LCU and adjust the bracket in order to enter the LCU against the sprocket. Important: Arrange the cables to prevent pinching them. Figure 40 ASSA ABLOY Hospitality 66 1000 023-4...
- Page 32 LCU. The service cover shall be inserted 90 degrees to the left and then be turned 90 degrees clockwise in order to fasten Figure 44 ASSA ABLOY Hospitality 66 1000 023-4...
- Page 33 25. To install the strike: The depth in the frame must be sufficient (min 25,4 mm/1'') for throwing the deadbolt. Figure 45 ASSA ABLOY Hospitality 66 1000 023-4...
-
Page 34: To Access The Service Jack
When access to the service jack is needed, twist by hand the service cover counterclockwise and lift it off. To mount it again, twist it clockwise until the RFID card symbol looks as in Figure 47. Figure 47 ASSA ABLOY Hospitality 66 1000 023-4... -
Page 35: To Check The Installation
5.1.4 Striker plate The depth in the frame must be sufficient for throwing the deadbolt with small clearance (min. clearance 26.4 mm; 1.04") and releasing the latch (min. clearance 20 mm; 0.79"). ASSA ABLOY Hospitality 66 1000 023-4... -
Page 36: Operational Check
4.3) - or the handle on inside rose Signature (pos 2 in the exploded views of section 4.3) - and the handle on inside rose Signature is fully depressed, the latch, auxiliary latch and deadbolt should be flush with the lock front. ASSA ABLOY Hospitality 66 1000 023-4... -
Page 37: Security Function Check
If the deadbolt is thrown, you should get three very short yellow flashes. The outside door handle should still be blocked. If the deadbolt is not thrown, you should get a green light. The outside door handle can easily be depressed. ASSA ABLOY Hospitality 66 1000 023-4... -
Page 38: Maintenance
For a reliable operation of the lock, a certain level of maintenance is required. 6.1 Lubrication All parts that need lubrication are already lubricated by ASSA ABLOY Hospitality. No parts should therefore need any further lubrication. Caution: The use of lubricants containing solvents or graphite will void the warranty on the lock. -
Page 39: To Troubleshoot The Mechanical Operation
(which is located inside the handle on outside rose Signature) may be broken or displaced. Remove the door handle roses to check the handle return spring. ASSA ABLOY Hospitality 66 1000 023-4... -
Page 40: Lock Operation
It is possible to power open the LCU 5351 (pos 11 in the exploded views of section 4.3) with a service cable and a service PC with the Lock Service 3G software; see Quick reference guide Lock Service 3G for detailed information. ASSA ABLOY Hospitality 66 1000 023-4... -
Page 41: Lock Repair And Part Replacement
Tip: Use a long set of pliers to remove the spindle locking clip. 6.6.2 To replace an LCU Essence RFID assy (3G) or LCA To replace an LCU Essence RFID assy (3G) or LCA, see the Installation section. ASSA ABLOY Hospitality 66 1000 023-4... -
Page 42: Appendix A: Part Dimensions Table
Appendix A: Part dimensions table for VingCard Signature/VingCard Essence (v2) Table A1 ASSA ABLOY Hospitality 66 1000 023-4... -
Page 43: Appendix B: Site Survey Form
Appendix B: Site survey form Table B1 ASSA ABLOY Hospitality 66 1000 023-4... -
Page 44: Appendix C: To Install Adb
1. Install the lock in the door according to the Installation section. 2. Place the ADB striker plate in the frame as shown in Figure C1, 49 mm (1 30/32") above the bottom of the lock front (30mm + 19mm, i.e. 3/4"+1 3/16"). ASSA ABLOY Hospitality 66 1000 023-4... - Page 45 Appendix C: To install ADB ANSI (DA) ADB, mortise If the frame is mortised for a standard ANSI striker plate, the frame must be modified as shown in Figure C2. Figure C2: Remove the hatched area ASSA ABLOY Hospitality 66 1000 023-4...
-
Page 46: Ansi (Db) Adb
1. Install the lock in the door according to the Installation section. 2. Place the ADB striker plate in the frame as shown in Figure C3, 49 mm (1 30/32") below the top of the lock front (30mm + 19mm, i.e. 3/4"+1 3/16"). ASSA ABLOY Hospitality 66 1000 023-4... - Page 47 Appendix C: To install ADB ANSI (DB) ADB, mortise If the frame is mortised for a standard ANSI striker plate, the frame must be modified as shown in Figure C4. Figure C4: Remove the hatched area ASSA ABLOY Hospitality 66 1000 023-4...
-
Page 48: Euro Adb
Figure C5: EURO ADB lock case The notes below refer to Figure C5. Note 1: Latch - same function as standard ASSA ABLOY Hospitality EURO lock. Note 2: Auxiliary latch/deadbolt trigger - when the door is closed and the auxiliary latch hits the striker plate/frame, the automatic deadbolt will be thrown and the latch will be blocked. -
Page 49: Appendix D: Online
70 (2 3/4'') 25/28/32 (63/64'' 1 7/64'' 1 17/64'') ANSI JPN 70 (2 3/4'') 25/28/32 (63/64'' 1 7/64'' 1 17/64'') EURO with 2 switches 65/80 20/22/24 EURO with ADB 65 20/22/24 Audit trail 2000 events Cylinder option System compatibility Visionline Table D1 ASSA ABLOY Hospitality 66 1000 023-4... -
Page 50: Online Kit
Figure D1: The online kit is purchased separately and contains ZigBee endnode, plastic cover, Y-cable and fire-retardant material. Note: The fire-retardant material is only needed for European online installations. The fire-retardant material is not needed for UL rated online doors. ASSA ABLOY Hospitality 66 1000 023-4... -
Page 51: To Install An Online Lock
2. Position the lock case into the edge of the door and fasten it with two screws wood, countersunk 5X25 mm (23). If applicable, do not forget to install the cylinder fastening clip before inserting the lock case. Figure D4 ASSA ABLOY Hospitality 66 1000 023-4... - Page 52 5. Insert the spindle handles into the lock case from the outside of the door so that the hole that goes through the spindle handle is visible on the inside (room side) of the door. Note: The spindle handle marked 'EXT' must be on the outside of the door. ASSA ABLOY Hospitality 66 1000 023-4...
- Page 53 Important: For both left handles and right handles, make sure that the handle retainer*Signature is in the "click" position within the groove on the shank of the handle. Figure D9 ASSA ABLOY Hospitality 66 1000 023-4...
- Page 54 Insert the inside handle onto the spindle handle and screw the handles together. 9. Insert the inside handle including the handle retainer*Signature (3) onto the spindle handle. Fasten the handles together using screws Signature M5 (1). Figure D10 ASSA ABLOY Hospitality 66 1000 023-4...
- Page 55 - The nomal way; insert the 2 mm Unbrako into the screw, and insert the screw in the hole facing towards the lock front. Tighten the cylinder in the lock case as illustrated in Figures Figure D13 D11-D13. ASSA ABLOY Hospitality 66 1000 023-4...
- Page 56 Essence cassette. Note: As stated at Figure D1, the fire-retardant material is only needed for European online installations. The fire-retardant material is not needed for UL rated online doors. Figure D15 ASSA ABLOY Hospitality 66 1000 023-4...
- Page 57 IV in Figure D17, to avoid pinching Figure D17 of the cable. 22.Insert the Essence cassette into the door. Figure D18 23.Loose the bracket with a wrench (8 mm) until it moves freely. Figure D19 ASSA ABLOY Hospitality 66 1000 023-4...
- Page 58 LCU. The service cover shall be inserted 90 degrees to the left and then be turned 90 degrees clockwise in order to fasten Figure D24 ASSA ABLOY Hospitality 66 1000 023-4...
- Page 59 30. To install the strike: The depth in the frame must be sufficient (min 25,4 mm/1'') for throwing the deadbolt. Figure D25 ASSA ABLOY Hospitality 66 1000 023-4...
-
Page 60: Battery Maintenance
Figure D26 Battery maintenance The procedure to replace batteries is the same for online locks as for offline locks; section 6.3. ASSA ABLOY Hospitality 66 1000 023-4... -
Page 61: Appendix E: Firmware Change In Lcu 5350
Upload firmware dialog, but it is recommended to go via Visionline. If Upload is not clicked within 4 seconds, there will be a timeout and the service cable must be disconnected and then connected again. ASSA ABLOY Hospitality 66 1000 023-4... - Page 62 Some tips have been slightly rewritten to be understandable outside their original context. 1. Introduction Important: VingCard Essence (v2) can only be installed in non-metallic doors. 2. Site survey Note: Always make sure to have the correct handing for all doors.
- Page 63 Use a service cable and a service PC with the software Lock Service 3G; see Quick reference guide Lock Service 3G for details. If the time is not correct, a soft reset has occurred. ASSA ABLOY Hospitality 66 1000 023-4...
- Page 64 Do not insert any card during the battery exchange. If other batteries than those provided by ASSA ABLOY Hospitality are used, make sure that they are alkaline or long life batteries.
- Page 65 Removed Valli & Valli handle range (this is instead described in marketing material) March 22, 2017 Added dimensions for fire-retardant material September 19, 2017 Changed LCU 5350 to LCU 5351 (including modified FCC/IC texts) ASSA ABLOY Hospitality 66 1000 023-4...
- Page 66 E-mail: apac.hospitality@assaabloy.com Phone: +65 6305 7670 ASSA ABLOY Hospitality EMEA E-mail: emea.hospitality@assaabloy.com Phone: +47 69 24 50 00 ASSA ABLOY Hospitality North America E-mail: northam.hospitality@assaabloy.com Phone: +1 972 907 2273 ASSA ABLOY Hospitality Latin America E-mail: lam.hospitality@assaabloy.com Phone: +52 55 36 40 12 00 www.assaabloyhospitality.com...
Need help?
Do you have a question about the VingCard Essence and is the answer not in the manual?
Questions and answers
Ola. Sou instalador de fechaduras Preciso de orientação para configuração de fechadura
To configure the ASSA ABLOY Essence lock, use the Lock Configurator tool. Select the lock model "Vingcard Essence" from the list of available options in the configurator.
This answer is automatically generated