Beckman Coulter Avanti J-E Instruction Manual
Hide thumbs
Also See for Avanti J-E:
- Instructions for use manual (36 pages) ,
- Instructions for use manual (58 pages) ,
- Instructions for use manual (158 pages)
Table of Contents
Advertisement
Advertisement
Table of Contents

Related Manuals for Beckman Coulter Avanti J-E


Summary of Contents for Beckman Coulter Avanti J-E
- Page 1 SJ-IM-8 Avanti Avanti J-E Centrifuge J-E Centrifuge ® ® Instruction Manual...
- Page 2 Symbol Simbolo Symbol Title Titel Titre Titulo Titolo Symbole Símbolo Dangerous voltage Gefährliche elektrische Spannung Courant haute tension Voltaje peligroso Pericolo: alta tensione Attention, consult accompanying documents Achtung! Begleitpapiere beachten! Attention, consulter les documents joints Atención, consulte los documentos adjuntos Attenzione: consultare le informazioni allegate On (power) Ein (Netzverbindung)
- Page 3 Safety During Installation and/or Maintenance This centrifuge is designed to be installed by a Beckman Coulter Field Service representative. Installation by anyone other than authorized Beckman Coulter personnel invalidates any warranty covering the instrument.
- Page 4 Laboratory Biosafety Manual) are handled; materials of a higher group require more than one level of protection. • Dispose of all waste solutions according to appropriate environmental health and safety guidelines. It is your responsibility to decontaminate the centrifuge and accessories before requesting service by Beckman Coulter field service.
- Page 5 SJ-IM-8 August 2009 Avanti Avanti J-E Centrifuge J-E Centrifuge ® ® Instruction Manual © 2009 Beckman Coulter, Inc.
-
Page 7: Table Of Contents
Contents Page INTRODUCTION Certification ..........Scope of Manual. - Page 8 Contents Page SECTION 3: OPERATION Summary of Run Procedures ....... . 3-2 Programmed Run .
- Page 9 Illustrations and Tables Page ® Figure 1-1. The Avanti J-E Centrifuge....... . . 1-1 Figure 1-2.
-
Page 11: Introduction
ISO 9001 or 13485 facility. They have been designed and tested to be compliant (when used with Beckman Coulter rotors) with the laboratory equipment requirements of applicable regulatory agencies. Declarations of conformity and certificates of compliance are available at www.beckmancoulter.com. -
Page 12: Conventions
Introduction ➠ NOTE If the centrifuge is used in a manner other than specified in this manual, the safety and performance of this equipment could be impaired. Further, the use of any equipment other than that recommended by Beckman Coulter has not been evaluated for safety. Use of any equipment not specifically recommended in this manual and/or the applicable rotor manual is the sole responsibility of the user. -
Page 13: Typographic Conventions
• Keynames (for example, [ ] or [ ]) appear in capital START PROGRAM letters within brackets. CFC-FREE CENTRIFUGATION To ensure minimal environmental impact, no CFCs are used in the manufacture or operation of Avanti J-E centrifuges. -
Page 14: Radio Interference
For Beckman Coulter products bearing this label please contact your dealer or local Beckman Coulter office for details on the take back program that will facilitate the proper collection, treatment,... -
Page 15: Description
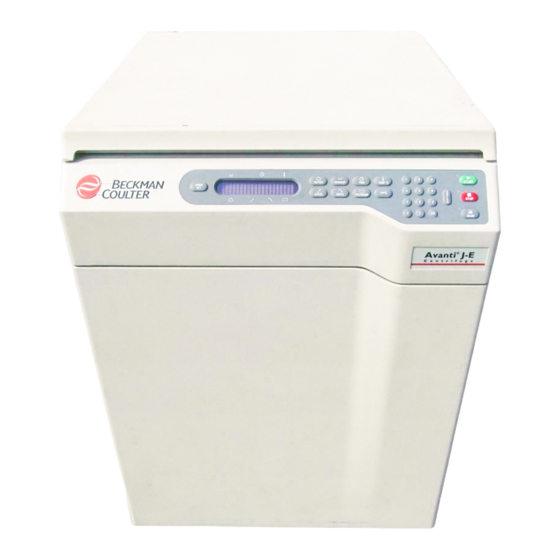
Description DESCRIPTION CENTRIFUGE FUNCTION ® The Avanti J-E high-performance centrifuge (see Figure 1-1) is a refrigerated centrifuge that generates centrifugal forces required for a wide variety of applications. Together with the compatible Beckman Coulter rotors, applications include: • Routine processing such as sample preparations, pelleting, extrac- tions, purifications, concentrations, phase separations, and spin column and spin filter centrifugations. -
Page 16: Housing And Door
• Separation of blood cells and cellular components. • Gradient separation, for example, Ficoll-Hypaque and Percoll. The Avanti J-E is microprocessor-controlled, providing interactive operation. The instrument design features a brushless switched- reluctance drive motor, a temperature control system with automatic temperature compensation unique for each compatible rotor, and selectable acceleration and deceleration rates. -
Page 17: Rotor Chamber
Description ROTOR CHAMBER The rotor chamber is made of stainless steel to resist corrosion. A rubber gasket around the chamber opening ensures sealing. (Instrument gaskets have not been qualified as bioseals for aerosol containment.) VACUUM The friction reduction system (FRS) uses a mechanical rotary vane vacuum pump to reduce chamber pressure to approximately one-half atmosphere. -
Page 18: Drive
Description DRIVE The drive shaft is belt driven by a brushless, high-torque, switched- reluctance motor. The instrument’s resilient suspension minimizes disturbance of the sample during acceleration and deceleration, and reduces damage to the drive shaft if an imbalance occurs during centrifugation. - Page 19 Description Digital Displays The displays provide run information, user messages, and diagnostics. • During a run, they show the actual (real-time) operating conditions. • When the run parameters are being entered, they show the set values selected. Set values can be recalled during operation by pressing [ ].
- Page 20 Description (PROGRAM) • During setup—when the [ ] key is pressed a program PROGRAM number (one of nine possible) can be entered. • During centrifugation—the number of the program being run is displayed. Run-Parameter Keys Run-parameter keys are used to enter specific run information as follows.
- Page 21 Description The centrifuge has two acceleration profiles: MAX—maximum acceleration from 0 rpm to set speed, or SLOW—slow acceleration from 0 to 500 rpm, followed by maximum acceleration to set speed. The [ ] key is used to select the maximum acceleration or slow ACCEL acceleration, provided to maintain optimum separation.
-
Page 22: Safety Features
Locks and unlocks the door. (The instrument will not accept the open command if the rotor is spinning.) SAFETY FEATURES The Avanti J-E centrifuge has been designed and tested to operate safely indoors at altitudes up to 2 000 m (6 562 ft). Safety features include the following. -
Page 23: Protective Ring
NAME RATING PLATE A name rating plate is affixed to the rear of the instrument. Always mention the serial number and model number when contacting Beckman Coulter regarding your Avanti J-E centrifuge. -
Page 24: Specifications
Description SPECIFICATIONS Only values with tolerances or limits are guaranteed data. Values without tolerances are informative data, without guarantee. Speed Set speed ....300 to 21 000 rpm in 10-rpm increments Speed control . -
Page 25: Available Rotors
J-E centrifuge. At 35°C ambient temperature and 95 percent humidity. Maximum speed in the Avanti J-E for the rotor with magnets; without magnets maximum is 14 000 rpm. (Maximum speed at 2°C in a 50-Hz centrifuge is 14 000 rpm.) Maximum speed for rotor without magnets is 13 000 rpm. - Page 26 J-E centrifuge. At 35°C ambient temperature and 95 percent humidity. Maximum speed in the Avanti J-E for the rotor with magnets; without magnets maximum is 14 000 rpm. (Maximum speed at 2°C in a 50-Hz centrifuge is 14 000 rpm.) Maximum speed for rotor without magnets is 13 000 rpm.
- Page 27 J-E centrifuge. At 35°C ambient temperature and 95 percent humidity. Maximum speed in the Avanti J-E for the rotor with magnets; without magnets maximum is 14 000 rpm. (Maximum speed at 2°C in a 50-Hz centrifuge is 14 000 rpm.) Maximum speed for rotor without magnets is 13 000 rpm.
-
Page 29: Preinstallation Requirements
➠ NOTE This centrifuge is designed to be installed by a Beckman Coulter Field Service representative. Installation by anyone other than authorized Beckman Coulter personnel invalidates any warranty covering the instrument. SPACE REQUIREMENTS... -
Page 30: Figure 2-1. Dimensions Of The Avanti ® J-E Centrifuge
Preinstallation Requirements If it is necessary to move the centrifuge, maintain the following conditions. • Select a location away from heat-producing laboratory equipment, with sufficient ventilation to allow for heat dissipation. • The centrifuge must have adequate air ventilation to ensure compliance to local requirements for vapors produced during centrifuge operation. -
Page 31: Electrical Requirements
1.8-m (6-ft) three-wire UL/CSA approved electrical cord and plug to connect the centrifuge to earth-ground. (Contact your local Beckman Coulter office for specific information regarding local plug requirements.) To preserve this safety feature: • Power to the centrifuge should originate directly from a main power line transformer at a power source known to be clear of erratic loads, spikes, and electromagnetic interference. -
Page 32: Securing The Centrifuge To The Floor
Refer to this document for additional installation instructions. ➠ NOTE Beckman Coulter representatives are not equipped to drill holes in your floor. The holes must be drilled before your scheduled installation. -
Page 33: Bio-Safety Level 3 Installation
Preinstallation Requirements BIO-SAFETY LEVEL 3 INSTALLATION For laboratories with epoxy aggregate floors, such as BSL-3 labs, a non-invasive installation kit (PN 393830) is available. The kit which consists of an adhesive-backed mounting plate, is CSA certified for use on epoxy aggregate floors only. - Page 35 Operation This section contains manual and programmed operating procedures. A summary is provided at the start of this section. If you are an expe- rienced user of this centrifuge, you can turn to the summary for a quick review of operating steps. WARNING Normal operation may involve the use of solu- tions and test samples that are pathogenic,...
-
Page 36: Operation
Operation WARNING Do not use the centrifuge in the vicinity of flammable liquids or vapors, and do not run such materials in the instrument. Do not lean on the instrument or place items on it while it is operating. SUMMARY OF RUN PROCEDURES For runs at other than room temperature, refrigerate or warm the rotor beforehand for fast equilibration. -
Page 37: Manual Run
Operation MANUAL RUN POWER Turn the power switch on ( I ). Press [ ] to unlock the chamber door; lift the door open. DOOR DOOR Install the rotor according to the applicable rotor manual, then close the chamber door and press [ DOOR Press [ ], then use the keypad to enter the rotor entry code. -
Page 38: Installing The Rotor
[ ] to into the drive hole. If you do not see at least two clear the message.) metal pins near the top of the hole, do not use the rotor in the Avanti J-E. -
Page 39: Manual Operation
Operation Action Result 5. Close the chamber door and The door latches. When the latches engage, the LED next to the press [ ]. (To keep the ] key lights. DOOR DOOR chamber clean and dry, leave the door closed whenever possible.) MANUAL OPERATION •... -
Page 40: Entering Run Speed
Operation ENTERING RUN SPEED Enter a run speed up to the maximum speed of the rotor in use (21 000 rpm maximum). Or, enter a relative centrifugal field (RCF) value up to the maximum achievable RCF of the rotor. Action Result 1. -
Page 41: Entering Run Temperature
Operation Action Result 1. Press [ The cursor appears. TIME 2. Use the keypad to enter Entered time appears on the display. If you entered a number higher required time. than 59 minutes, the centrifuge automatically recalculates the time in hours and minutes. -
Page 42: Entering Acceleration And Deceleration Rates
Operation ENTERING ACCELERATION AND DECELERATION RATES The instrument provides a choice of two acceleration rates and three deceleration rates to protect the gradient and sample-to-gradient inter- face. The acceleration time is the time it takes a rotor to reach set speed from rest. -
Page 43: Starting A Run
Operation STARTING A RUN Action Result 1. Press [ ] and [ The green light next to the [ ] key flashes and the rotor begins ENTER START START to spin. ➠ NOTE To begin a run, [ ] must always be the last ENTER key pressed before pressing [ ]. -
Page 44: Creating A New Program
Operation CREATING A NEW PROGRAM Action Result 1. Press [ Previously saved program numbers are displayed. PROGRAM 2. Use the keypad to select a The message “Press [ ] to run, or edit parameters” is ENTER START program number that is not in displayed. -
Page 45: Recalling And Changing A Program
Operation Action Result 3. Press [ The number you selected will appear in the program display. Run SHOW SET parameters for that program will be displayed for 5 seconds. (To make changes, see Changing a Program, below.) 4. Press [ ] and [ ] to The run starts, the green light next to the [... - Page 46 Operation Action Result 1. Press [ Previously saved program numbers in use are displayed. PROGRAM 2. Select the appropriate keypad The message “Press [ ] to run, or edit parameters” is ENTER START number and press [ displayed. ENTER 3. Press [ ] to display SHOW SET program parameters.
-
Page 47: Troubleshooting
Refer to Table 4-1 to determine the nature of the condition and any recom- mended actions. If a problem persists after you have performed the recommended action, call Beckman Coulter Field Service. To help... -
Page 48: Table 4-1. Diagnostic Message Chart
8C above set ture setting by more than 8°C C3– Cannot maintain Run shuts down with • Check the air filter and replace if dirty Temp, call service temperature maximum brake (see Section 5, MAINTENANCE). • Call Beckman Coulter service. Continued—... - Page 49 FRS, call service time • Wipe any ice and excess moisture from chamber. • Call Beckman Coulter service. No magnets identified, or Run continues, speed Press [ ] to clear message. If R1, and R2– magnets incorrectly...
-
Page 50: Retrieving Your Sample In Case Of Power Failure
Message Problem Result Recommended Action S1 through S14– There is a problem with System shuts down Call Beckman Coulter service. System error, call the system control soft- service ware, EPROM, or RAM H1, H5, H7, and H8– Speed control problem Run shuts down with Call Beckman Coulter service. - Page 51 Troubleshooting WARNING Any maintenance procedure requiring removal of a panel exposes the operator to the possibility of electrical shock and/or mechanical injury. Therefore, turn the power off and disconnect the instrument from the main power source, and refer such mainte- nance to service personnel.
-
Page 52: Figure 4-1. Manual Door Release
Troubleshooting Hex Wrench Latch Override Hex Wrench Figure 4-1. Manual Door Release Action Result CAUTION 3. Lower the panel as far as the Do not attempt to remove tether cords. They tether cords allow. are required to assure safe operation of the centrifuge. -
Page 53: Maintenance
This section contains care and maintenance procedures that should be performed regularly. For maintenance not covered in this manual, contact Beckman Coulter Field Service (1-800-742-2345 in the United States) for assistance. User messages and recommended actions are discussed in Section 4, . -
Page 54: Maintenance
Maintenance MAINTENANCE Perform the following procedures regularly to ensure continued performance and long service life of the centrifuge. • Inspect the centrifuge chamber for accumulations of sample, dust, or glass particles from broken sample tubes. Clean as required (see , below). CLEANING •... -
Page 55: Decontamination
Maintenance • Clean the drive hub regularly using Solution 555 (diluted 10 to 1 with water) and a soft brush. Rinse thoroughly and dry completely. Tube Breakage If a glass tube breaks, and all the glass is not contained in the bucket or rotor, be sure to thoroughly clean the chamber. -
Page 56: Replacing The Air Filter
Maintenance While Beckman Coulter has tested ethanol (70%) and found that it does not damage the centrifuge, no guarantee of sterility or disinfec- tion is expressed or implied. When sterilization or disinfection is a concern, consult your laboratory safety officer regarding proper methods to use. -
Page 57: Circuit Breaker And Fuses
OFF (O) position. Reset the circuit breaker by turning the power switch back to the ON (I) position. If it trips again immediately, do not reset it. Call Beckman Coulter Field Service. CAUTION Repeated attempts to reset the centrifuge circuit breaker can cause substantial damage to electrical and electronic components. -
Page 58: Supply List
742-2345 in the United States, or by contacting your local Beckman Coulter office. Contact Beckman Coulter Sales (1-800-742-2345 in the United States; worldwide offices are listed on the back cover of this manual) for information about ordering parts and supplies. A partial list of supplies is given below for your convenience. - Page 59 Beckman Coulter, vice for a reasonable period of time, Beckman Coulter will or unless such repair in the sole opinion of Beckman Coulter repair or, at its election, replace such component or accessory.
- Page 64 Beckman Coulter, Inc. • 250 S. Kraemer Blvd. • Brea, California 92821 Sales and Service: 1-800-742-2345 • Internet: www.beckmancoulter.com ©2009 Beckman Coulter, Inc. All rights reserved...
Need help?
Do you have a question about the Avanti J-E and is the answer not in the manual?
Questions and answers